Subaru Legacy IV (2008 year). Service manual — part 1049
LI-13
Headlight Assembly
LIGHTING SYSTEM
11.Headlight Assembly
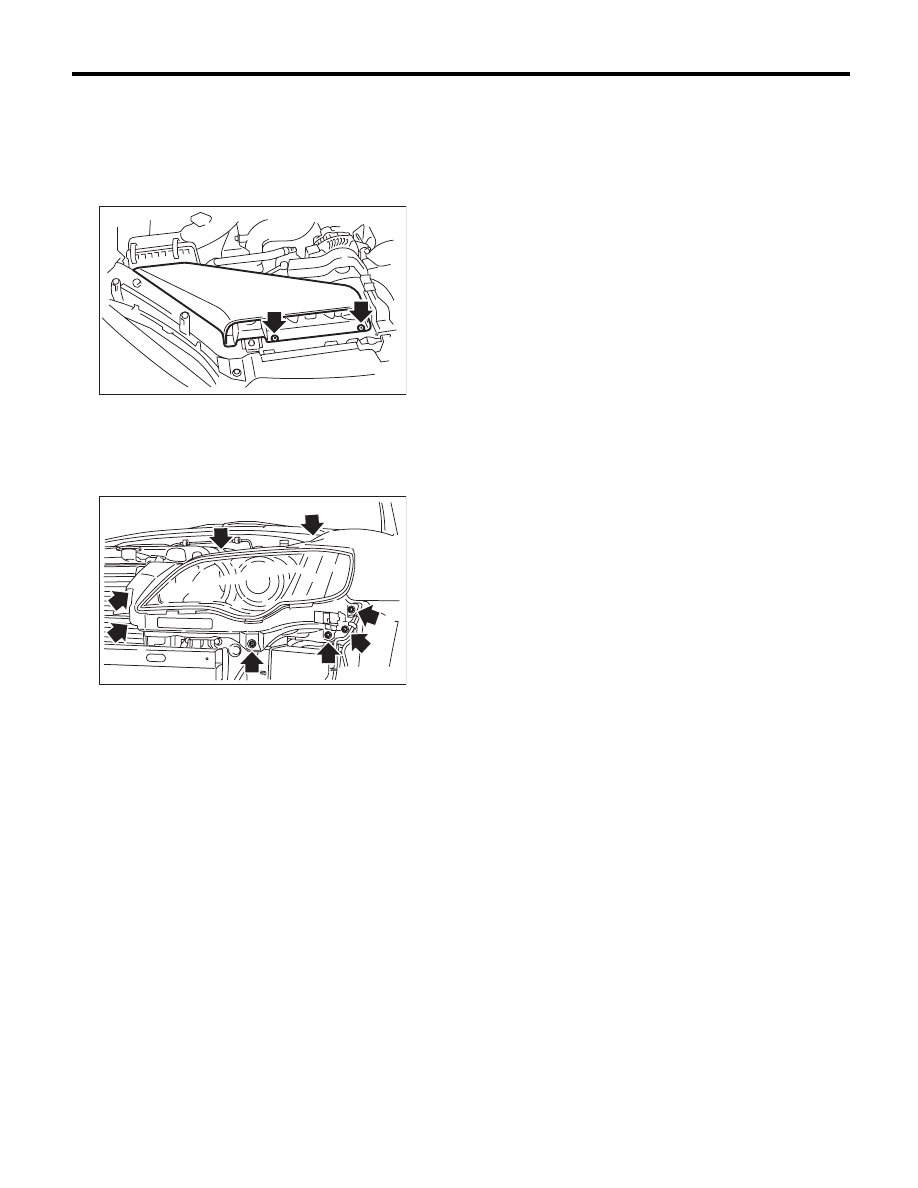
A: REMOVAL
1) Disconnect the ground cable from the battery.
2) Remove the air intake duct. (When removing the
headlight RH).
3) Remove the front bumper. <Ref. to EI-30, RE-
MOVAL, Front Bumper.>
4) Disconnect harness connectors.
5) Remove the 7 bolts, disengage 1 clip, then de-
tach the headlight assembly.
B: INSTALLATION
Install in the reverse order of removal.
Tightening torque:
7.5 N·m (0.76 kgf-m, 5.5 ft-lb)
C: ADJUSTMENT
1. HEADLIGHT BEAM ADJUSTMENT
NOTE:
The headlight can only be adjusted in the vertical
direction but not the horizontal direction.
CAUTION:
Turn off the light before adjusting the headlight
beam level. If it is necessary to inspect the
beam level, do not keep the light on for two min-
utes or more.
NOTE:
Before checking the headlight beam level, be sure
of the following:
• The area around the headlight has not sustained
any accident, damage or other type of deformation.
• Vehicle is parked on a level surface.
• The inflation pressure of tires is correct.
• Vehicle’s fuel tank is fully filled.
1) Bounce the vehicle several times to normalize
the suspension.
2) Make certain that someone is seated in the driv-
er’s seat.
LI-00273
LI-00772
LI-14
Headlight Assembly
LIGHTING SYSTEM
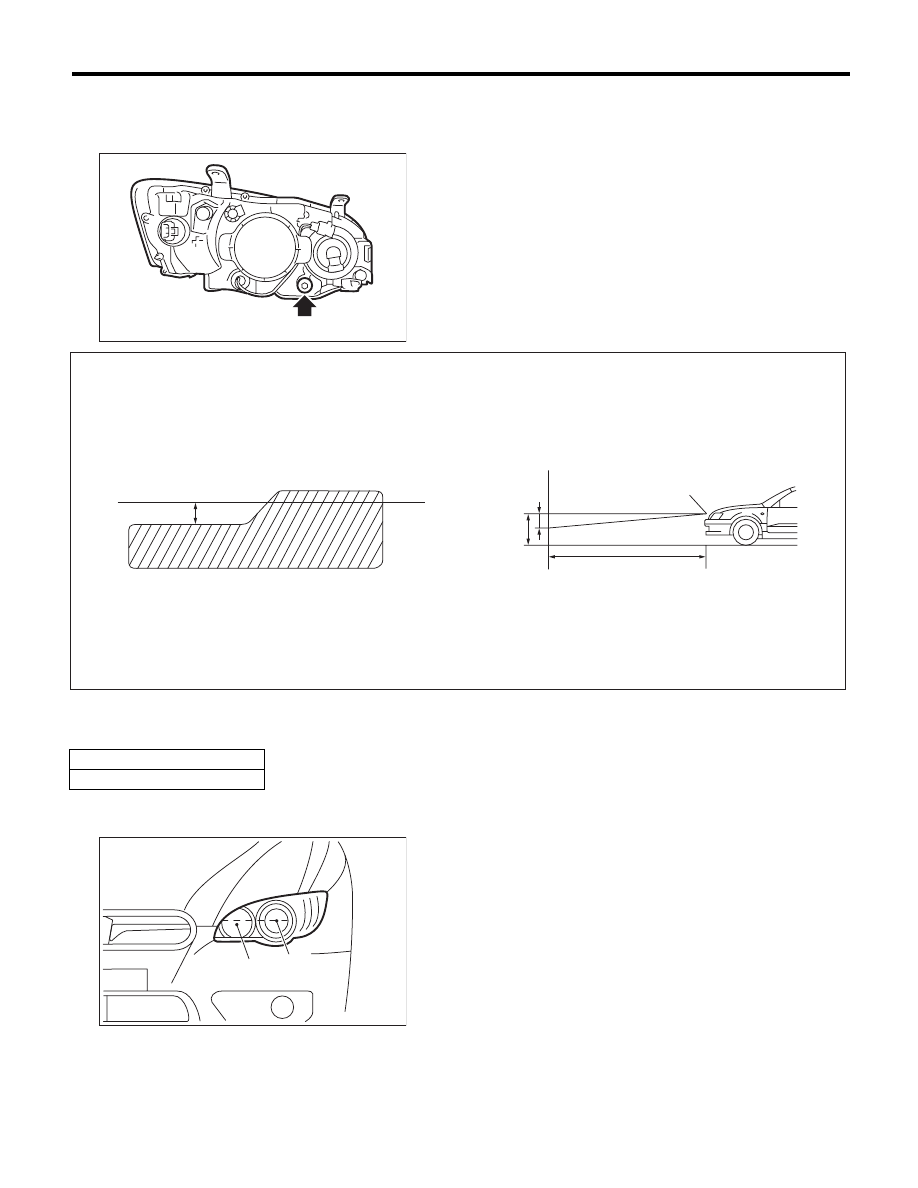
3) Turn the headlights on and then adjust the low beam pattern.
NOTE:
Adjust the headlight beam level by turning the adjusting screw (A).
NOTE:
Check the bulb center mark on the inner side of the lens.
LI-00435
(A)
(A)
Bulb center marking
(B)
3 m (10 ft)
(H)
Height of the headlight LOW beam
center
LI-00453
H
h
H
h
(B)
(A)
h mm (in) at 3 m (10 ft)
21 (0.83)
(A) Low beam
(B) High beam
LI-00900
(B)
(A)
LI-15
Headlight Bulb
LIGHTING SYSTEM
12.Headlight Bulb
A: REMOVAL
1. HIGH BEAM AND LOW BEAM
CAUTION:
• Because the halogen bulb operates at a high
temperature, dirt and oil on the bulb surface re-
duces the bulb’s service life. Hold the flange
portion when replacing the bulb. Never touch
the glass portion.
• Do not leave the headlight without a bulb for
a long time. Dust, moisture, etc. entering the
headlight may affect its performance.
1) Disconnect the ground cable from the battery.
2) Remove the air intake duct. (When removing the
headlight bulb RH)
3) Remove the battery cover. (When removing the
headlight bulb LH)
4) Tilt the washer tank filler neck. (When removing
the headlight bulb LH)
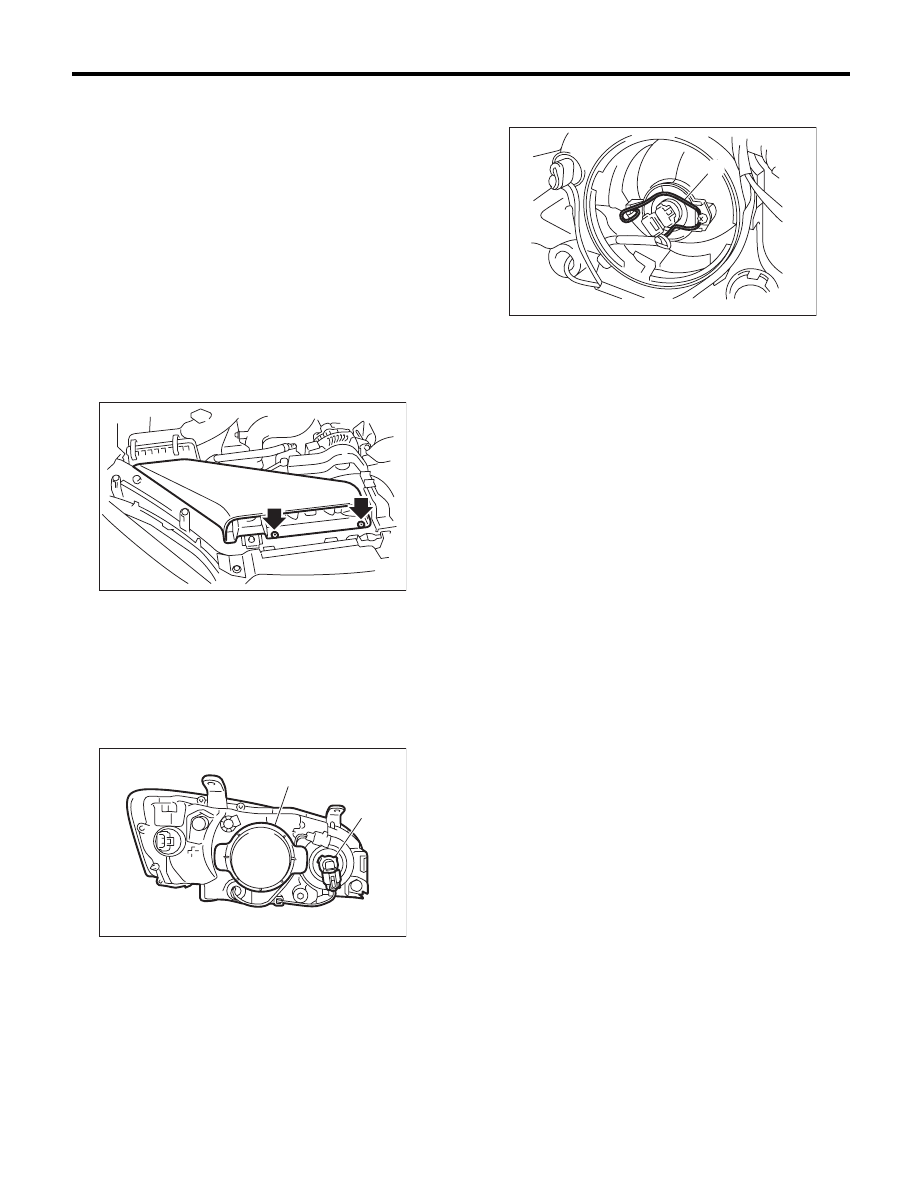
5) Disconnect the harness connector.
6) Remove the bulb assembly (A) then remove the
high beam. To remove the low beam, remove the
back cover (B), and then go to Step 7.
7) Remove the light bulb retaining spring (A) to re-
move bulb.
B: INSTALLATION
Install in the reverse order of removal.
C: INSPECTION
1) Visually check the bulb for blow out.
2) Check the bulb specification.
<Ref. to LI-2, SPECIFICATION, General Descrip-
tion.>
3) If NG, replace the bulb with a new part.
LI-00273
LI-00437
(B)
(A)
LI-00279
(A)
LI-16
Front Turn Signal Light Bulb
LIGHTING SYSTEM
13.Front Turn Signal Light Bulb
A: REMOVAL
1) Disconnect the ground cable from the battery.
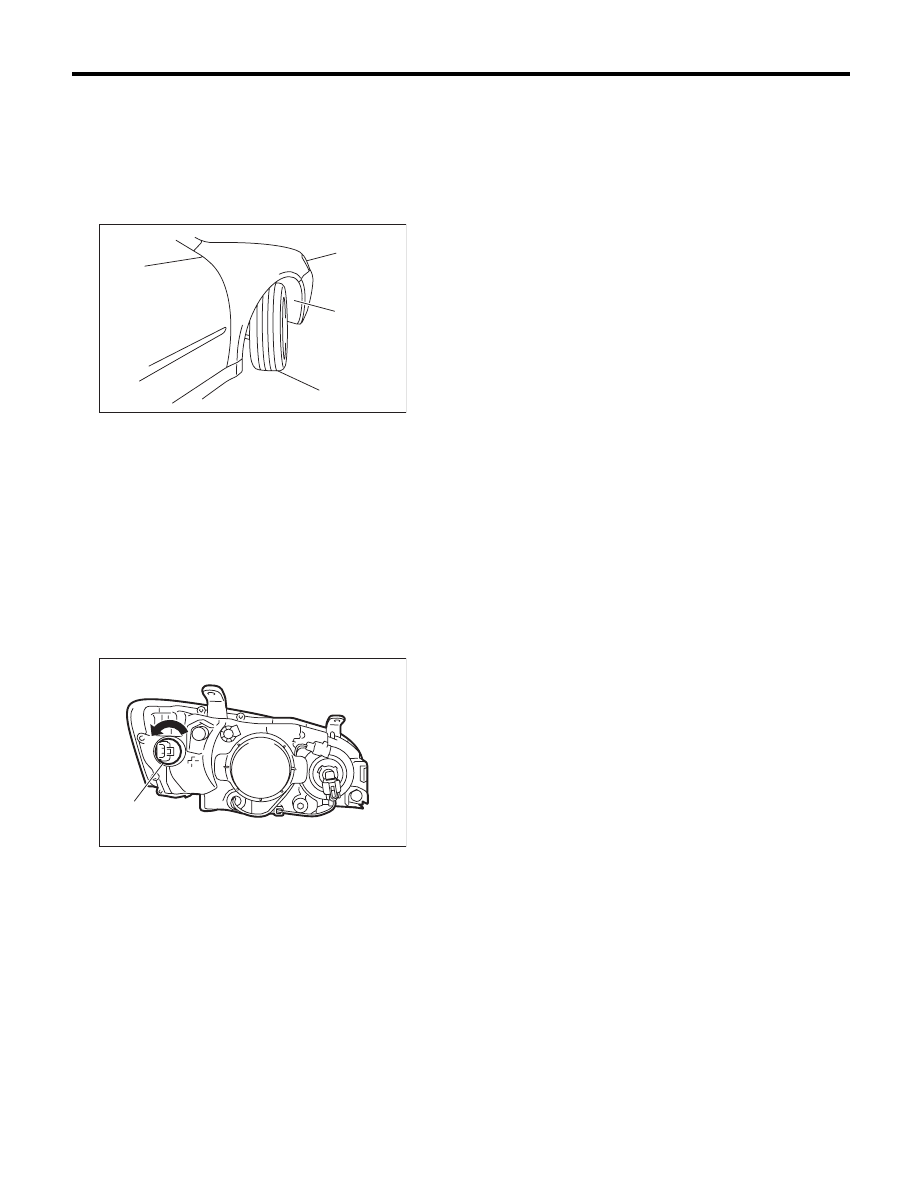
2) When removing the turn signal light bulb, fully
turn the steering wheels to opposite direction from
the turn signal light bulb to remove.
3) Turn the mud guard inward.
4) Turn socket (A) from the wheel arch, and re-
move the front turn signal light bulb.
CAUTION:
For 5AT model, the turn signal light bulb LH
cannot be removed from the wheel arch. Re-
move the bulb by removing the battery from the
engine compartment side.
B: INSTALLATION
Install in the reverse order of removal.
C: INSPECTION
1) Visually check the bulb for blow out.
2) Check the bulb specification.
<Ref. to LI-2, SPECIFICATION, General Descrip-
tion.>
3) If NG, replace the bulb with a new part.
(1) Turn the steering wheel fully.
(2) Mud guard
(3) Front turn signal light
LI-00311
(3)
(2)
(1)
LI-00438
(A)
Нет комментариевНе стесняйтесь поделиться с нами вашим ценным мнением.
Текст