Subaru Legacy III (2000-2003 year). Service manual — part 928
WW-10
WIPER AND WASHER SYSTEMS
WIPER BLADE
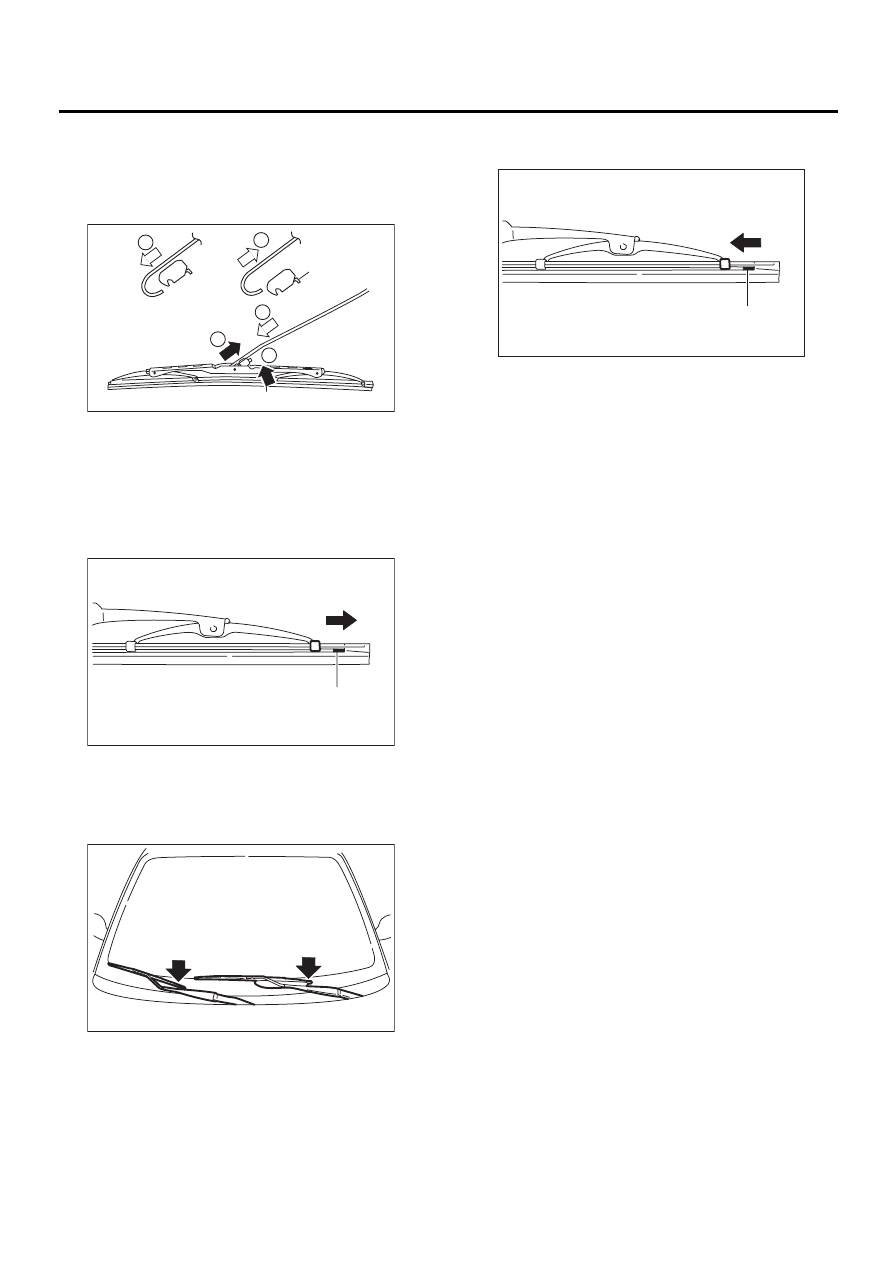
4. Wiper Blade
A: REMOVAL
While pushing locking clip (A) up, pull out blade
from arm to arrow direction.
B: INSTALLATION
1) Install in the reverse order of removal.
2) Confirm that clip was locked securely.
C: DISASSEMBLY
Pull on side (A) of the wiper rubber stopper and re-
move the rubber from the blade assembly.
D: ASSEMBLY
1) Insert the wiper rubber onto the blade so that the
stopper is in the position shown (at the bottom of
the wiper arm).
2) Make sure the wiper rubber is securely fastened
to the pull stopper (A).
E: INSPECTION
1) When the wiper does not perform well, inspect
the following:
• Make sure the movable part of the blade assem-
bly moves smoothly.
• Make sure the wiper rubber is not deformed or
damaged.
2) Replace with a new part if damage is found.
WW-00064
1
2
2
3
3
( A )
WW-00009
( A )
WW-00049
WW-00037
( A )
WW-11
WIPER AND WASHER SYSTEMS
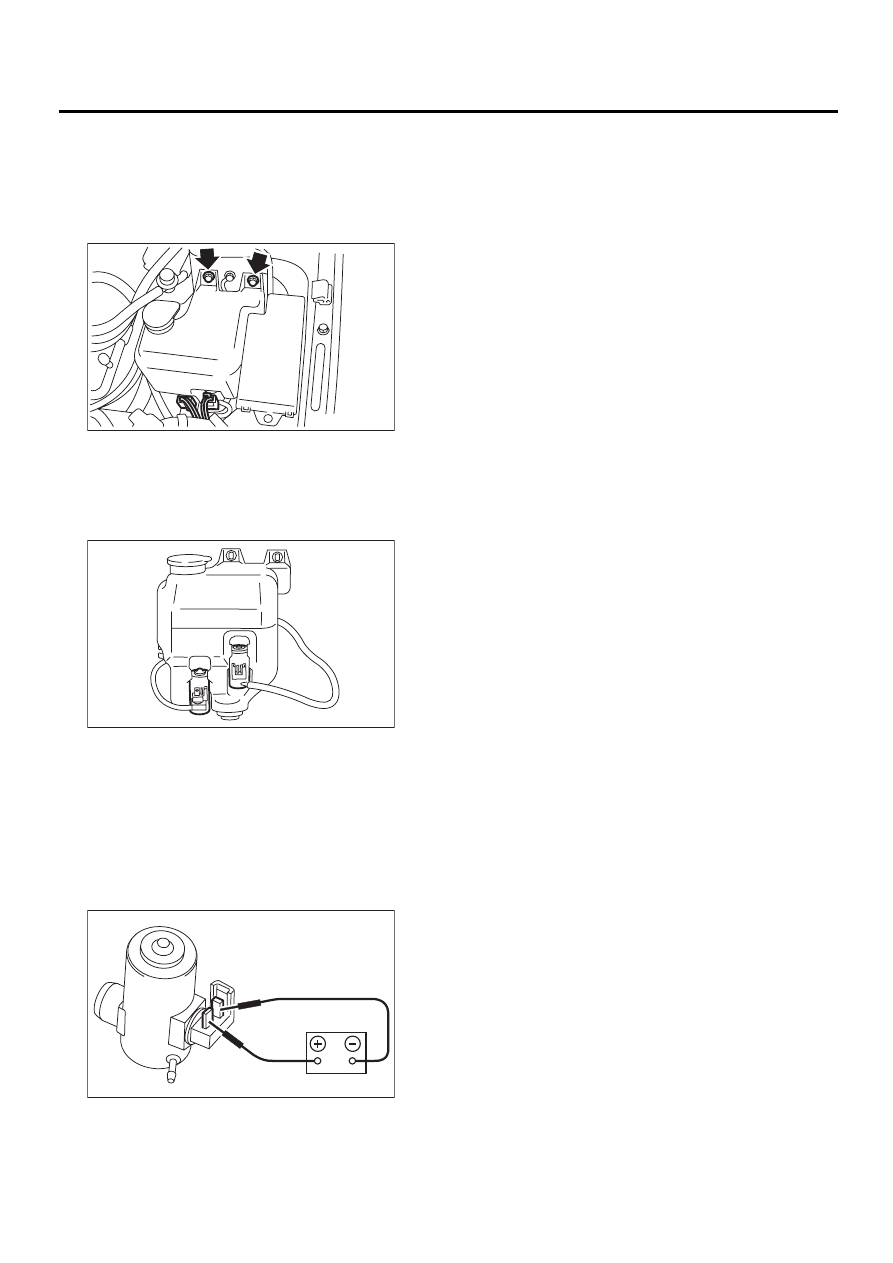
WASHER TANK AND MOTOR
5. Washer Tank and Motor
A: REMOVAL
1) Open hood.
2) Remove the 2 bolts, hose and connector and
then remove the tank.
B: INSTALLATION
Install in the reverse order of removal.
C: DISASSEMBLY
Remove washer motor from tank.
D: ASSEMBLY
1) Assemble in the reverse order of disassembly.
2) Confirm that water does not leak from installa-
tion area of motor.
E: INSPECTION
Apply battery voltage to the connector terminal of
the washer motor and make sure the motor oper-
ates.
WW-00011
WW-00012
WW-00013
WW-12
WIPER AND WASHER SYSTEMS
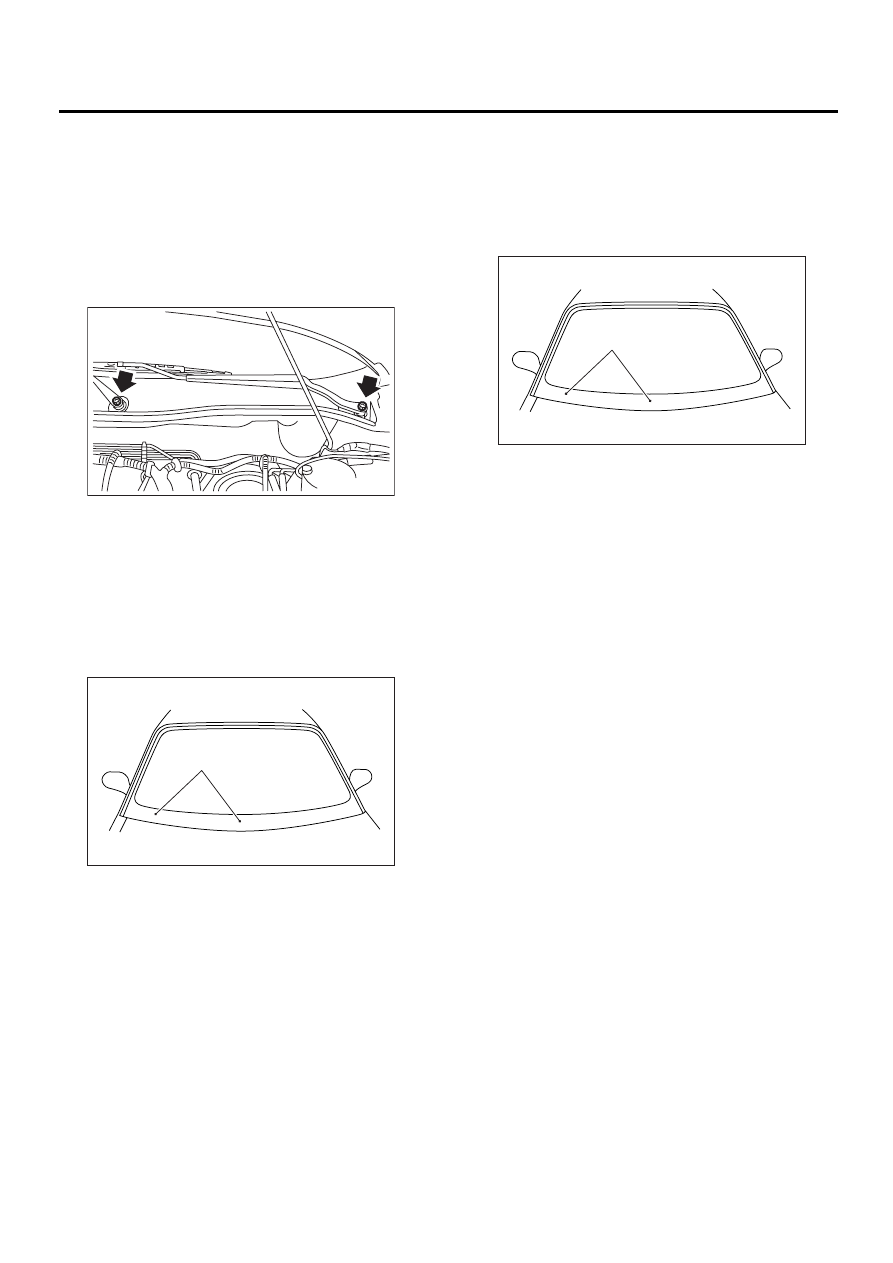
FRONT WIPER ARM
6. Front Wiper Arm
A: REMOVAL
NOTE:
The positions for RHD model are symmetrically op-
posite.
1) Open hood.
2) Remove cap.
3) Loosen nut to remove arm.
B: INSTALLATION
NOTE:
The positions for RHD model are symmetrically op-
posite.
1) Install in the reverse order of removal.
2) Operate wiper once.
3) Align wiper blade to ceramic print point mark (A)
of front window pane.
Tightening torque:
Refer to COMPONENT in General Descrip-
tion. <Ref. to WW-3, FRONT WIPER, COM-
PONENT, General Description.>
C: ADJUSTMENT
NOTE:
The positions for RHD model are symmetrically op-
posite.
Operate wiper once. Align wiper blade to ceramic
print point mark (A) of front window pane.
WW-00071
WW-00048
(A)
WW-00048
(A)

WW-13
WIPER AND WASHER SYSTEMS
FRONT WIPER MOTOR AND LINK
7. Front Wiper Motor and Link
A: REMOVAL
NOTE:
The positions for RHD model are symmetrically op-
posite.
1) Remove cowl panel. <Ref. to EI-27, REMOVAL,
Cowl Panel.>
2) Disconnect connector of motor.
3) Loosen bolts and nuts to remove wiper link.
4) Loosen bolts and nuts to remove motor.
B: INSTALLATION
Install in the reverse order of removal.
Tightening torque:
Refer to COMPONENT in General Descrip-
tion. <Ref. to WW-3, FRONT WIPER, COM-
PONENT, General Description.>
C: INSPECTION
1) When battery is connected to terminal of con-
nectors, confirm that motor operates at low speed.
2) When battery is connected to terminal of con-
nectors, confirm that motor operates at high speed.
3) Connect battery to terminals of connector, and
remove terminal connection with motor rotated at
low speed, and stop wiper motor through operation.
4) Connect battery and confirm that motor stops at
automatic stop position after motor operates at low
speed again.
WW-00074
WW-00075
WW-00076
1
2
3
4
5
WW-00077
1
2
3
4
5
WW-00078
1
2
3
4
5
WW-00079
1
2
3
4
5
Нет комментариевНе стесняйтесь поделиться с нами вашим ценным мнением.
Текст