Subaru Legacy III (2000-2003 year). Service manual — part 929
WW-14
WIPER AND WASHER SYSTEMS
FRONT WASHER NOZZLE
8. Front Washer Nozzle
A: REMOVAL
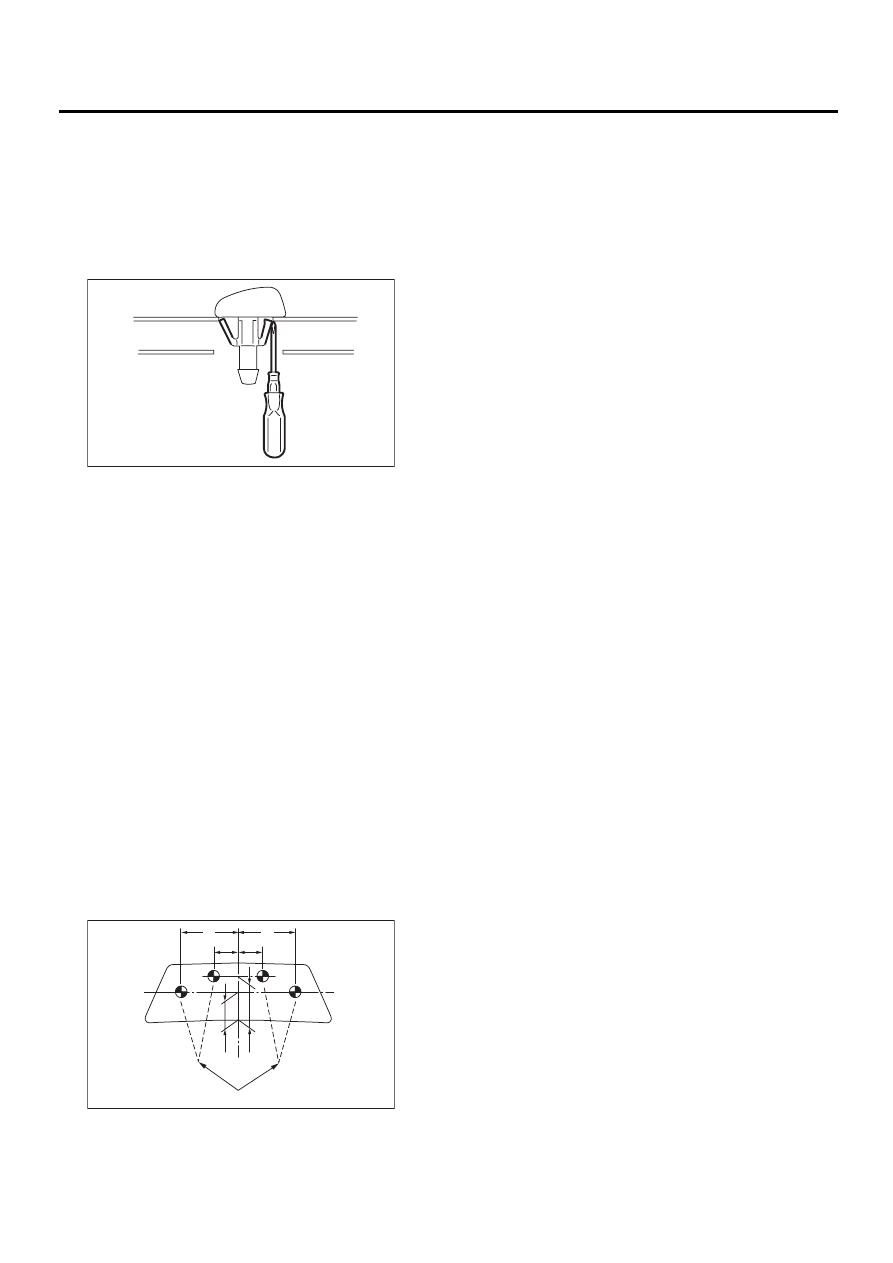
1) Remove the washer hose from the washer noz-
zle.
2) Open the clips on the underside of the hood with
a thin screwdriver or other tool, and remove the
washer nozzle.
B: INSTALLATION
1) Install in the reverse order of removal.
2) Adjust the position of the washer liquid sprayer.
<Ref. to WW-14, ADJUSTMENT, Front Washer
Nozzle.>
C: INSPECTION
• Make sure the nozzle and hose are not clogged.
• Make sure the hose is not bent.
D: ADJUSTMENT
NOTE:
Adjustment positions for left-handed vehicle. Carry
out left-right symmetry for adjustment positions for
right-handed vehicle.
1) Turn wiper switch to OFF position.
2) When vehicle stops, adjust washer injection po-
sition as shown in the figure.
Injection position:
A: 350 mm (13.78 in)
B: 150 mm (5.91 in)
C: 300 mm (11.81 in)
D: 600 mm (23.62 in)
(1) Nozzle
WW-00023
WW-00111
A
B
C
D
B
A
( 1 )
WW-15
WIPER AND WASHER SYSTEMS
REAR WIPER ARM
9. Rear Wiper Arm
A: REMOVAL
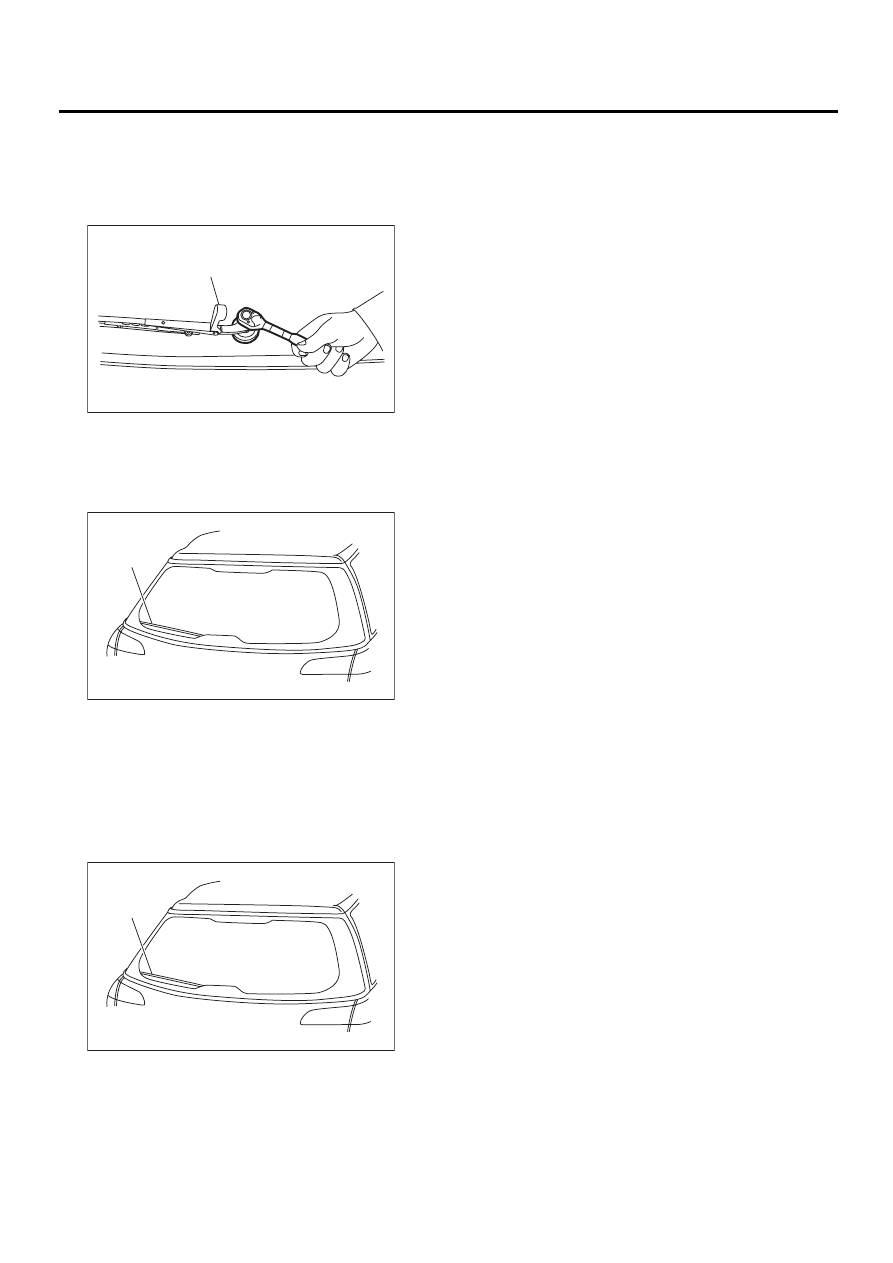
1) Raise wiper arm cover (A).
2) Loosen nut to remove wiper arm.
B: INSTALLATION
1) Install in the reverse order of removal.
2) Operate rear wiper once.
3) Align blade to rear defogger heat wire (A).
Tightening torque:
Refer to COMPONENT in General Descrip-
tion. <Ref. to WW-4, REAR WIPER, COM-
PONENT, General Description.>
C: ADJUSTMENT
1) Operate rear wiper once.
2) Align blade to rear defogger heat wire (A).
WW-00025
( A )
WW-00083
( A )
( A )
WW-00084
WW-16
WIPER AND WASHER SYSTEMS
REAR WIPER MOTOR
10.Rear Wiper Motor
A: REMOVAL
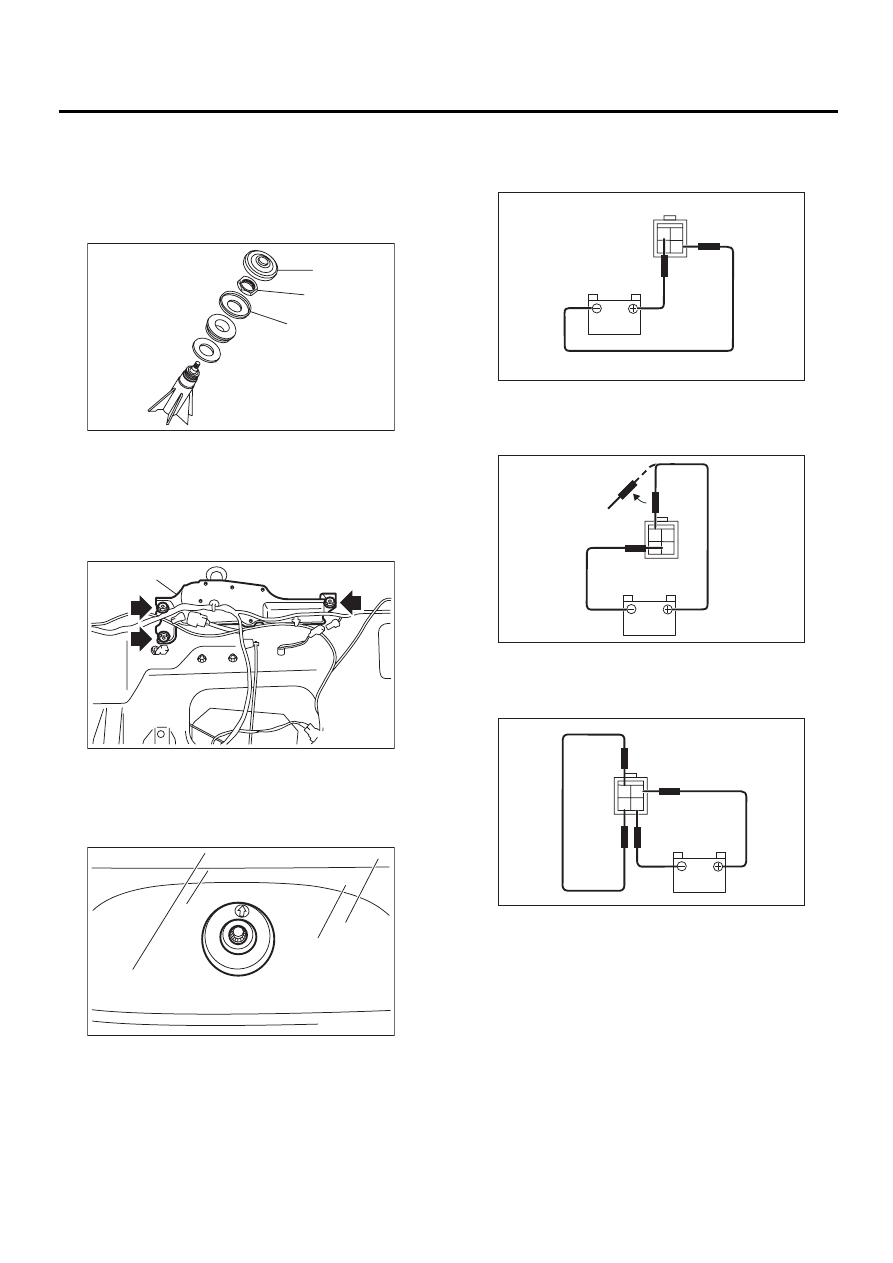
1) Remove rear wiper arm.
2) Remove cap (A), nut (B), and spacer (C) from
rear wiper shaft.
3) Remove rear gate lower trim. <Ref. to EI-44,
REMOVAL, Rear Gate Trim.>
4) Unclip clip of harness and disconnect connector
of wiper motor.
5) Loosen bolts to remove wiper motor assembly
(A).
B: INSTALLATION
1) Install in the reverse order of removal.
2) Install rear wiper cushion with the arrow mark
facing up, as shown in the figure.
Tightening torque:
Refer to COMPONENT in General Descrip-
tion. <Ref. to WW-4, REAR WIPER, COM-
PONENT, General Description.>
C: INSPECTION
1) Connect battery to wiper motor connector and
confirm that wiper motor operates.
2) Connect battery to terminal of connector and re-
move terminal connections with motor rotated, and
stop wiper motor through operation.
3) Connect battery and confirm that motor stops at
automatic stop position after motor operates at low
speed again.
WW-00027
( A )
( B )
( C )
WW-00086
( A )
WW-00029
WW-00030
1
4 3
2
WW-00031
1
4 3
2
WW-00032
1
4 3
2
WW-17
WIPER AND WASHER SYSTEMS
REAR WASHER NOZZLE
11.Rear Washer Nozzle
A: REMOVAL
1) Remove the high-mount stop light. <Ref. to LI-
29, REMOVAL, High-mounted Stop Light.>
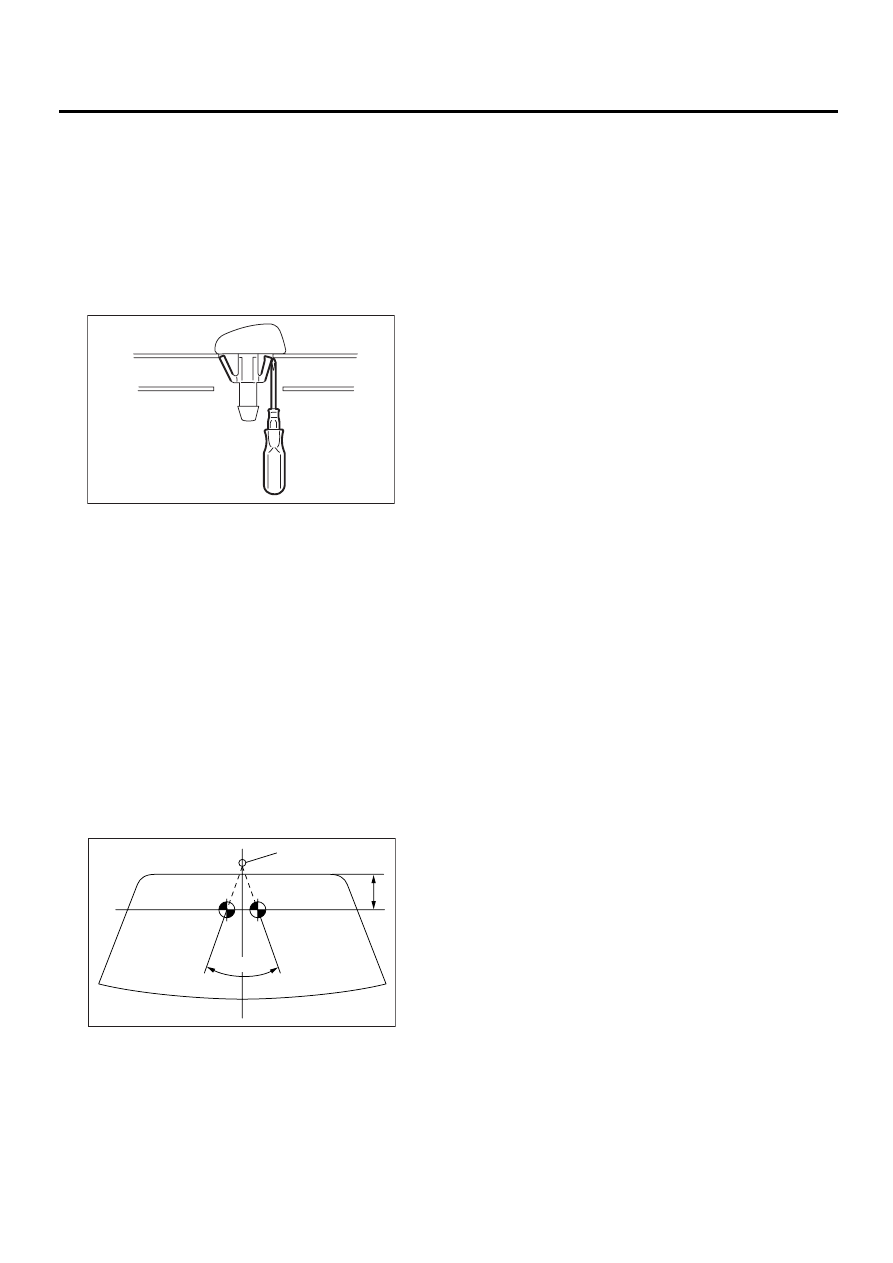
2) Remove the washer hose from the washer noz-
zle.
3) Open the clips on the underside of the rear gate
panel with a thin screwdriver or other tool, and re-
move the washer nozzle.
B: INSTALLATION
1) Install in the reverse order of removal.
2) Adjust the position of the washer liquid sprayer.
<Ref. to WW-17, ADJUSTMENT, Rear Washer
Nozzle.>
C: INSPECTION
• Make sure the nozzle and hose are not clogged.
• Make sure the hose is not bent.
D: ADJUSTMENT
1) Turn wiper switch to OFF position.
2) When vehicle stops, adjust washer injection po-
sition as shown in the figure.
Injection position:
A: 60 mm (2.36 in)
B: 42
°°°°
(1) Nozzle
WW-00023
WW-00054
A
(1)
B
Нет комментариевНе стесняйтесь поделиться с нами вашим ценным мнением.
Текст