Subaru Legacy III (2000-2003 year). Service manual — part 966

SL-20
SECURITY AND LOCKS
FRONT OUTER HANDLE
5. Front Outer Handle
A: REMOVAL
1) Remove the front door latch assembly. <Ref. to
SL-21, REMOVAL, Front Door Latch Assembly.>
2) Remove the two bolts. Remove the front outer
handle (A).
CAUTION:
Do not use excessive force to remove the door
panel. This will deform it.
B: INSTALLATION
Install in the reverse order of removal.
NOTE:
Make sure the outer handle works properly after in-
stallation.
C: INSPECTION
1) Make sure the rod is not deformed.
2) Make sure the lever and rod work smoothly.
SL-00073
( A )

SL-21
SECURITY AND LOCKS
FRONT DOOR LATCH ASSEMBLY
6. Front Door Latch Assembly
A: REMOVAL
1) Disconnect ground cable from battery.
2) Remove the front door trim. <Ref. to EI-30, RE-
MOVAL, Front Door Trim.>
3) Remove the sealing cover. <Ref. to EB-13, RE-
MOVAL, Front Sealing Cover.>
4) Remove the front inner remote. <Ref. to SL-19,
REMOVAL, Front Inner Remote.>
5) Remove the front door glass. <Ref. to GW-12,
REMOVAL, Front Door Glass.>
6) Remove three nuts, and detach the front door
sash (Rear).
7) Remove the three screws and bolt.
8) Disconnect the connector. Remove the front
door latch assembly.
B: INSTALLATION
Install in the reverse order of removal.
NOTE:
Make sure the lock works properly after installation.
C: INSPECTION
1) Make sure the rod is not deformed.
2) Make sure the lever and rod work smoothly.
SL-00074
SL-22
SECURITY AND LOCKS
FRONT DOOR LOCK ACTUATOR
7. Front Door Lock Actuator
A: REMOVAL
1) Remove the front door latch assembly. <Ref. to
SL-21, REMOVAL, Front Door Latch Assembly.>
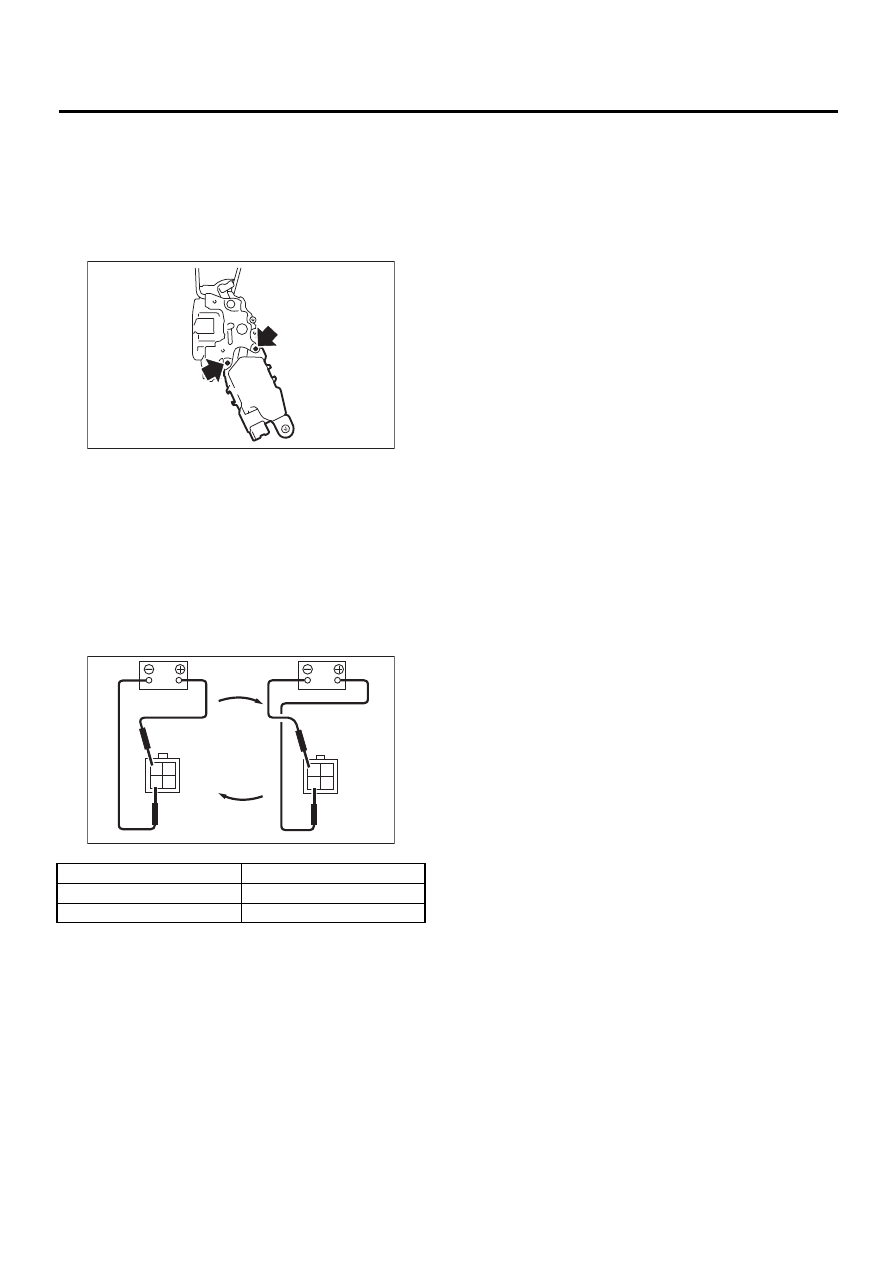
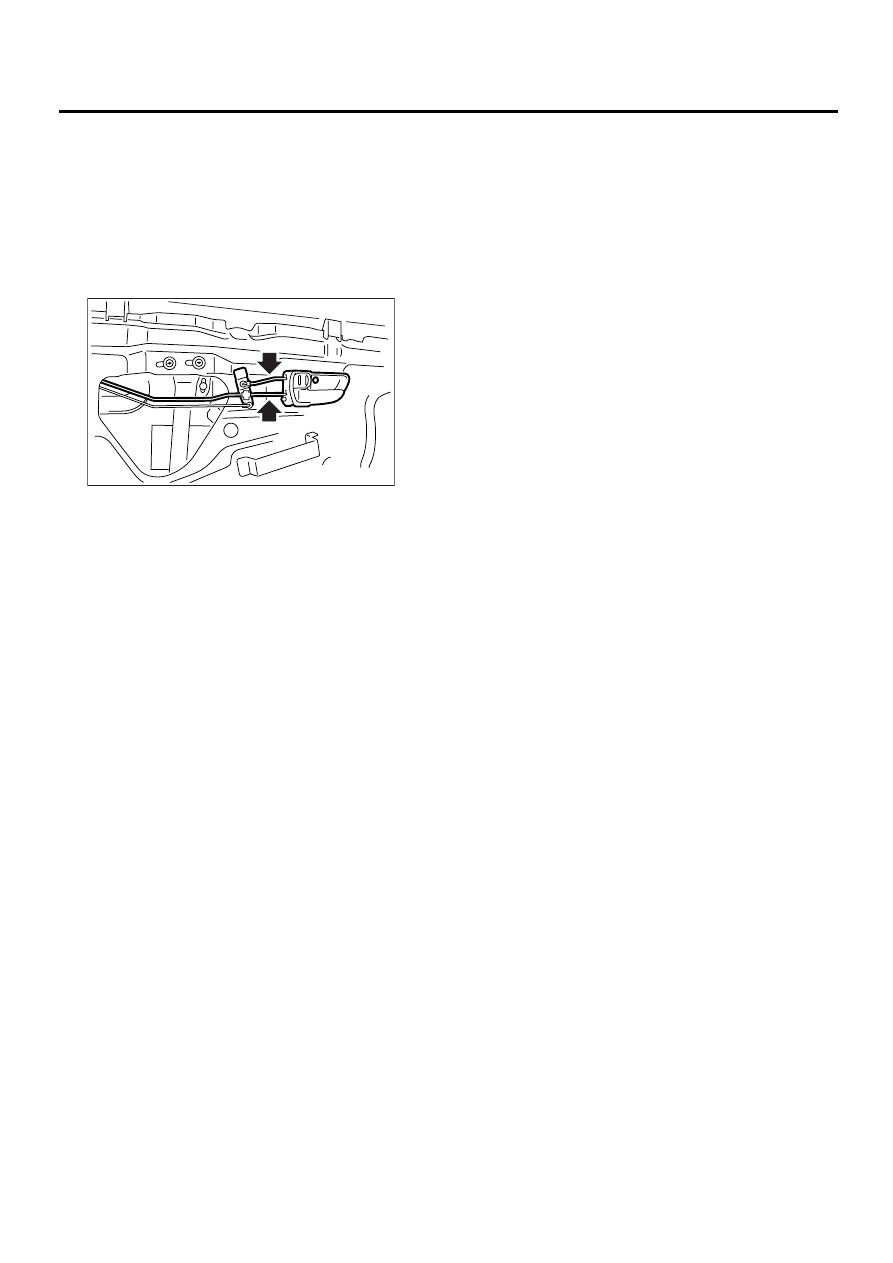
2) Remove the bolt. Remove the front door lock ac-
tuator.
B: INSTALLATION
Install in the reverse order of removal.
NOTE:
Make sure the lock works properly after installation.
C: INSPECTION
1) Disconnect the door lock actuator harness con-
nector.
2) Connect the battery to the door lock actuator ter-
minals.
If NG, replace the door lock actuator.
Terminal No.
Actuator operation
No. 2 (+) and No. 4 (–)
Unlocked
→
Locked
No. 4 (+) and No. 2 (–)
Locked
→
Unlocked
SL-00075
SL-00076
2 1
4 3
2 1
4 3
SL-23
SECURITY AND LOCKS
REAR INNER REMOTE
8. Rear Inner Remote
A: REMOVAL
1) Remove the rear door trim. <Ref. to EI-31, RE-
MOVAL, Rear Door Trim.>
2) Remove the sealing cover. <Ref. to EB-16, RE-
MOVAL, Rear Sealing Cover.>
3) Remove the two rod joints.
4) Remove the screw, and detach the inner remote.
B: INSTALLATION
Install in the reverse order of removal.
NOTE:
Make sure the inner remote works properly after in-
stallation.
C: INSPECTION
1) Make sure the rod is not deformed.
2) Make sure the lever and rod work smoothly.
3) Make sure the child safety lock on rear doors
work properly, when applicable.
SL-00077
Нет комментариевНе стесняйтесь поделиться с нами вашим ценным мнением.
Текст