Subaru Legacy III (2000-2003 year). Service manual — part 262
ME(H6DO)-36
MECHANICAL
ENGINE MOUNTING
8. Engine Mounting
A: REMOVAL
1) Remove engine assembly. <Ref. to ME(H6DO)-
29, REMOVAL, Engine Assembly.>
2) Remove engine mounting from engine assem-
bly.
B: INSTALLATION
Install in the reverse order of removal.
Tightening torque:
Engine mounting;
34 N·m (3.5 kgf-m, 25.3 ft-lb)
C: INSPECTION
Make sure there are no cracks or other damage.
ME(H6DO)-37
MECHANICAL
PREPARATION FOR OVERHAUL
9. Preparation for Overhaul
A: REMOVAL
1) Remove engine from body. <Ref. to ME(H6DO)-
29, REMOVAL, Engine Assembly.>
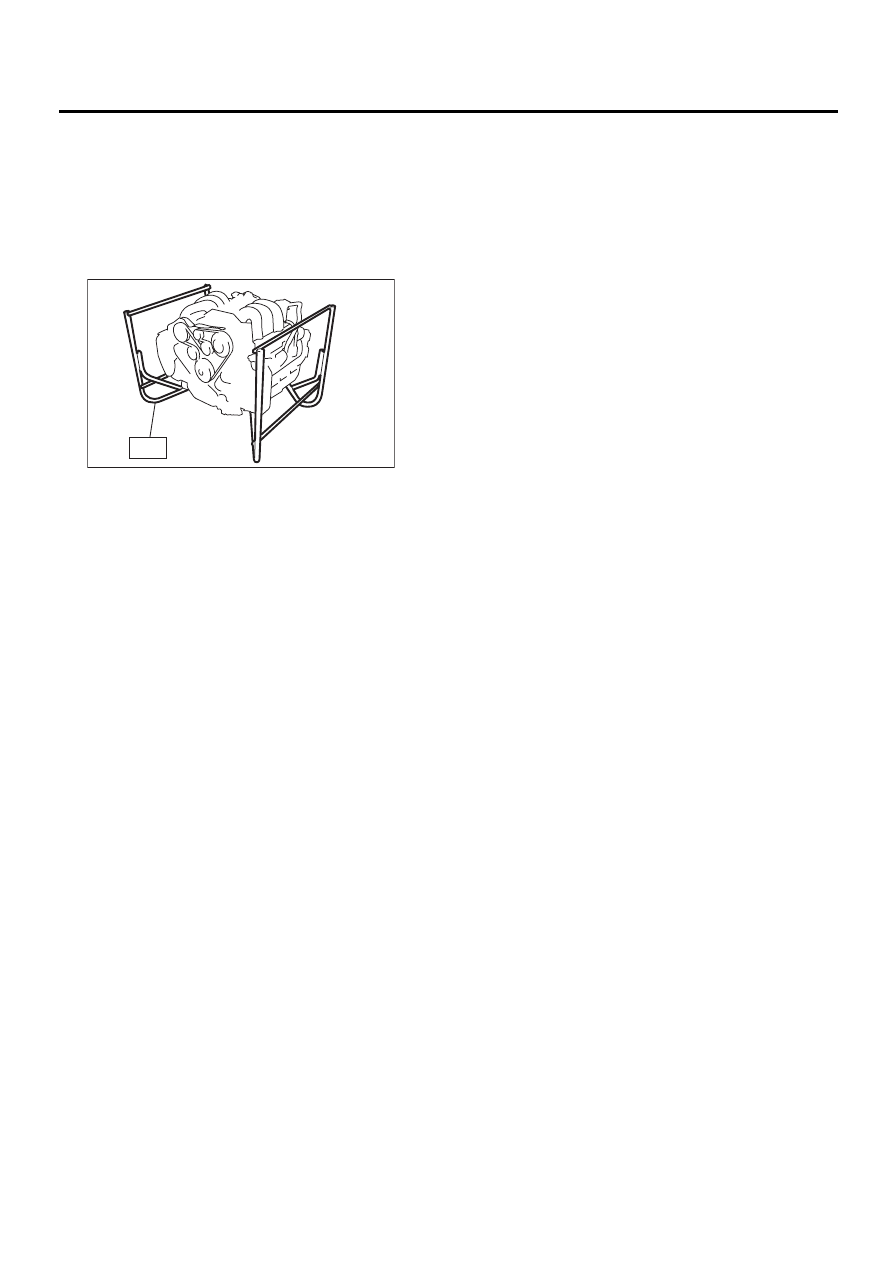
2) After removing engine from body, install ST onto
engine.
ST
18232AA000
ENGINE STAND
3) Remove sensors, pipes, and hoses installed on
engine before starting overhaul.
(1) Remove intake manifold. <Ref. to
FU(H6DO)-17, REMOVAL, Intake Manifold.>
(2) Remove generator. <Ref. to SC(H6DO)-14,
REMOVAL, Generator.>
(3) Remove A/C compressor. <Ref. to AC-35,
REMOVAL, Compressor.>
(4) Remove EGR pipe. <Ref. to EC(H6DO)-10,
REMOVAL, EGR Valve.>
(5) Remove water pipe and hoses.
(6) Remove engine harness.
(7) Remove spark plugs. <Ref. to IG(H6DO)-4,
REMOVAL, Spark Plug.>
(8) Remove camshaft position sensor. <Ref. to
FU(H6DO)-31, REMOVAL, Camshaft Position
Sensor.>
(9) Remove crankshaft position sensor. <Ref.
to FU(H6DO)-30, REMOVAL, Crankshaft Posi-
tion Sensor.>
(10)Remove knock sensor. <Ref. to FU(H6DO)-
32, REMOVAL, Knock Sensor.>
(11)Remove engine coolant temperature sen-
sor. <Ref. to FU(H6DO)-29, REMOVAL, Engine
Coolant Temperature Sensor.>
(12)Remove oil pressure switch. <Ref. to
LU(H6DO)-16, REMOVAL, Oil Pressure
Switch.>
(13)Remove oil filter. <Ref. to LU(H6DO)-17,
REMOVAL, Engine Oil Filter.>
(14)Remove oil cooler. <Ref. to LU(H6DO)-18,
REMOVAL, Oil Cooler.>
ST
ME-00495
ME(H6DO)-38
MECHANICAL
CRANKSHAFT PULLEY
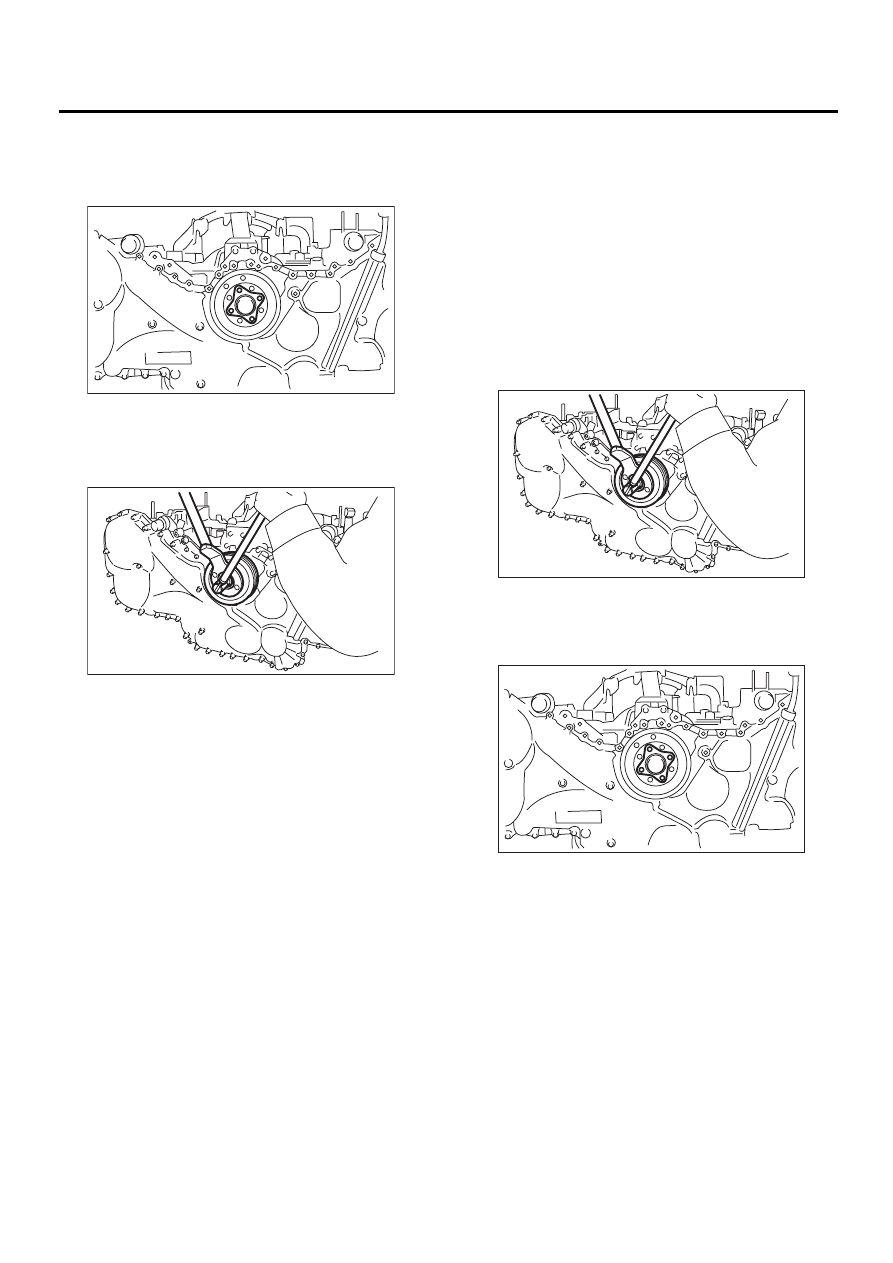
10.Crankshaft Pulley
A: REMOVAL
1) Remove crankshaft pulley cover.
2) Remove crankshaft pulley bolt. To lock crank-
shaft, use ST.
ST
499977100
CRANKSHAFT PULLEY
WRENCH
3) Remove crankshaft pulley.
B: INSTALLATION
1) Install crankshaft pulley.
2) Install crankshaft pulley bolt. To lock crankshaft,
use ST.
ST
499977100
CRANKSHAFT PULLEY
WRENCH
(1) Clean the crankshaft pulley thread using an
air gun.
(2) Apply engine oil to the crankshaft pulley bolt
seat and thread.
(3) Tighten the crankshaft pulley bolts.
Tightening torque:
178 N·m (18.1 kgf-m, 131 ft-lb)
3) Install the crankshaft pulley cover.
Tightening torque:
6.4 N·m (0.65 kgf-m, 4.7 ft-lb)
C: INSPECTION
1) Check crankshaft pulley cover for oil leaks and
bleeding.
2) Check crankshaft pulley for looseness.
ME-00496
ME-00497
ME-00497
ME-00496
ME(H6DO)-39
MECHANICAL
FRONT CHAIN COVER
11.Front Chain Cover
A: REMOVAL
1) Remove crankshaft pulley. <Ref. to ME(H6DO)-
38, REMOVAL, Crankshaft Pulley.>
2) Remove front chain cover.
NOTE:
There are four different types of chain cover mount-
ing bolts. Sort them into separate containers to
avoid confusion at installation.
Bolt dimension:
*: Sealing washer
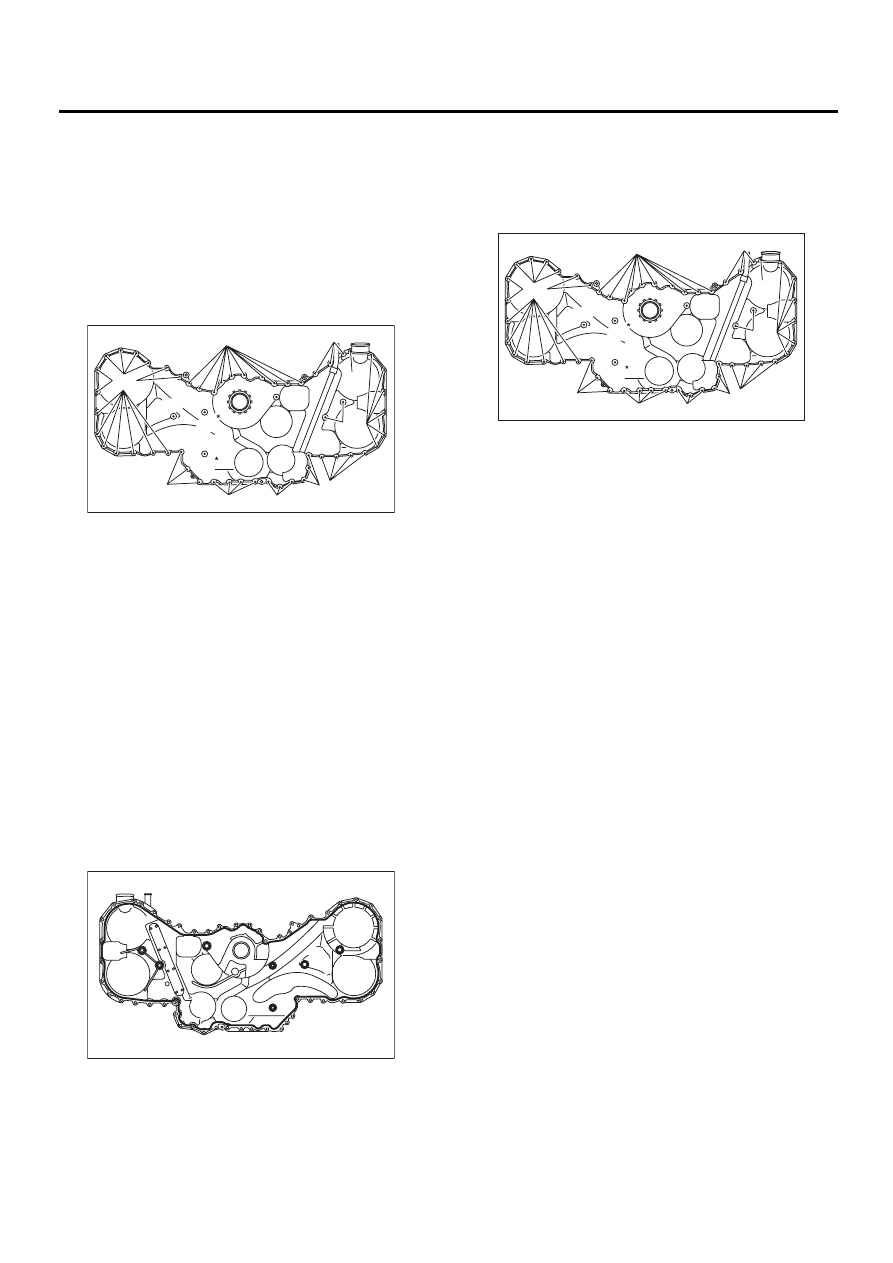
B: INSTALLATION
1) Remove old fluid gasket on the matching sur-
face, and degrease it.
2) Apply fluid gasket to the mating surface of front
chain cover.
Fluid gasket:
THREE BOND 1280B
Part No.: K0877YA018
Fluid gasket application diameter:
2.5
±±±±
0.5 mm (0.098
±±±±
0.020 in)
3) Install front chain cover. Temporarily tighten the
bolts.
CAUTION:
Do not confuse the mounting positions of the
bolts.
Bolt dimension:
*: Sealing washer
(A) 6
×
45
(B) 6
×
16
(C) 6
×
30
(D) 6
×
50
( A )
( C )
( C )
( C )
( D )
( B )
ME-00498
( C )
( A )
( B )
( B )
( B )
( A )
ME-00499
(A) 6
×
45
(B) 6
×
16
(C) 6
×
30
(D) 6
×
50
( A )
( C )
( C )
( C )
( D )
( B )
ME-00498
( C )
( A )
( B )
( B )
( B )
( A )
Нет комментариевНе стесняйтесь поделиться с нами вашим ценным мнением.
Текст