Infiniti QX56 (JA60). Manual — part 267
DOOR
DLK-239
< ON-VEHICLE REPAIR >
[WITH INTELLIGENT KEY SYSTEM]
C
D
E
F
G
H
I
J
L
M
A
B
DLK
N
O
P
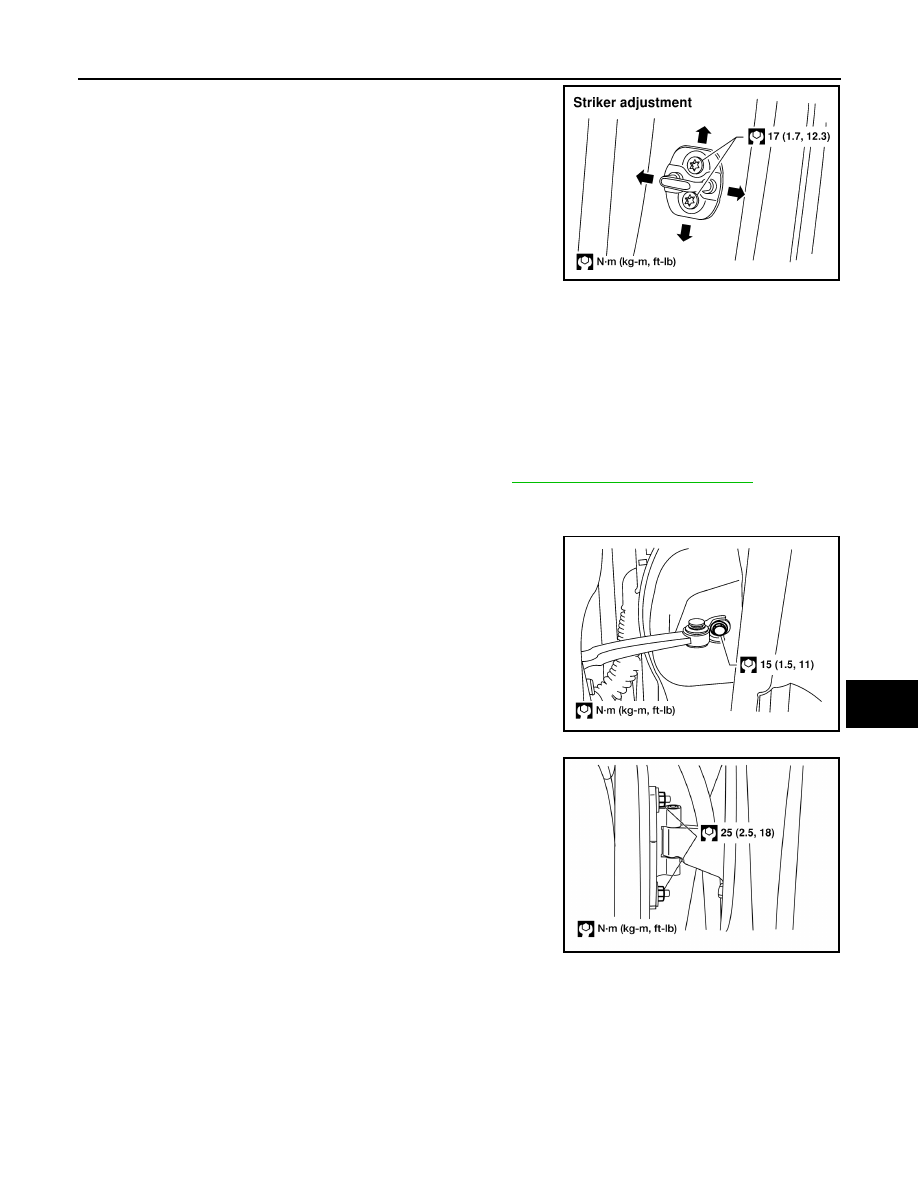
1. Adjust the striker so that it becomes parallel with the lock inser-
tion direction.
Removal and Installation
INFOID:0000000005147055
FRONT DOOR
Removal
CAUTION:
• When removing and installing the door assembly, support the door with a jack and shop cloth to pro-
tect the door and body.
• When removing and installing door assembly, be sure to carry out the fitting adjustment.
• Check the hinge rotating part for poor lubrication. If necessary, apply "body grease".
1. Remove the door window and module assembly. Refer to
GW-15, "Removal and Installation"
2. Remove the door harness.
3. Remove the check link cover.
4. Remove the check link bolt from the hinge pillar.
5. Remove the door-side hinge nuts and bolts, and remove the
door assembly.
Installation
Installation is in the reverse order of removal.
REAR DOOR
Removal
CAUTION:
• When removing and installing the door assembly, support the door with a jack and shop cloth to pro-
tect the door and body.
• When removing and installing door assembly, be sure to carry out the fitting adjustment.
• Check the hinge rotating part for poor lubrication. If necessary, apply "body grease".
LIIA1502E
LIIA1503E
LIIA1504E
DLK-240
< ON-VEHICLE REPAIR >
[WITH INTELLIGENT KEY SYSTEM]
DOOR
1. Remove the door window and module assembly. Refer to
GW-18, "Removal and Installation"
.
2. Remove the door harness.
3. Remove the check link cover.
4. Remove the check link bolt from the hinge pillar.
5. Remove the door-side hinge nuts and bolts, and remove the
door assembly.
Installation
Installation is in the reverse order of removal.
BACK DOOR
Removal
WARNING:
Always support back door when removing or replacing back door stays. Power back door opener will
not support back door with back door stays removed.
1. Remove the back door glass. Refer to
GW-13, "Removal and Installation"
2. Remove the back door lock assembly. Refer to
.
3. Remove the rear wiper motor. Refer to
.
4. Remove the back door wire harness.
5. Remove the rear washer nozzle and hose from the back door. Refer to
.
CAUTION:
LIIA1503E
LIIA1504E
WIIA0890E
DOOR
DLK-241
< ON-VEHICLE REPAIR >
[WITH INTELLIGENT KEY SYSTEM]
C
D
E
F
G
H
I
J
L
M
A
B
DLK
N
O
P
Two technicians should be used to avoid damaging the back door during removal.
6. Support the back door.
7. Disconnect the power back door lift arm from the door.
8. Remove the back door stays.
9. Remove the door side nuts and the back door assembly.
Installation
Installation is in the reverse order of removal.
Back Door Stay Disposal
INFOID:0000000005369274
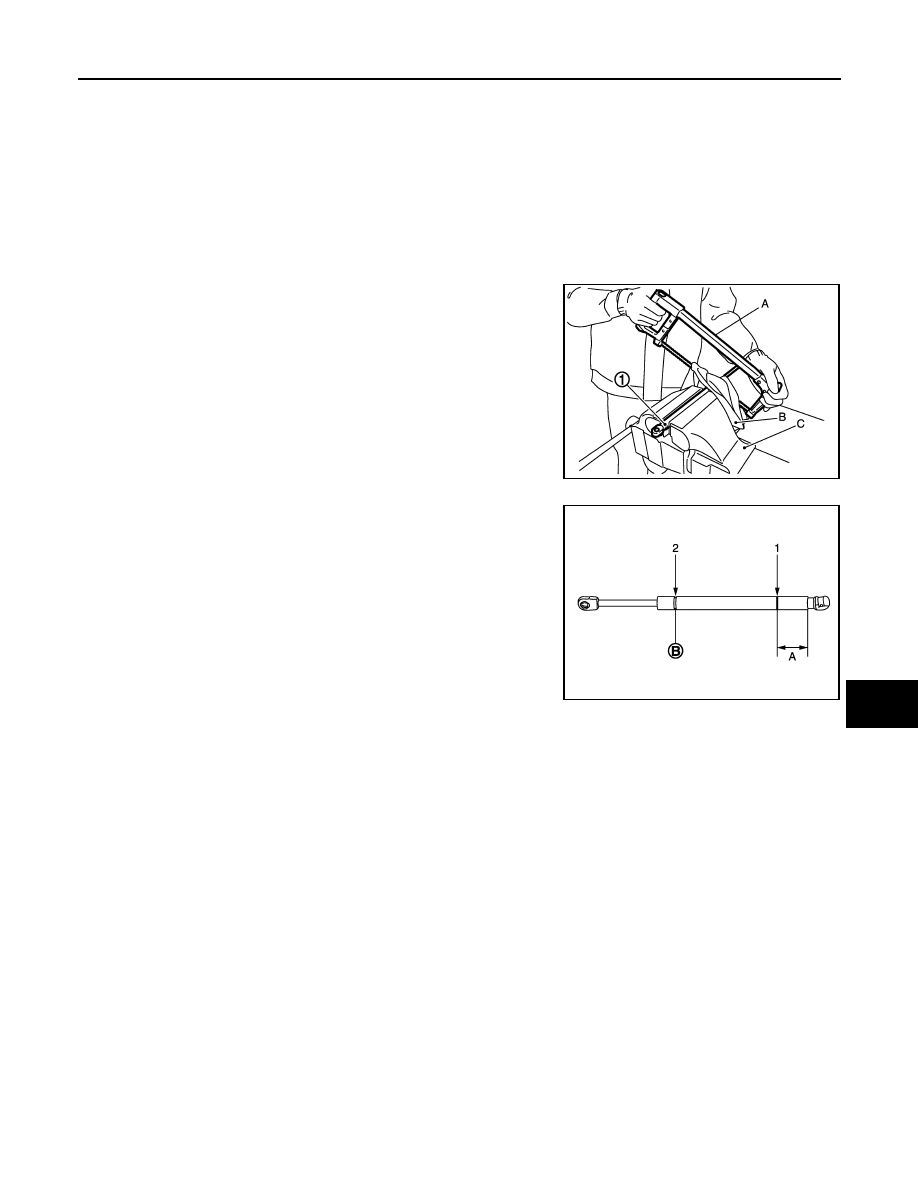
1. Fix back door stay (1) using a vise (C).
2. Using hacksaw (A) slowly make 2 holes in the back door stay, in
numerical order as shown in the figure.
CAUTION:
• When cutting a hole on back door stay, always cover a
hacksaw using a shop cloth (B) to avoid scattering metal
fragments or oil.
• Wear eye protection (safety glasses).
• Wear gloves.
JMKIA3336ZZ
A: 20 mm (0.787 in)
B: Cut at the groove.
JMKIA3609ZZ
DLK-242
< ON-VEHICLE REPAIR >
[WITH INTELLIGENT KEY SYSTEM]
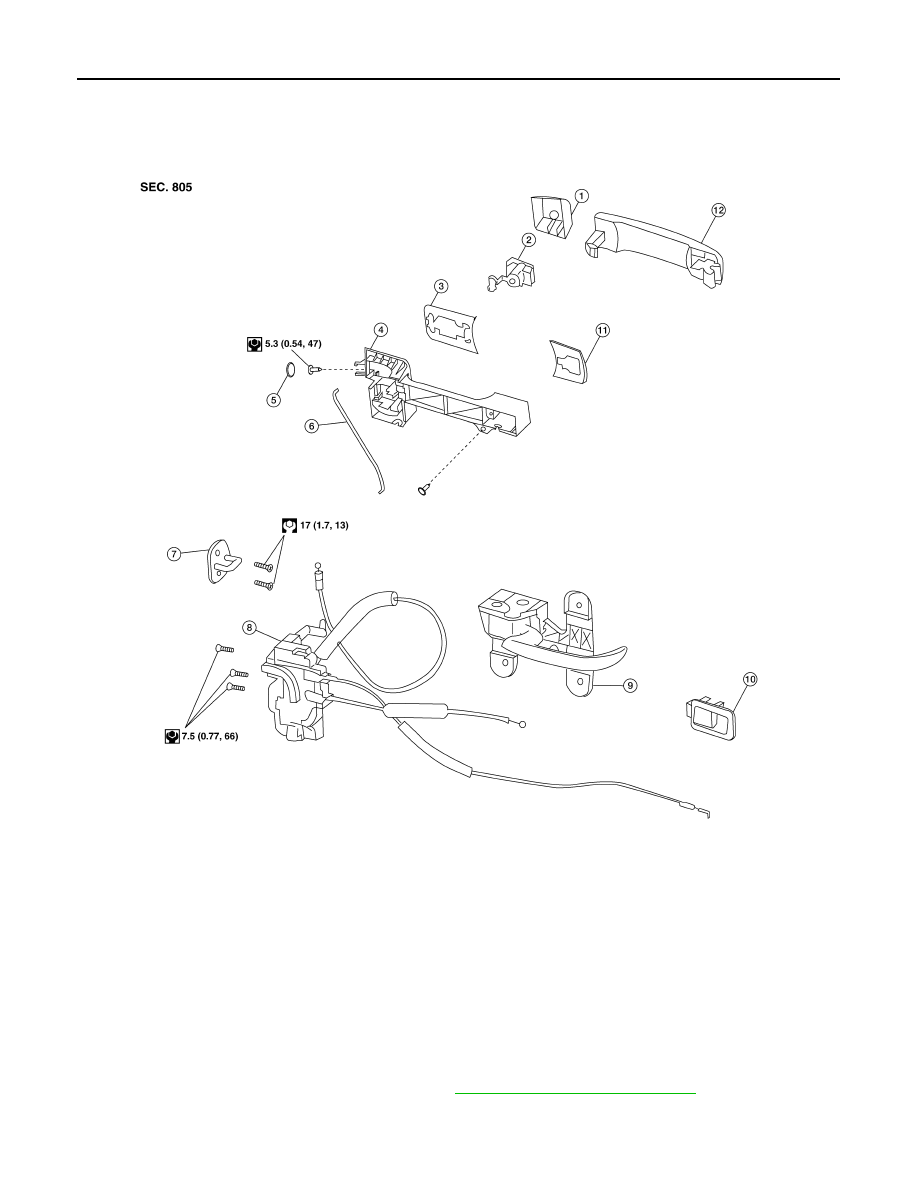
FRONT DOOR LOCK
FRONT DOOR LOCK
Component Structure
INFOID:0000000005147056
Removal and Installation
INFOID:0000000005147057
REMOVAL
1. Remove the front door window regulator. Refer to
GW-15, "Removal and Installation"
.
2. Remove the front door window rear glass run.
1.
Door key cylinder assembly (Driver
side) Outside handle escutcheon
(Passenger side)
2.
Key cylinder assembly (Driver side
only)
3.
Rear gasket
4.
Outside handle bracket
5.
Grommet
6.
Key cylinder rod (Driver side only)
7.
Front door striker
8.
Door lock assembly
9.
Inside handle assembly
10. Inside door lock lever
11. Front gasket
12. Outside handle assembly
ALKIA0898GB
Нет комментариевНе стесняйтесь поделиться с нами вашим ценным мнением.
Текст