Infiniti QX56 (JA60). Manual — part 807
SB-8
< ON-VEHICLE REPAIR >
SEAT BELTS
Installation
Installation is in the reverse order of removal.
NOTE:
Make sure that seat belt height adjuster is locked in the lowest position during installation.
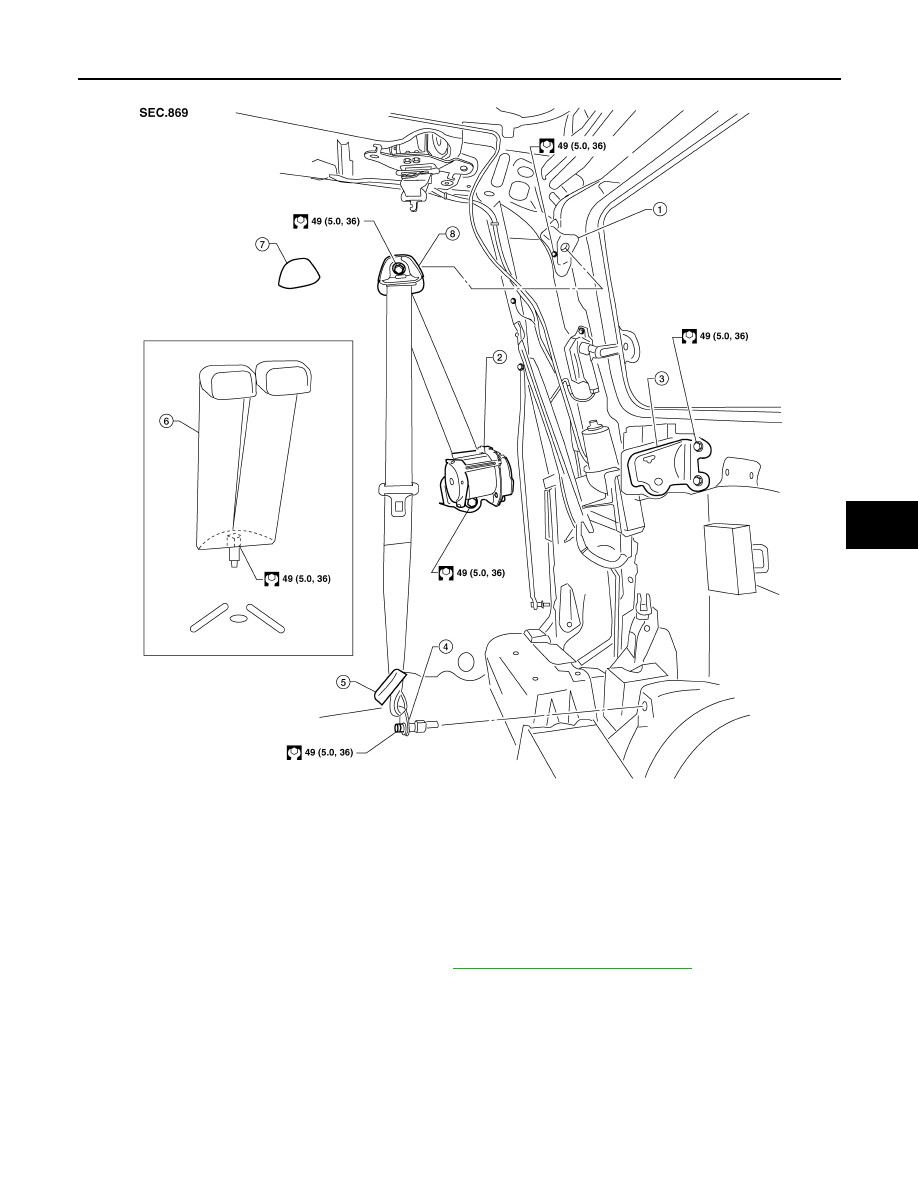
SECOND ROW SEAT BELT RETRACTOR - CENTER
Removal
1. Remove seat belt anchor.
2. Remove seat belt bezel.
3. Remove seat back upholstery and foam. Refer to
SE-72, "Disassembly and Assembly"
.
4. Remove seat belt retractor cover.
5. Remove bolt and remove seat belt retractor and seat belt assembly.
Installation
Installation is in the reverse order of removal.
SECOND ROW SEAT BELT BUCKLE - OUTBOARD
Removal
1. Remove the seat cushion finisher. Refer to
.
2. Remove the anchor bolt and buckle.
Installation
Installation is in the reverse order of removal.
SECOND ROW SEAT BELT BUCKLE - CENTER
Removal
1. Remove the rear center seat. Refer to
SE-56, "Removal and Installation"
.
2. Remove the screw and seat cushion inner finisher. Refer to
SE-72, "Disassembly and Assembly"
3. Remove the anchor bolt and buckle.
Installation
Installation is in the reverse order of removal.
Removal and Installation of Third Row Seat Belt
INFOID:0000000005266530
THIRD ROW SEAT BELT RETRACTOR - OUTBOARD
SEAT BELTS
SB-9
< ON-VEHICLE REPAIR >
C
D
E
F
G
I
J
K
L
M
A
B
SB
N
O
P
Removal
1. Remove the D-ring anchor bolt cover and D-ring anchor bolt.
2. Remove the lower anchor bolt cover and lower anchor bolt.
3. Remove the lower luggage side finisher. Refer to
INT-19, "Removal and Installation"
4. Remove the seat belt retractor and belt assembly bolt.
Installation
Installation is in the reverse order of removal.
• Seat belt lower anchor base should be flat to the floor during installation and not on the anti-rotation bead.
THIRD ROW SEAT BELT RETRACTOR - CENTER
1.
D-ring mounting bracket
2.
Seat belt retractor and belt assembly 3.
Retractor mounting bracket
4.
Seat belt lower anchor
5.
Lower anchor bolt cover
6.
Seat belt buckles
7.
D-ring anchor bolt cover
8.
D-ring anchor
WHIA0283E
SB-10
< ON-VEHICLE REPAIR >
SEAT BELTS
Removal
1. Remove the rear roof finisher. Refer to
INT-17, "Removal and Installation"
.
2. Lower the rear portion of the headliner.
3. Remove the seat belt retractor anchor bolts and retractor and belt assembly.
Installation
Installation is in the reverse order of removal.
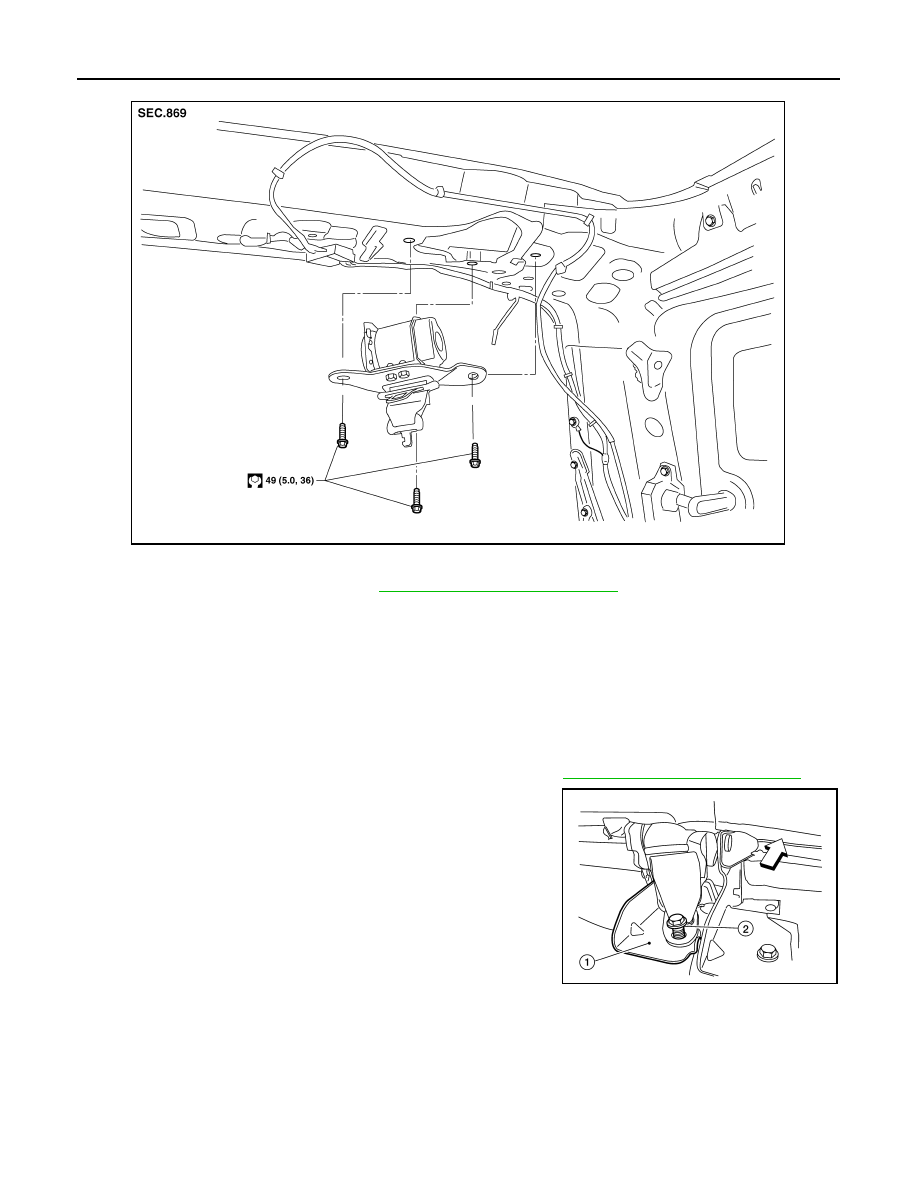
THIRD ROW SEAT BELT BUCKLE
Removal
1. Place seatback RH/LH in the folded position.
2. Remove luggage floor board assembly and storage box. Refer to
INT-19, "Removal and Installation"
.
3. Remove seat belt buckle bolt (2) from rear seat hinge (1).
•
⇐: Vehicle front
WHIA0284E
Seat belt buckle bolt
: 49 N·m (5.0 kg-m, 36 ft-lb)
LHIA0107E
SEAT BELTS
SB-11
< ON-VEHICLE REPAIR >
C
D
E
F
G
I
J
K
L
M
A
B
SB
N
O
P
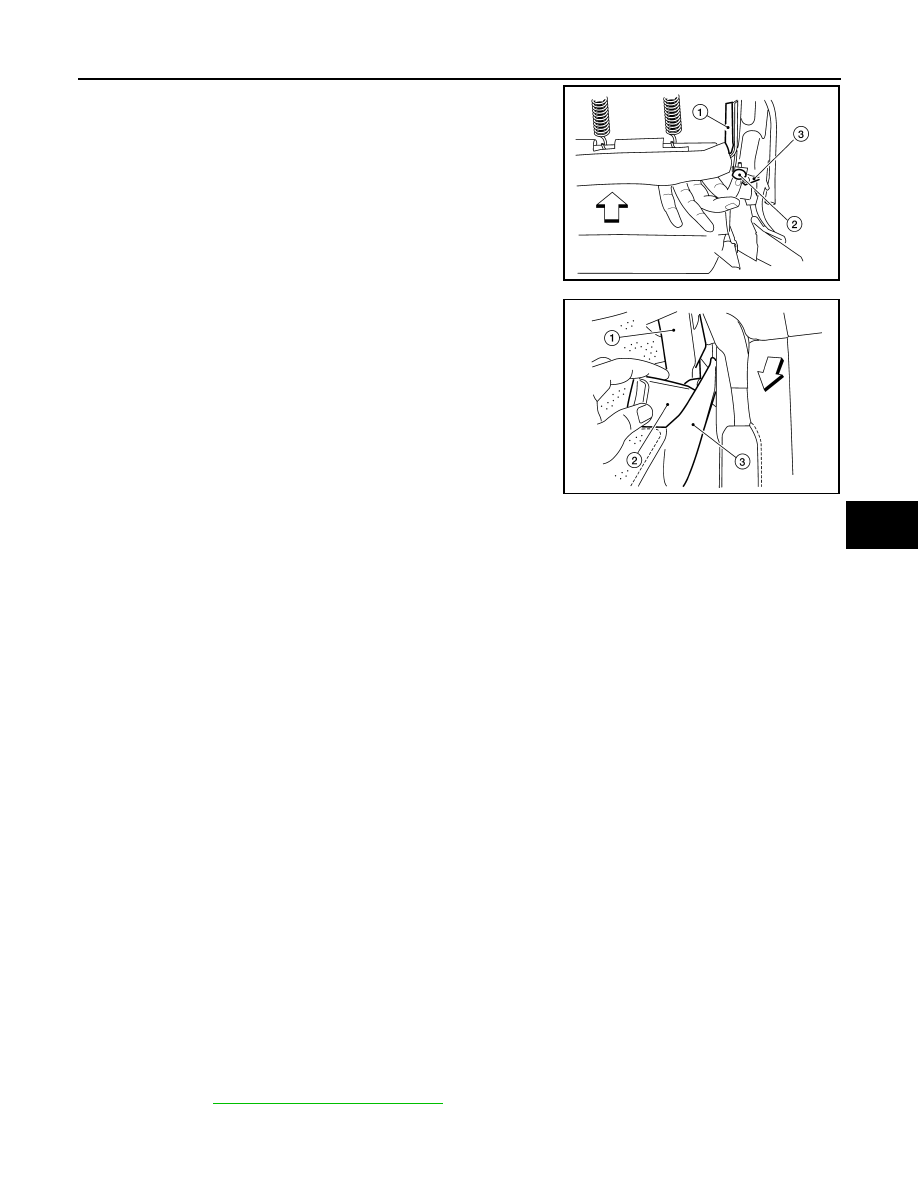
4. Remove push pin (2) and release elastic ban (3) from seat
frame (1). Repeat for opposite seat.
•
⇐: Vehicle front
5. Partially lift seatback upright, then remove seat belt buckle (2)
from between hinge cover (1) and seat cushion side facing (3).
Repeat for LH seat.
•
⇐: Vehicle front
Installation
Installation is in the reverse order of removal.
• Raise and lock both seats in the full upright position to check for abnormal noises or binding.
Seat Belt Inspection
INFOID:0000000005266531
AFTER A COLLISION
WARNING:
Inspect all seat belt assemblies including retractors and attaching hardware after any collision.
NISSAN recommends that all seat belt assemblies in use during a collision be replaced unless the col-
lision was minor and the belts show no damage and continue to operate properly. Failure to do so
could result in serious personal injury in an accident. Seat belt assemblies not in use during a colli-
sion should also be replaced if either damage or improper operation is noted. Seat belt pre-tensioners
should be replaced even if the seat belts are not in use during a frontal collision in which the air bags
are deployed.
Replace any seat belt assembly (including anchor bolts) if:
• The seat belt was in use at the time of a collision (except for minor collisions and the belts, retractors and
buckles show no damage and continue to operate properly).
• The seat belt was damaged in an accident. (i.e. torn webbing, bent retractor or guide).
• The seat belt attaching point was damaged in an accident. Inspect the seat belt attaching area for damage
or distortion and repair as necessary before installing a new seat belt assembly.
• Anchor bolts are deformed or worn out.
• The seat belt pre-tensioner should be replaced even if the seat belts are not in use during the collision in
which the air bags are deployed.
PRELIMINARY CHECKS
1. Check the seat belt warning lamp/chime for proper operation as follows:
a. Switch ignition ON. The seat belt warning lamp should illuminate. Also, the seat belt warning chime should
sound for about seven seconds.
b. Fasten drivers seat belt. The seat belt warning lamp should go out and the chime (if sounding) should
stop.
2. If the air bag warning lamp is blinking, conduct self-diagnosis using CONSULT-III, and air bag warning
lamp. Refer to
.
3. Check that the seat belt retractor, seat belt anchor and buckle bolts are securely attached.
LHIA0105E
LHIA0106E
Нет комментариевНе стесняйтесь поделиться с нами вашим ценным мнением.
Текст