Infiniti I35 (A33). Manual — part 151
SBT863
GI
MA
EM
LC
EC
FE
AT
AX
SU
BR
ST
RS
HA
SC
EL
IDX
BODY FRONT END
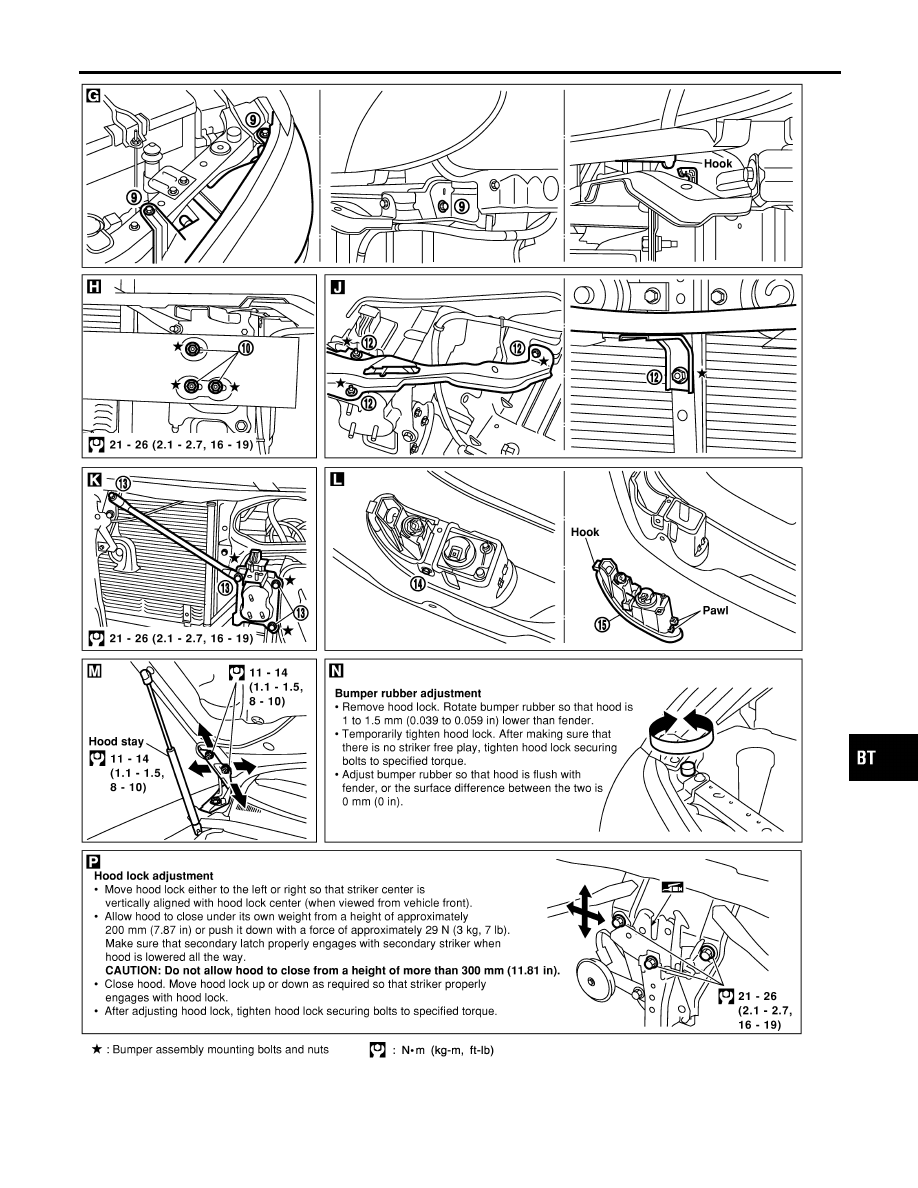
Removal and Installation (Cont’d)
BT-15
INSTALLATION
NHBT0004S03
I
Install in the reverse order of removal.
BODY FRONT END
Removal and Installation (Cont’d)
BT-16
Removal and Installation
NHBT0005
SBT315A
GI
MA
EM
LC
EC
FE
AT
AX
SU
BR
ST
RS
HA
SC
EL
IDX
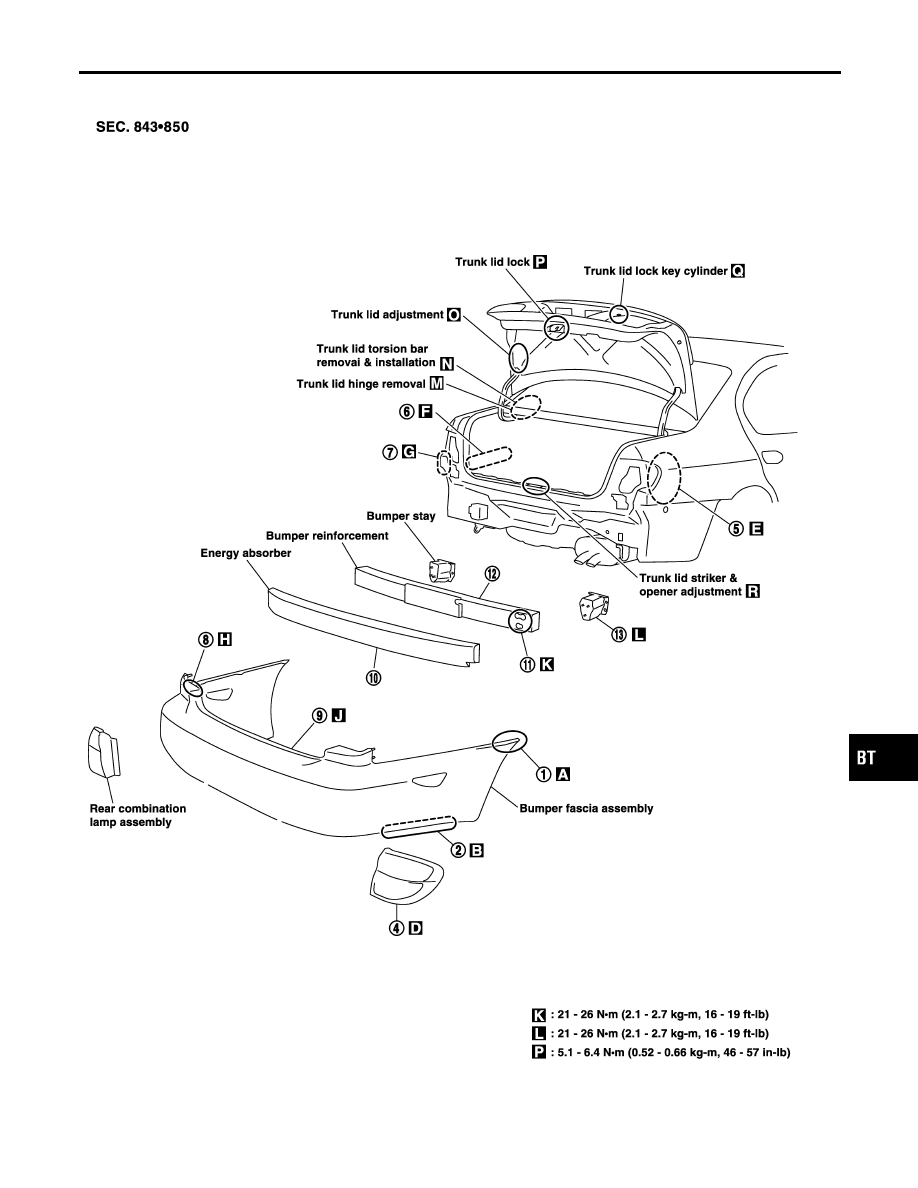
BODY REAR END AND OPENER
Removal and Installation
BT-17
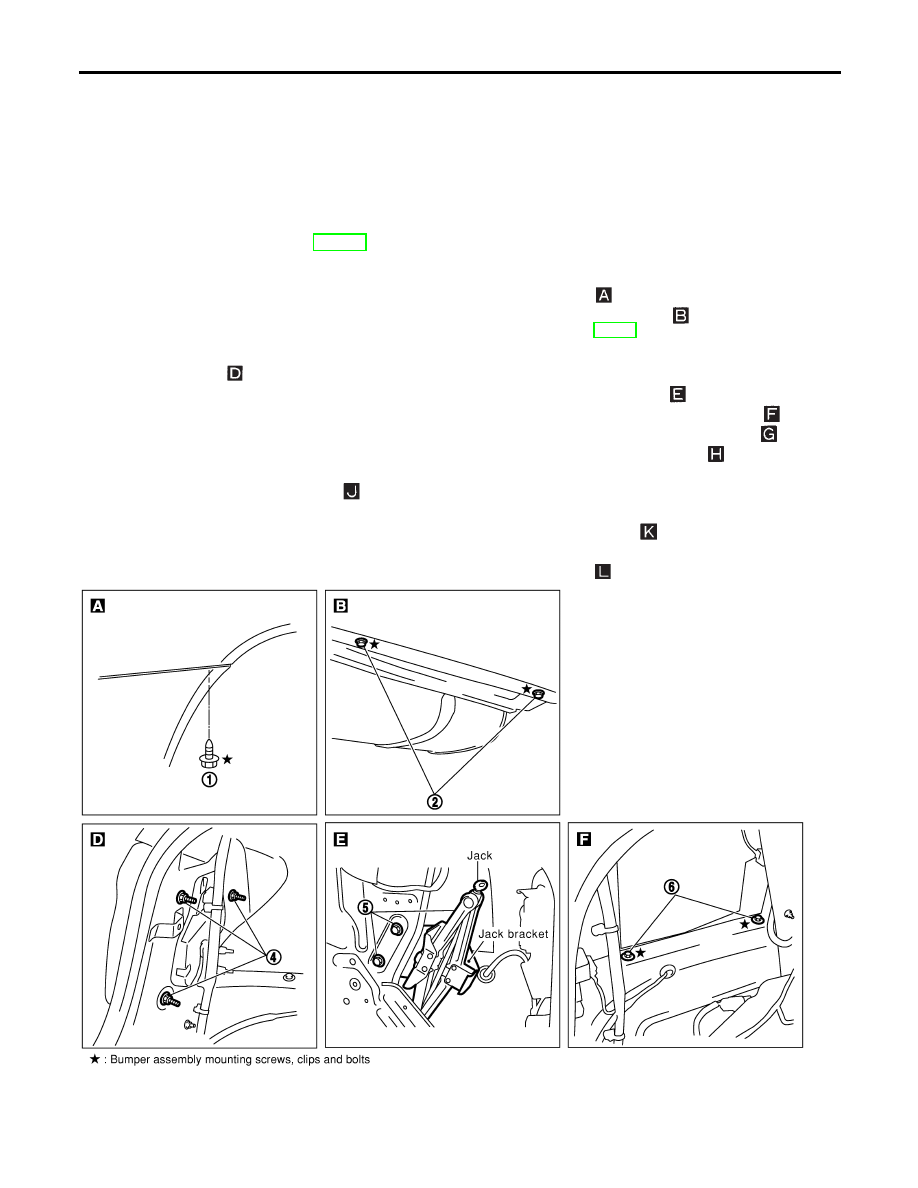
REMOVAL
NHBT0005S03
I
When removing or installing trunk lid, place a cloth or other padding on trunk lid. This prevents vehicle
body from being scratched.
I
Bumper fascia is made of plastic. Do not use excessive force and be sure to keep oil away from it.
I
Trunk lid adjustment: Adjust at hinge-trunk lid portion for proper trunk lid fit.
I
Trunk lid lock system adjustment: Adjust striker so that it is in the center of the lock. After adjustment, check
trunk lid lock operation.
I
After installation, make sure that trunk lid and fuel filler lid open smoothly.
★
For Wiring Diagram, refer to EL-215, “TRUNK LID AND FUEL FILLER LID OPENER”.
Rear Bumper Assembly
NHBT0005S0301
1. Remove screws securing left and right rear fenders to bumper fascia.
2. Remove screws securing left and right rear fenders to bumper fascia lower side.
3. Remove trunk room trim. Refer to “TRUNK ROOM TRIM” for details, BT-43.
4. Working from inside trunk, remove nuts securing rear combination lamp assembly, then disconnect har-
ness connectors.
5. Working from inside trunk, remove jack then remove nuts securing jack bracket.
6. Working from inside trunk, remove bolts securing left and right rear fenders to bumper fascia.
7. Working from inside trunk, remove nuts securing left and right rear fenders to bumper fascia.
8. Remove clips securing left and right rear bumper bracket assembly to bumper fascia.
9. Extract rear bumper fascia assembly after removing the clamps securing it, and then disconnect side
marker lamp harness connectors.
10. Remove energy absorber.
11. Remove nuts securing bumper reinforcement to left and right bumper stays.
12. Extract bumper reinforcement.
13. Remove nuts securing bumper stays, then remove the bumper stays.
SBT082A
BODY REAR END AND OPENER
Removal and Installation (Cont’d)
BT-18
Нет комментариевНе стесняйтесь поделиться с нами вашим ценным мнением.
Текст