Infiniti I35 (A33). Manual — part 93
SAT030F
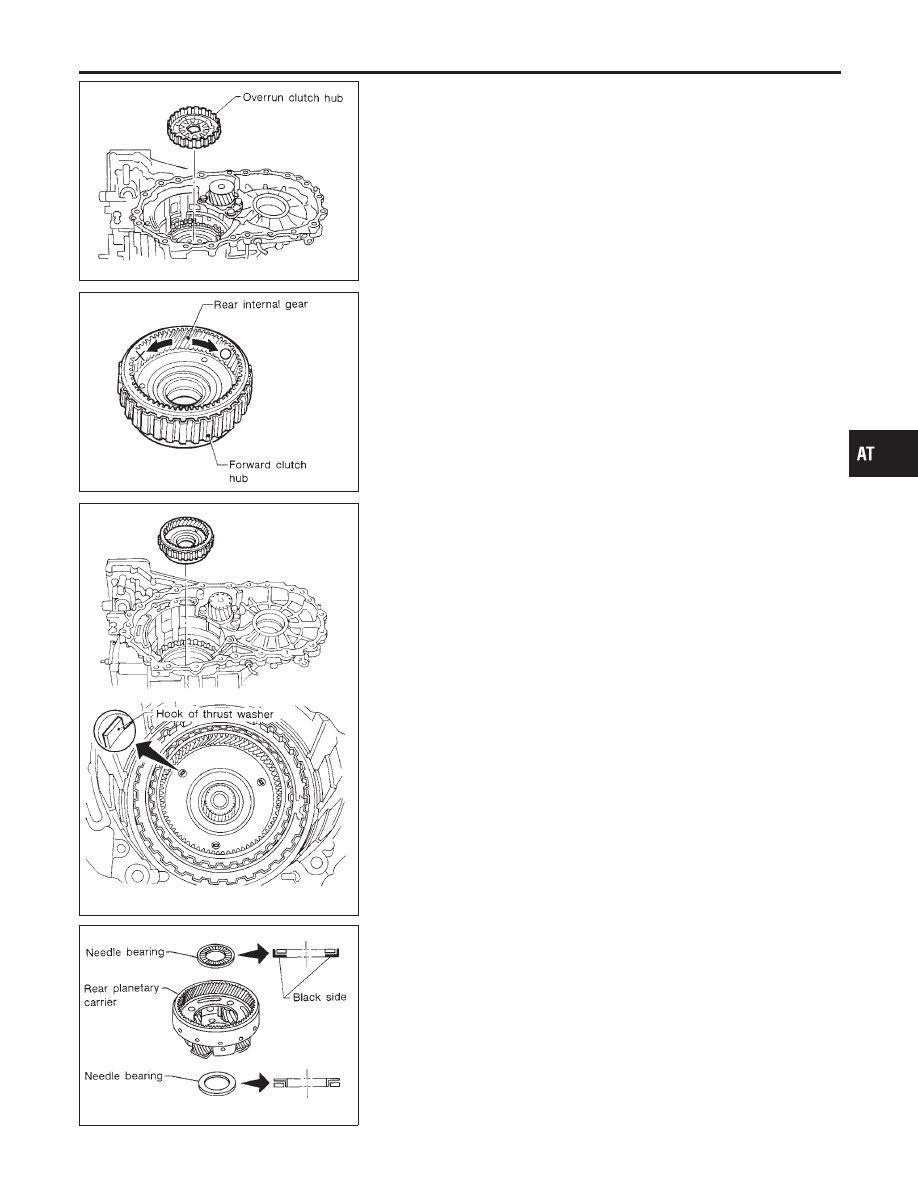
8.
Install overrun clutch hub.
I
Apply petroleum jelly to thrust washers.
I
Align teeth of overrun clutch drive plates before installing.
SAT198F
9.
Hold forward clutch hub and turn rear internal gear.
Check overrun clutch hub for correct directions of lock and
unlock.
I
If not shown as illustrated, check installed direction of
forward one-way clutch.
SAT199F
10. Install forward clutch hub and rear internal gear assembly.
I
Align teeth of forward clutch drive plates before installing.
I
Check that three hooks of thrust washer are correctly
aligned after installing.
SAT028F
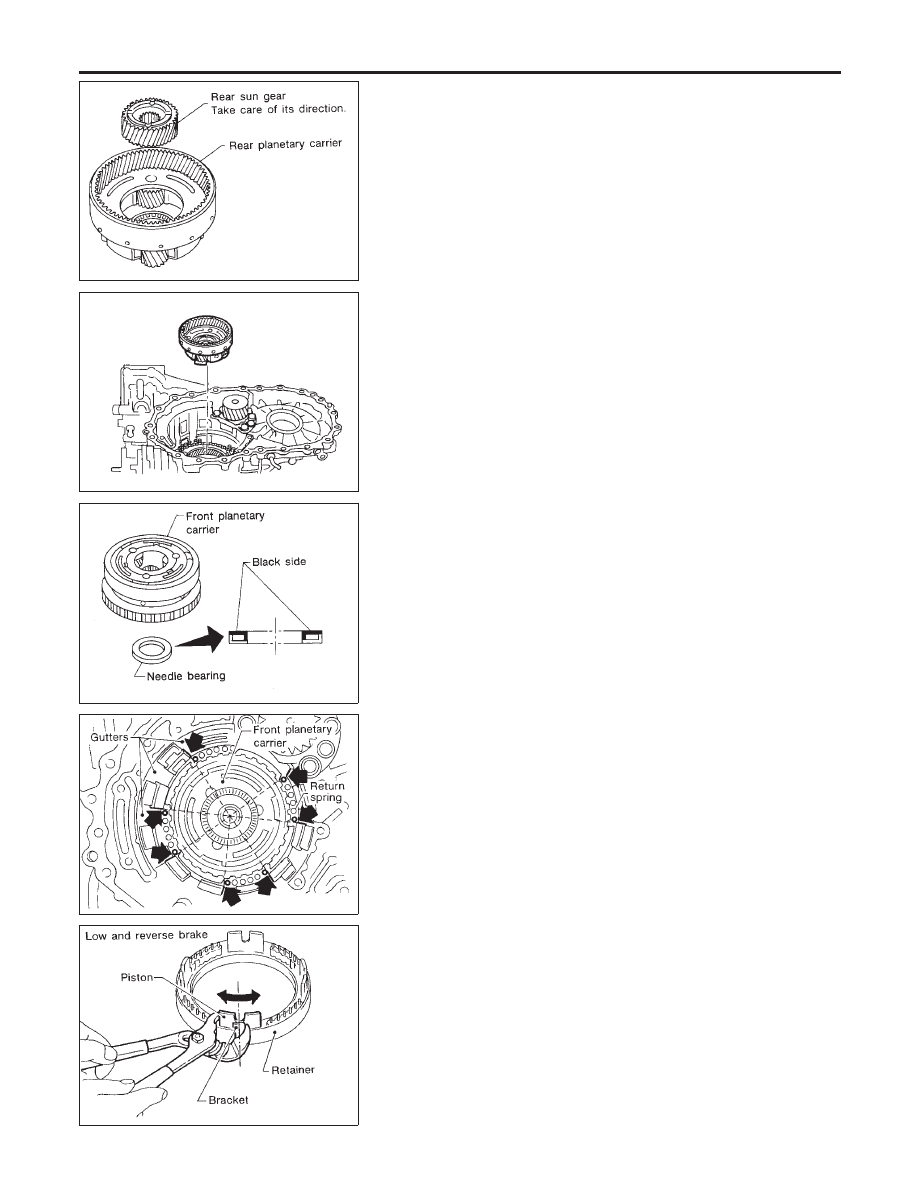
11. Install rear planetary carrier assembly and rear sun gear
according to the following procedures.
a.
Install needle bearings on rear planetary carrier.
I
Apply petroleum jelly to needle bearings.
I
Pay attention to direction of needle bearings.
GI
MA
EM
LC
EC
FE
AX
SU
BR
ST
RS
BT
HA
SC
EL
IDX
ASSEMBLY
Assembly (2) (Cont’d)
AT-369
SAT027F
b.
Install rear sun gear on rear planetary carrier.
I
Pay attention to direction of rear sun gear.
SAT026F
c.
Install rear planetary carrier on transmission case.
SAT380F
12. Install thrust needle bearing on front planetary carrier, then
install them together on transmission case.
I
Apply petroleum jelly to thrust needle bearing.
I
Pay attention to direction of thrust needle bearing.
SAT322F
13. Install low and reverse brake piston according to the following
procedures.
a.
Set and align return springs to transmission case gutters as
shown in illustration.
SAT323F
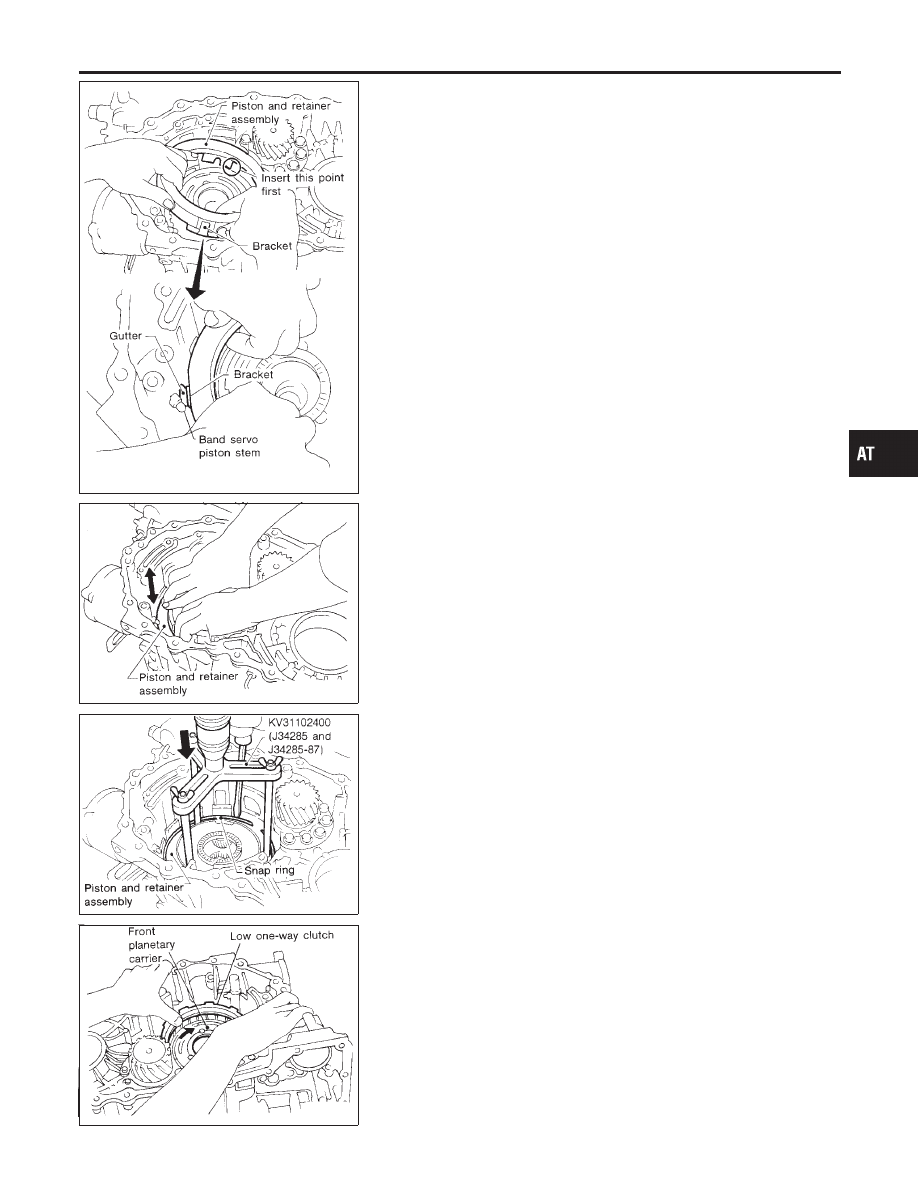
b.
Set and align piston with retainer.
ASSEMBLY
Assembly (2) (Cont’d)
AT-370
SAT324F
c.
Install piston and retainer assembly on the transmission case.
I
Align bracket to specified gutter as indicated in illustra-
tion.
SAT325F
d.
Check that each protrusion of piston is correctly set to corre-
sponding return spring as follows.
I
Push piston and retainer assembly evenly and confirm
they move smoothly.
I
If they can not move smoothly, remove piston and retainer
assembly and align return spring correctly as instructed
in step “a”.
SAT326FB
e.
Push down piston and retainer assembly and install snap ring.
SAT206F
14. Install low one-way clutch to front planetary carrier by turning
carrier in the direction of the arrow shown.
GI
MA
EM
LC
EC
FE
AX
SU
BR
ST
RS
BT
HA
SC
EL
IDX
ASSEMBLY
Assembly (2) (Cont’d)
AT-371
SAT046D
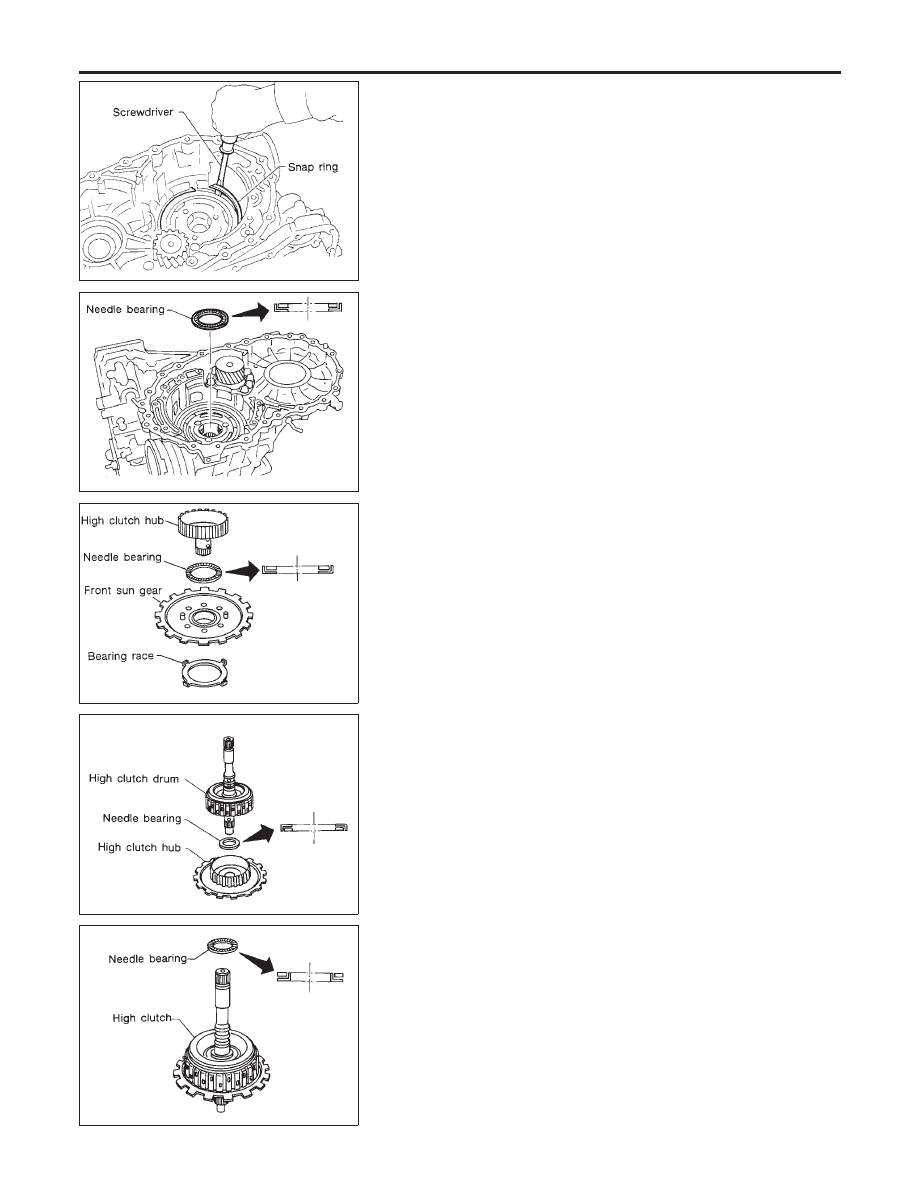
15. Install snap ring with screwdriver.
I
Forward clutch and bearing must be correctly installed for
snap ring to fit into groove of transmission case.
SAT020F
16. Install needle bearing on transmission case.
I
Apply petroleum jelly to needle bearing.
I
Pay attention to direction of needle bearing.
SAT019F
17. Install bearing race, needle bearing and high clutch hub on
front sun gear.
I
Apply petroleum jelly to needle bearing.
I
Pay attention to direction of needle bearing.
SAT018F
18. Install needle bearing and high clutch drum on high clutch hub.
SAT017F
19. Install needle bearing on high clutch drum.
I
Apply petroleum jelly to needle bearing.
I
Pay attention to direction of needle bearing.
ASSEMBLY
Assembly (2) (Cont’d)
AT-372
Нет комментариевНе стесняйтесь поделиться с нами вашим ценным мнением.
Текст