Infiniti G37 Coupe. Manual — part 701

EXT-18
< ON-VEHICLE REPAIR >
REAR BUMPER
8.
Pull the bumper fascia side toward the vehicle side to disengage
the fitting of bumper side bracket and bumper fascia side.
9.
Remove bumper fascia assembly.
CAUTION:
When removing bumper fascia, 2 workers are required so as to prevent it from dropping.
10. Remove the following parts after removing bumper fascia.
• License plate lamp. Refer to
EXL-204, "Removal and Installation"
.
• License lamp bracket.
• License plate bracket.
• Bumper lower retainer.
11. Remove bumper energy absorber.
12. Remove license lamp harness clamps of bumper reinforcement.
13. Remove bumper reinforcement mounting nuts and bolts, and then remove bumper reinforcement with
power tool.
INSTALLATION
Install in the reverse order of removal.
NOTE:
After installing, perform fitting adjustment.
JMKIA1235ZZ
Portion
Clearance
Rear bumper – Trunk lid
A – A
4.0 – 8.0 mm (0.157 – 0.315 in)
Rear bumper – Rear combination lamp
B – B
0.0 – 3.0 mm (0.000 – 0.118 in)
Rear bumper – Rear fender
C – C
0.0 – 0.8 mm (0.000 – 0.031 in)
Rear bumper – Rear fender
D – D
0.0 – 0.8 mm (0.000 – 0.031 in)
FRONT GRILLE
EXT-19
< ON-VEHICLE REPAIR >
C
D
E
F
G
H
I
J
L
M
A
B
EXT
N
O
P
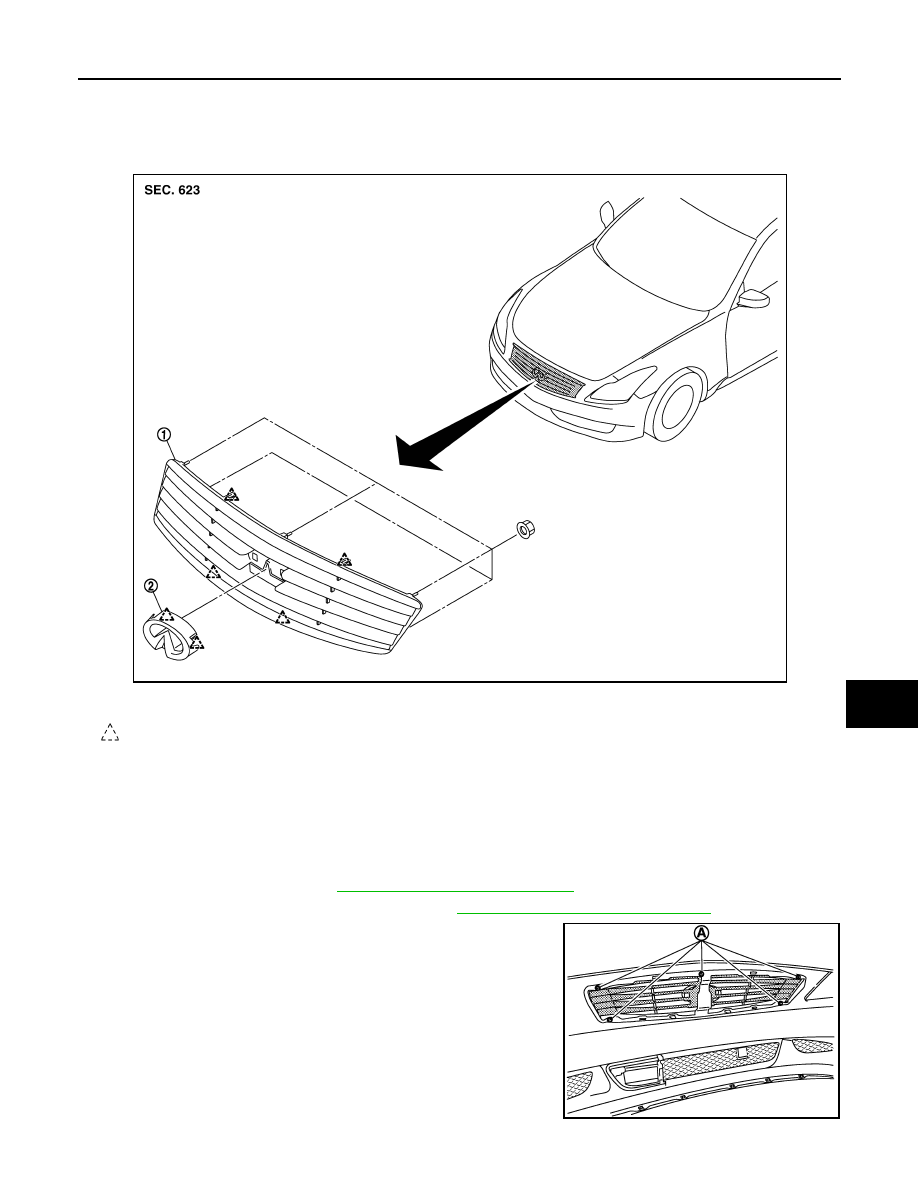
FRONT GRILLE
Exploded View
INFOID:0000000001677480
Removal and Installation
INFOID:0000000001677481
REMOVAL
CAUTION:
Apply protection tape around outer circumference of front grille (bumper fascia side).
1.
Fully open hood assembly.
2.
Remove reservoir tank. Refer to
CO-15, "Removal and Installation"
.
3.
Remove radiator core support ornament. Refer to
DLK-214, "Removal and Installation"
4.
Remove front grille mounting nuts (A).
1.
Front grille
2.
Front emblem
: Pawl
JMKIA1236ZZ
JMKIA0097GB
EXT-20
< ON-VEHICLE REPAIR >
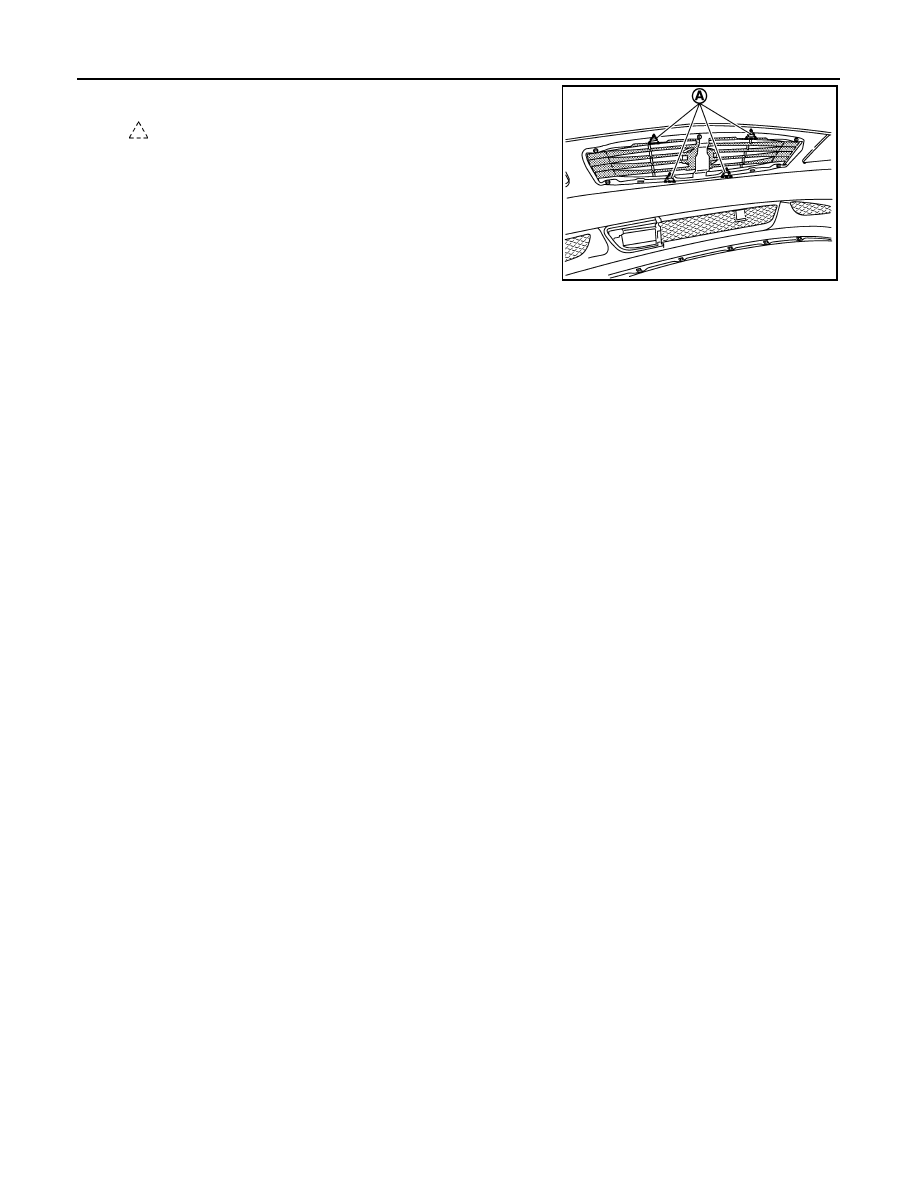
FRONT GRILLE
5.
Disengage pawls (A) of fixing front grille.
6.
Pull front grille out toward vehicle front.
7.
Remove the following parts after removing front grille.
Front emblem
INSTALLATION
Install in the reverse order of removal.
: Pawl
JMKIA0098GB
COWL TOP
EXT-21
< ON-VEHICLE REPAIR >
C
D
E
F
G
H
I
J
L
M
A
B
EXT
N
O
P
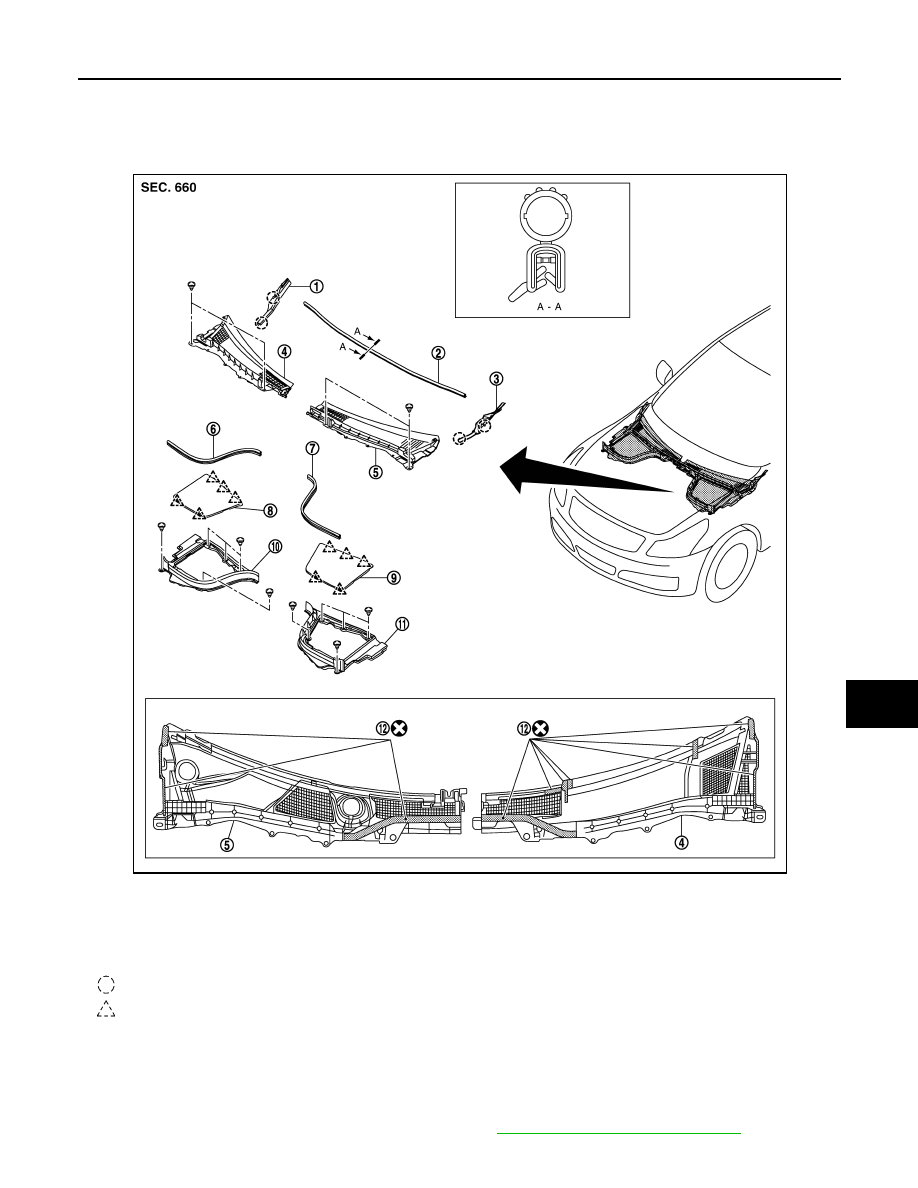
COWL TOP
Exploded View
INFOID:0000000001677482
Removal and Installation
INFOID:0000000001677483
REMOVAL
1.
Fully open hood assembly.
2.
Remove front wiper arm (LH/RH) from vehicle. Refer to
WW-88, "Removal and Installation"
1.
Front fender cover (RH)
2.
Cowl top seal
3.
Front fender cover (LH)
4.
Cowl top cover (RH)
5.
Cowl top cover (LH)
6.
Cowl top cover seal (RH)
7.
Cowl top cover seal (LH)
8.
Battery cover
9.
Brake master cylinder cover
10. Hoodledge cover (RH)
11. Hoodledge cover (LH)
12. EPT sealer
: Clip
: Pawl
JMKIA0077GB
Нет комментариевНе стесняйтесь поделиться с нами вашим ценным мнением.
Текст