Infiniti Q45 (FY33). Manual — part 430
INSPECTION
Wash all parts, except for nonmetallic parts, clean with suitable
solvent and dry with compressed air.
Blow dirt and dust off of nonmetallic parts using compressed air.
Strut assembly
I
Oil oozing out around gland packing does not need strut
replacement.
If oil leakage is evident on spring seat, check piston rod gland
packing and O-ring.
If oil leakage occurs on welded portion of outer strut casing,
replace strut assembly.
I
If shock absorber itself is malfunctioning, replace as shock
absorber kit.
Gland packing
Check gland packing for oil leakage. Replace gland packing if
necessary.
Strut mounting insulator
Check cemented rubber-to-metal portion for melting or cracks.
Check rubber parts for deterioration. Replace if necessary.
Thrust seat
Check for cracks, deformation or other damage. Replace if neces-
sary.
Coil spring
Check for cracks, deformation or other damage. Replace if neces-
sary.
SFA141
ASSEMBLY
I
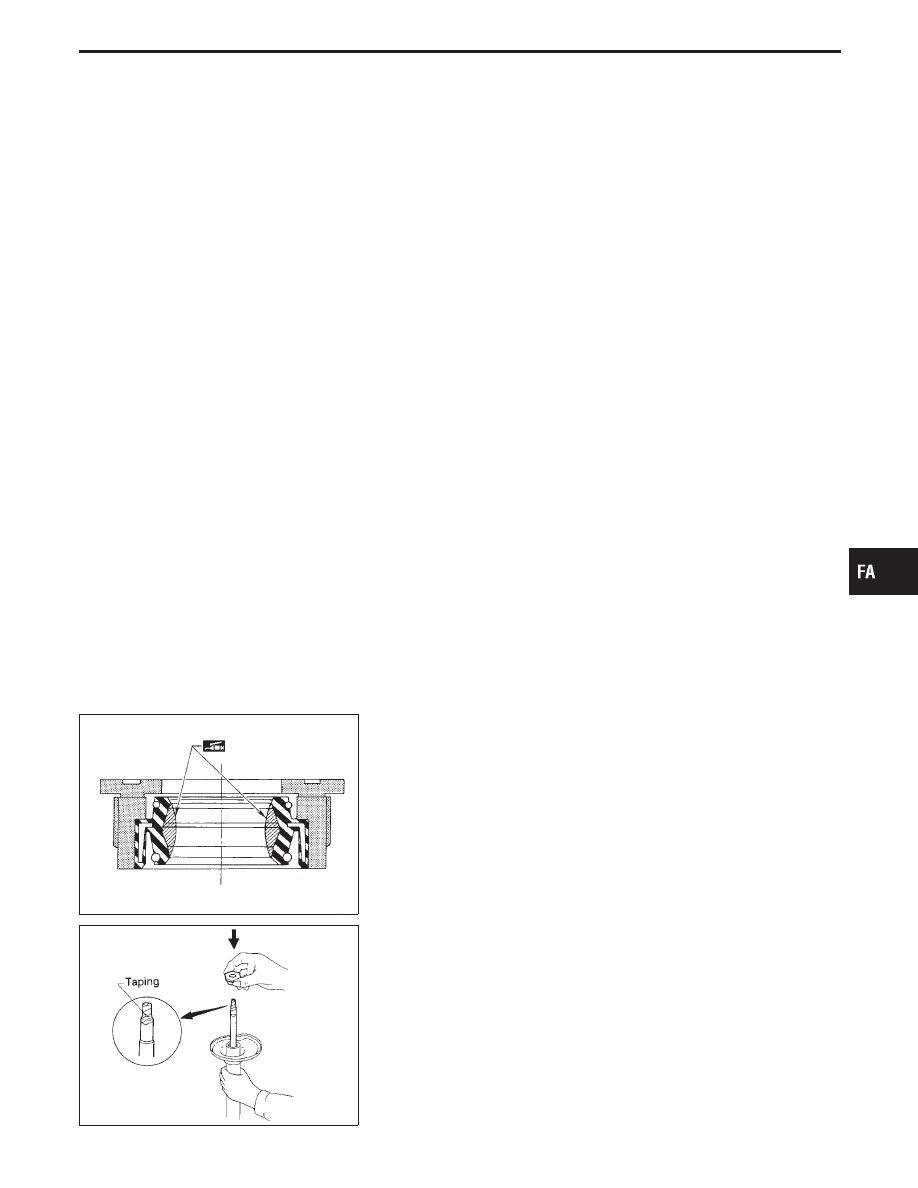
Lubricate sealing lip of gland packing.
SFA574
I
Install gland packing.
Cover piston rod with tape so as not to damage oil sealing lip.
GI
MA
EM
LC
EC
FE
AT
PD
RA
BR
ST
RS
BT
HA
EL
IDX
FRONT SUSPENSION
Coil Spring and Strut Assembly (Cont’d)
FA-19
SFA759-C
I
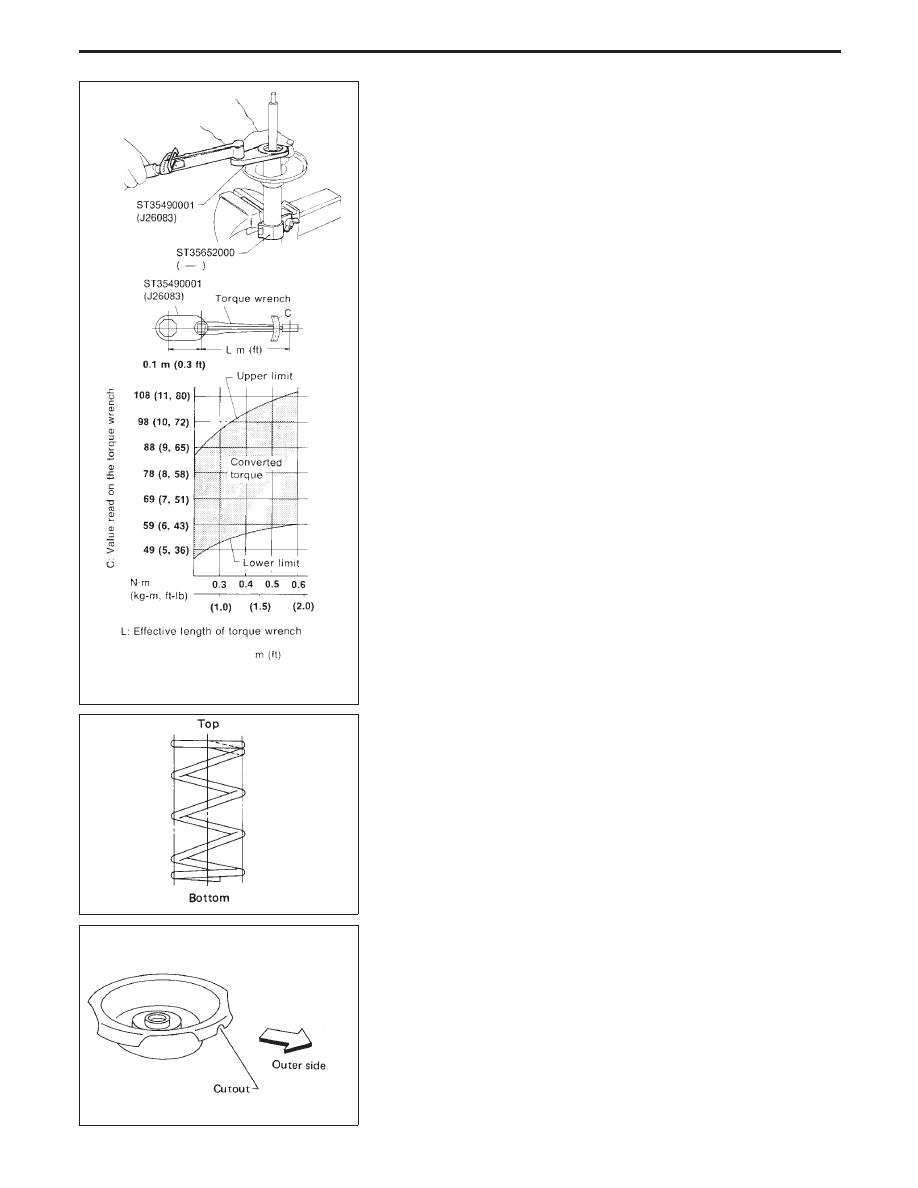
Tighten gland packing to the specified torque (refer to chart at
left) with Tool.
SFA760
I
When installing coil spring, be careful not to reverse top and
bottom direction. (Top end is flat.)
SFA664A
I
Install upper spring seat with its cutout facing the outer side of
vehicle.
FRONT SUSPENSION
Coil Spring and Strut Assembly (Cont’d)
FA-20
SFA149
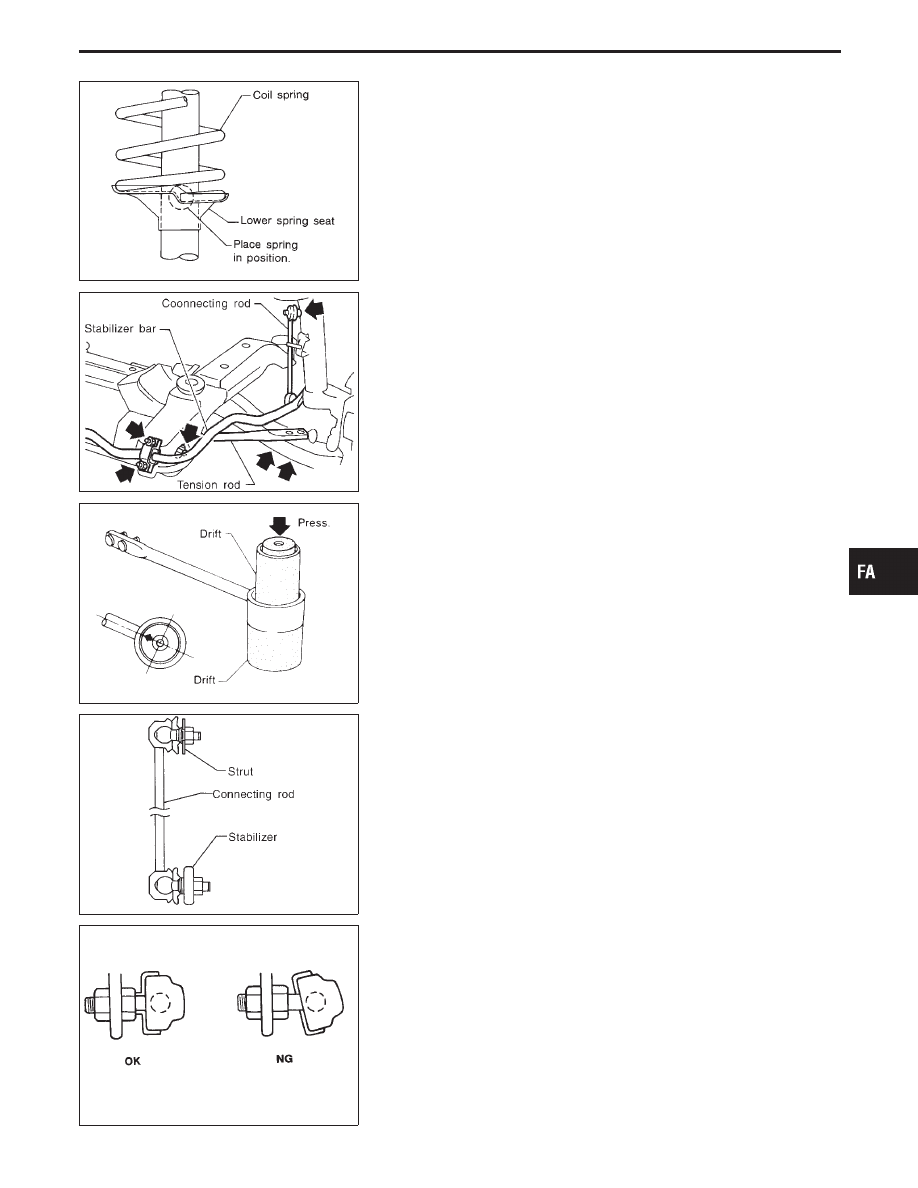
After placing spring in position on lower spring seat, release
spring compressor gradually.
SFA795B
Tension Rod and Stabilizer Bar
REMOVAL AND INSTALLATION
I
Remove tension rod and stabilizer bar.
I
Prevent stabilizer connecting rod from turning by inserting hex
wrench into end of ball stud, then remove nut.
SFA837A
I
Place a drift on lower side of tension rod bushing and another
on upper side, as shown. Remove tension rod bushing by
pressing it out.
I
Place arrow mark on bushing facing tension rod before install-
ing bushing.
SFA796B
I
Install stabilizer bar with ball joint socket properly placed.
SFA449BB
GI
MA
EM
LC
EC
FE
AT
PD
RA
BR
ST
RS
BT
HA
EL
IDX
FRONT SUSPENSION
Coil Spring and Strut Assembly (Cont’d)
FA-21
SFA344B
Transverse Link Assembly
REMOVAL AND INSTALLATION
I
Separate suspension ball joint from knuckle arm.
I
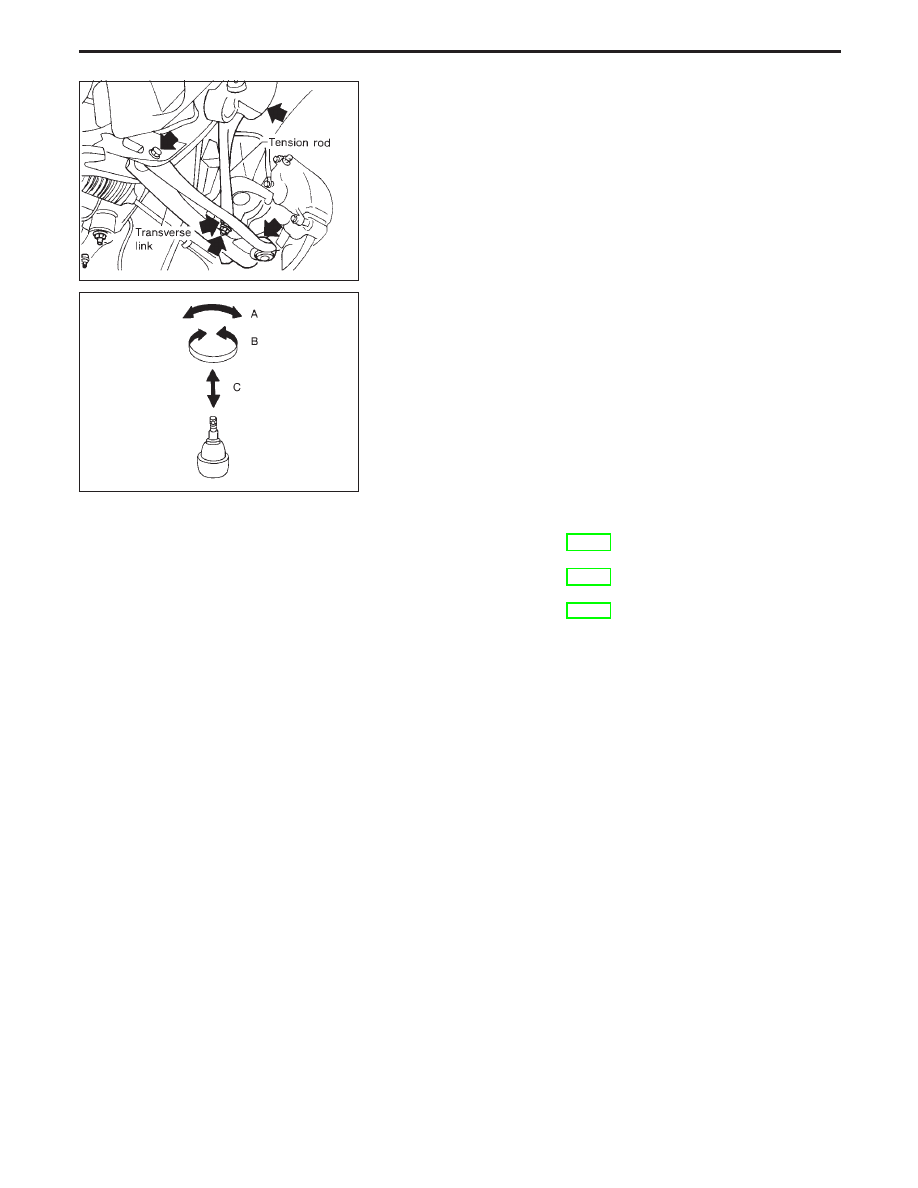
Remove tension rod and transverse link assembly.
SFA858A
INSPECTION
I
Check tension rod, stabilizer bar and transverse link for
damage, cracks, deformation; replace transverse link assem-
bly if necessary.
I
Check rubber bushing for damage, cracks and deformation;
replace tension rod or transverse link assembly if necessary.
I
Check ball joint for excessive play. Replace transverse link
assembly if any of the following exists:
I
Ball stud is worn.
I
Joint is hard to swing.
I
Play in axial direction is excessive.
Before checking, turn ball joint at least 10 revolutions so that
ball joint is properly broken in.
Swinging force:
Refer to SDS (FA-61).
Turning torque:
Refer to SDS (FA-61).
Vertical end play:
Refer to SDS (FA-61).
I
Check dust cover for damage. Replace it and cover clamp if
necessary.
FRONT SUSPENSION
FA-22
Нет комментариевНе стесняйтесь поделиться с нами вашим ценным мнением.
Текст