Infiniti M35/M45 Y50. Manual — part 756
HEADLINING
EI-55
C
D
E
F
G
H
J
K
L
M
A
B
EI
INSTALLATION
Install in the reverse order of removal.
CAUTION:
●
Install headlining assembly after inserting clips to clip holder of headlining rear end.
●
Do not bend headlining when installing.
●
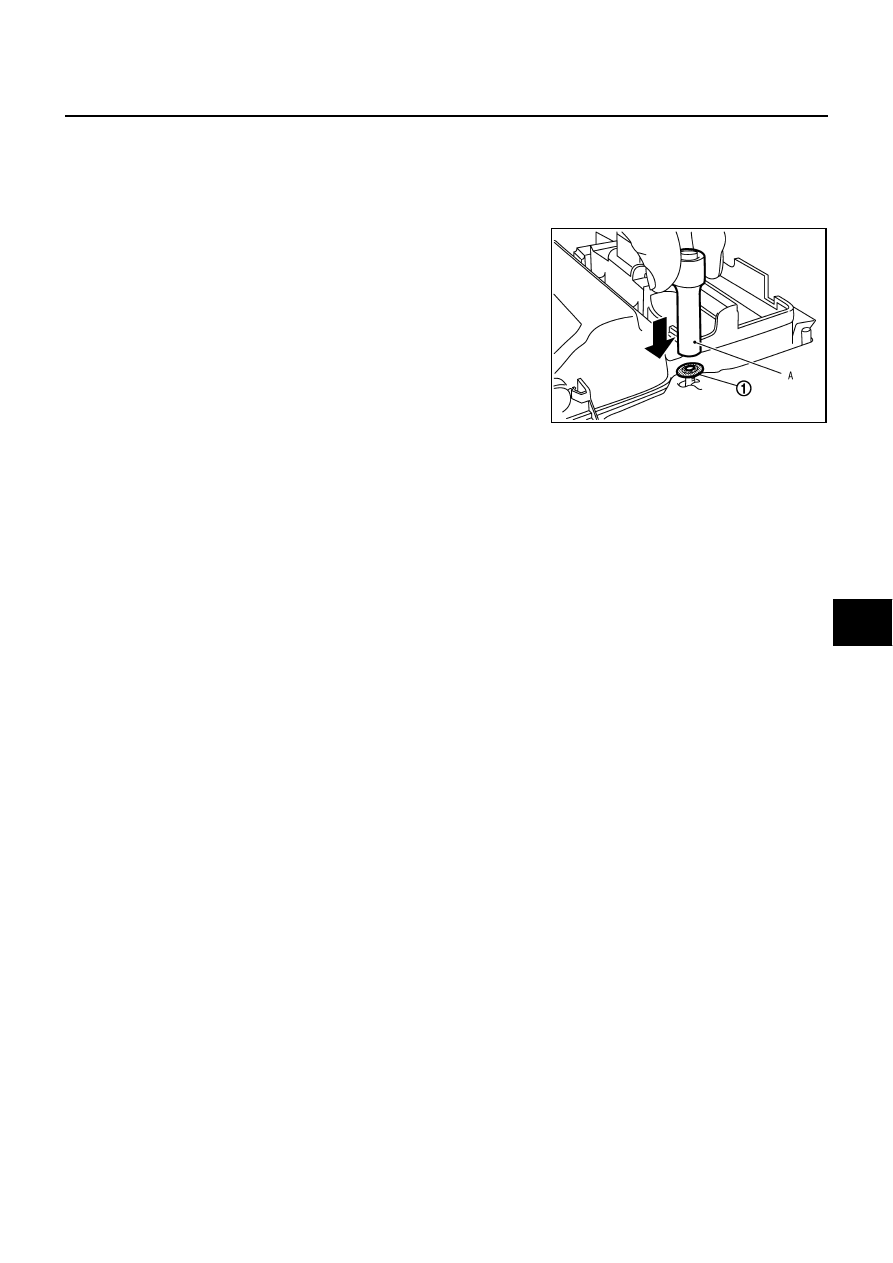
When installing the map lamp assembly (new unit) or assist
grip assembly (new unit), use tools like drafter or deep
socket A to eliminate the gap between the headlining and
the above new units while the push on nuts (1).
PIIB7194J
EI-56
TRUNK ROOM TRIM & TRUNK LID FINISHER
TRUNK ROOM TRIM & TRUNK LID FINISHER
PFP:84920
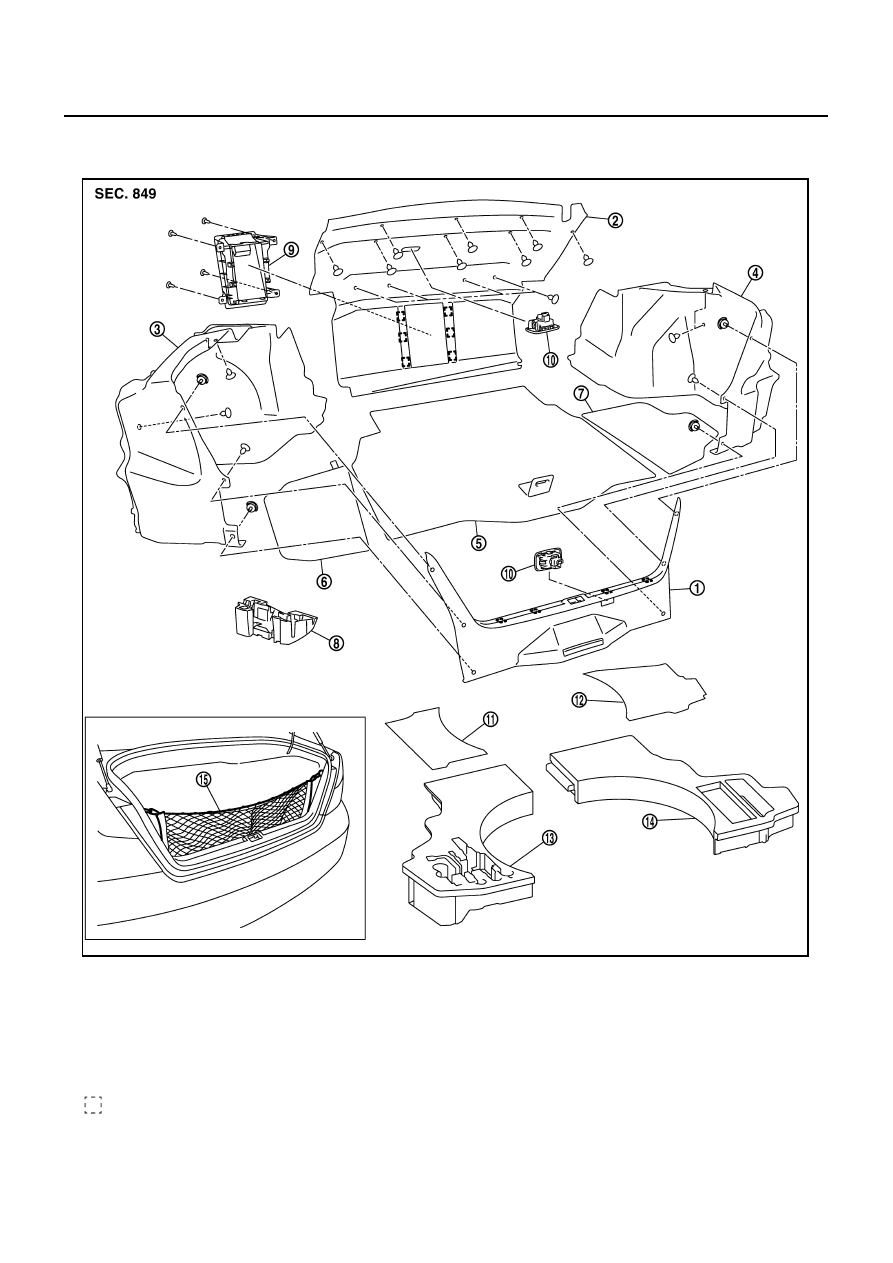
Removal and Installation for Trunk Room Trim
NIS00254
1.
Trunk rear plate
2.
Trunk front finisher
3.
Trunk side finisher (LH)
4.
Trunk side finisher (RH)
5.
Trunk floor carpet
6.
Trunk floor carpet (LH)
7.
Trunk floor carpet (RH)
8.
Trunk side box
(for temper tire models)
9.
Rear seatback finisher
10. Trunk room lamp
11. Trunk floor felt (LH)
12. Trunk floor felt (RH)
13. Trunk floor spacer (LH)
(for sport models)
14. Trunk floor spacer (RH)
(for sport models)
15. Trunk net
Metal clip
PIIB6290E
TRUNK ROOM TRIM & TRUNK LID FINISHER
EI-57
C
D
E
F
G
H
J
K
L
M
A
B
EI
REMOVAL
1.
Fully open trunk lid assembly.
2.
Remove trunk floor carpet.
3.
Remove trunk side box. (for temper tire models)
4.
Remove trunk floor spacer (LH/RH). (for sport models)
5.
Remove trunk room lamp of trunk rear plate, and disconnect trunk room lamp connector.
6.
Remove trunk rear plate mounting clips, and the remove trunk rear plate.
7.
Remove trunk side finisher mounting clips, and the remove trunk side finisher (LH/RH).
8.
Remove rear seatback and rear seat cushion. Refer to
.
9.
Remove rear seatback finisher mounting clips, and the remove rear seatback finisher.
10. Remove trunk room lamp of trunk front finisher, and disconnect trunk room lamp connector.
11. Remove trunk front finisher mounting clips, and the trunk front finisher.
INSTALLATION
Install in the reverse order of removal.
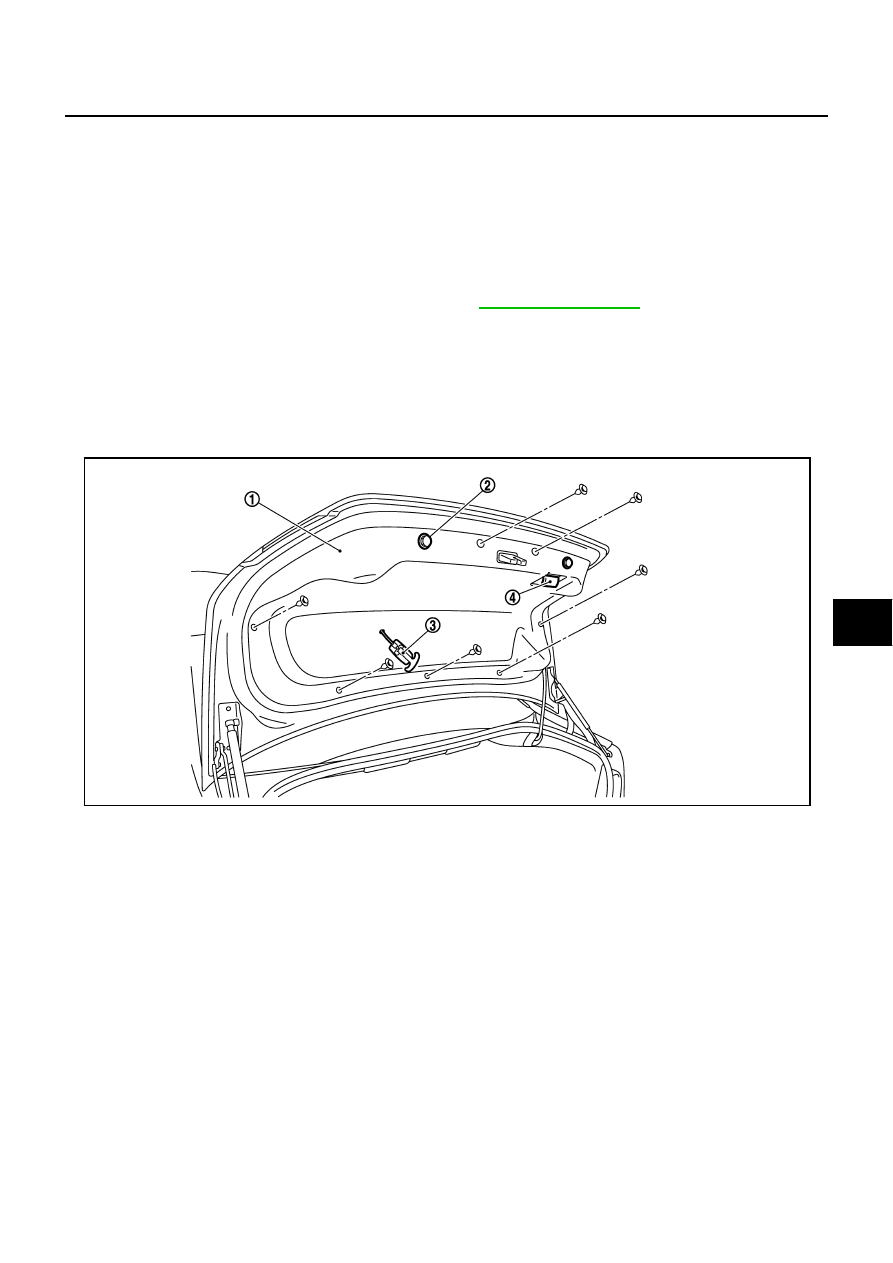
REMOVAL AND INSTALLATION OF TRUNK LID FINISHER INNER
Removal
1.
Fully open trunk lid assembly.
2.
Remove trunk lid bumper rubber.
3.
Remove screws of trunk lid pull handle, and then remove trunk lid pull handle.
4.
Remove clips of trunk lid finisher.
5.
Remove trunk lid emergency handle holder.
6.
Remove trunk lid finisher inner.
Installation
Install in the reverse order of removal.
1.
Trunk lid finisher inner
2.
Trunk lid bumper rubber
3.
Emergency handle
4.
Trunk lid pull handle
PIIB4941E
EI-58
TRUNK ROOM TRIM & TRUNK LID FINISHER
Нет комментариевНе стесняйтесь поделиться с нами вашим ценным мнением.
Текст