Infiniti M35/M45 Y50. Manual — part 755
FLOOR TRIM
EI-51
C
D
E
F
G
H
J
K
L
M
A
B
EI
9.
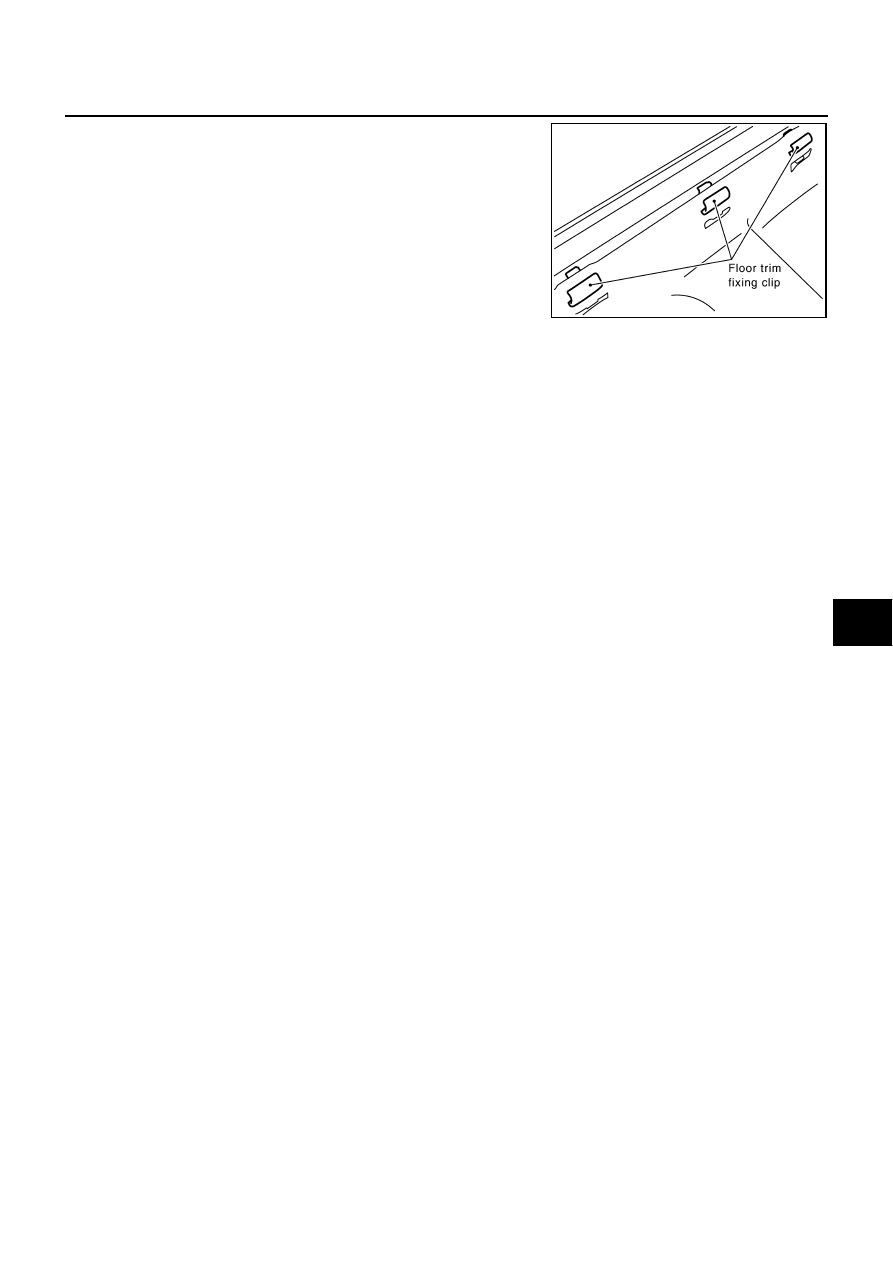
Remove floor carpet from carpet clips and remove floor carpet.
INSTALLATION
Install in the reverse order of removal.
PIIA7125E
EI-52
HEADLINING
HEADLINING
PFP:73910
Removal and Installation
NIS00253
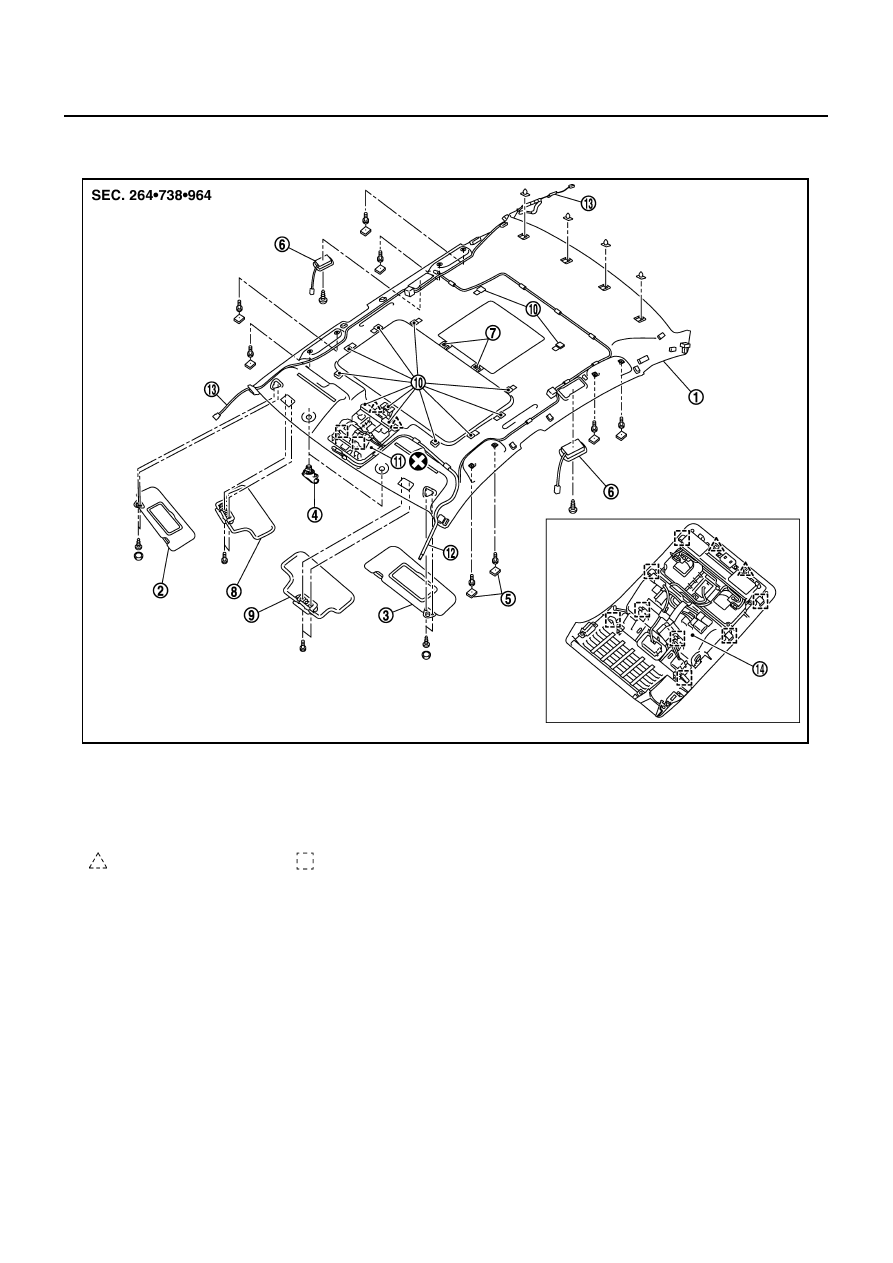
1.
Headlining assembly
2.
Sun-visor (RH)
3.
Sun-visor (LH)
4.
Sun-visor holder
5.
Clip
6.
Personal lamp
7.
Clip holder
8.
Dual-visor (RH)
9.
Dual-visor (LH)
10. Dual lock fastener
11. Map lamp assembly
12. Roof harness assembly
13. Antenna feeder assembly
14. Map lamp assembly (with LDW system)
Pawl
Metal clip
PIIB7208E
HEADLINING
EI-53
C
D
E
F
G
H
J
K
L
M
A
B
EI
REMOVAL
1.
Remove front pillar garnish (LH/RH). Refer to
2.
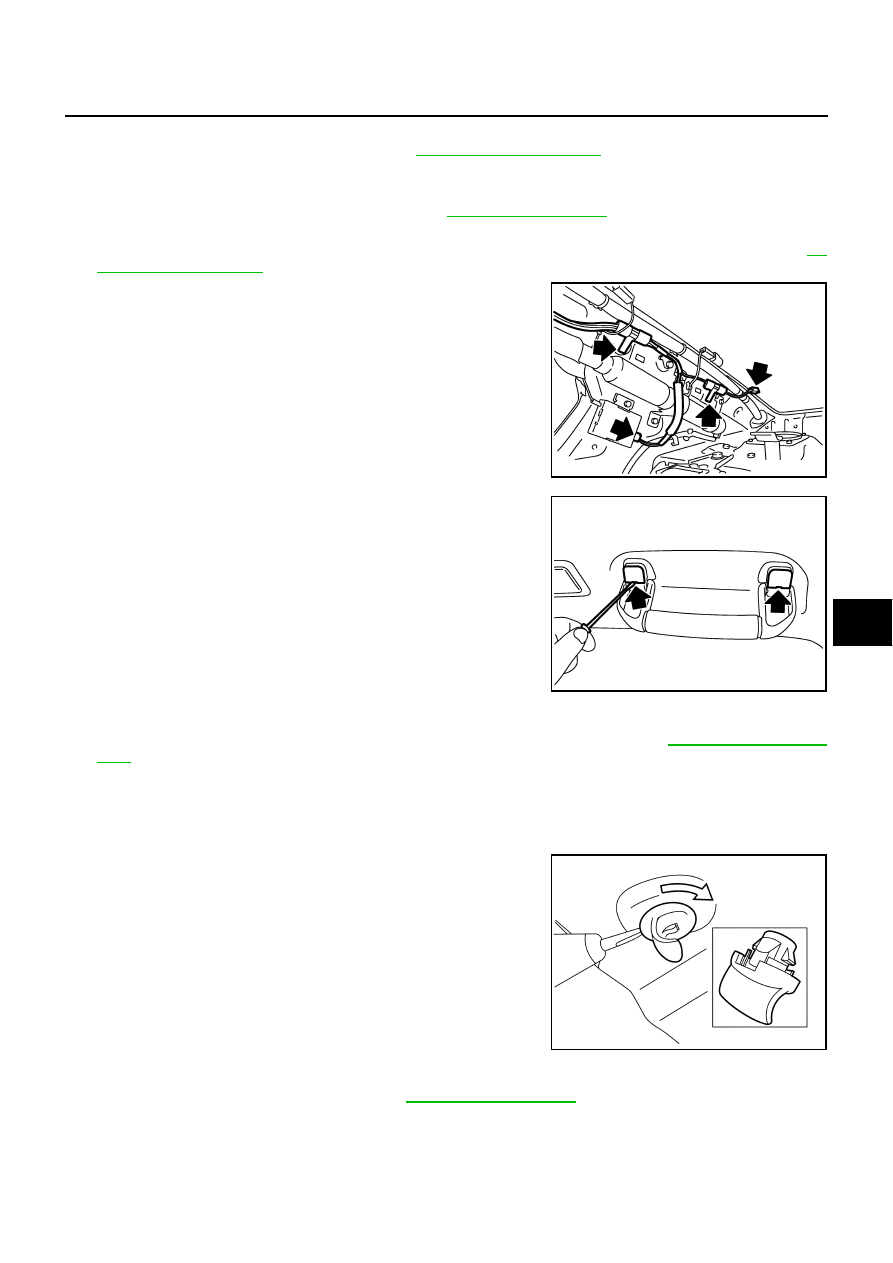
Remove roof harness and antenna feeder securing clip using a clip clamp remover after removing front
pillar garnish (LH/RH), and then disconnect roof harness and antenna feeder connectors.
3.
Remove rear seat cushion and seatback. Refer to
4.
Remove front kicking plate inner, center pillar lower garnish, center pillar upper garnish, front body side
welt, rear kicking plate inner, rear wheelhouse garnish, rear pillar finisher, rear body side welt. Refer to
5.
Disconnect antenna feeder connectors of antenna amplifier and
sub-antenna feeder after removing rear pillar finisher (LH), and
then remove antenna feeder securing clip using a remover.
6.
Models with sunroof: Remove mounting plastic clips of front
assistance grip (LH/RH) and rear assistance grip (LH/RH), and
then remove bolts.
Models with standard roof: Remove mounting plastic clips of
front assistance grip (LH) and rear assistance grip (LH/RH).
CAUTION:
●
Always use SST, and attach a cloth to protect from dam-
age.
●
Assistance grip is crimped from back of headlining.
Remove it by disengaging the crimping area of back of
lamp after removing headlining from the vehicle.
7.
Remove screws on personal lamp (in coat hanger hook).
8.
Remove rear display unit. (models with mobile entertainment system) Refer to
9.
Remove sun visor bracket cover and mounting screws, and then remove sun visors (LH/RH).
NOTE:
Disconnect vanity mirror illumination harness connector when removing sun visor.
10. Remove screws of dual-visor, and then remove dual-visor (LH/RH).
11. Insert a screwdriver into the sun visor holder cutout and rotate
90 degrees to remove sun visor holder (LH/RH).
12. Remove map lamp assembly. (models with LDW system)
13. Remove passenger seat assembly. Refer to
.
14. Using a removal tool, remove body side mounting plastic clip from rear side of headlining.
PIIB4939E
PIIB3585J
SIIA0224J
EI-54
HEADLINING
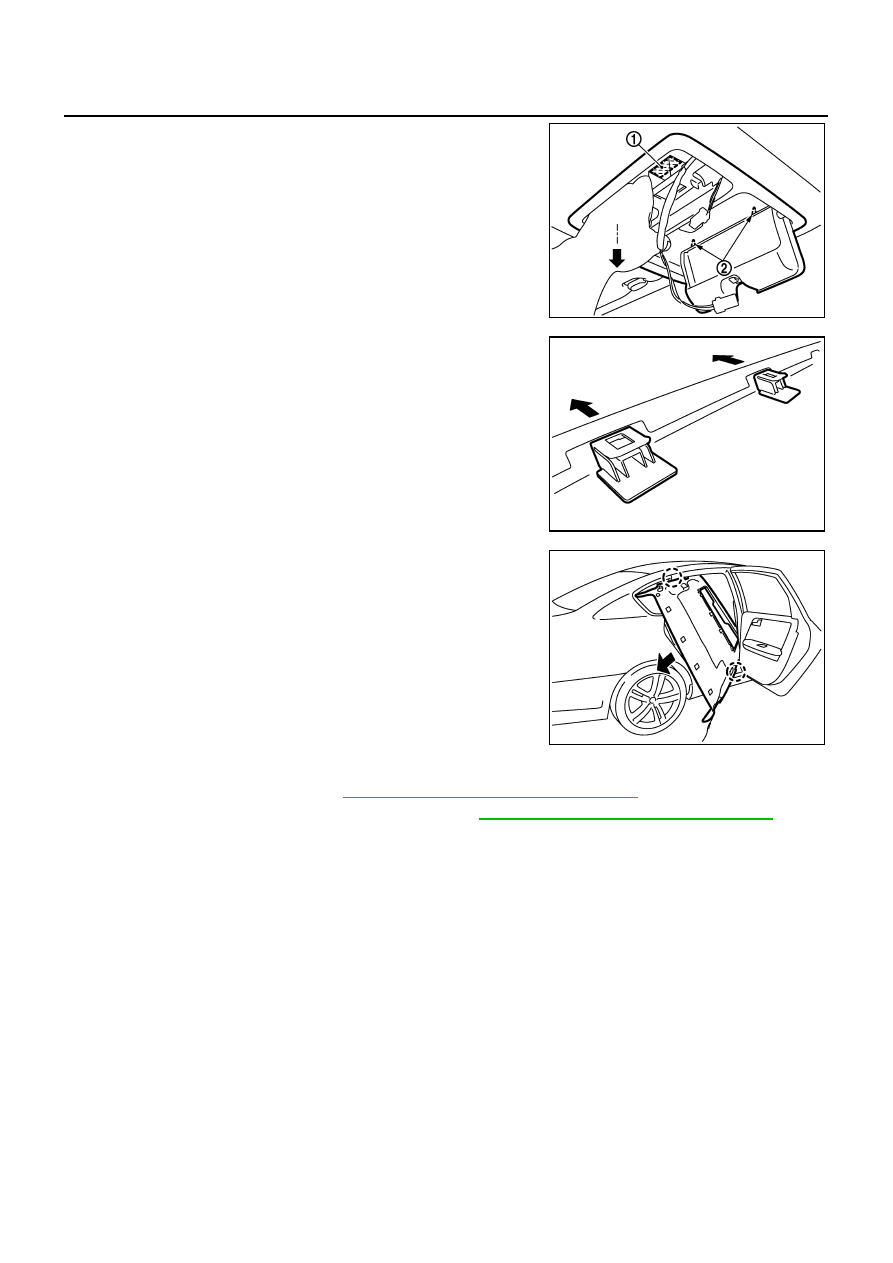
15. Pull map lamp assembly toward vehicle lower, and disengage
dual-lock fastener (1) and metal clips (2). (models without LDW
system)
CAUTION:
Map lamp assembly is crimped from back of headlining.
Remove it by disengaging the crimping area of back of map
lamp assembly after removing headlining from the vehicle.
16. Remove dual lock fastener around the sunroof opening, and
then disengage hooks (rear of roof opening on back of headlin-
ing) by sliding the headlining toward vehicle front.
17. Remove headlining from front door left opening.
CAUTION:
●
When removing, 2 workers are required. (1 for each front
and rear of headlining)
●
Cover center console finisher upper surface with a shop
cloth so as to prevent it from being damaged.
●
Set A/T selector lever to D position, and make a space to
remove front end of headlining right side.
●
Do not bend headlining when removing.
18. Remove the following parts after removing headlining.
●
Personal lamp (LH/RH). Refer to
LT-289, "REMOVAL AND INSTALLATION"
●
Map lamp assembly (without LDW system). Refer to
LT-289, "REMOVAL AND INSTALLATION"
.
●
Assistance grip assembly.
●
Roof harness assembly.
●
Antenna feeder assembly.
PIIB3600J
PIIB3587J
PIIB4940E
Нет комментариевНе стесняйтесь поделиться с нами вашим ценным мнением.
Текст