Infiniti M35/M45 Y50. Manual — part 283
TRUNK LID
BL-201
C
D
E
F
G
H
J
K
L
M
A
B
BL
TRUNK LID
PFP:H4300
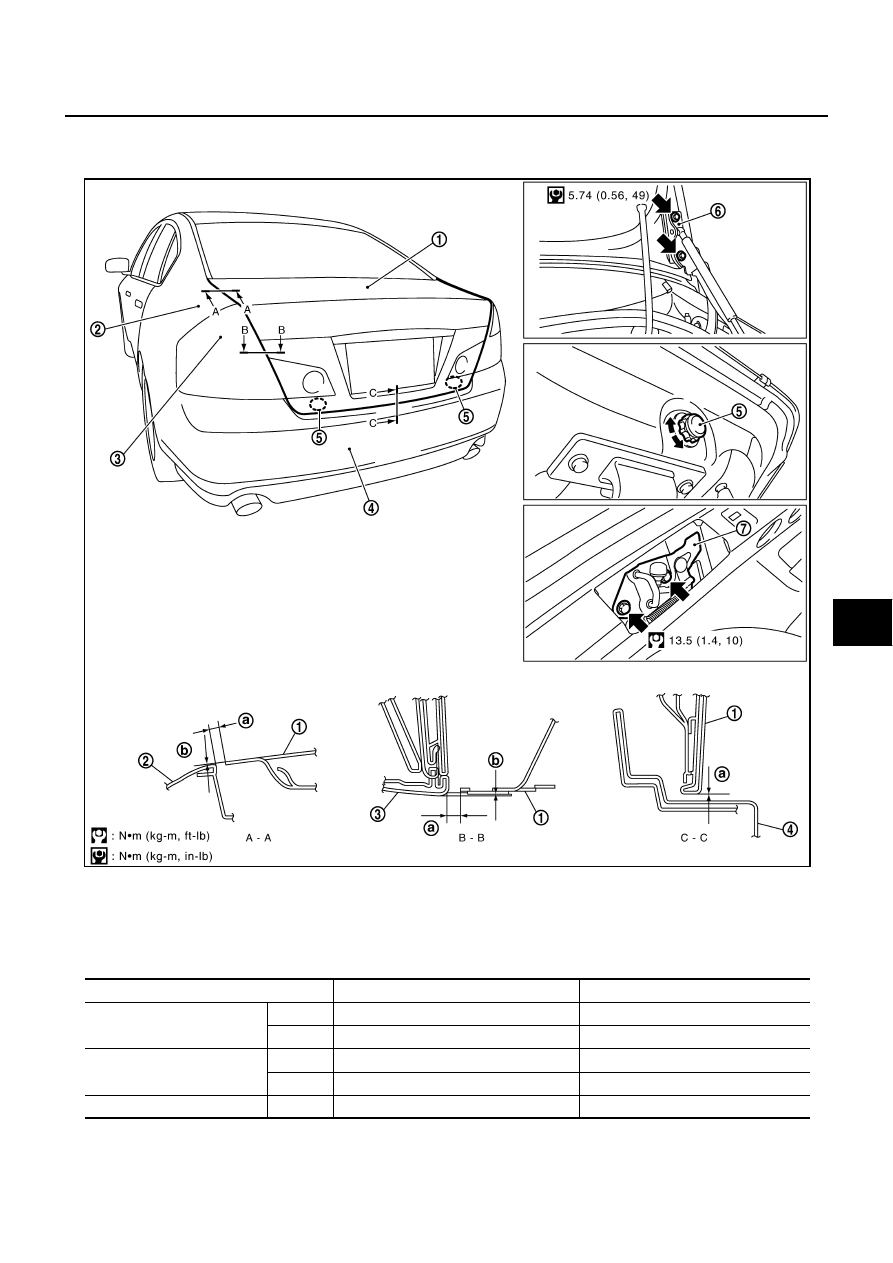
Fitting Adjustment
NIS001ZH
1.
Check the clearance and the evenness between the trunk lid and eack part by visual and tactile feeling.
(Fitting standard dimension in the table below should be satisfied.)
* Unit: mm (in)
2.
In case out of specification, adjust them according to the procedures shown below.
●
Loosen the bumper rubber.
1.
Trunk lid assembly
2.
Rear fender
3.
Rear combination lamp
4.
Rear bumper fascia
5.
Bumper rubber
6.
Trunk lid hinge
7.
Trunk lid striker
Parts
Standard
Right/left clearance (MAX)
A – A
a
2.5 - 4.5 (01.0 - 0.18)
1.5 (0.06)
b
-1.0 - 1.0 (-0.04 - 0.04)
1.5 (0.06)
B – B
a
2.5 - 5.5 (0.10 - 0.22)
2.0 (0.08)
b
-1.5 - 1.5 (-0.06 - 0.06)
2.0 (0.08)
C – C
a
2.4 - 6.6 (0.09 - 0.26)
—
PIIB5817E
BL-202
TRUNK LID
●
Loosen the striker mounting bolts.
●
Lift up the trunk lid approx. 100 - 150 mm (3.94 - 5.91 in) height then close it lightly and make sure it
engaged firmly with the trunk lid closed.
●
Check the clearance and evenness.
●
Finally tighten the trunk lid striker.
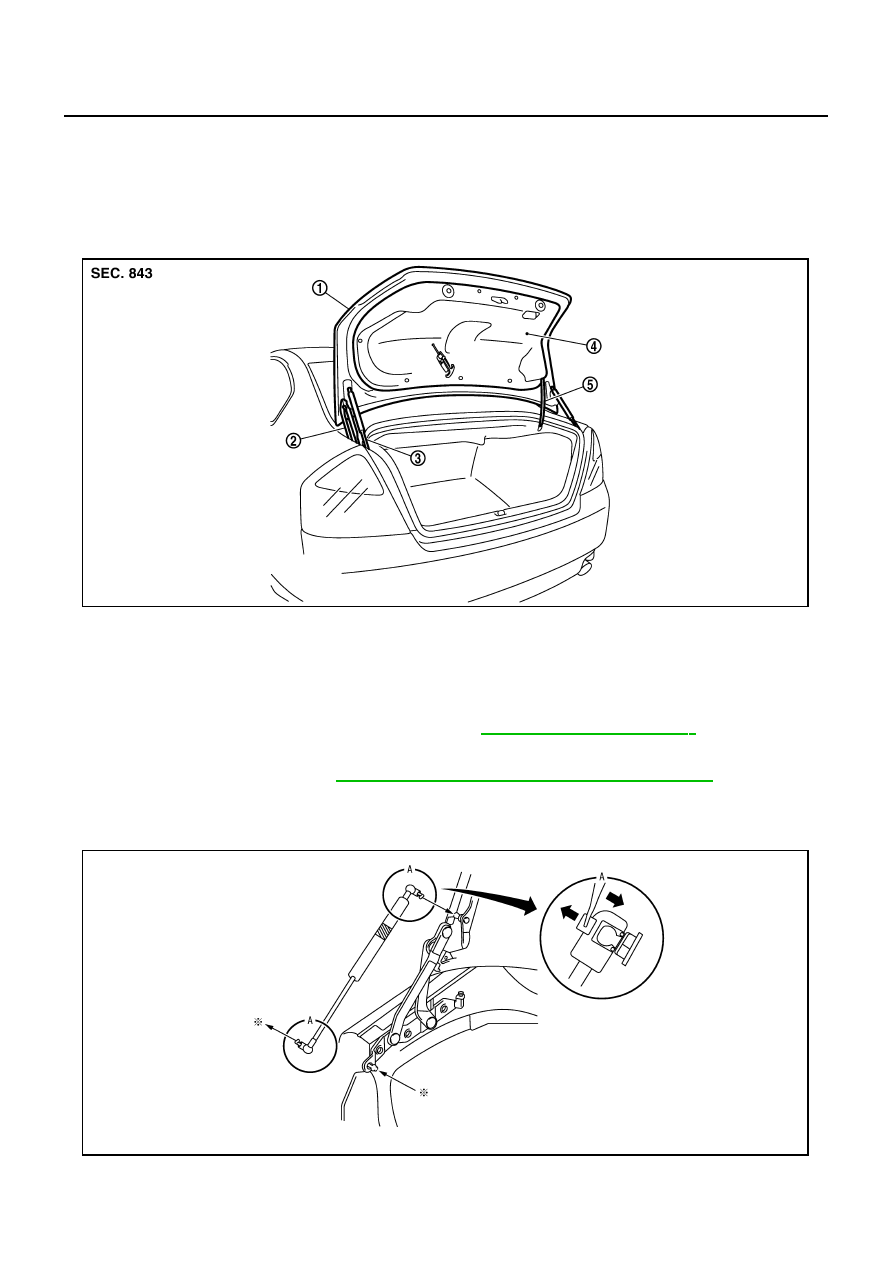
Removal and Installation of Trunk Lid Assembly
NIS001ZI
CAUTION:
●
After installing, apply touch-up paint (the body color) onto the head of the hinge mounting bolts.
●
After installing, check operation.
●
After installing, perform fitting adjustment. Refer to
REMOVAL
1.
Remove trunk lid finisher. Refer to
EI-56, "Removal and Installation for Trunk Room Trim"
.
2.
Disconnect the connectors in the trunk lid, and remove the harness clamps to pull the harness out of the
trunk lid.
3.
Insert flat-bladed screwdriver into the gap and remove holder.
1.
Trunk lid assembly
2.
Trunk lid hinge
3.
Trunk lid stay
4.
Trunk lid finisher
5.
Trunk lid harness
PIIB5818E
PIIB3895J
TRUNK LID
BL-203
C
D
E
F
G
H
J
K
L
M
A
B
BL
4.
Remove trunk lid stay (gas stay).
WARNING:
Body injury may occur if no supporting rod is holding the
trunk lid open when removing the damper stay.
5.
Remove the mounting bolts, and remove the trunk lid assembly.
INSTALLATION
Install in the reverse order of removal.
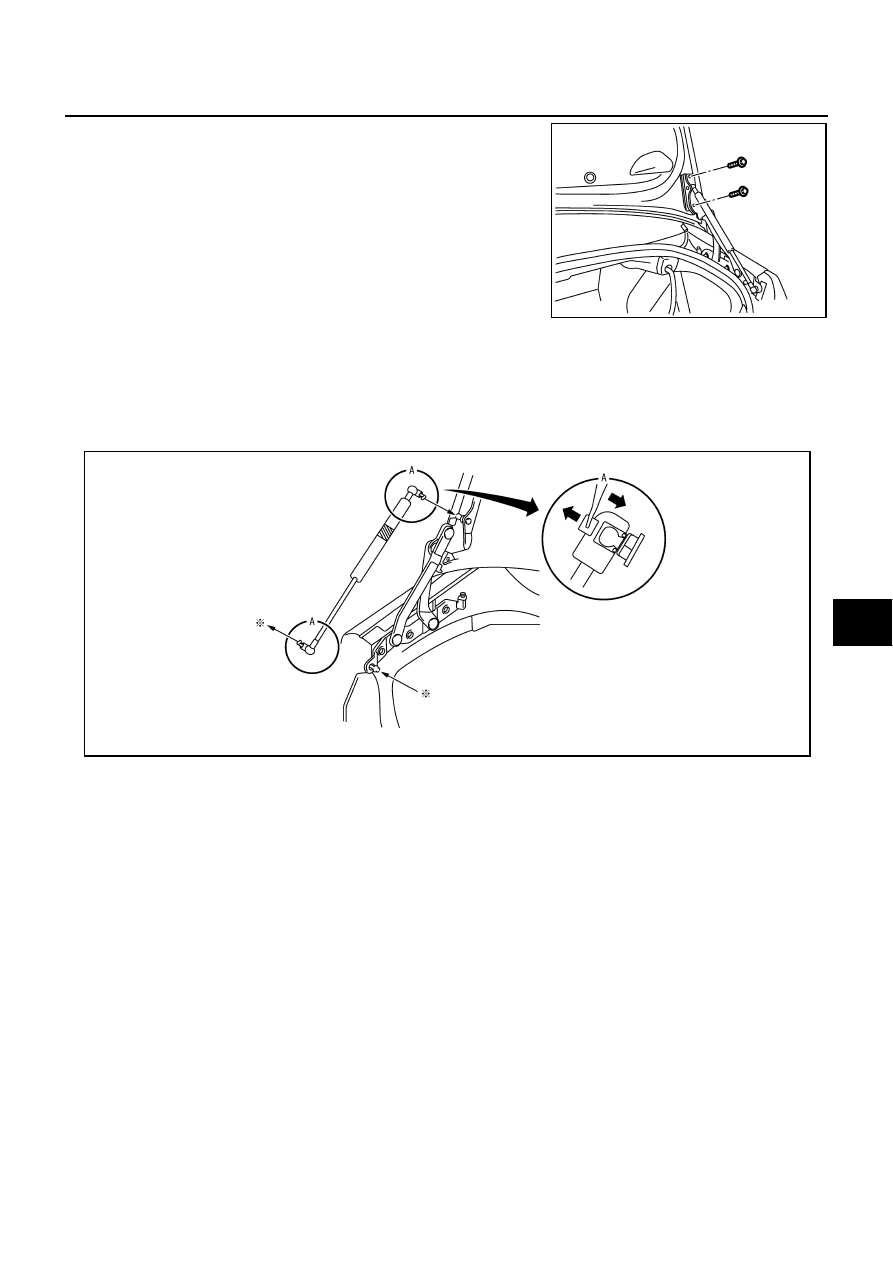
Removal and Installation of Trunk Lid Stay
NIS001ZJ
REMOVAL
1.
Insert flat-bladed screwdriver into the gap and remove holder.
2.
Remove trunk lid stay on the trunk lid.
3.
Remove the stud balls, and trunk lid stay.
INSTALLATION
1.
Install in the reverse order of removal.
2.
After installing, check the operation.
PIIB4909J
PIIB3895J
BL-204
TRUNK LID
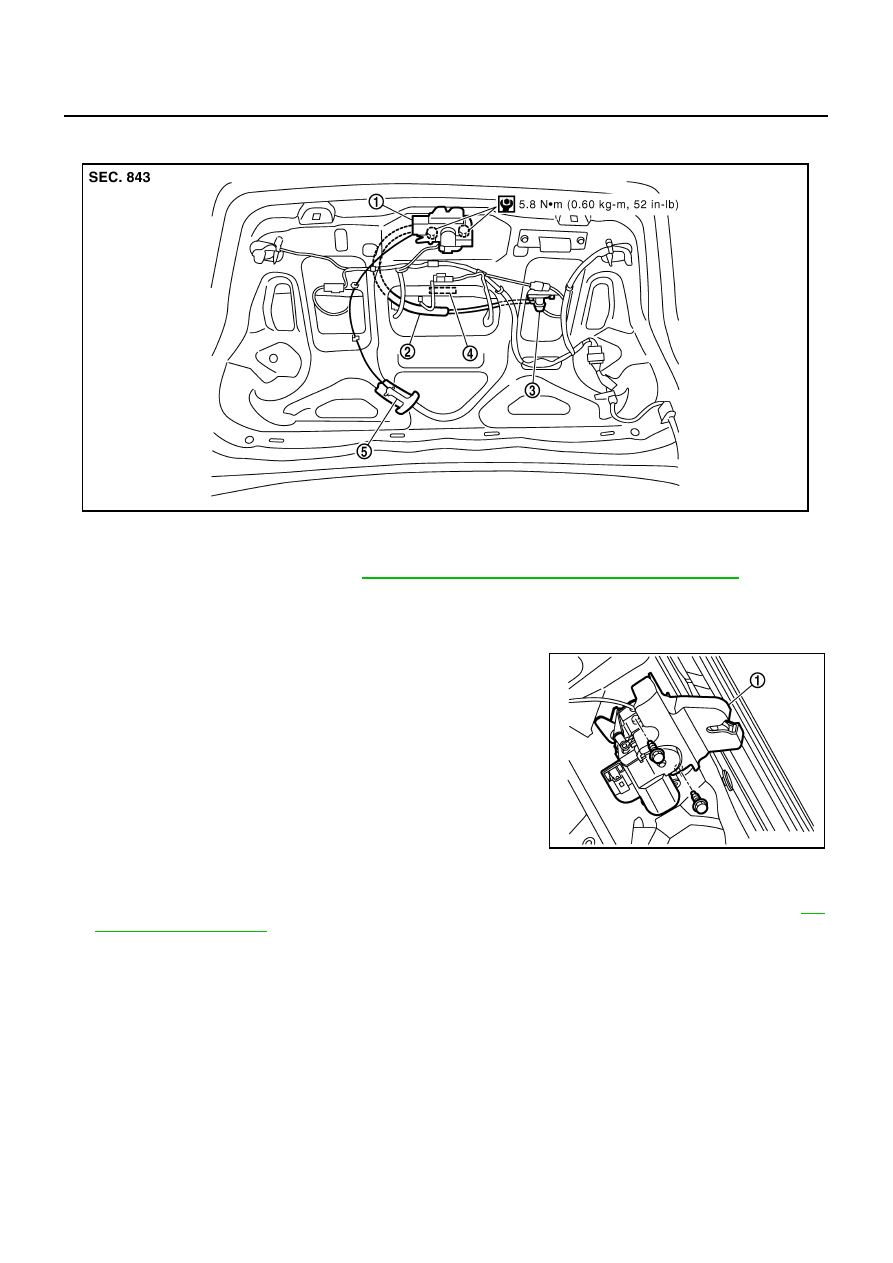
Removal and Installation of Trunk Lid Lock
NIS001ZK
REMOVAL
1.
Remove the trunk lid finisher. Refer to
EI-56, "Removal and Installation for Trunk Room Trim"
2.
Remove the trunk lid emergency opener lever.
3.
Disconnect the trunk lid opener cable.
4.
Disconnect the trunk lid.
5.
Remove the mounting bolts, and remove the trunk lid lock.
INSTALLATION
1.
Install in the reverse order of removal.
2.
After installing, close the trunk lid height. Perform the lock and surface height adjustment. Refer to
3.
After installing, check the operation.
1.
Trunk lid lock
2.
Trunk lid opener cable
3.
Trunk lid key cylinder
4.
Trunk lid opener switch
5.
Trunk lid emergency opener lever
PIIB5819E
PIIB5820E
Нет комментариевНе стесняйтесь поделиться с нами вашим ценным мнением.
Текст