Mitsubishi Lancer Evolution IX. Manual — part 98

TRIMS
INTERIOR
52A-11
CLIP POSITION
AC504405 AB
A
A
B
B
B
B
C
C
C
C
B
B
D
D
E
E
F
F
G G
H
H
I
I
Note
:
Clip positions
: Claw positions
Section A – A
Section B – B
Section C – C
Section F – F
Section E – E
Section D – D
Section G – G
Section H – H
Section I – I
Retractor
cover
Rear shelf trim
Claw
Rear shelf trim
Clip
Clip
Clip
Clip
Clip
Clip
Clip
Front pillar trim
Rear pillar trim
Front pillar trim,
upper centre pillar trim,
rear pillar trim
Headlining
Speaker garnish
Front scuff plate,
rear scuff plate
Rear shelf trim
Rear end trim
DOOR TRIM
INTERIOR
52A-12
REMOVAL SERVICE POINT
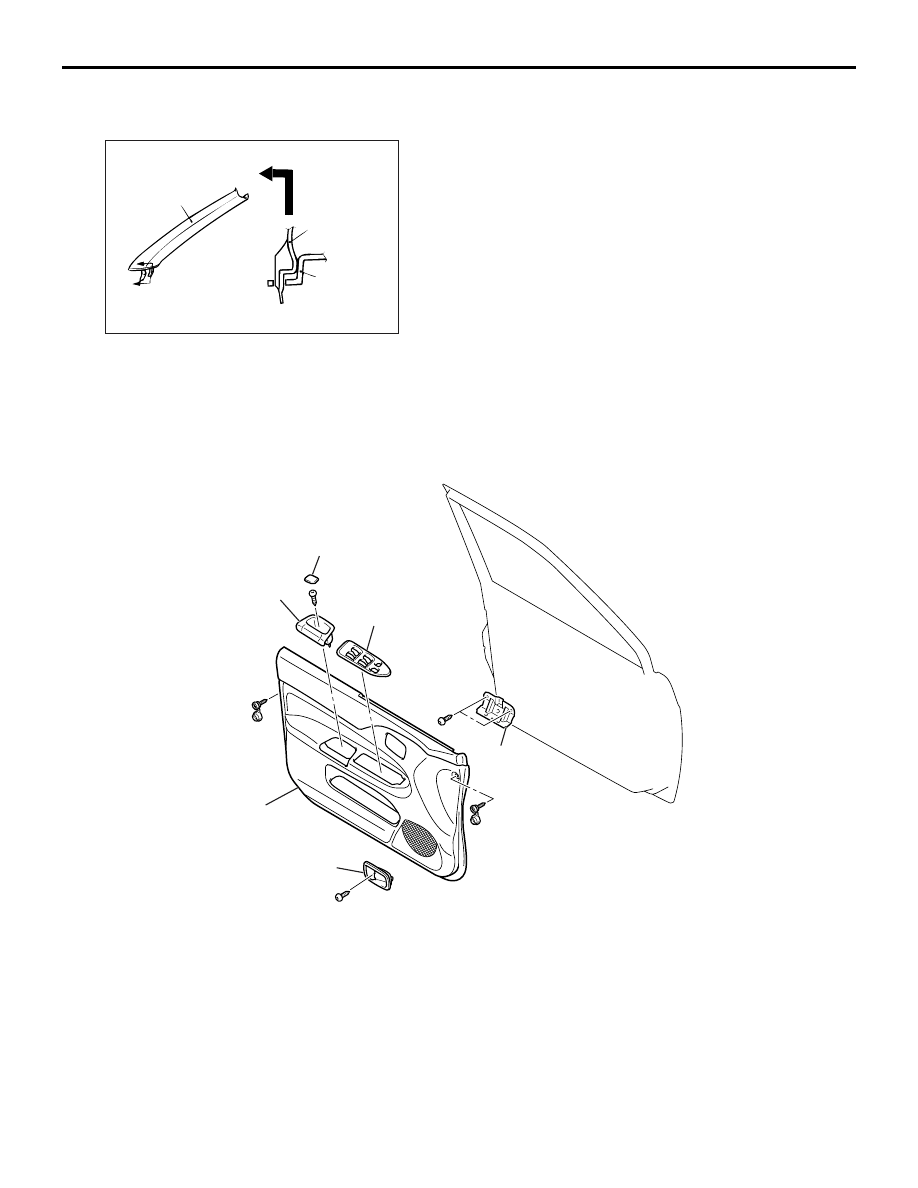
<<A>> FRONT PILLAR TRIM REMOVAL
AC005511
Front pillar
trim
Front pillar
trim
Instrument
panel
Section A - A
A
A
AB
Release the clip by pulling in the direction shown in
the illustration and remove the front pillar trim.
DOOR TRIM
REMOVAL AND INSTALLATION
M1521006400213
AC210022
1
2
3
4
5
6
AB
<Front door trim>
Removal steps
1. Cap
2. Pull handle box
3. Power window switch panel assembly
<<
A
>>
4. Door inside handle cover
5. Front door trim
6. Front door pull handle bracket
Removal steps (Continued)
AC208724
AC210019
1
2
3
4
5
AB
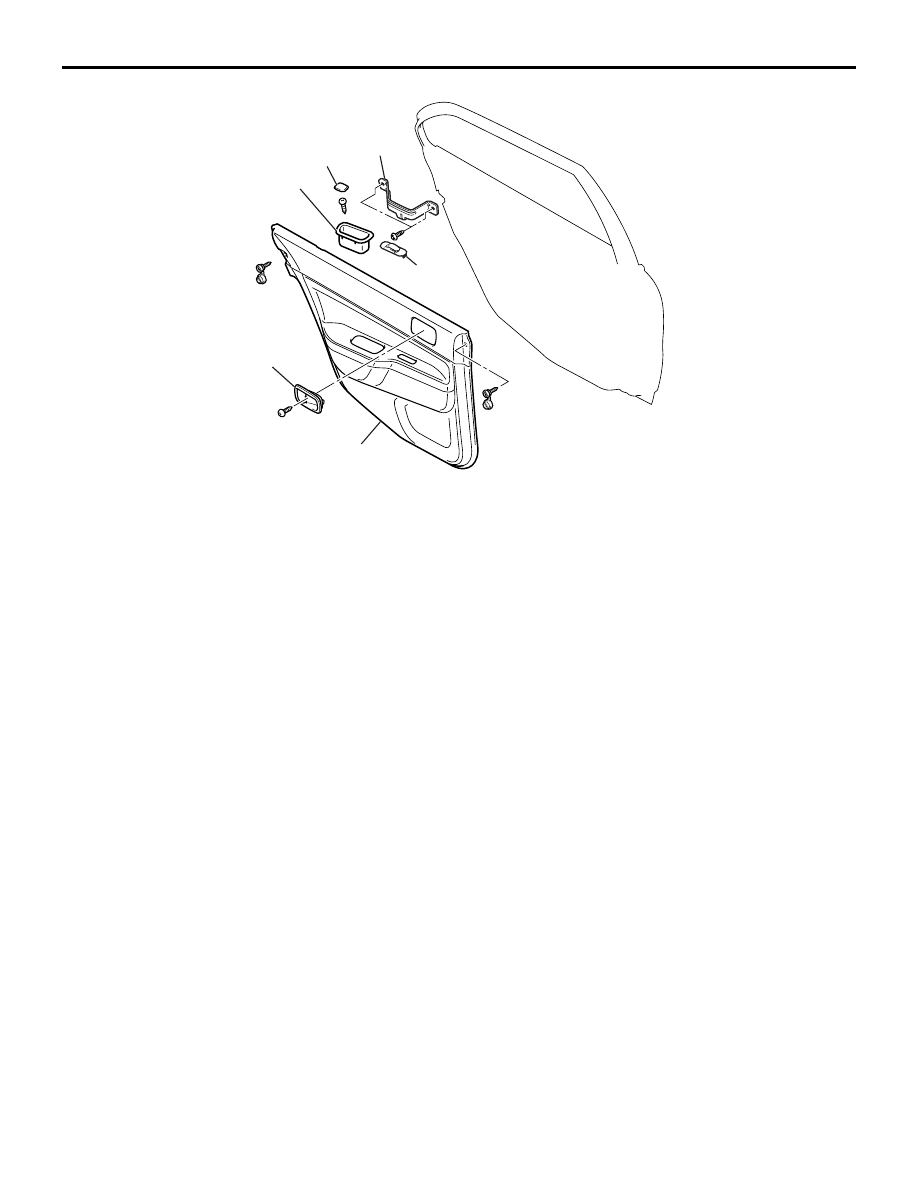
<Rear door trim>
6
Removal steps
1.
Cap
2.
Pull handle box
3.
Power window switch panel
assembly
<<
A
>>
4.
Door inside handle cover
5.
Rear door trim
6.
Rear door pull handle bracket
DOOR TRIM
INTERIOR
52A-13
Removal steps (Continued)
DOOR TRIM
INTERIOR
52A-14
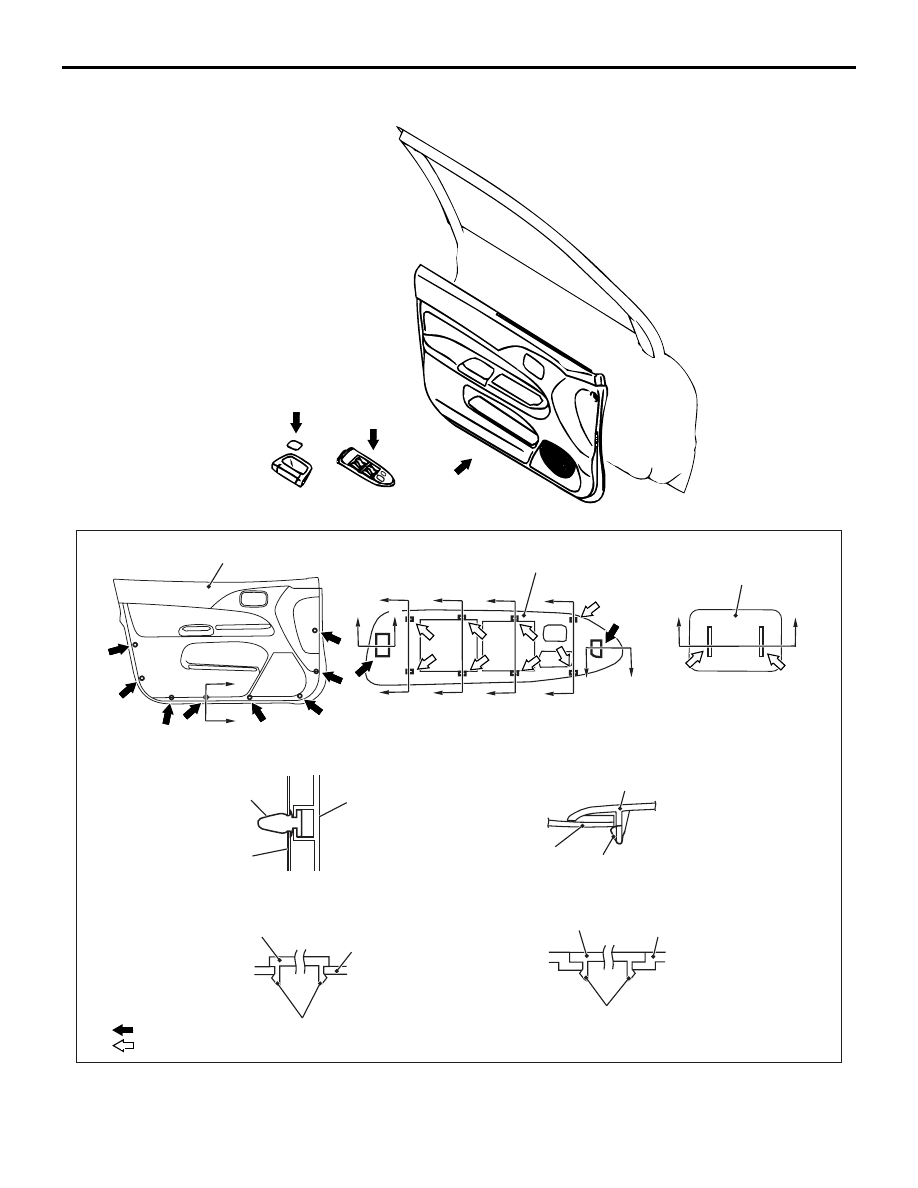
CLIP AND CLAW POSITIONS
AC210245
Note
(1) : Clip positions
(2) : Claw positions
Section D – D
A
B
C
View A
View B
View C
D
D
E
E
E
E
F
F
F
F
F
F
F
F
G
G
Front door trim
Power window switch
panel assembly
Cap
Clip
Door panel
Front door trim
Section E – E
Power window switch
panel assembly
Front door trim
Clip
Section F – F
Power window switch
panel assembly
Claw
Front door trim
Section G – G
Cap
Pull handle box
Claw
AE
<Front door trim>
Нет комментариевНе стесняйтесь поделиться с нами вашим ценным мнением.
Текст