Mitsubishi Lancer Evolution IX. Manual — part 100

FRONT SEAT ASSEMBLY
INTERIOR
52A-19
INSTALLATION SERVICE POINT
>>A<< FRONT SEAT ASSEMBLY INSTAL-
LATION
1.
AC310736 AB
Temporarily tighten the nuts and bolts in all mounting
locations shown in the illustration with no load
applied to the front seat cushion, and check the
operation of the seat slide.
2. Tighten the nuts and bolts in all mounting loca-
tions to the specified torque.
DISASSEMBLY AND REASSEMBLY
M1522001500519
AC310735
8
2
7
9
1
6
5
4
11
10
3
22 ± 3 N·m
22 ± 3 N·m
44 ± 10 N·m
22 ± 3 N·m
22 ± 3 N·m
AB

Disassembly steps
1.
Cap
2.
Reclining adjuster knob
3.
Slide adjuster outer
4.
Slide adjuster inner
5.
Inner seat belt
6.
Cushion shield inner
7.
Cushion shield outer
8.
Seatback assembly
9.
Seat cushion assembly
10. Snap ring
11. Slide adjuster lever
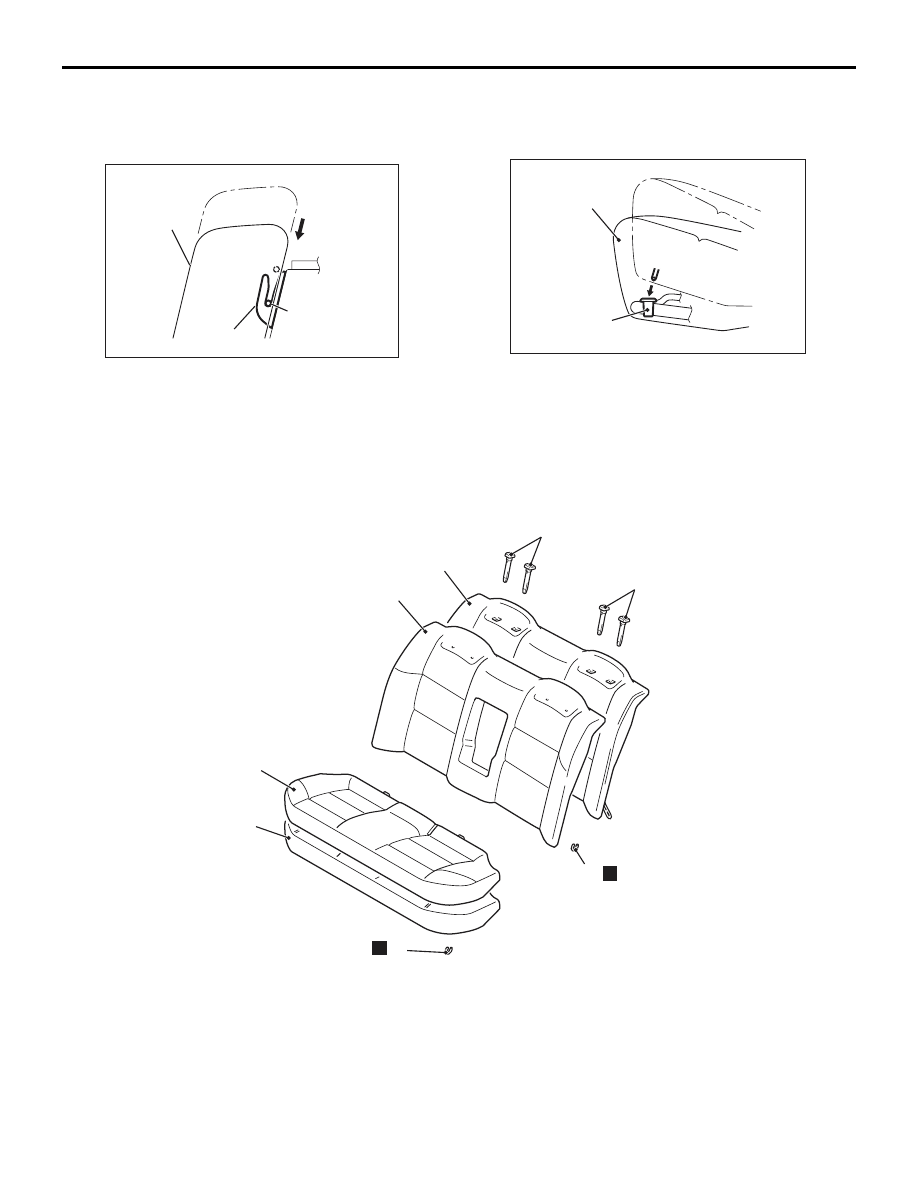
REAR SEAT ASSEMBLY
INTERIOR
52A-20
REAR SEAT ASSEMBLY
REMOVAL AND INSTALLATION
M1522001800338
AC310031
1
1
5
3
4
2
6
6
22 ± 4 N·m
AB
1.
Headrestraint
Removal steps
>>
B
<<
2.
Rear seat cushion assembly
3.
Armrest spacer
4.
Armrest
>>
A
5.
Rear seatback assembly
6.
Rear seat hook
Disassembly steps (Continued)
Removal steps (Continued)
REAR SEAT ASSEMBLY
INTERIOR
52A-21
INSTALLATION SERVICE POINTS
>>A<< INSTALLATION OF REAR SEAT-
BACK ASSEMBLY
AC005519AB
Hook
Rear seatback
assembly
Attachment wire
Press the rear seatback assembly in the direction
shown in the illustration and fit the attachment wire
into the hook securely to install the rear seatback
assembly.
>>B<< INSTALLATION OF REAR SEAT
CUSHION ASSEMBLY
AC005521AB
Rear seat hook
Rear seat cushion
assembly
Fit the rear seat cushion into the rear seat hook
securely.
DISASSEMBLY AND REASSEMBLY
M1522002000380
AC310045 AB
2
3
1
4
4
7
6
5
N
N
Disassembly steps
1.
Hog ring
2.
Rear seat cushion cover
3.
Rear seat cushion pad
4.
Headrestraint guide
5.
Hog ring
6.
Rear seatback cover
7.
Rear seatback pad
Disassembly steps (Continued)
FRONT SEAT BELT
INTERIOR
52A-22
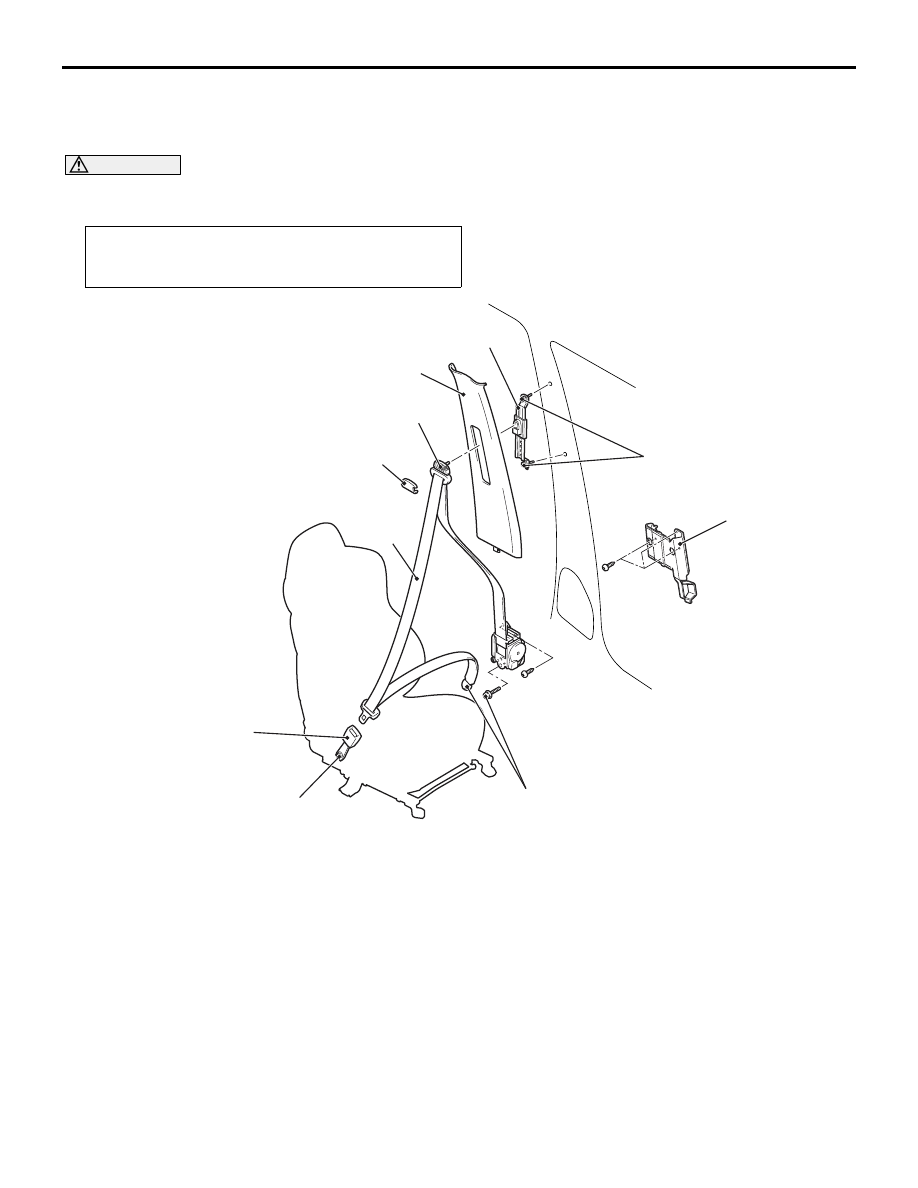
FRONT SEAT BELT
REMOVAL AND INSTALLATION
M1523001300400
CAUTION
SRS: Before removing and installing the seat belts with pre-tensioner, refer to GROUP 52B, Seat Belts
with Pre-tensioner
Pre-removal and Post-installation Operation
• Turn the ignition key to the LOOK (OFF) position.
• Disconnect the negative battery terminal.
AC310727
1
2
3
4
5
6
44 ± 10 N·m
44 ± 10 N·m
44 ± 10 N·m
44 ± 10 N·m
AB
Outer seat belt removal steps
1. Sash guide cover
•
Lower centre pillar trim (refer to
).
2. Bracket
3. Outer seat belt (refer to GROUP 52B,
Seat Belts with Pre-tensioner
4. Upper centre pillar trim (Refer to
).
5. Adjustable seat belt anchor
Inner seat belt removal steps
•
Shield cover (refer to
6. Inner seat belt
Outer seat belt removal steps
Нет комментариевНе стесняйтесь поделиться с нами вашим ценным мнением.
Текст