Mitsubishi Montero (1991+). Manual — part 5
bracket. Remove timing belt upper lower cover, noting length and
location of cover bolts.
4) If reusing timing belt, place arrow on belt to indicate
direction of belt rotation. Remove timing belt and belt tensioner.
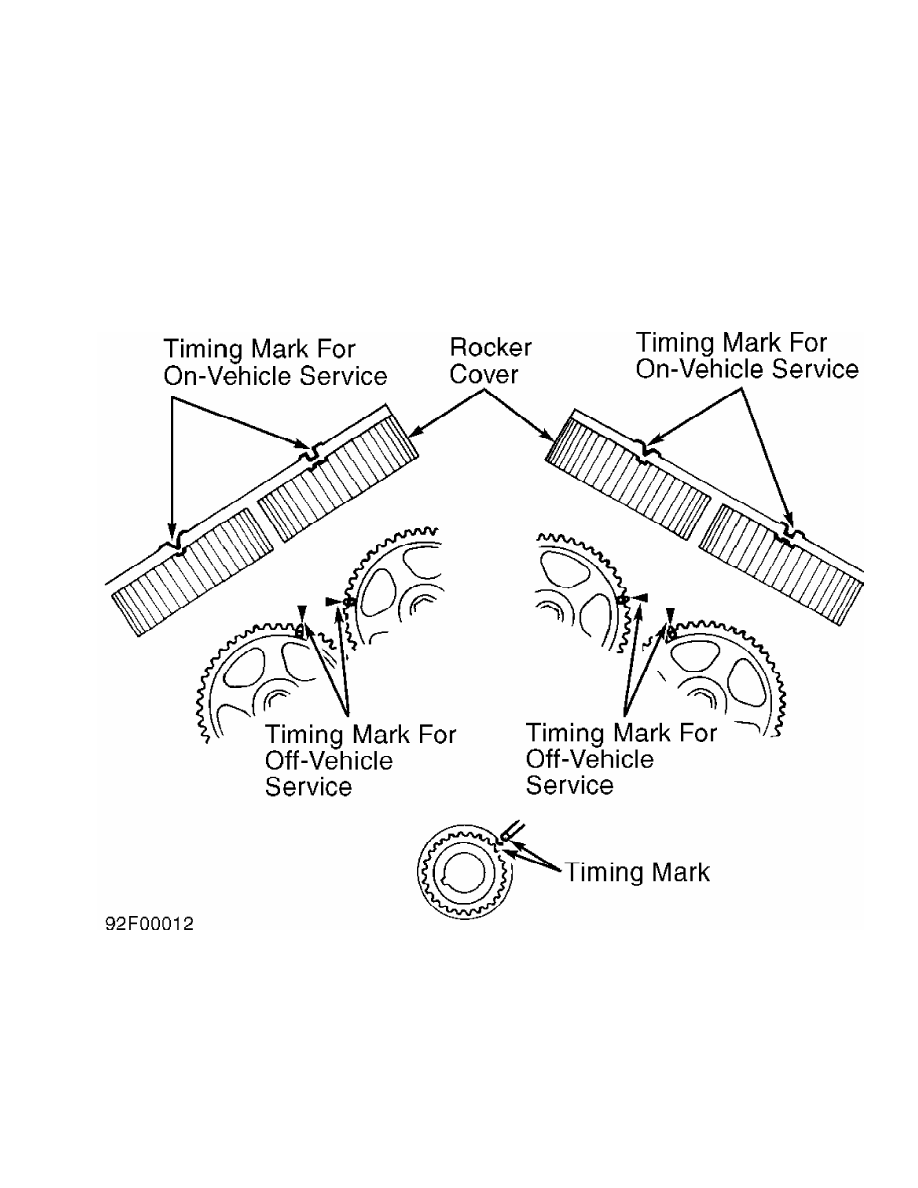
Rotate crankshaft and align all timing marks. See Fig. 13. Loosen
center tensioner bolt, and remove timing belt.
5) If camshaft sprocket requires removal, install wrench on
hexagonal portion of camshaft. Hold camshaft while loosening camshaft
sprocket bolt. Remove camshaft sprocket bolt and camshaft sprocket.
Fig. 13: Aligning Timing Marks Initial Alignment (DOHC)
Courtesy of Mitsubishi Motor Sales of America, Inc.
Inspection (DOHC)
Inspect timing belt for wear on edges of drive teeth. Inspect
belt for oil and coolant contamination. Replace belt if damaged or
contaminated. Inspect belt tensioner for smooth rotation. Replace if
defective.
Installation (DOHC)
1) Install camshaft sprockets (if removed). Using wrench,
hold camshaft at hexagonal section and tighten camshaft sprocket bolt
to specification. See TORQUE SPECIFICATIONS (3000GT) table at end of
article.
2) Place automatic tensioner assembly in a soft-faced vise.
Squeeze rod back into automatic tensioner in small increments until
both rod and housing holes are aligned. Install a .055" (1.39 mm)
diameter wire through both holes.
3) Remove automatic tensioner from vise, and install assembly
with wire installed. Install crankshaft sprocket (if removed). Align
timing marks on crankshaft and camshaft sprockets. See Fig. 13.
CAUTION: Turning camshaft sprockets while No. 1 cylinder is at TDC
may damage valve and piston. Use care when aligning timing
marks.
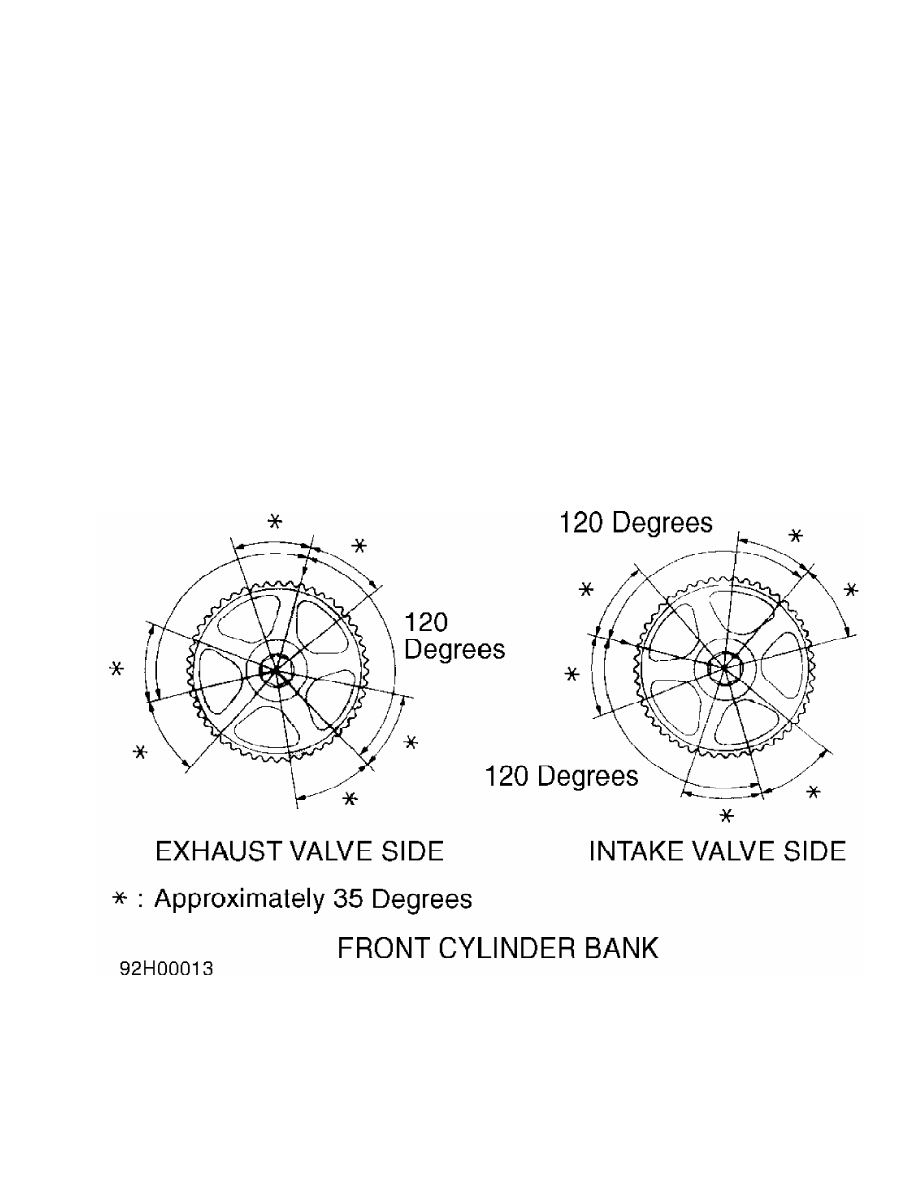
4) To lower No. 1 piston from TDC and prevent valve and
piston contact, turn crankshaft back 3 sprocket teeth (measured at
timing mark). Starting with front bank of cylinders, ensure intake and
exhaust camshaft timing marks are not within shaded area of figure.
See Fig. 14.
When camshaft sprocket timing marks are in indicated area,
camshaft is under valve spring pressure and may rotate suddenly,
pinching hand between sprockets. Use care when aligning timing marks.
Fig. 14: Adjusting Timing Marks to Prevent Valve & Piston Damage
(DOHC)
Courtesy of Mitsubishi Motor Sales of America, Inc.
5) If camshaft sprocket timing mark is within indicated area,
carefully rotate camshaft sprocket until timing mark is located in
nearest safe area. See Fig. 14.
6) Rotate either camshaft sprocket clockwise to align timing
marks as shown in Fig. 15. If camshaft sprocket is turned past timing
mark, turn it counterclockwise to realign it. Repeat procedure for
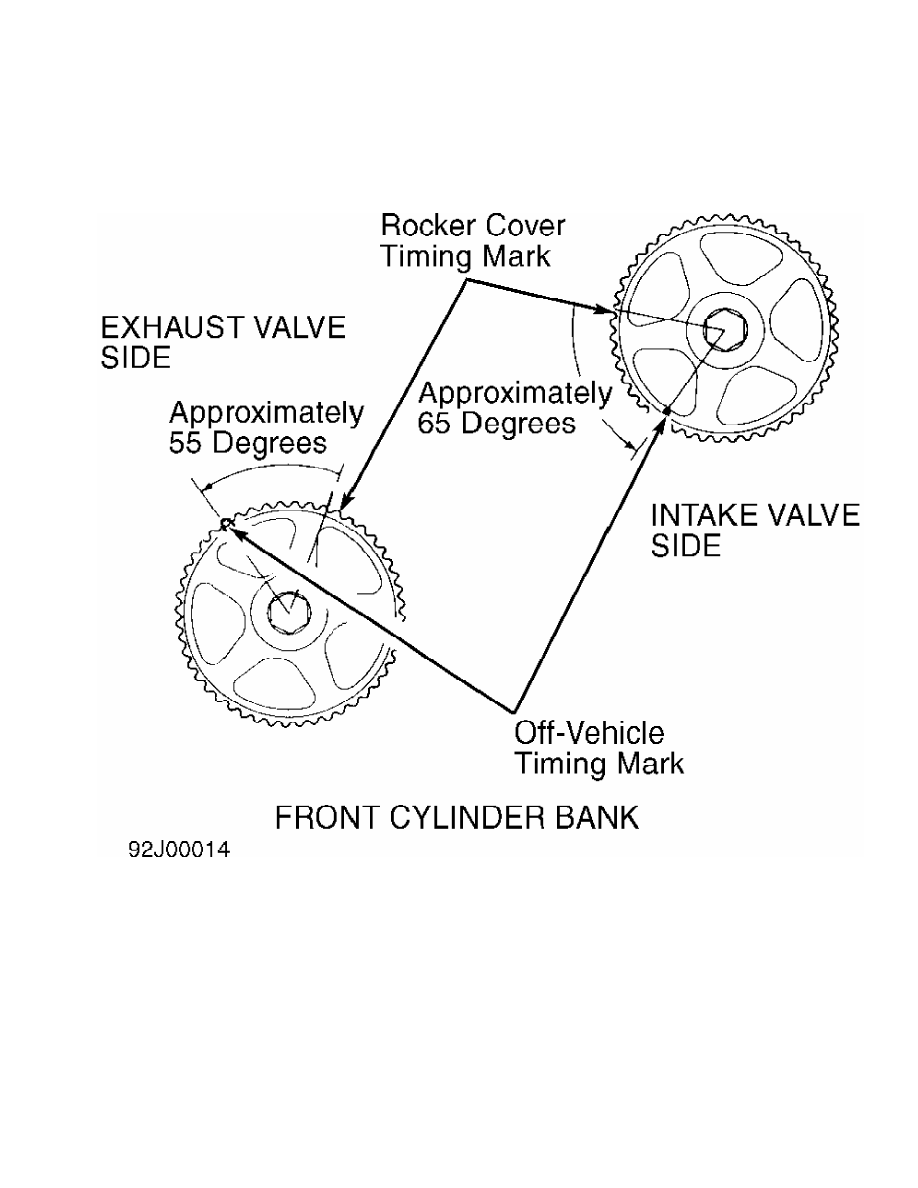
other front bank camshaft sprocket.
Fig. 15: Aligning Timing Marks Final Alignment (DOHC)
Courtesy of Mitsubishi Motor Sales of America, Inc.
7) Repeat steps 4)-6) for rear cylinder bank camshafts. Align
crankshaft timing mark. Install timing belt on sprockets in sequence.
See Fig. 16. Use spring-type paper clips to secure belt on sprockets.
Use offset box-end wrenches on camshaft sprocket bolts to keep
camshafts from turning during belt installation.
NOTE: If necessary, crankshaft sprocket may be turned one tooth
counterclockwise to aid belt installation.
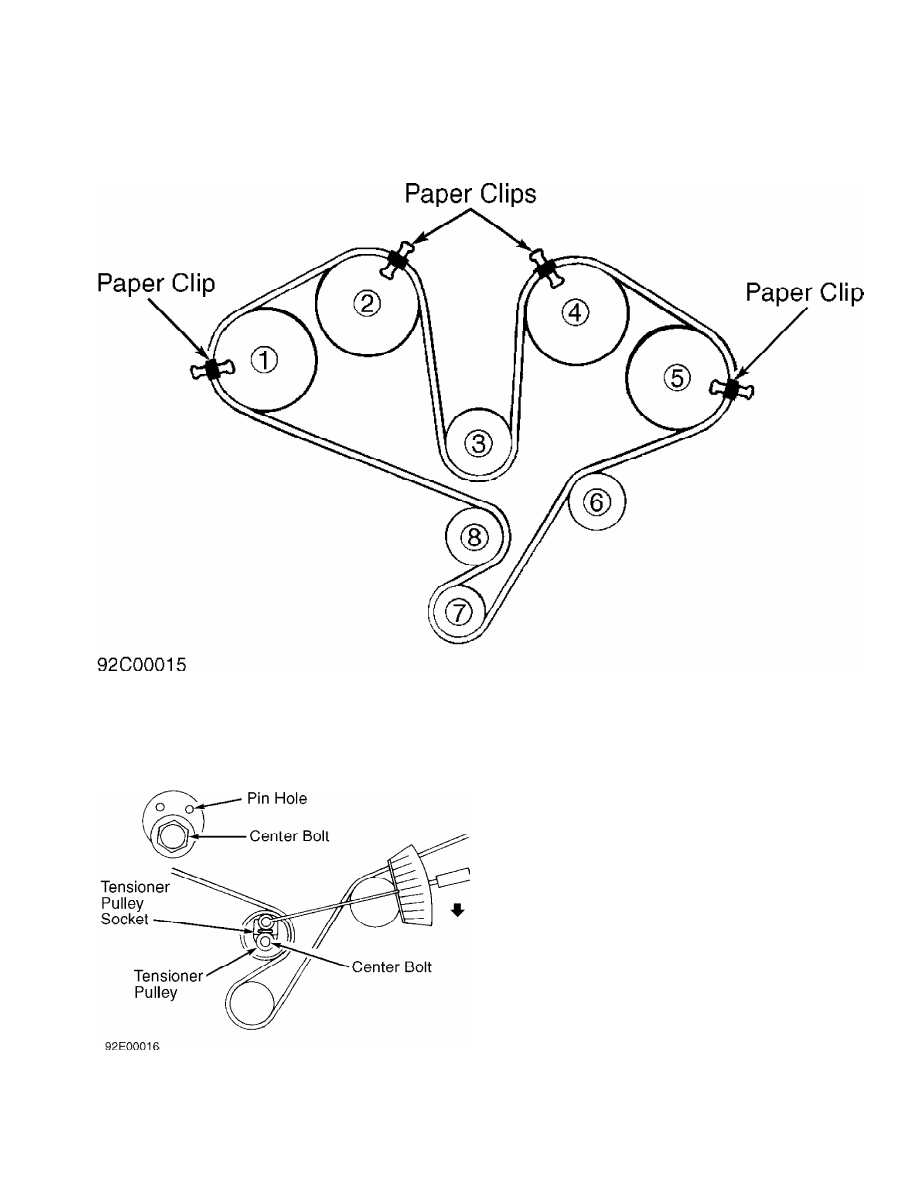
Fig. 16: Installing Timing Belt (DOHC)
Courtesy of Mitsubishi Motor Sales of America, Inc.
8) Rotate timing belt tensioner pulley until pin holes are
located above center bolt. See Fig. 17. Push tensioner pulley against
belt, and temporarily tighten center bolt. Ensure all timing marks are
still aligned, and remove clips.
Fig. 17: Adjusting Timing Belt Tensioner (DOHC)
Courtesy of Mitsubishi Motor Sales of America, Inc.
9) Rotate crankshaft 1/4 revolution counterclockwise. Rotate
crankshaft clockwise until timing marks are realigned. Loosen
Нет комментариевНе стесняйтесь поделиться с нами вашим ценным мнением.
Текст