Mitsubishi Eclipse / Eclipse Spyder (2000-2002). Service and repair manual — part 35
TIMING BELT
TSB Revision
ENGINE OVERHAUL <2.4L ENGINE>
11B-17
INSPECTION
M1113002000050
TIMING BELT
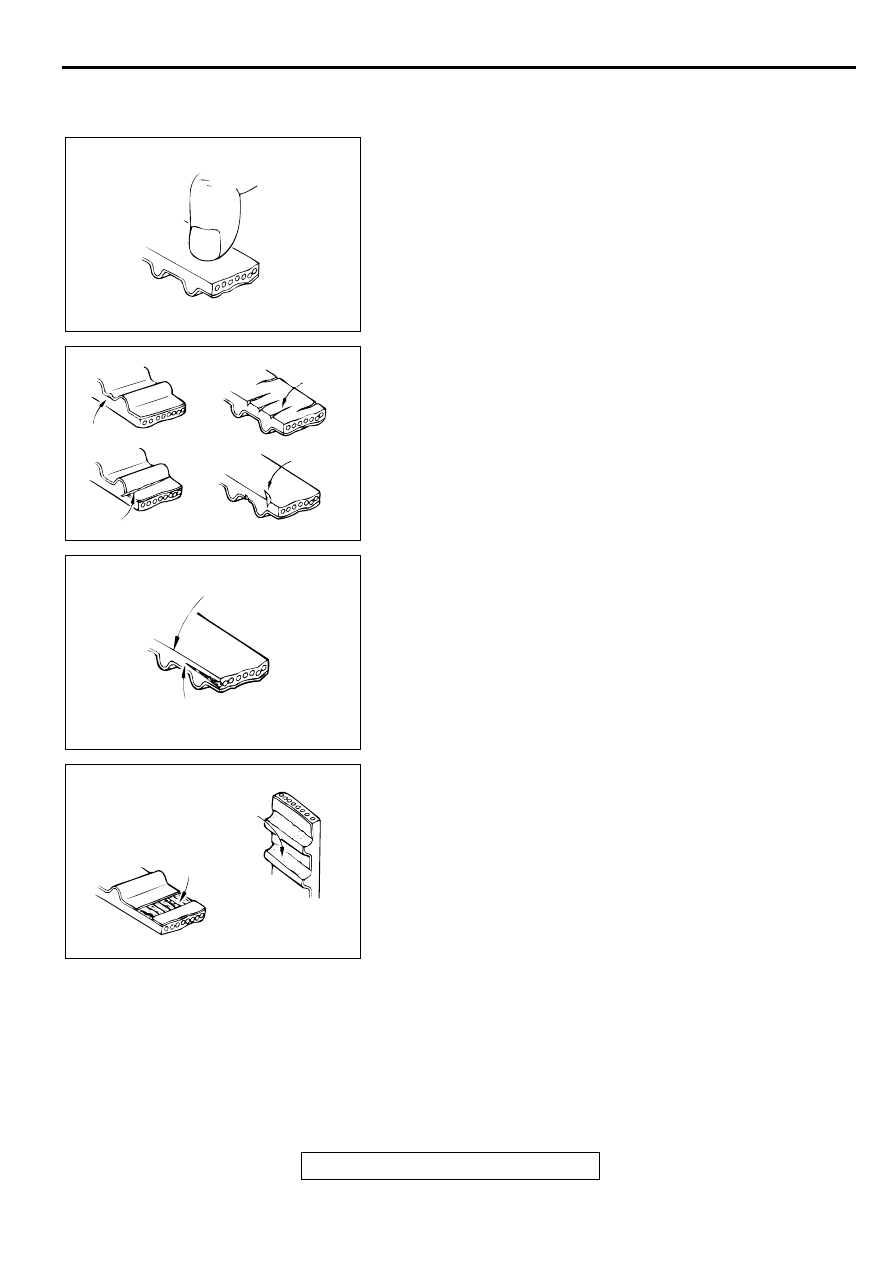
Replace the belt if any of the following conditions exist:
1. Hardening of rubber backing.
Back side is glossy without resilience and leaves no indent
when pressed with fingernail.
2. Cracks on rubber back.
3. Cracks or peeling of canvas.
4. Cracks on rib root.
5. Cracks on belt sides.
6. Abnormal wear of belt sides. Normal wear is indicated if the
sides are sharp as if cut by a knife. Abnormal wear is
indicated if the sides are ragged.
7. Abnormal wear on teeth.
8. Missing tooth.
AKX00601
AKX00564
CRACKS
CRACKS
CRACKS
PEELING
AB
AKX00602
ROUNDED EDGE
ABNORMAL WEAR
(RAGGED)
AB
AKX00603
TOOTH
MISSING
RUBBER EXPOSED
AB
TIMING BELT
TSB Revision
ENGINE OVERHAUL <2.4L ENGINE>
11B-18
AUTO-TENSIONER
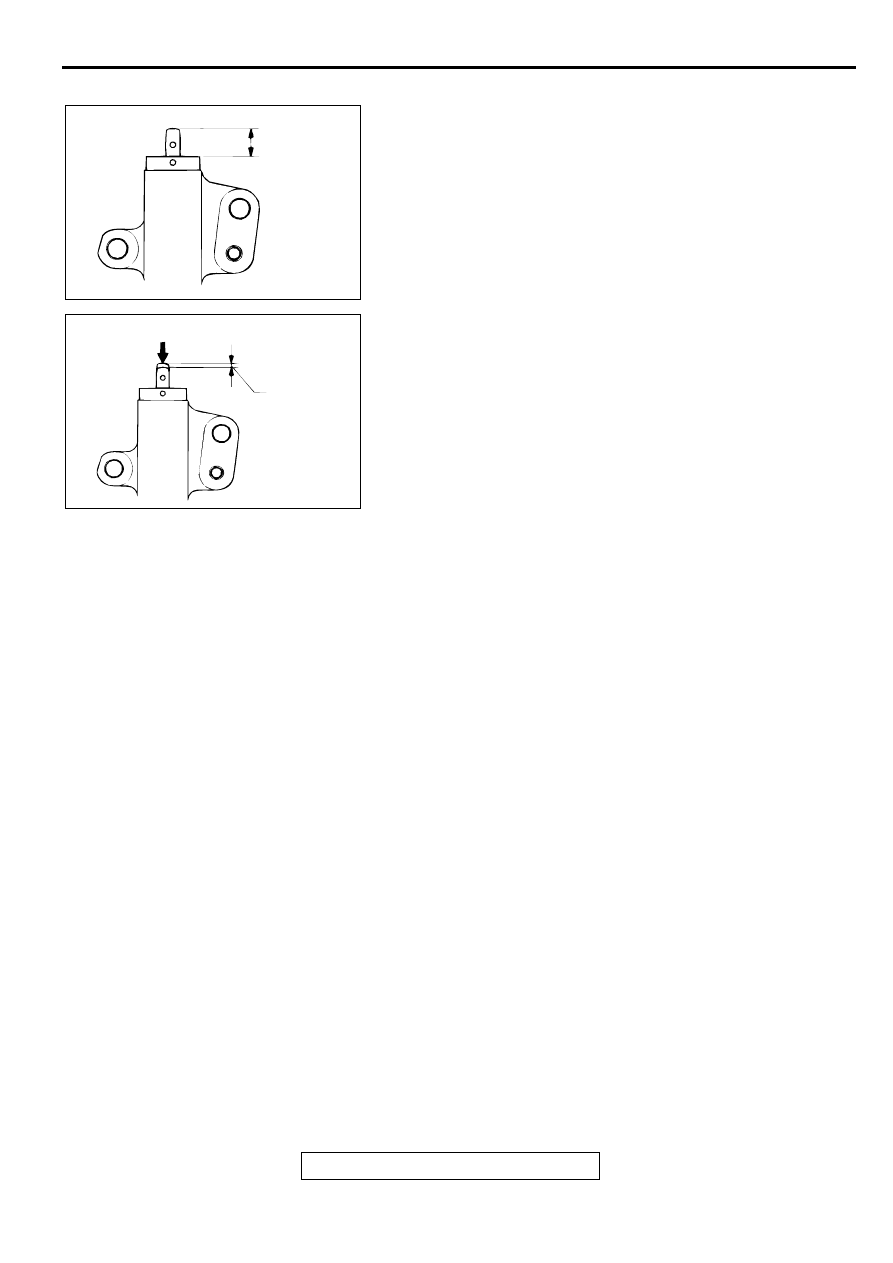
1. Check for oil leaks. If oil leaks are evident, replace the auto-
tensioner.
2. Check the rod end for wear or damage and replace the auto-
tensioner if necessary.
3. Measure the rod protrusion. If it is out of specification,
replace the auto tensioner.
Standard value: 12 mm (0.5 inch)
4. Press the rod with a force of 98 to 196 N (22 to 44 pound)
and measure the movement of the rod.
If the measured value is out of the standard value, replace
the auto-tensioner.
Standard value: 1.0 mm (0.03 inch) or less
AKX00477
12 mm
(0.5 in)
AB
AKX00478
98 TO196 N (22 TO 44 lb)
MOVEMENT
AB
FUEL AND EMISSION PARTS
TSB Revision
ENGINE OVERHAUL <2.4L ENGINE>
11B-19
FUEL A N D EM ISSIO N PA R TS
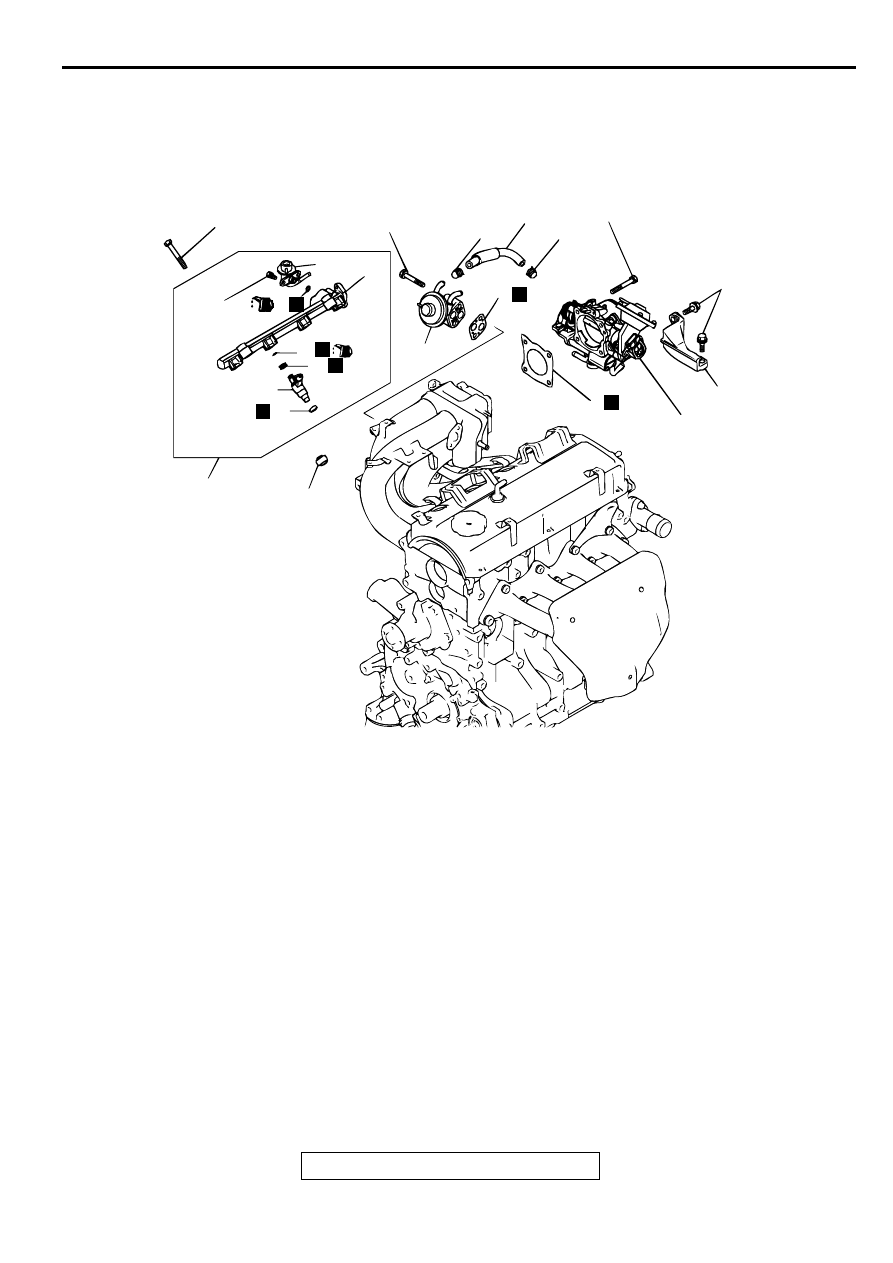
REMOVAL AND INSTALLATION
M1113002200032
AKX00513
19 ± 3 N·m
14 ± 2 ft-lb
19 ± 3 N·m
14 ± 2 ft-lb
19 ± 3 N·m
14 ± 2 ft-lb
8.8 ± 2 N·m
78 ± 17 in-lb
2
1
1
10
16
7
14
6
15
13
3
5
12
4
8
9
N
N
N
N
N
N
AB
12 ± 1 N·m
104 ± 9 in-lb
11
REMOVAL STEPS
1. HOSE CLIP
2. WATER HOSE
3 THROTTLE BODY STAY
4. THROTTLE BODY
>>C<<
5. THROTTLE BODY GASKET
6. EGR VALVE
7. GASKET
8. INJECTOR AND FUEL RAIL
9. INSULATOR
>>B<<
10.FUEL PRESSURE REGULATOR
11. O-RING
12.INSULATOR
>>A<<
13.INJECTOR
14.O-RING
15.GROMMET
16.FUEL RAIL
REMOVAL STEPS (Continued)
FUEL AND EMISSION PARTS
TSB Revision
ENGINE OVERHAUL <2.4L ENGINE>
11B-20
INSTALLATION SERVICE POINTS
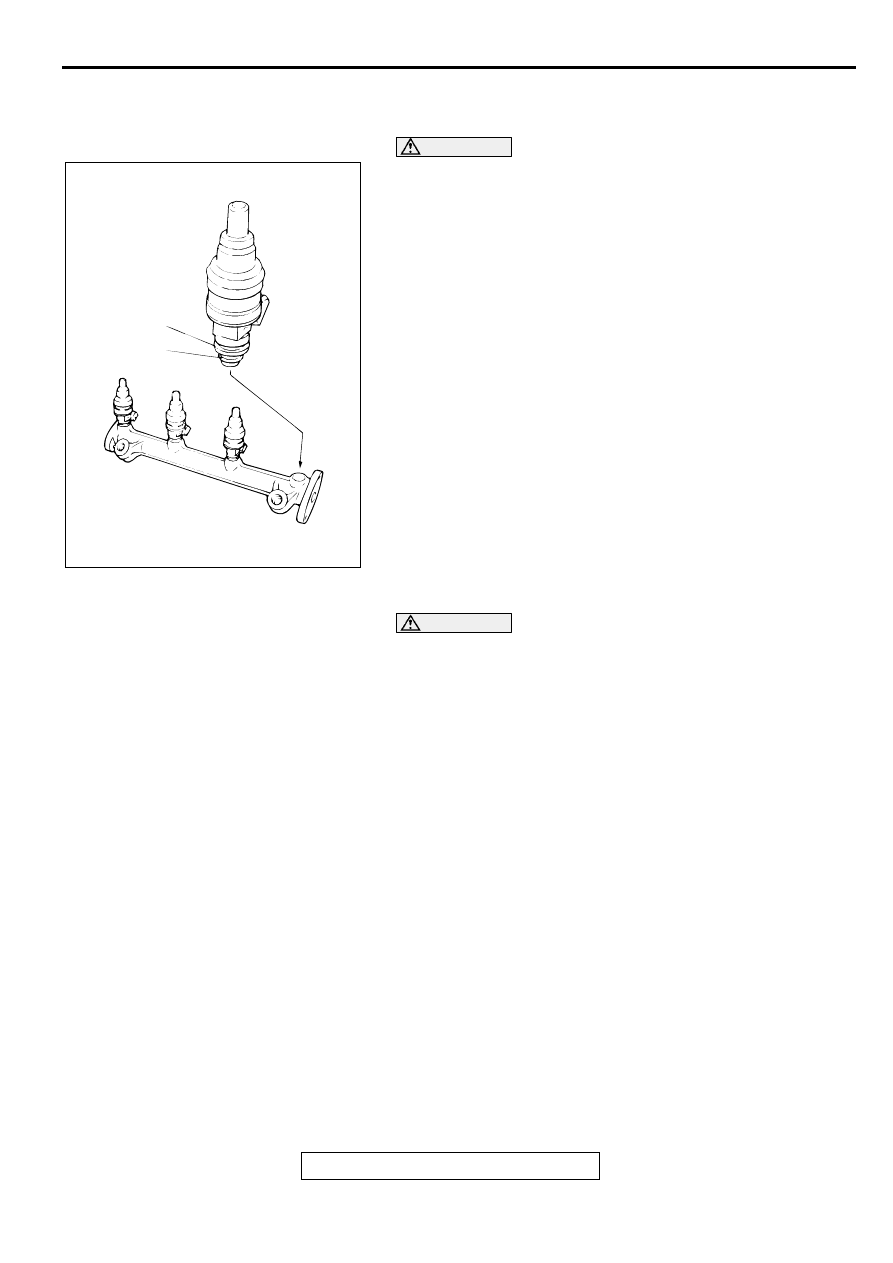
>>A<< INJECTORS INSTALLATION
CAUTION
Use care not to let engine oil enter the fuel rail.
1. Apply clean engine oil to the O-ring.
2. Insert the injector into the fuel rail.
3. Make sure the injector rotates smoothly.
If not, remove the injector to check the O-ring for damage,
and replace the O-ring if necessary. Then, reinstall the
injector and check that it rotates smoothly.
>>B<< FUEL PRESSURE REGULATOR INSTALLATION
CAUTION
Do not let engine oil enter the fuel rail.
1. Apply clean engine oil to the O-ring.
2. Insert the fuel pressure regulator into the fuel rail.
3. Make sure the pressure regulator rotates smoothly.
If not, remove the fuel pressure regulator to check the O-ring
for damage, and replace the O-ring if necessary. Then,
reinstall the fuel pressure regulator and check that it rotates
smoothly.
4. Tighten the two bolts to the specified torque.
Tightening torque: 8.8
±
2 N
⋅
m (78
±
17 in-lb)
AKX00446
GROMMET
O-RING
AB
Нет комментариевНе стесняйтесь поделиться с нами вашим ценным мнением.
Текст