Mitsubishi Eclipse / Eclipse Spyder (2000-2002). Service and repair manual — part 36
FUEL AND EMISSION PARTS
TSB Revision
ENGINE OVERHAUL <2.4L ENGINE>
11B-21
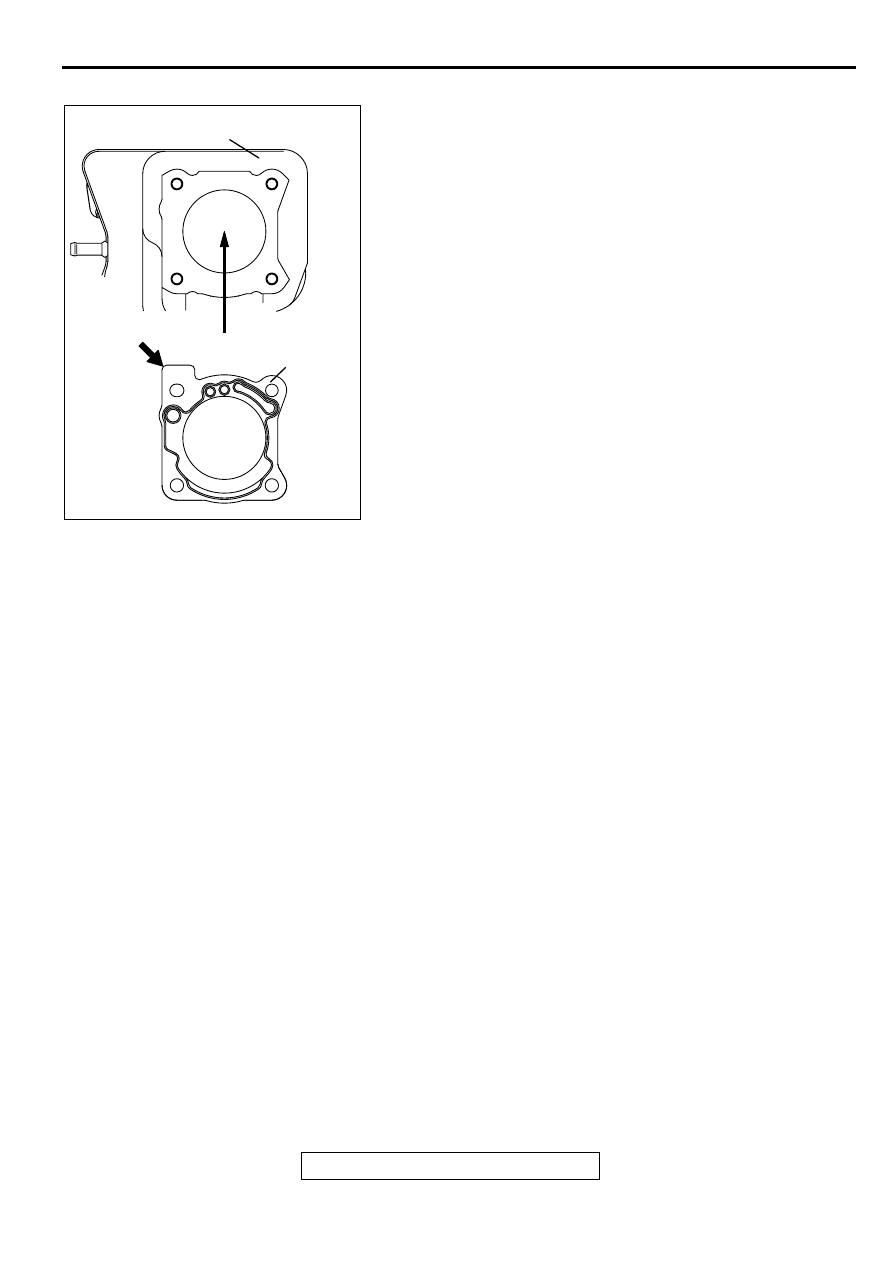
>>C<< THROTTLE BODY GASKET INSTALLATION
Install a new gasket so that the tab is positioned as shown in
the illustration.
AK000270
GASKET SURFACE OF INTAKE MANIFOLD
TAB
THROTTLE
BODY
GASKET
AB
INTAKE MANIFOLD
TSB Revision
ENGINE OVERHAUL <2.4L ENGINE>
11B-22
IN TA KE M A N IFO LD
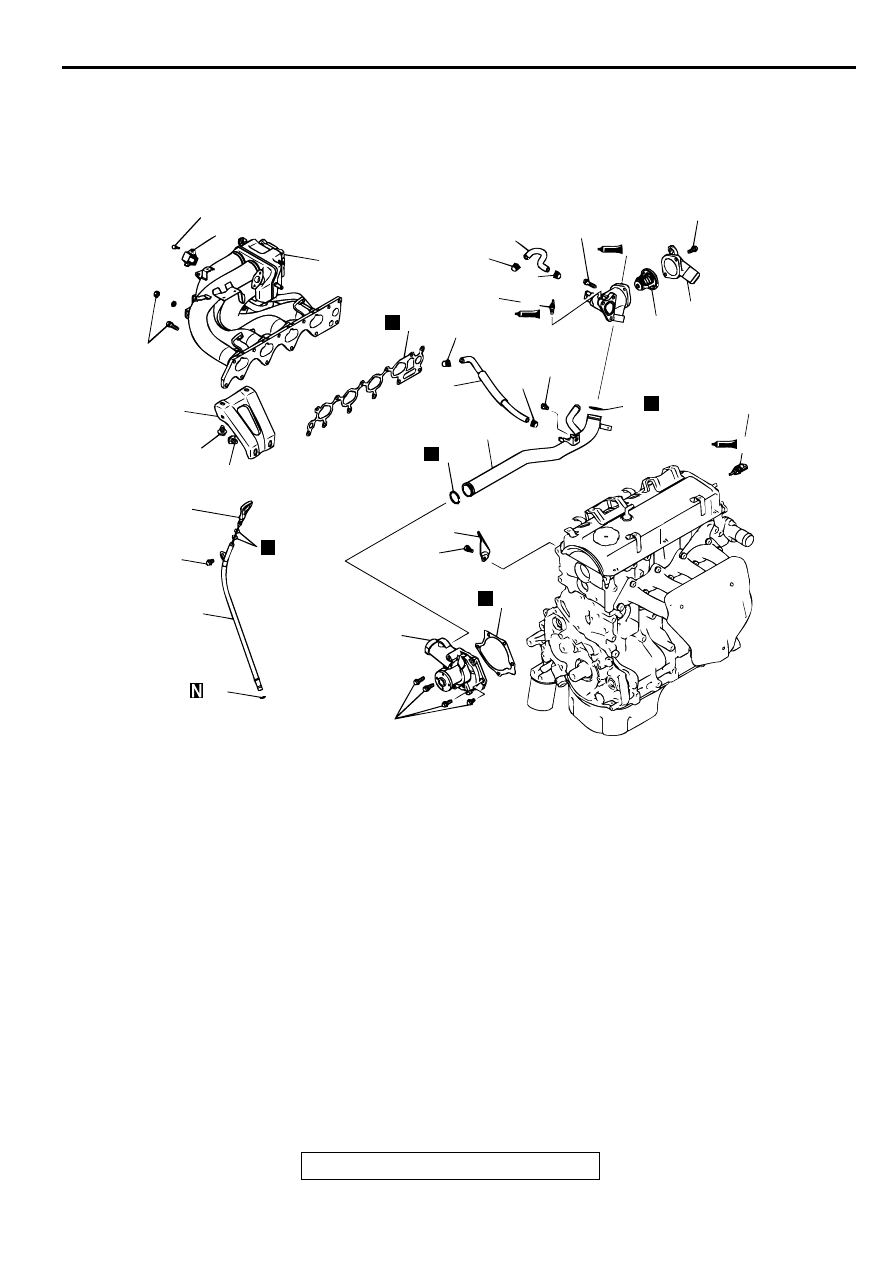
REMOVAL AND INSTALLATION
M1113002700059
INSTALLATION SERVICE POINTS
>>A<< INTAKE MANIFOLD STAY INSTALLATION
1. Install the intake manifold stay and tighten the bolts just
finger tight.
AKX00511
5 ± 1 N·m
43 ± 9 in-lb
13 ± 2 N·m
113 ± 17 in-lb
24 ± 4 N·m
17 ± 3 ft-lb
11 ± 1 N·m
95 ± 9 in-lb
13 ± 2 N·m
113 ± 17 in-lb
20 ± 2 N·m
14 ± 1 ft-lb
29 ± 10 N·m
22 ± 7 ft-lb
21 ± 4 N·m
15 ± 3 ft-lb
30 ± 3 N·m
22 ± 2 ft-lb
14 ± 1 N·m
122 ± 9 in-lb
19 ± 3 N·m
14 ± 2 ft-lb
14 ± 1 N·m
122 ± 9 in-lb
17
2
9
1
19
1
6
7
20
3
8
4
3
11
18
10
5
14
21
13
15
12
16
N
N
N
N
N
AB
11
REMOVAL STEPS
1. HOSE CLIP
2. WATER HOSE
3 HOSE CLIP
4. WATER HOSE
>>F<<
5. ENGINE COOLANT
TEMPERATURE SENSOR
>>E<<
6. ENGINE COOLANT
TEMPERATURE GAUGE UNIT
7. WATER INLET FITTING
>>D<<
8. THERMOSTAT
>>C<<
9. THERMOSTAT HOUSING
>>B<<
10.WATER INLET PIPE
>>B<<
11. O-RING
12.WATER PUMP
13.WATER PUMP GASKET
14.OIL DIPSTICK
15.OIL DIPSTICK GUIDE
16.O-RING
17.MANIFOLD DIFFERENTIAL
PRESSURE SENSOR
>>A<<
18.INTAKE MANIFOLD STAY
19.INTAKE MANIFOLD
20.INTAKE MANIFOLD GASKET
21.ENGINE HANGER
REMOVAL STEPS (Continued)
INTAKE MANIFOLD
TSB Revision
ENGINE OVERHAUL <2.4L ENGINE>
11B-23
2. Check to ensure that the stay is in close contact with the
bosses of the intake manifold and cylinder block.
3. Tighten first the intake manifold side bolts to the specified
torque, then the cylinder block side bolts to the specified
torque.
Tightening torque:
21
±
4 N
⋅
m (15
±
3 ft-lb) for intake manifold side bolts
30
±
3 N
⋅
m (22
±
2 ft-lb) for cylinder block side bolts
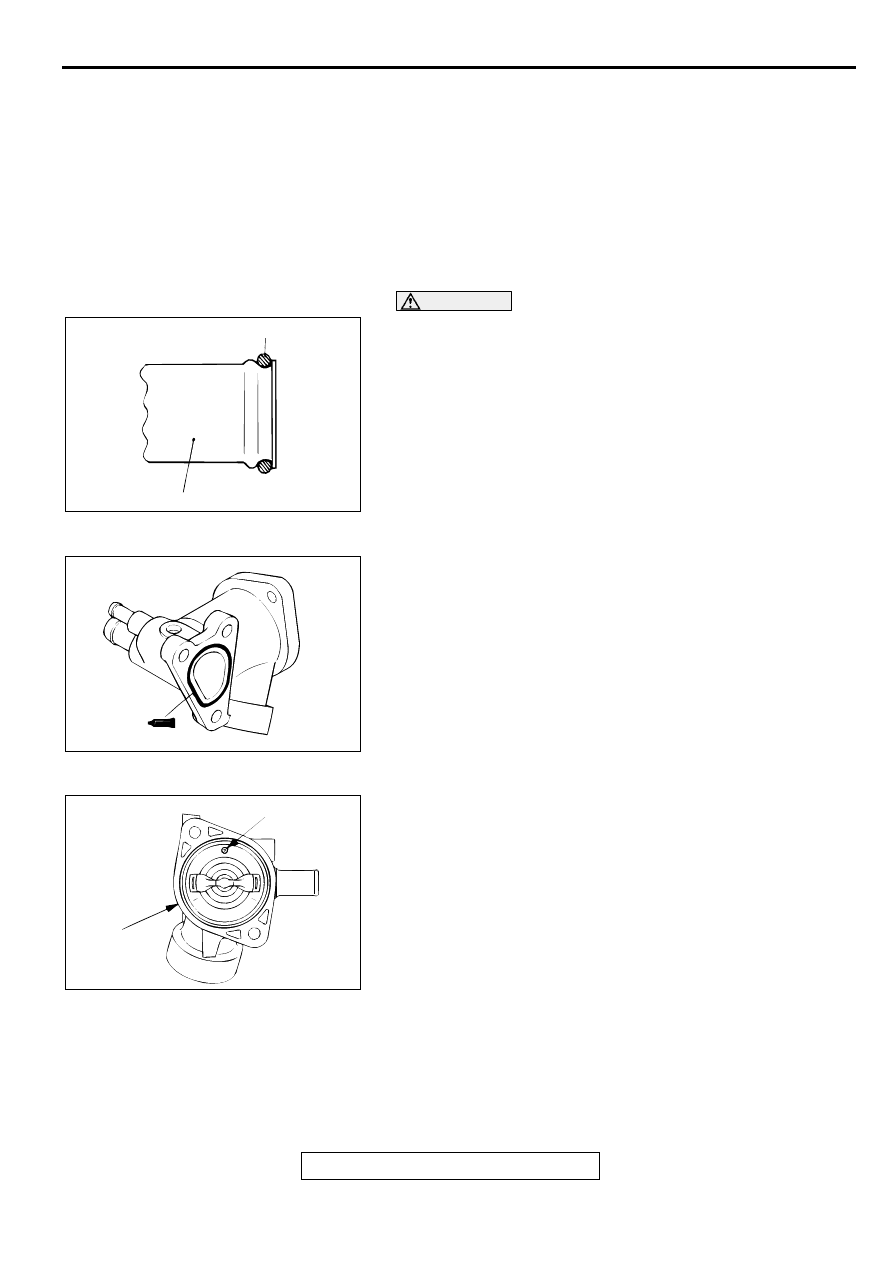
>>B<< WATER INLET PIPE/O-RING INSTALLATION
CAUTION
Keep the O-ring free of oil or grease.
1. Attach a new O-ring to each end of the water inlet pipe.
2. Wet the O-ring with water.
3. Insert the front end of the pipe into the water pump.
>>C<< THERMOSTAT HOUSING INSTALLATION
1. Apply a 3 mm (0.1 inch) diameter bead of sealant
MITSUBISHI Genuine Part number MD970389 or equivalent
to the groove as shown in the illustration.
2. Install the housing quickly (within 15 minutes) while the
sealant is wet and tighten the bolts to the specified torque.
Tightening torque: 24
±
4 N
⋅
m (17
±
3 ft-lb)
NOTE: After installation, keep the sealed area away from
the coolant for approximately one hour.
>>D<< THERMOSTAT INSTALLATION
1. Check that the rubber ring is free from damage and seated
correctly in the thermostat flange.
2. Install the thermostat as shown in the illustration. The jiggle
valve must be at the uppermost position.
AKX00561
O-RING
WATER INLET PIPE
AB
AKX00471
AKX00491
JIGGLE VALVE
THERMOSTAT
HOUSING
AB
INTAKE MANIFOLD
TSB Revision
ENGINE OVERHAUL <2.4L ENGINE>
11B-24
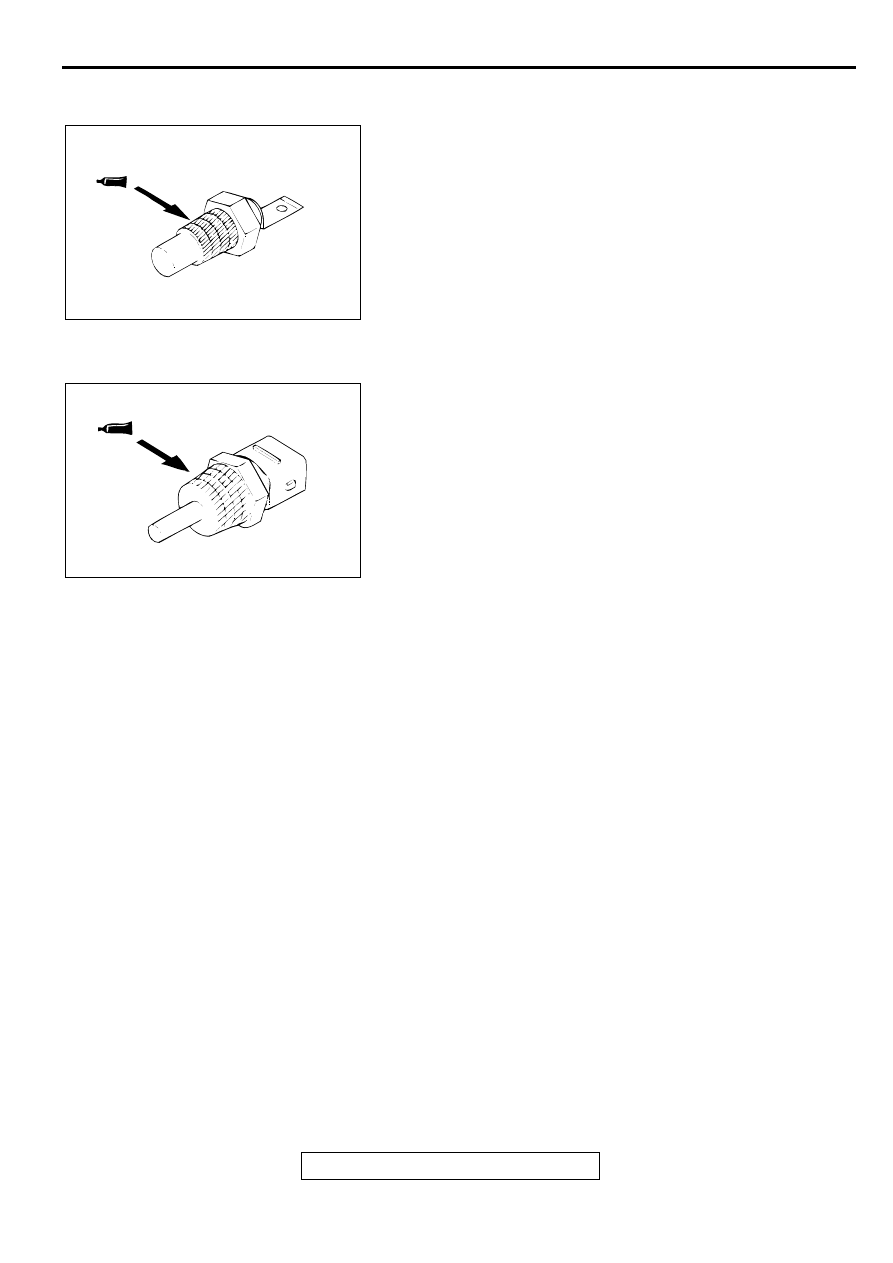
>>E<< SEALANT APPLICATION TO ENGINE COOLANT
TEMPERATURE GAUGE UNIT
Apply 3M
AAD Part number 8672 or equivalent to the engine
coolant temperature gauge unit.
>>F<< SEALANT APPLICATION TO ENGINE COOLANT
TEMPERATURE SENSOR
Apply 3M
AAD Part number 8731 or equivalent to the engine
coolant temperature sensor.
AKX00523
AKX00522
Нет комментариевНе стесняйтесь поделиться с нами вашим ценным мнением.
Текст