Mitsubishi Eclipse / Eclipse Spyder (2000-2002). Service and repair manual — part 42

FRONT CASE AND OIL PUMP
TSB Revision
ENGINE OVERHAUL <2.4L ENGINE>
11B-45
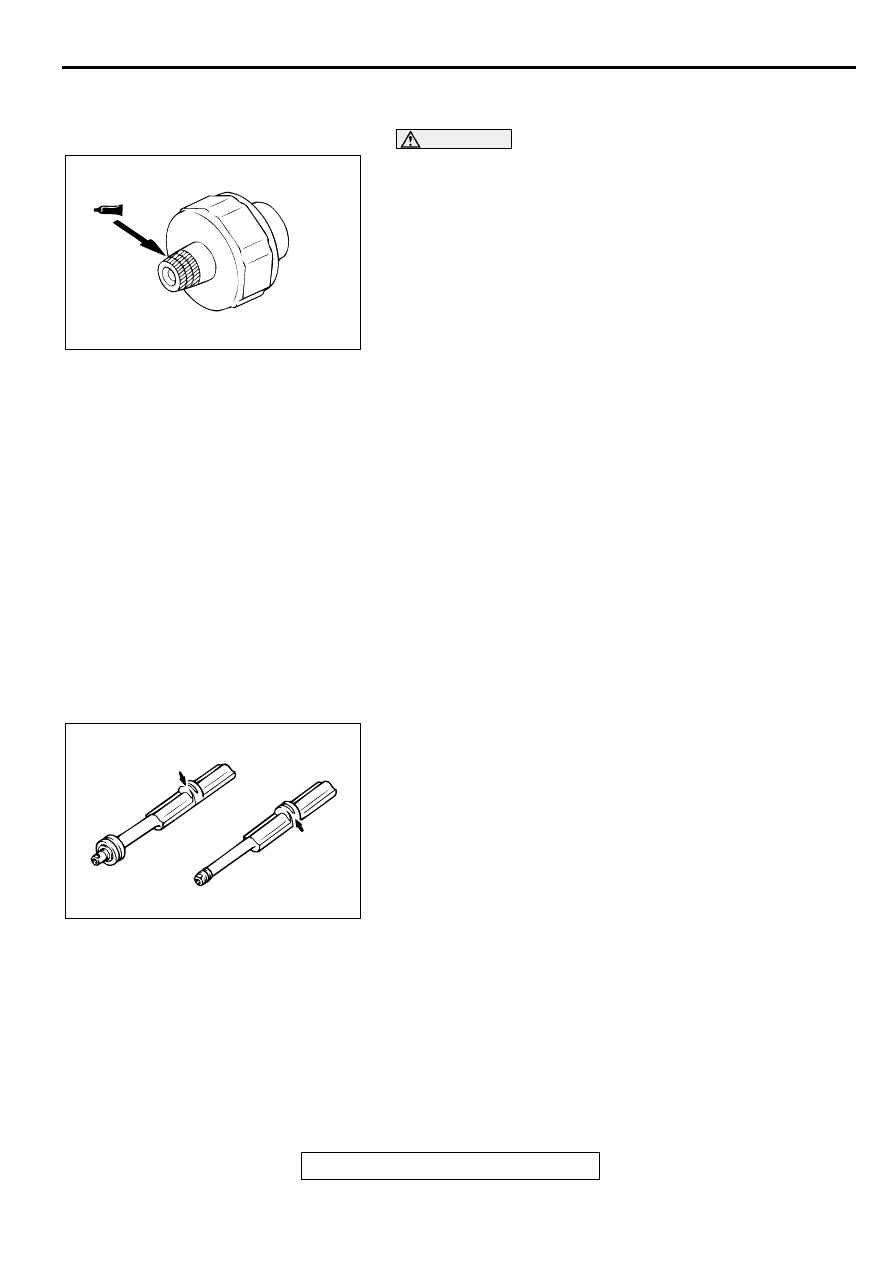
>>L<< DRAIN PLUG GASKET INSTALLATION
CAUTION
If the gasket is installed in the wrong direction, oil leaks
will occur.
Install the drain plug gasket in the direction shown.
>>M<< OIL FILTER INSTALLATION
1. Clean the installation surface of the filter bracket.
2. Apply engine oil to the O-ring of the oil filter.
3. Install the oil filter to the bracket and tighten it to the
specified torque.
Tightening torque:
Part number MD360935 filter:
14
±
2 N
⋅
m (122
±
17 in-lb)
Other Mitsubishi Genuine filter:
17
±
3 N
⋅
m (12
±
2 ft-lb)
4. If no torque wrench can be used for tightening, use the
following procedure:
(1) Screw in the oil filter until its O-ring contacts the oil filter
bracket.
(2) Tighten the oil filter by giving the specified amount of turn:
Part number MD360935 filter: one turn
Other Mitsubishi Genuine filter: 3/4 turn
AKX00596
DRAIN PLUG
OIL PAN
OIL PAN
SIDE
GASKET
AB
AKX00529
BRACKET SIDE
AB
FRONT CASE AND OIL PUMP
TSB Revision
ENGINE OVERHAUL <2.4L ENGINE>
11B-46
>>N<< SEALANT APPLICATION TO OIL PRESSURE
SWITCH
CAUTION
Be careful not to block the oil passage with sealant.
1. Apply 3M
AAD Part number 8672 or equivalent to the
threads of the oil pressure switch.
2. Tighten the switch to the specified torque.
Tightening torque: 19
±
3 N
⋅
m (14
±
2 ft-lb)
INSPECTION
M1113007300034
FRONT CASE
1. Check the oil passage for clogging and clean if necessary.
2. Check the left counterbalance shaft front bearing for wear,
damage and seizure. If the bearing is damaged, replace the
front case.
3. Check the front case for cracks and other damage.
Replace cracked or damaged front case.
OIL SEAL
1. Check the oil seal lip for wear and damage. Replace the oil
seal if necessary.
2. Check the oil seal lip for deterioration. Replace the oil seal if
necessary.
COUNTERBALANCE SHAFT
1. Check the oil holes for clogging and clean if necessary.
2. Check the journal for seizure, damage and contact with
bearing. If there is anything wrong with the journal, replace
the counterbalance shaft, bearing or front case assembly if
required.
AKX00524
AKX00606
FRONT CASE AND OIL PUMP
TSB Revision
ENGINE OVERHAUL <2.4L ENGINE>
11B-47
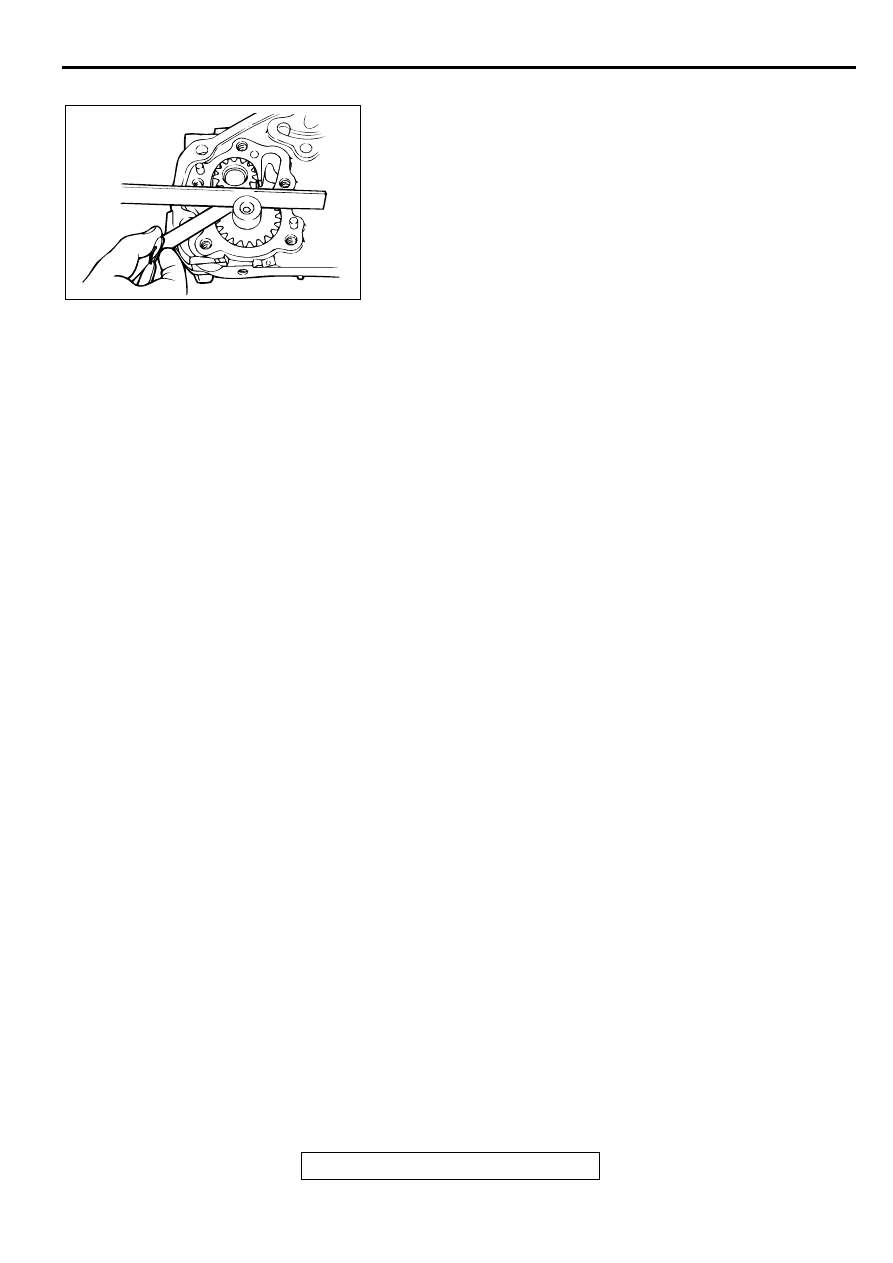
OIL PUMP
1. Assemble the oil pump gears to the front case and rotate it
to ensure smooth rotation with no looseness.
2. Ensure that there is no ridge wear on the contact surface
between the front case and the gear surface of the oil pump
cover.
3. Check the side clearance.
Standard value:
Drive gear 0.08
−
0.14 mm (0.004
−
0.006 inch)
Driven gear 0.06
−
0.12 mm (0.003
−
0.004 inch)
AKX00593
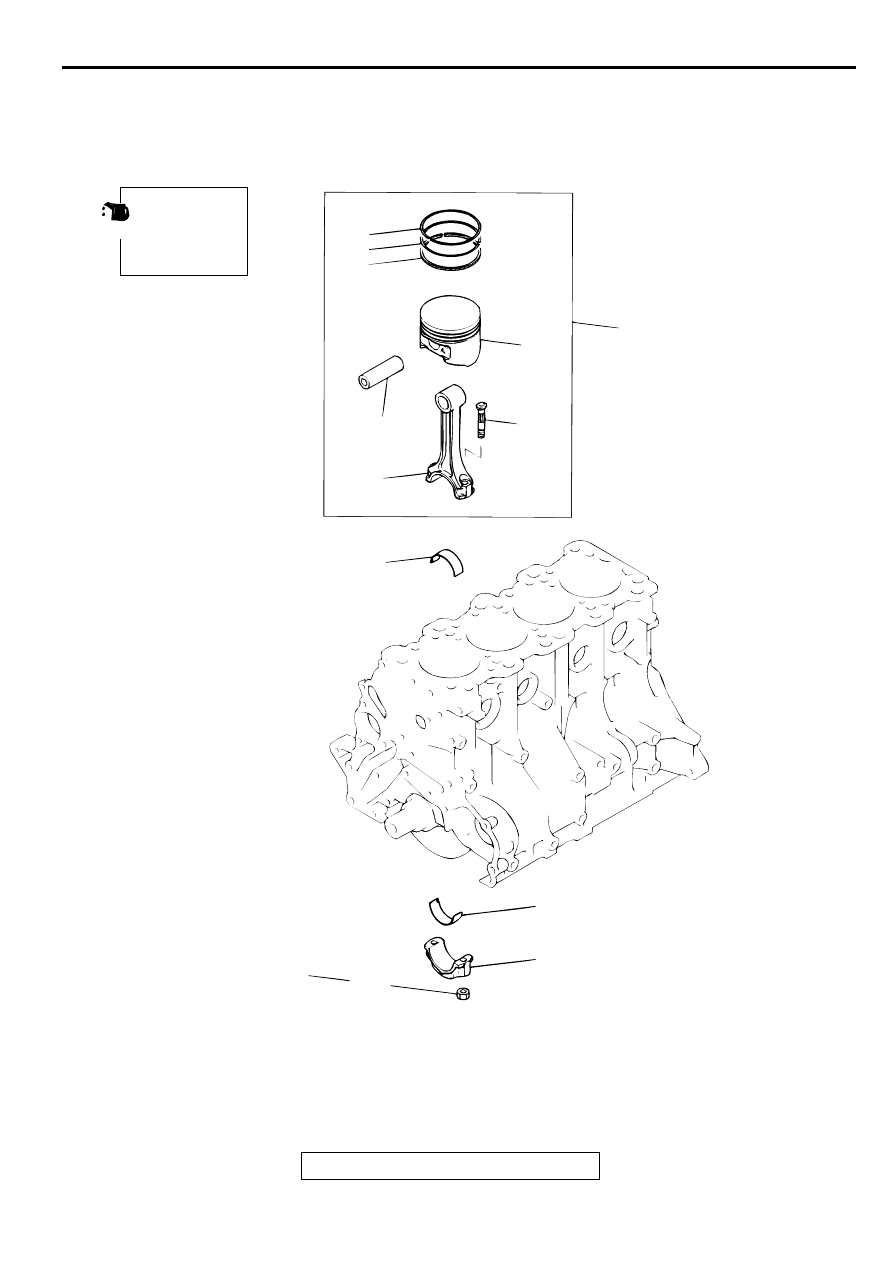
PISTON AND CONNECTING ROD
TSB Revision
ENGINE OVERHAUL <2.4L ENGINE>
11B-48
PISTO N A N D C O N N EC TIN G R O D
REMOVAL AND INSTALLATION
M1113008400056
AKX00501
APPLY ENGINE
OIL TO ALL
MOVING PARTS
BEFORE
INSTALLATION.
20 ± 2 N·m
14 ± 1 ft-lb
+ 90˚to 94˚
1
2
4
6
7
8
10
12
9
11
5
AB
3
REMOVAL STEPS
>>G<<
1. NUT
<<A>>
>>F<<
2. CONNECTING ROD CAP
>>D<<
3. CONNECTING ROD BEARING
>>E<<
4. PISTON AND CONNECTING ROD
ASSEMBLY
>>D<<
5. CONNECTING ROD BEARING
>>C<<
6. PISTON RING No. 1
>>C<<
7. PISTON RING No. 2
>>B<<
8. OIL RING
<<B>>
>>A<<
9. PISTON PIN
REMOVAL STEPS (Continued)
Нет комментариевНе стесняйтесь поделиться с нами вашим ценным мнением.
Текст