Mitsubishi Eclipse / Eclipse Spyder (2000-2002). Service and repair manual — part 656
GARNISHES AND MOULDINGS
TSB Revision
EXTERIOR
51-11
REMOVAL SERVICE POINTS
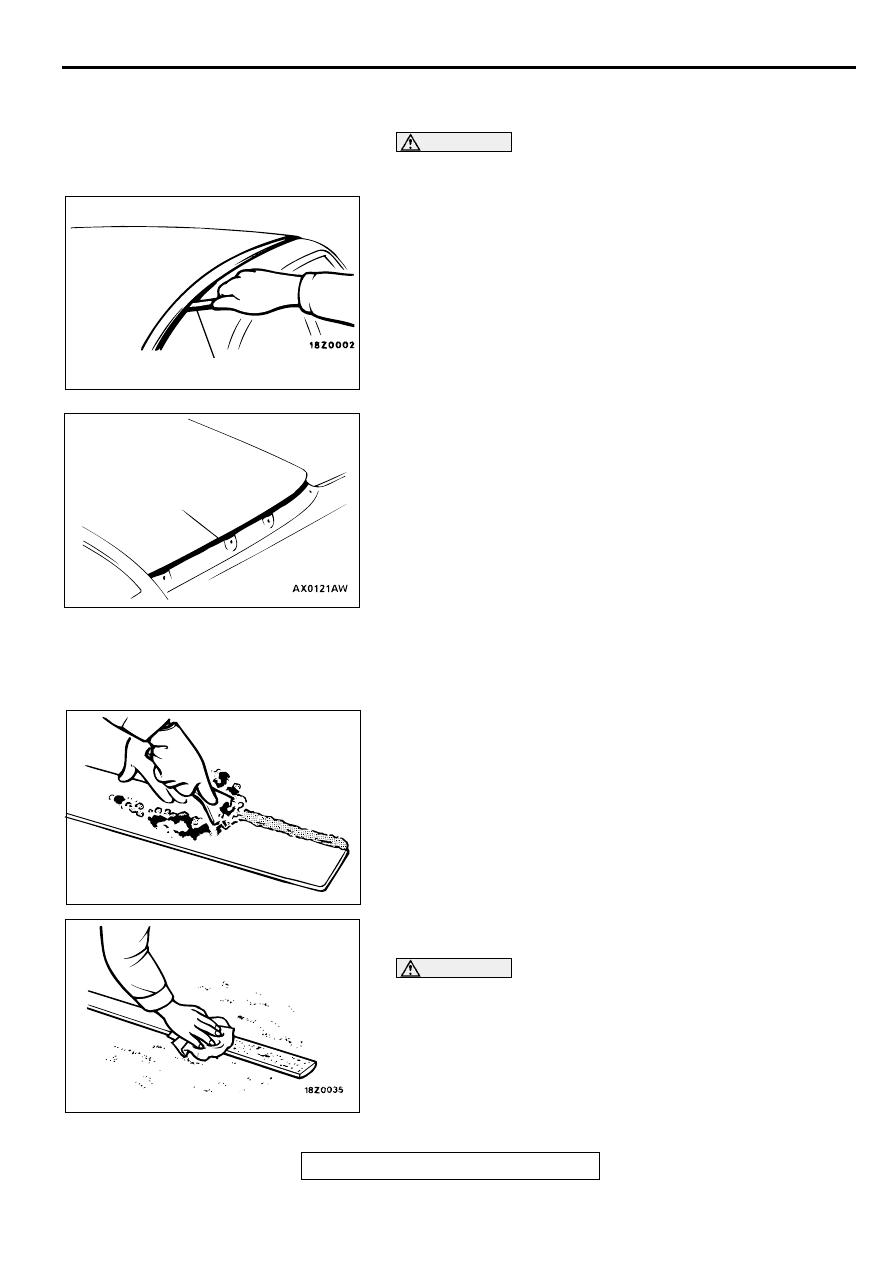
<<A>> ROOF DRIP MOLDING REMOVAL
CAUTION
If the molding has become warped, it should not be
reused.
Use special tool MB990449 to lever out the molding.
<<B>> REAR PILLAR GARNISH REMOVAL
1. Use a resin spatula to scrape off the double-sided tape.
2. Wipe the body surface and clean it with a shop towel
moistened with isopropyl alcohol.
INSTALLATION SERVICE POINTS
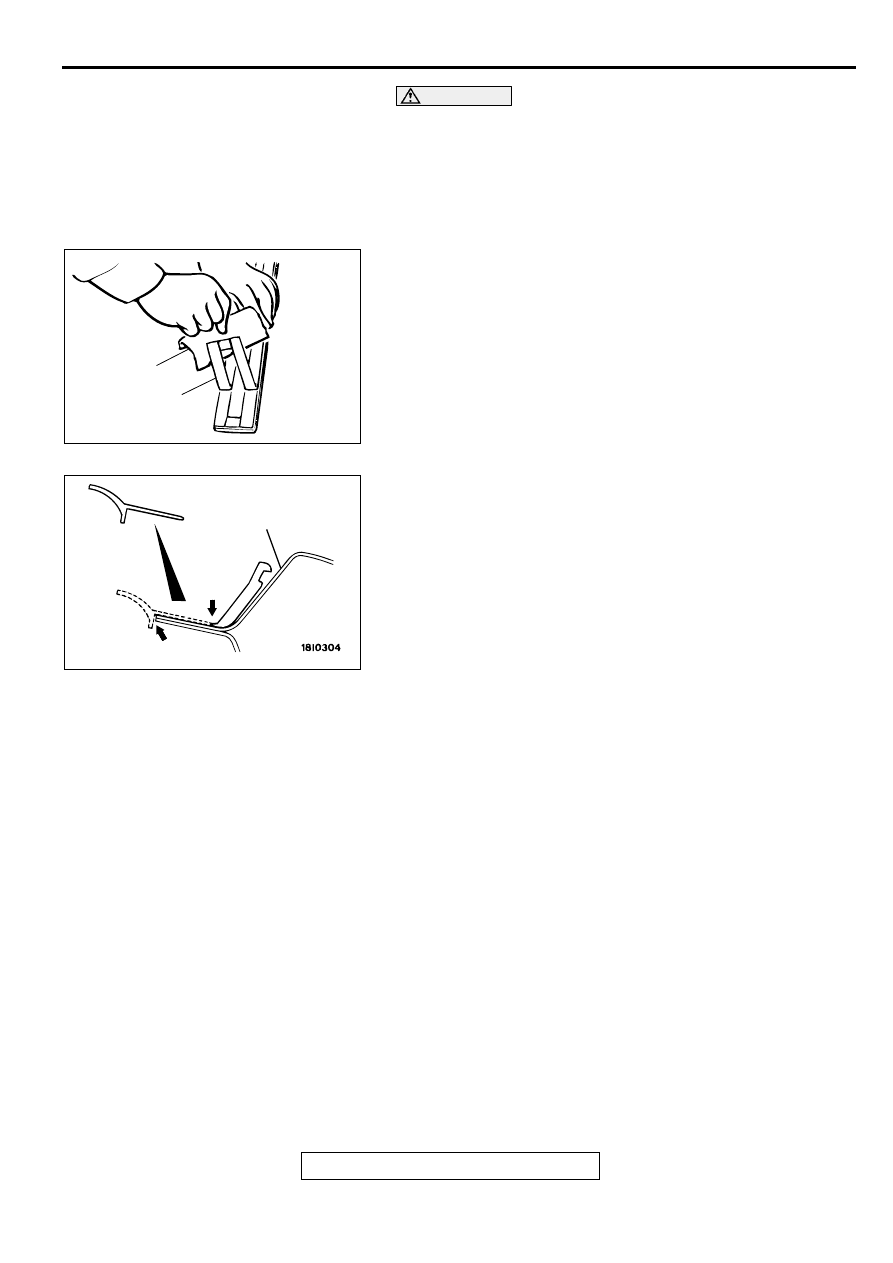
>>A<< REAR PILLAR GARNISH INSTALLATION
Double-sided tape affixing to the garnish (When reusing)
1. Scrape off the double-sided tape with a resin spatula or
gasket scraper.
2. Use a shop towel moistened with 3M
AAD Part number
8906 or equivalent to wipe the rear piller garnish surface.
CAUTION
Do not remove all of the residual adhesive.
3. Remove only a small portion of the residual adhesive.
AC003626AB
MB990449
AC003627
DOUBLE-SIDE TAPE
AB
AC000422
AC003628
GARNISHES AND MOULDINGS
TSB Revision
EXTERIOR
51-12
CAUTION
•
Always apply it evenly on the entire surface, because a
lot or little will reduce its strength.
•
Do not touch the painted surface.
4. Affix the specified double-sided tape [3 mm (0.1 inch) wide
and 5 mm (0.2 inch) thick].
REAR PILLAR GARNISH INSTALLATION.
1. Tear off the double-sided tape backing paper.
NOTE: If you attach the adhesive tape to the edge of the
backing paper, if will be easy to tear off.
2. Install the rear pillar garnish.
NOTE: If the double-sided tape is difficult to affix in cold
temperature, etc., warm the bonding surfaces of the body
and rear pillar garnish to about 40 - 60
°
C (104 - 140
°
F)
before affixing the tape.
3. Firmly press in the rear pillar garnish.
>>B<< ROOF DRIP MOLDING INSTALLATION
After installing the clip to the outer front pillar in alignment with
its section A, cut from section B.
AC000423AB
ADHESIVE TAPE
BACKING PAPER
AC003629
FRONT PILLAR
OUTER
SECTION
B
SECTION A
AB
AERO PARTS
TSB Revision
EXTERIOR
51-13
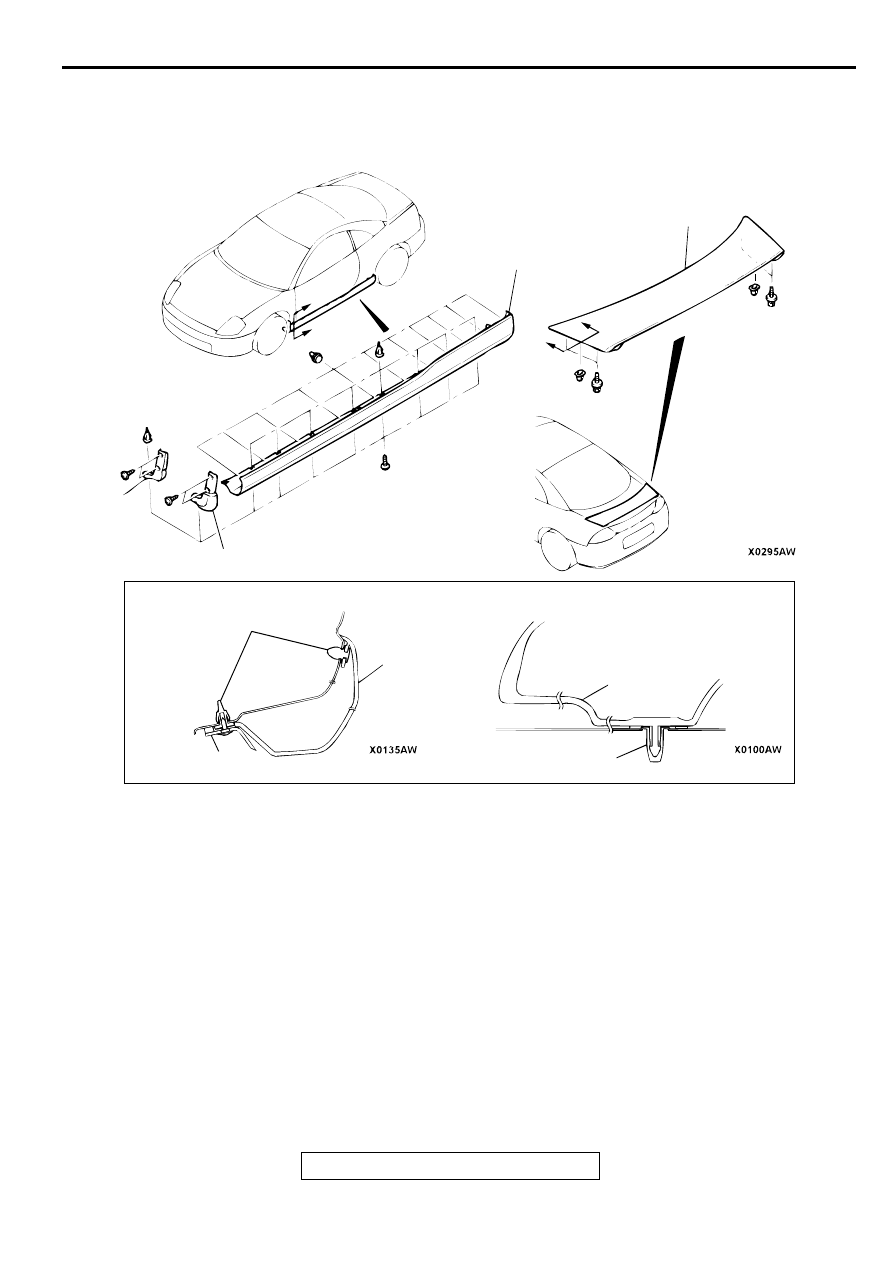
A ER O PA R TS
REMOVAL AND INSTALLATION
M1511005000039
REMOVAL STEPS
1. STONE GUARD <VEHICLES
WITHOUT SIDE AIR DAM>
2. FRONT SIDE AIR DAM
3. REAR SIDE AIR DAM
4. REAR SPOILER
AC003621
SECTION A – A
SECTION B – B
A
A
B
B
1
2
3
4
2
3
4
CLIP
CLIP
AB
WINDSHIELD WIPER AND WASHER
TSB Revision
EXTERIOR
51-14
W IN D SH IELD W IPER A N D WA SH ER
GENERAL DESCRIPTION
M1511000100116
OPERATION
Windshield Low-speed (and High-speed) Wiper
Operation
•
If the wiper switch is turned to the "LO" position
with the ignition switch at the "ACC" or "ON"
position, the column switch sends a low-speed
wiper ON and high-speed wiper OFF signals to
the front-ECU. This turns the wiper signal on and
the wiper speed switching relay off (low-speed),
causing the wipers to operate at low-speed.
•
If the wiper switch is turned to the "HI" position,
the column switch sends a low-speed wiper OFF
and high-speed wiper ON signals to the front-
ECU. This turns both the wiper signal and the
wiper speed switching relay on (high-speed),
causing the wipers to operate at high-speed.
Windshield Intermittent Wiper Operation
•
The ETACS-ECU calculates the wiper operation
interval according to the voltage signal sent from
the column switch. Then the ETACS-ECU sends
a signal to the front-ECU. The front-ECU
determines the wiper operation interval and turns
on the wiper relay signal. This causes the wiper
auto stop relay to turn on. Then the wiper auto
stop relay will turn off after the wipers reach the
park position. This causes the wiper signal relay
and then the wipers to turn off. If the wiper signal
relay remains off for the wiper operation interval,
the relay turns on again, causing the wipers to
operate in intermittent mode.
Windshield Mist Wiper Operation
•
If the wiper switch is turned to the "MIST" position
with the ignition switch at "ACC" or "ON" position,
the mist wiper high-speed operation signal is sent
to the front-ECU. This signal turns on the wiper
speed switching relay, causing the wipers to work
at high-speed while the mist switch is on.
•
While the mist wiper switch remains turned on
when the intermittent mode is still working, the
wipers work as the mist wiper. However, the
wipers return to the intermittent mode again when
the wiper auto stop signal turns on after the mist
wiper switch is turned off.
Windshield Washer Operation
•
If the wiper switch is turned to the "WASHER"
position with the ignition switch at "ACC" or "ON"
position, the washer ON signal is sent to the
front-ECU, causing the wiper signal to turn on
after 0.6 seconds. After the washer switch signal
turns off, the wiper signal turns off in three
seconds. If the wiper switch is turned the
"WASHER" position while the wiper is at
intermittent mode, the washer works for that
period when the washer switch remains on. Then
the wipers return to the intermittent mode.
WINDSHIELD WIPER AND WASHER DIAGNOSIS
M1511000700099
The windshield wiper and washer are controlled by
ETACS-ECU. For troubleshooting, refer to GROUP
54B, SWS Diagnosis.
Нет комментариевНе стесняйтесь поделиться с нами вашим ценным мнением.
Текст