Mitsubishi Eclipse / Eclipse Spyder (2000-2002). Service and repair manual — part 414
TRANSAXLE (TRANSMISSION)
TSB Revision
MANUAL TRANSAXLE OVERHAUL
22B-19
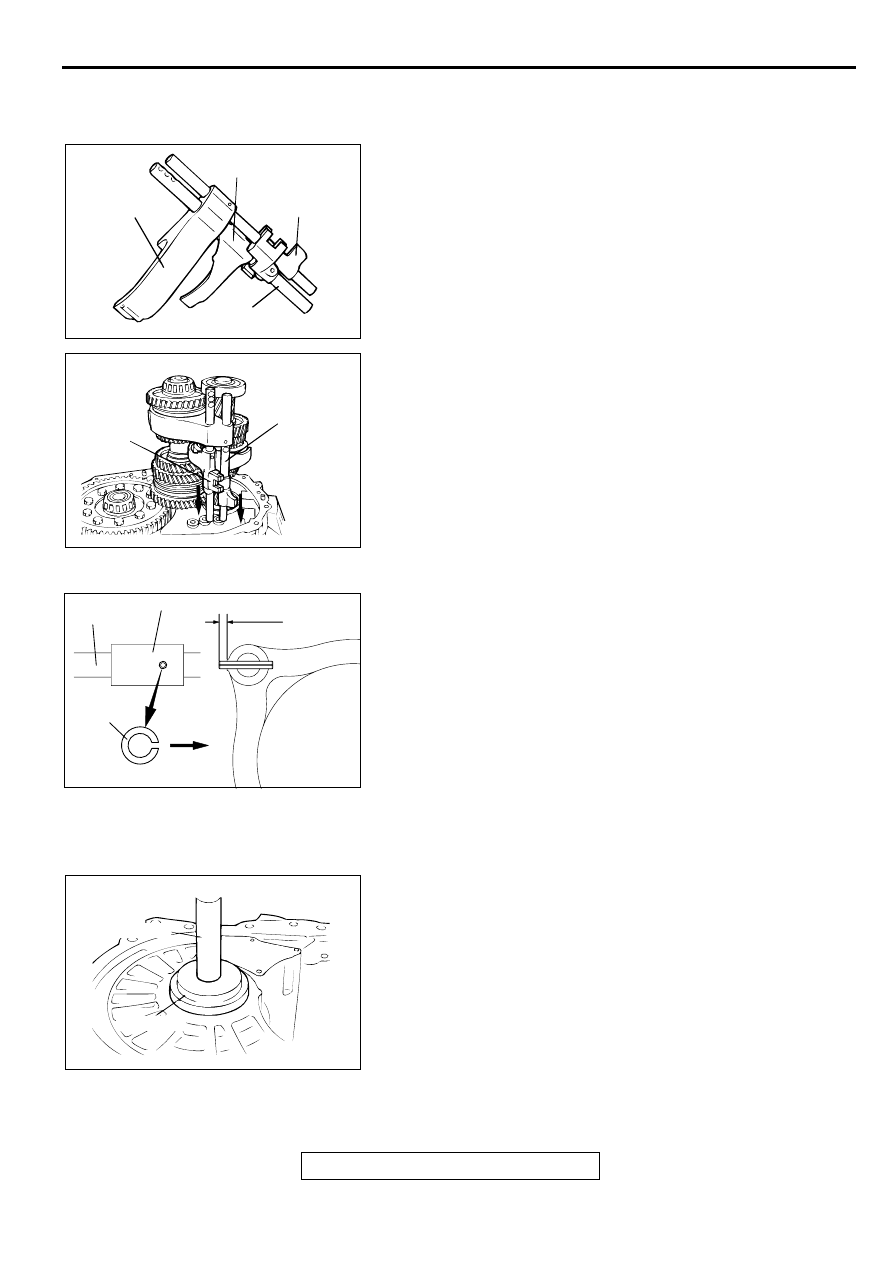
>>D<< 5TH-REVERSE SPEED SHIFT FORK/5TH-REVERSE
SPEED SHIFT RAIL/3RD-4TH SPEED SHIFT FORK/3RD-
4TH SPEED SHIFT RAIL INSTALLATION
1. Assemble the 3rd-4th speed shift rail and fork, and 5th-
reverse speed shift rail and fork.
2. Fit each shift fork in the groove of synchronizer sleeve and
install the shift fork and rail assembly.
3. Insert the 3rd-4th speed shift rail and 5th speed-reverse shift
rail into the rail hole in the clutch housing.
>>E<< SPRING PIN INSTALLATION
1. Align the pin holes in the shift rail and shift fork.
2. Insert the new spring pin. Push it in so that the slit and
center axis of the rail are aligned.
>>F<< SPACER AND OUTER RACE INSTALLATION
1. Install the spacer selected in the section "ADJUSTMENT
BEFORE ASSEMBLY."
2. Using special tools MB990935 and MB990938, press install
the outer race into the transaxle case.
AKX00884AB
3RD-4TH SPEED
SHIFT FORK
3RD-4TH SPEED
SHIFT RAIL
5TH-REVERSE
SPEED SHIFT RAIL
5TH-REVERSE
SPEED SHIFT
FORK
AKX00885
5TH-REVERSE
SPEED SHIFT
RAIL
3RD-4TH
SPEED
SHIFT RAIL
AB
AKX00920
SHIFT FORK
2.5 mm (0.098 in)
SHIFT RAIL
SPRING
PIN
AB
AKX00815AB
MB990938
MB990935
TRANSAXLE (TRANSMISSION)
TSB Revision
MANUAL TRANSAXLE OVERHAUL
22B-20
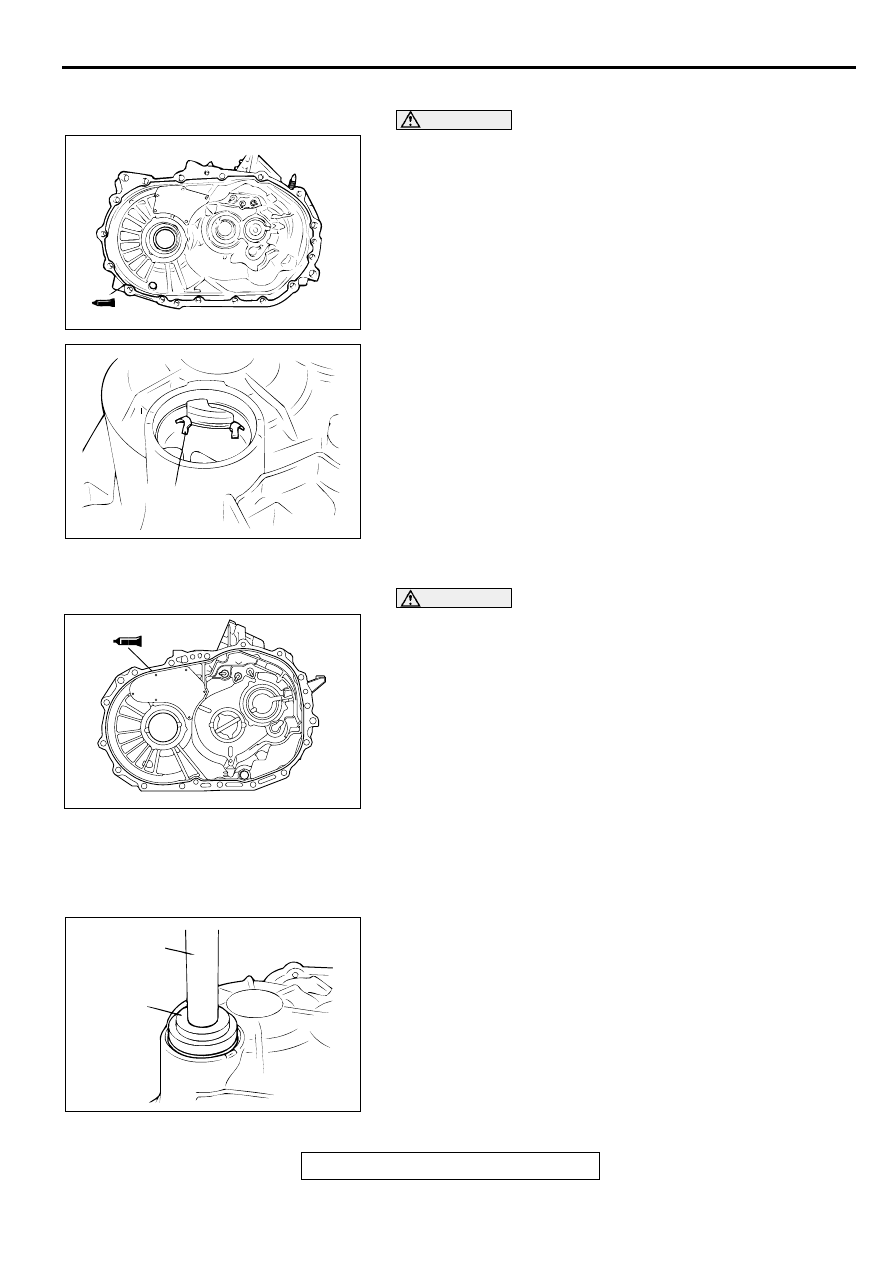
>>G<< TRANSAXLE CASE INSTALLATION
CAUTION
Squeeze out the sealant uniformly, while making sure that
it is not broken or excessively applied.
1. Apply a 2 mm (0.08 inch) diameter bead of sealant
(Mitsubishi Genuine Part number MD997740 or equivalent)
to the illustrated position of the transaxle case.
NOTE: Be sure to install the transaxle case while the
sealant is wet (within 15 minutes).
2. Install the transaxle case and expand the snap ring.
3. Tighten the transaxle case mounting bolts to the specified
torque.
Tightening torque: 44
±
5 N
⋅
m (33
±
4 ft-lb)
4. Place the transaxle upside down and let the snap ring fit in
the groove by taking advantage of the output shaft's own
weight.
NOTE: After installation, keep the sealed area away from
the oil for approximately one hour.
>>H<< TRANSAXLE CASE INSTALLATION
CAUTION
Squeeze out the sealant uniformly, while making sure that
it is not broken or excessively applied.
1. Apply a 2 mm (0.08 inch) diameter bead of sealant
(Mitsubishi Genuine Part number MD997740 or equivalent)
to the illustrated position of the transaxle case.
NOTE: Be sure to install the transaxle case while the
sealant is wet (within 15 minutes).
2. Install the transaxle case.
3. Tighten the transaxle case mounting bolts to the specified
torque.
Tightening torque: 44
±
5 N
⋅
m (33
±
4 ft-lb)
NOTE: After installation, keep the sealed area away from
the oil for approximately one hour.
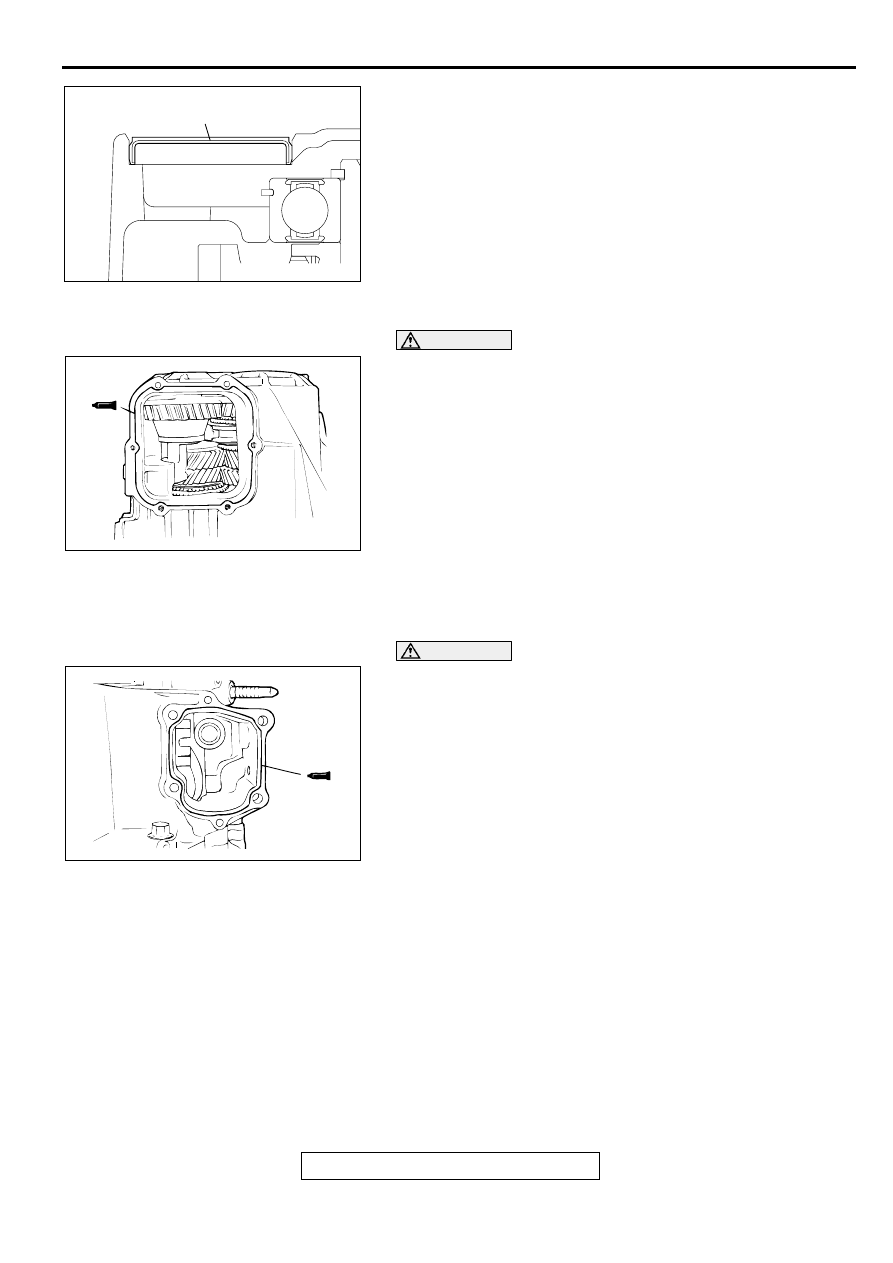
>>I<< SEALING CAP INSTALLATION
1. Using special tools MB990927 and MB990938, press install
the sealing cap onto the case.
AKX00816
AKX00810
SNAP RING
AB
AKX00886
AKX00818
MB990938
MB990927
AB
TRANSAXLE (TRANSMISSION)
TSB Revision
MANUAL TRANSAXLE OVERHAUL
22B-21
2. Evenly press the sealing cap so it is not placed at an angle.
>>J<< UNDER COVER INSTALLATION
CAUTION
Squeeze out the sealant uniformly, while making sure that
it is not broken or excessively applied.
1. Apply a 2 mm (0.08 inch) diameter bead of sealant
(Mitsubishi Genuine Part number MD997740 or equivalent)
to the illustrated position of the transaxle case.
NOTE: Be sure to install the case quickly while the sealant is
wet (within 15 minutes).
2. Install the under cover to the transaxle case and tighten the
bolts to specified torque.
Tightening torque: 7
±
1 N
⋅
m (61
±
9 in-lb)
NOTE: After installation, keep the sealed area away from
the oil for approximately one hour.
>>K<< CONTROL HOUSING INSTALLATION
CAUTION
Squeeze out the sealant uniformly, while making sure that
it is not broken or excessively applied.
1. Apply a 0.2 mm (0.08 inch) diameter bead of sealant
(Mitsubishi Genuine Part number MD997740 or equivalent)
to the illustrated position of the transaxle case.
NOTE: Be sure to install the case quickly while the sealant is
wet (within 15 minutes).
2. Install the control housing to the transaxle case and tighten
the bolts to specified torque.
Tightening torque: 19
±
3 N
⋅
m (14
±
2 ft-lb)
NOTE: After installation, keep the sealed area away from
the oil for approximately one hour.
AKX00817
SEALING CAP
AB
AKX00819
AKX00820
TRANSAXLE (TRANSMISSION)
TSB Revision
MANUAL TRANSAXLE OVERHAUL
22B-22
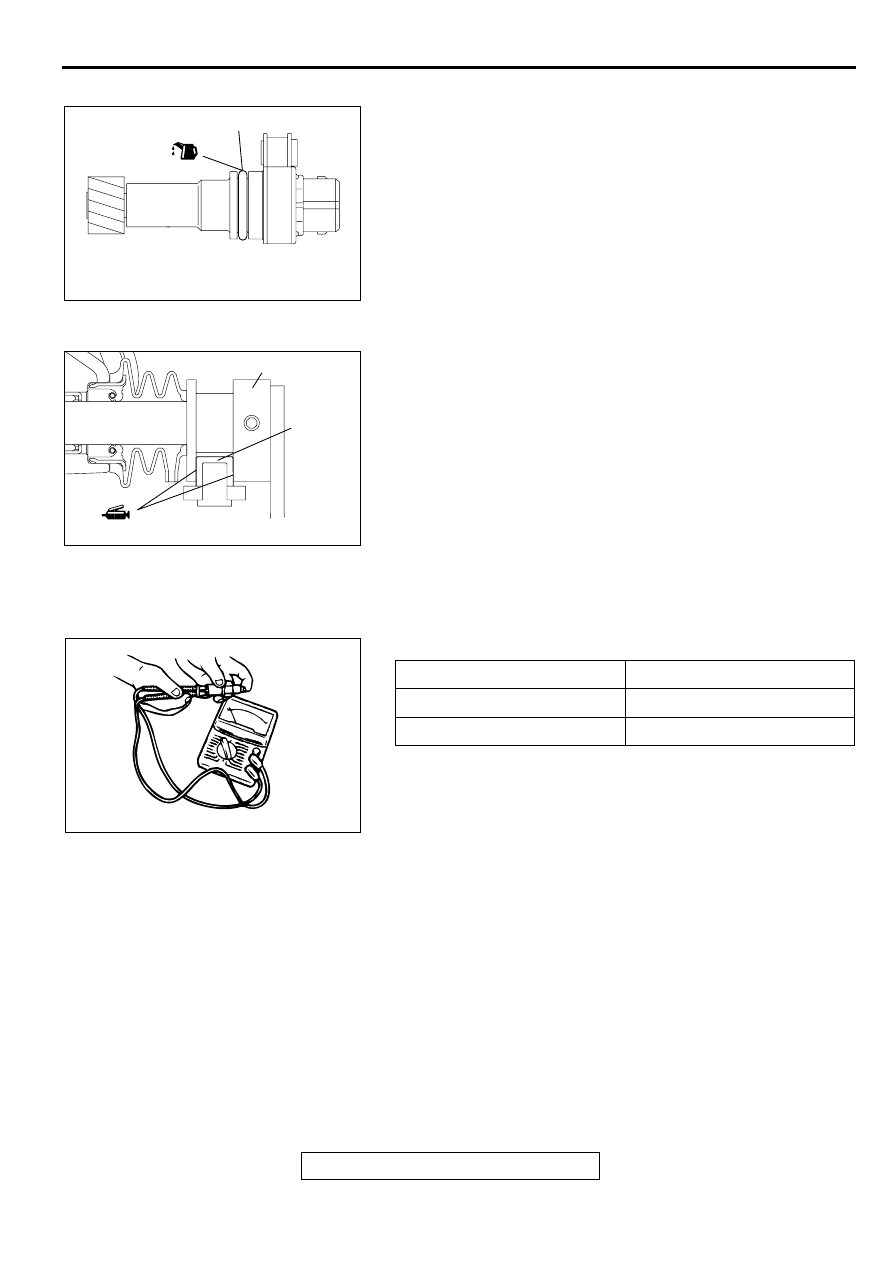
>>L<< SPEEDOMETER GEAR INSTALLATION
1. Apply gear oil (Hypoid gear oil SAE 75W-90 or 75W-85W
conforming to API classification GL-4) to the O-ring of the
speedometer gear.
2. Tighten the bolt to specified torque.
Tightening torque: 4
±
1 N
⋅
m (35
±
9 in-lb)
>>M<< SELECT LEVER INSTALLATION
1. Apply grease (Mitsubishi Genuine Part number 0101011 or
equivalent) to the control shaft sliding portion of the select
lever shoe.
2. Install the select lever and tighten the bolts to specified
torque.
Tightening torque: 19
±
3 N
⋅
m (14
±
2 ft-lb)
INSPECTION
M1222001100026
BACKUP LIGHT SWITCH
Check for continuity between terminals.
AKX00821
O-RING
AB
AKX00822
CONTROL SHAFT
SELECT
LEVER
SHOE
AB
SWITCH CONDITION
CONTINUITY
Pressed
Open
Released
Conductive
AKX00952
Нет комментариевНе стесняйтесь поделиться с нами вашим ценным мнением.
Текст