Mitsubishi Eclipse / Eclipse Spyder (2000-2002). Service and repair manual — part 53
CAMSHAFT AND CAMSHAFT OIL SEAL
TSB Revision
ENGINE MECHANICAL <3.0L ENGINE>
11C-21
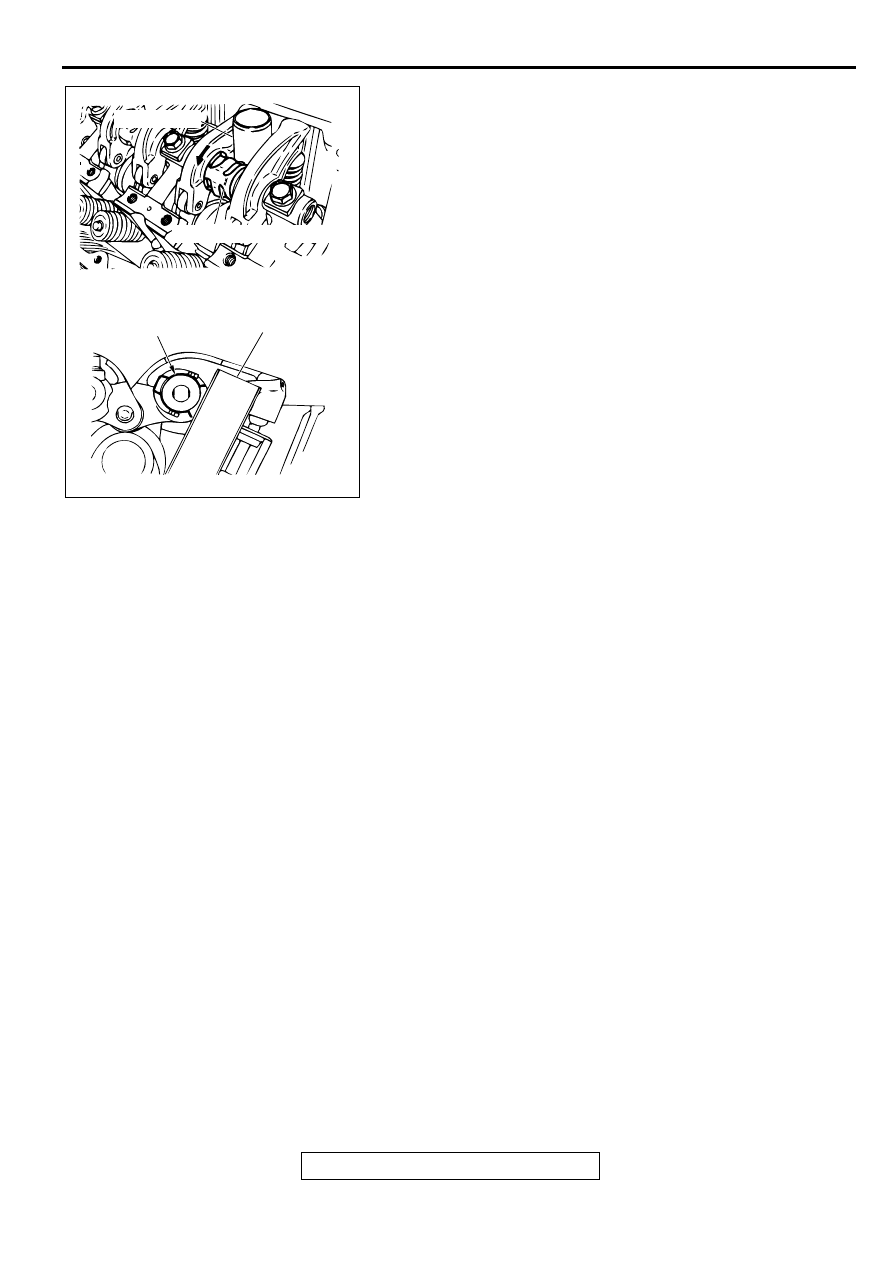
3. Position the rocker shaft spring so that it takes a right angle
against the plug guide.
NOTE: Set the rocker shaft spring before installing the
rocker arm and shaft assembly on the exhaust side.
4. Tighten the rocker arm and shaft assembly mounting bolts to
the specified torque.
Tightening torque: 31
±
3 N
⋅
m (23
±
2 ft-lb)
5. Remove special tool MD998443.
ACX00378
PLUG GUIDE
ROCKER SHAFT SPRING
ROCKER SHAFT
SPRING
PLUG GUIDE
AB
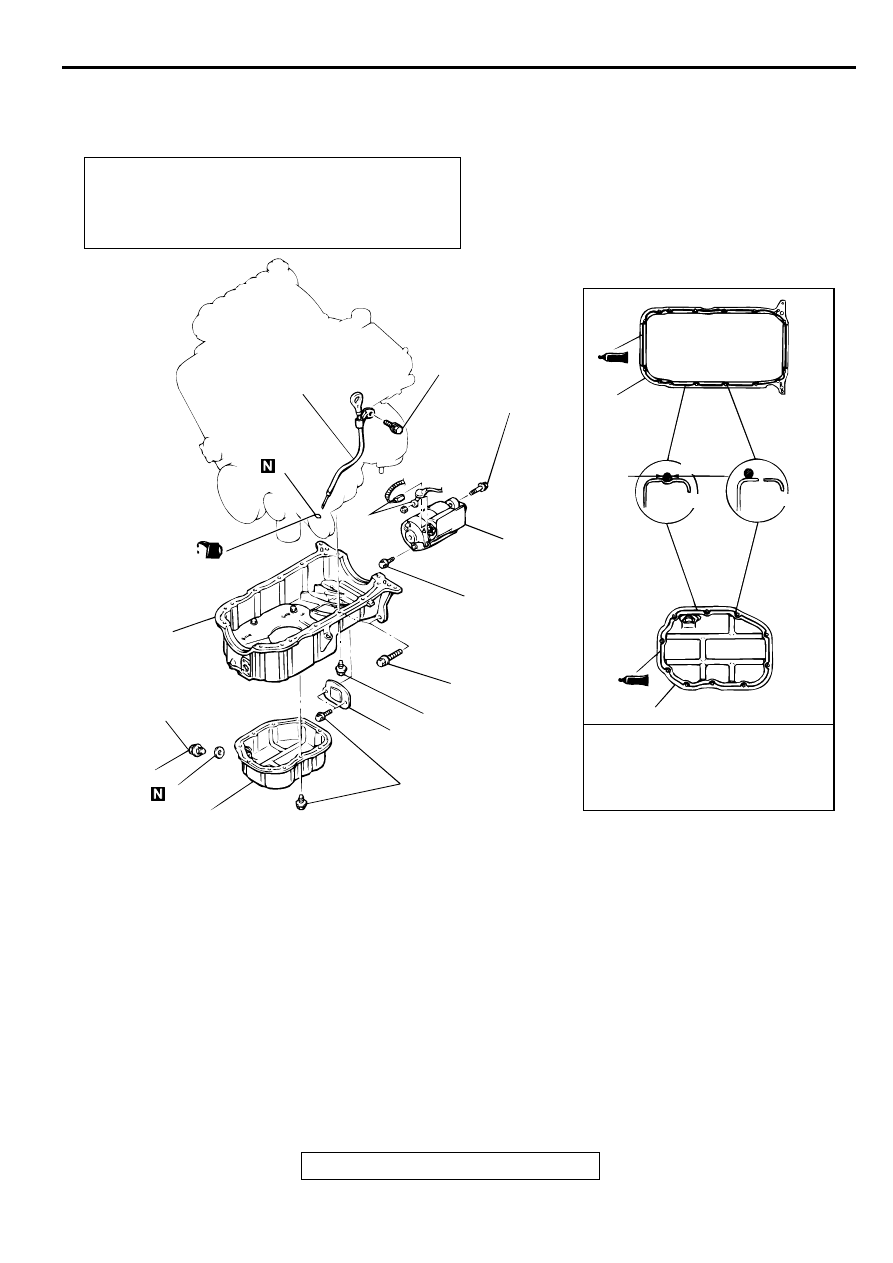
OIL PAN
TSB Revision
ENGINE MECHANICAL <3.0L ENGINE>
11C-22
O IL PA N
REMOVAL AND INSTALLATION
M1112002800105
Pre-removal and Post-installation operation
•
Engine Oil Draining and Refilling (Refer to GROUP 12,
On-vehicle Service
−
Engine Oil Replacement
.)
•
Front Exhaust Pipe Removal and Installation (Refer to
GROUP 15, Exhaust Pipe and Main Muffler
.)
AC001723 AB
48 ± 6 N·m
36 ± 4 ft-lb
30 ± 3 N·m
23 ± 2 ft-lb
30 ± 3 N·m
23 ± 2 ft-lb
35 ± 6 N·m
26 ± 4 ft-lb
5.9 ± 1.0 N·m
52 ± 9 in-lb
11 ± 1 N·m
96 ± 8 in-lb
39 ± 5 N·m
29 ± 4 ft-lb
1
2
3
4
5
6
7
8
9
7
9
SEALANT:
MITSUBISHI GENUINE PART
NO. MD970389 OR
EQUIVALENT
(ENGINE OIL)
GROOVE
BOLT HOLE
Ø 4 mm
(0.2 in)
LOWER OIL PAN REMOVAL
STEPS
1.
DRAIN PLUG
>>C<<
2.
DRAIN PLUG GASKET
<<A>>
>>B<<
7.
LOWER OIL PAN
UPPER OIL PAN REMOVAL
STEPS
1.
DRAIN PLUG
>>C<<
2.
DRAIN PLUG GASKET
3.
STARTER CONNECTOR
4.
STARTER
5.
OIL DIPSTICK AND DIPSTICK
GUIDE
6.
O-RING
<<A>>
>>B<<
7.
LOWER OIL PAN
8.
COVER
<<B>>
>>A<<
9.
UPPER OIL PAN
UPPER OIL PAN REMOVAL
STEPS (Continued)
OIL PAN
TSB Revision
ENGINE MECHANICAL <3.0L ENGINE>
11C-23
REMOVAL SERVICE POINTS
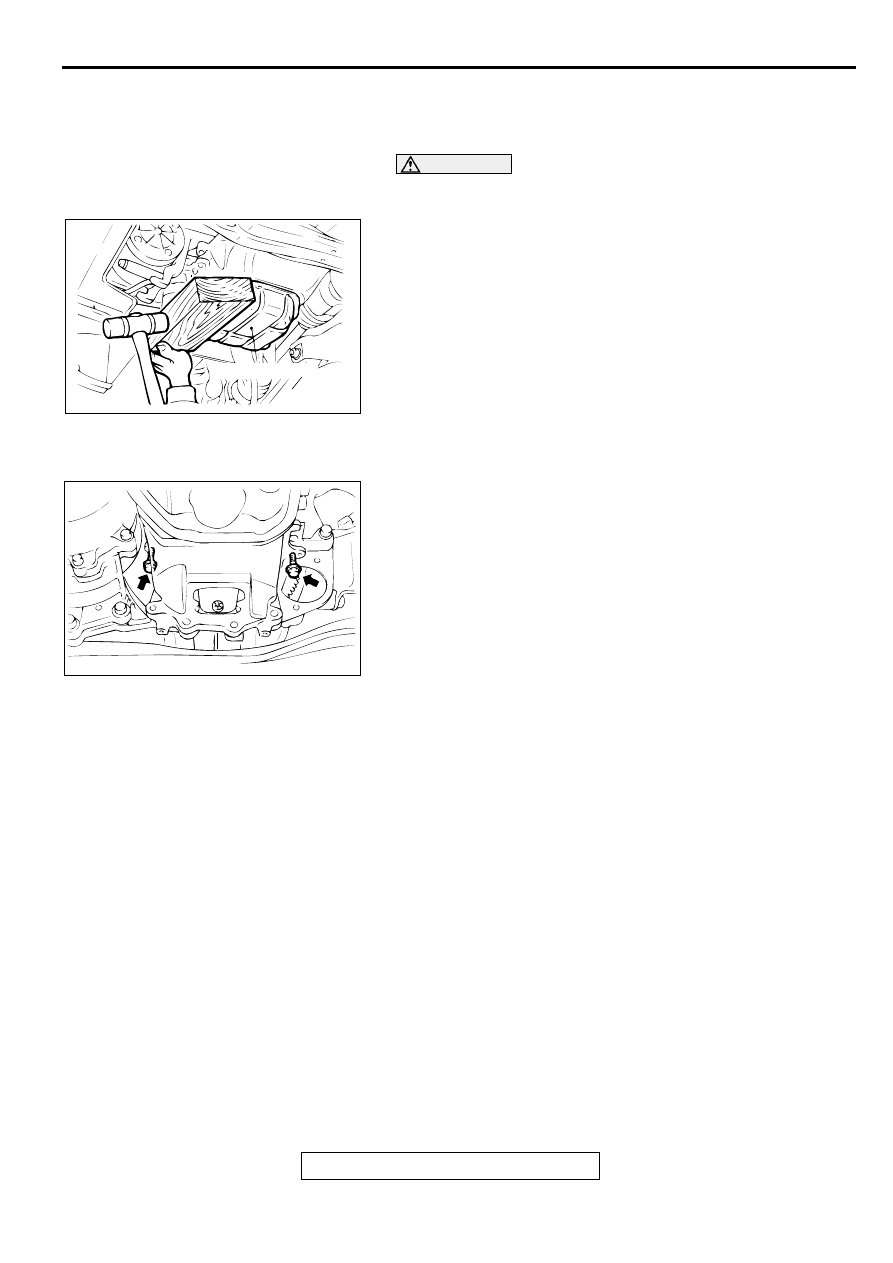
<<A>> LOWER OIL PAN REMOVAL
1. Remove the oil pan, lower mounting bolts.
CAUTION
Do not use the oil pan remover (MD998727). It will damage
the upper oil pan.
2. Place a wooden block against the lower oil pan as shown in
the illustration and remove by tapping with a hammer.
<<B>> UPPER OIL PAN REMOVAL
1. Remove the upper oil pan mounting bolts.
2. Screw the bolts (M10) securing the upper oil pan to the
transaxle assembly in the illustrated bolt holes, then remove
the upper oil pan.
AC001724
LOWER OIL PAN
AB
AC001725
OIL PAN
TSB Revision
ENGINE MECHANICAL <3.0L ENGINE>
11C-24
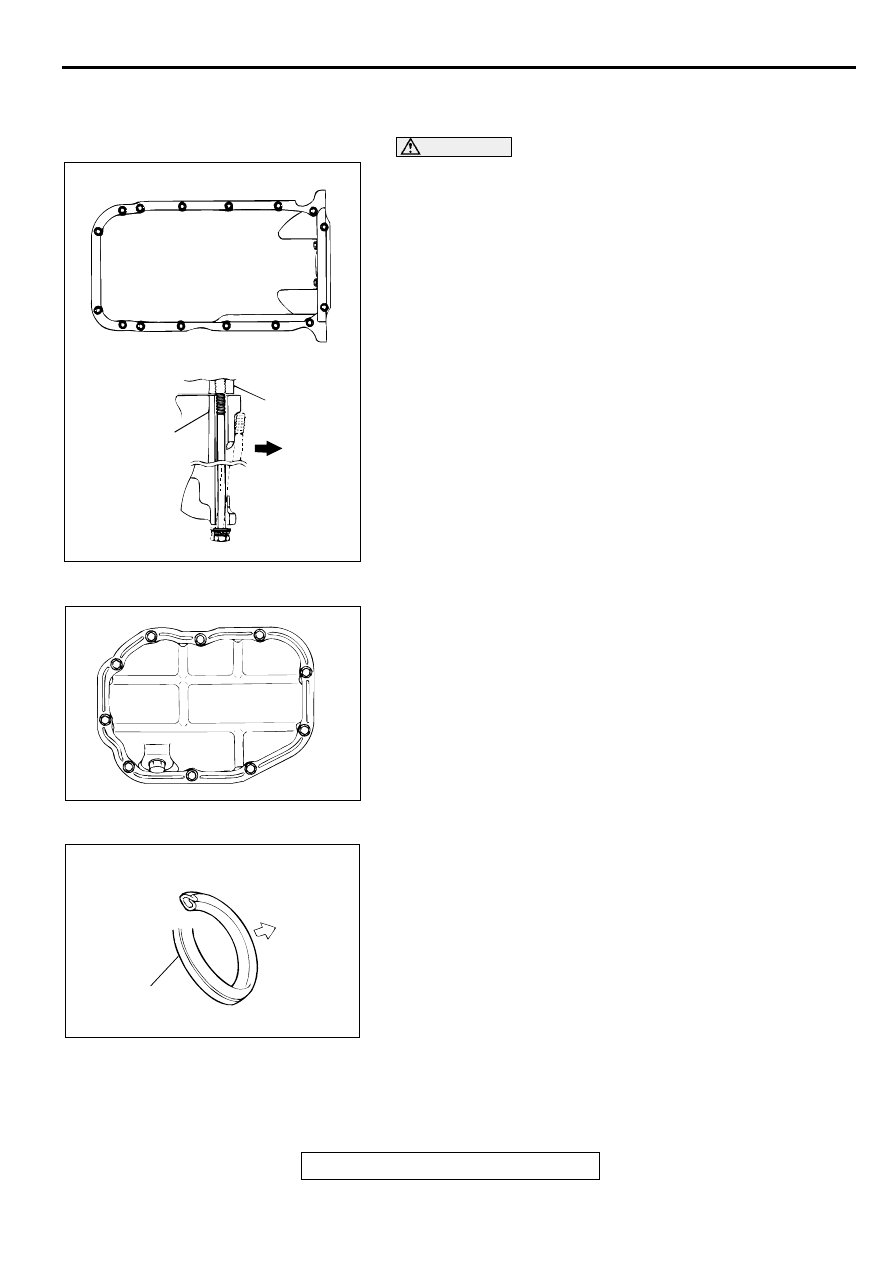
INSTALLATION SERVICE POINTS
>>A<< UPPER OIL PAN INSTALLATION
CAUTION
The bolt holes for bolts 13 and 14 in the illustration are cut
away on the transaxle side. Be careful not to insert these
bolts at an angle.
Tighten the oil pan, upper mounting bolts in the order shown.
>>B<< LOWER OIL PAN INSTALLATION
Tighten the lower oil pan mounting bolts in the order shown.
>>C<< DRAIN PLUG GASKET INSTALLATION
Replace the gasket with a new gasket. Install the new gasket in
the direction shown in the illustration.
AC001726AB
1
4
8
5
12
9
2
3
7
11
6
10
16
15
13
14
UPPER OIL PAN
REAR OIL
SEAL CASE
TRANSAXLE
SIDE
AC001727
1
2
3
4
5
6
7
8
9
10
AB
ACX00364
DRAIN PLUG
GASKET
OIL PAN
SIDE
AB
Нет комментариевНе стесняйтесь поделиться с нами вашим ценным мнением.
Текст