Mitsubishi Eclipse / Eclipse Spyder (2000-2002). Service and repair manual — part 68
OIL PAN AND OIL PUMP
TSB Revision
ENGINE OVERHAUL <3.0L ENGINE>
11D-43
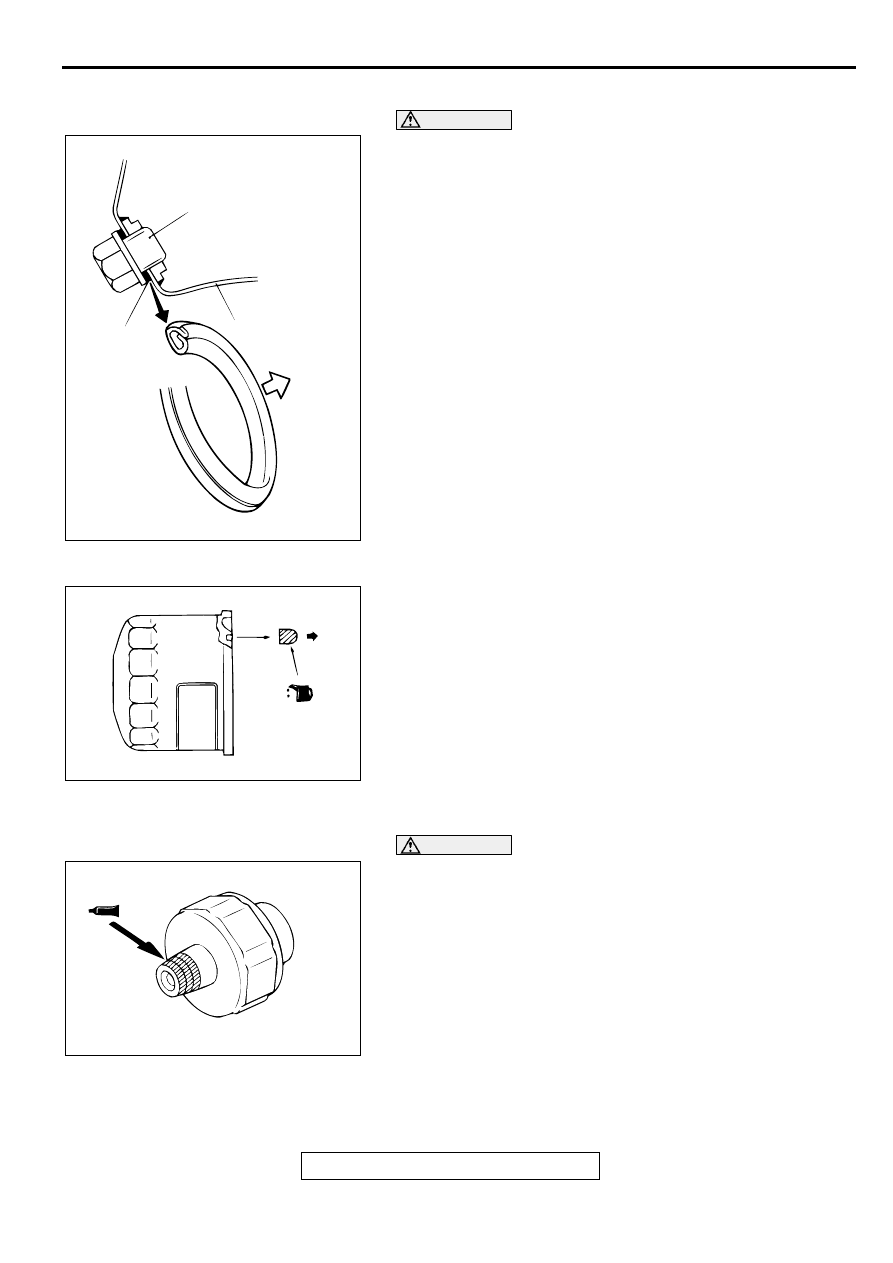
>>F<< DRAIN PLUG GASKET INSTALLATION
CAUTION
If the gasket is installed in the wrong direction, oil leaks
will be occurred.
Install the drain plug gasket in the direction shown.
>>G<< OIL FILTER INSTALLATION
1. Clean the installation surface of the filter bracket.
2. Apply engine oil to the O-ring of the oil filter.
3. Install the oil filter to the bracket and tighten it to the
specified torque.
Tightening torque: 14
±
2 N
⋅
m (122
±
17 in-lb)
4. If no torque wrench can be used for tightening, follow the
following procedure.
(1) Screw in the oil filter until its O-ring contacts the oil filter
bracket.
(2) Tighten the oil filter 3/4 turn.
>>H<< OIL PRESSURE SWITCH INSTALLATION
CAUTION
Be careful not to block the oil passage with sealant.
1. Apply 3M
AAD Part number 8672 or equivalent to the
thread of oil pressure switch.
2. Tighten the switch to the specified torque.
Tightening torque: 10
±
2 N
⋅
m (87
±
17 in-lb)
AKX00726
DRAIN PLUG
OIL
PAN
SIDE
GASKET
OIL PAN
AB
AKX00692
BRACKET
SIDE
AB
AKX00688
OIL PAN AND OIL PUMP
TSB Revision
ENGINE OVERHAUL <3.0L ENGINE>
11D-44
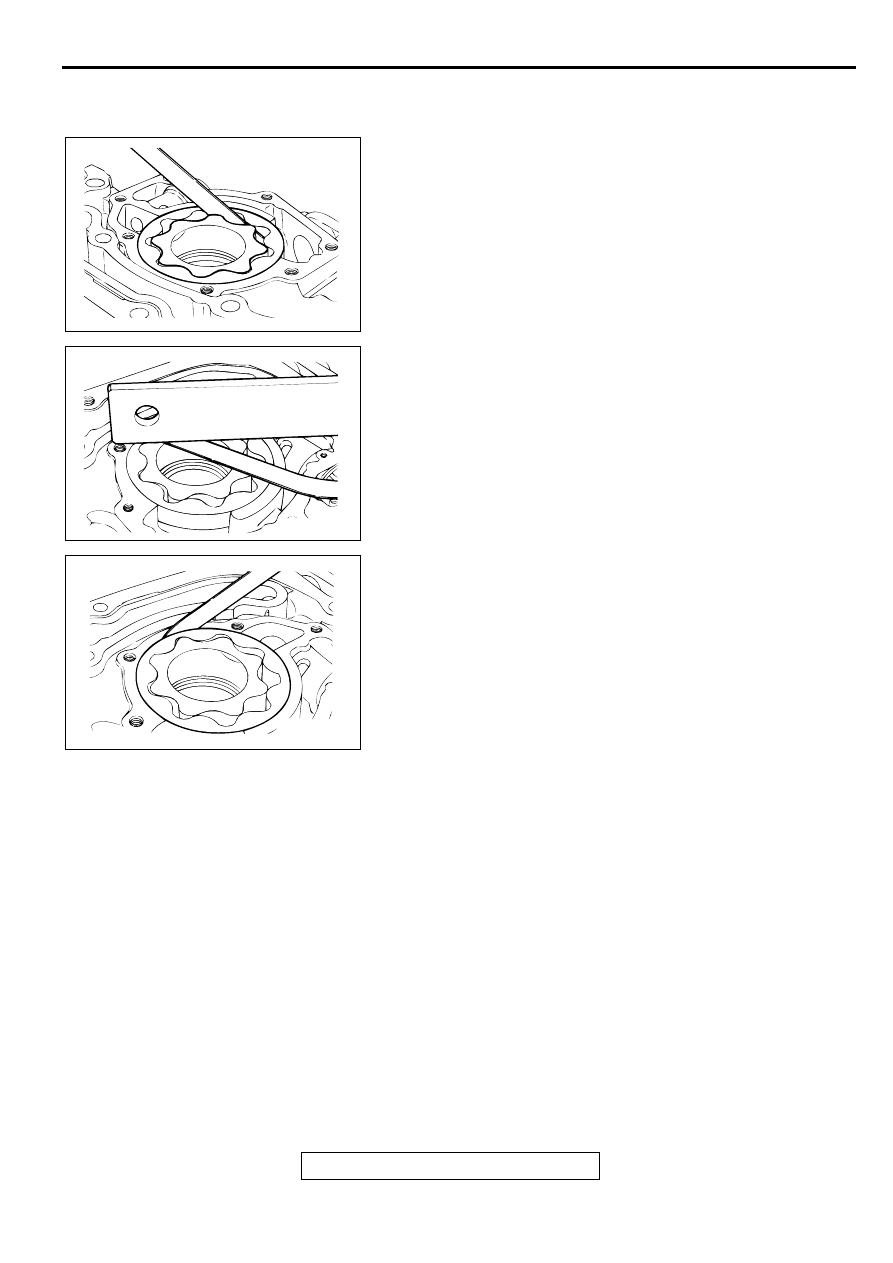
INSPECTION
M1113008200030
OIL PUMP
1. Check the tip clearance.
Standard value: 0.06
−
0.18 mm (0.003
−
0.007 inch)
2. Check the side clearance.
Standard value: 0.04
−
0.10 mm (0.002
−
0.003 inch)
3. Check the body clearance.
Standard value: 0.10
−
0.18 mm (0.004
−
0.007 inch)
Limit: 0.35 mm (0.013 inch)
AKX00743
AKX00744
AKX00745
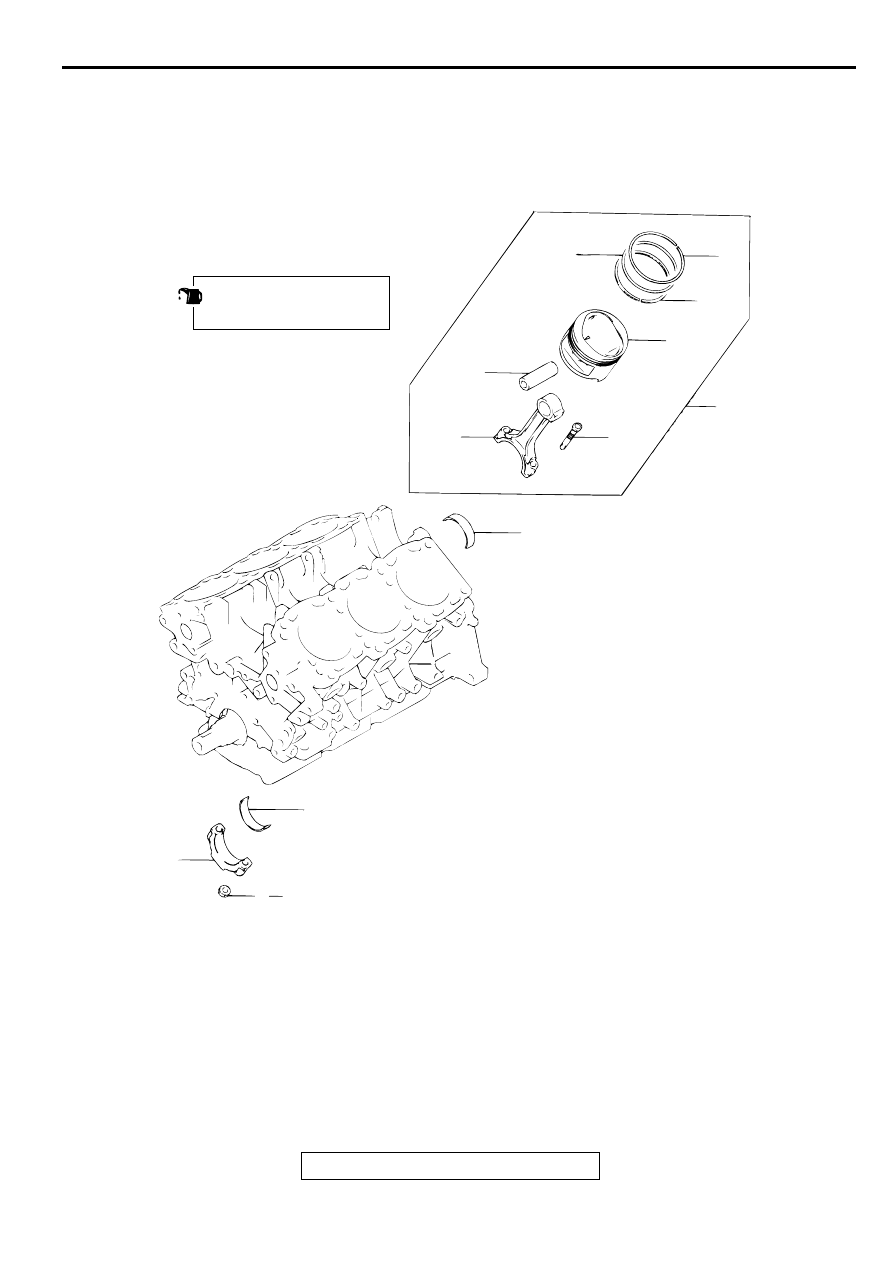
PISTON AND CONNECTING ROD
TSB Revision
ENGINE OVERHAUL <3.0L ENGINE>
11D-45
PISTO N A N D C O N N EC TIN G R O D
REMOVAL AND INSTALLATION
M1113008400045
AKX00729
7
9
4
5
3
2
1
6
8
10
12
11
51 ± 1 N·m
38 ± 1 ft-lb
AB
APPLY ENGINE OIL TO ALL
MOVING PARTS BEFORE
INSTALLATION.
REMOVAL STEPS
1. NUT
<<A>>
>>E<<
2. CONNECTING ROD CAP
3 CONNECTING ROD BEARING,
LOWER
>>D<<
4. PISTON AND CONNECTING ROD
ASSEMBLY
5. CONNECTING ROD BEARING,
UPPER
>>C<<
6. PISTON RING NO.1
>>C<<
7. PISTON RING NO.2
>>B<<
8. OIL RING
<<B>>
>>A<<
9. PISTON PIN
10.PISTON
11. CONNECTING ROD
12.BOLT
REMOVAL STEPS (Continued)
PISTON AND CONNECTING ROD
TSB Revision
ENGINE OVERHAUL <3.0L ENGINE>
11D-46
Required Special Tool:
MIT216941: Piston Pin Setting Tool
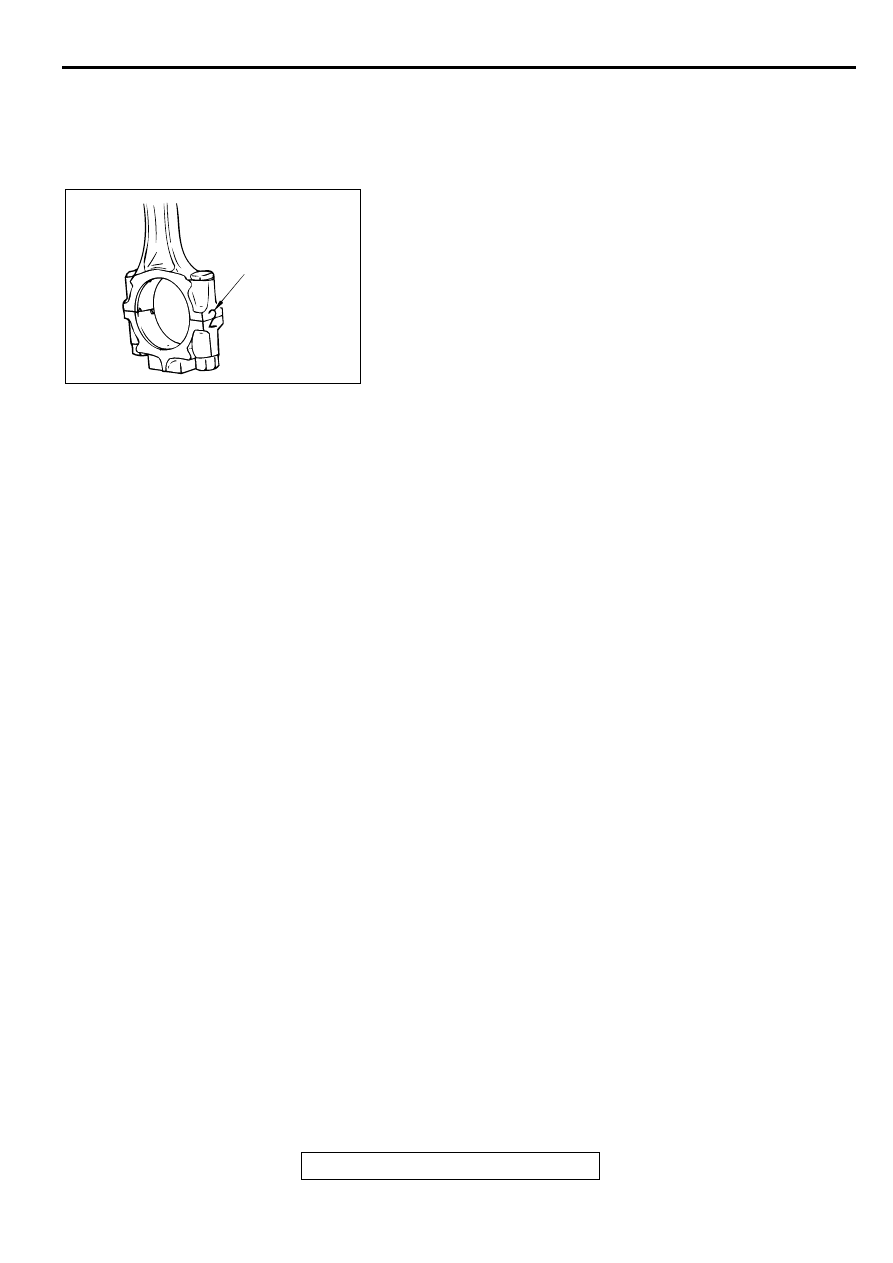
REMOVAL SERVICE POINTS
<<A>> CONNECTING ROD CAP REMOVAL
1. Mark the cylinder number on the side of the connecting rod
big end for correct reassembly.
2. Keep the removed connecting rods, caps, and bearings in
order according to the cylinder number.
AKX00734
CYLINDER
NUMBER
AB
Нет комментариевНе стесняйтесь поделиться с нами вашим ценным мнением.
Текст