Mitsubishi Colt Ralliart. Manual — part 586

FRONT BUMPER ASSEMBLY AND RADIATOR GRILLE
EXTERIOR
51-6
<RALLIART Version-R>
AC511769
11
AB
14
1
9
15
2
3
10
4
7
12
6
6
8
5
15
13
4
4
15
5
7
Screw
Boss
B
A
B
C
C
Double-sided tape:
Generic products
[ 18 mm width and 0.8 mm
thickness ]
View A: Double-sided tape
affixed location
Section B – B
Section C – C
Boss
Screw
Disassembly steps
1. Front bumper cover
2. Front bumper bracket A
3. Front bumper net
4. Three-diamond mark
5. Radiator grille assembly
6. Front bumper bracket B
7. RALLIART mark
8. Front bumper nut
9. Front bumper cap
10. Air dam skirt panel A
11. Front fog lamp bezel <vehicles with
fog lamp>
12. Front fog lamp <vehicles with fog
lamp>
13. Front bumper extension
14. Air dam skirt panel B
15. Front bumper face
Disassembly steps (Continued)
Main
Index
Group
TOC
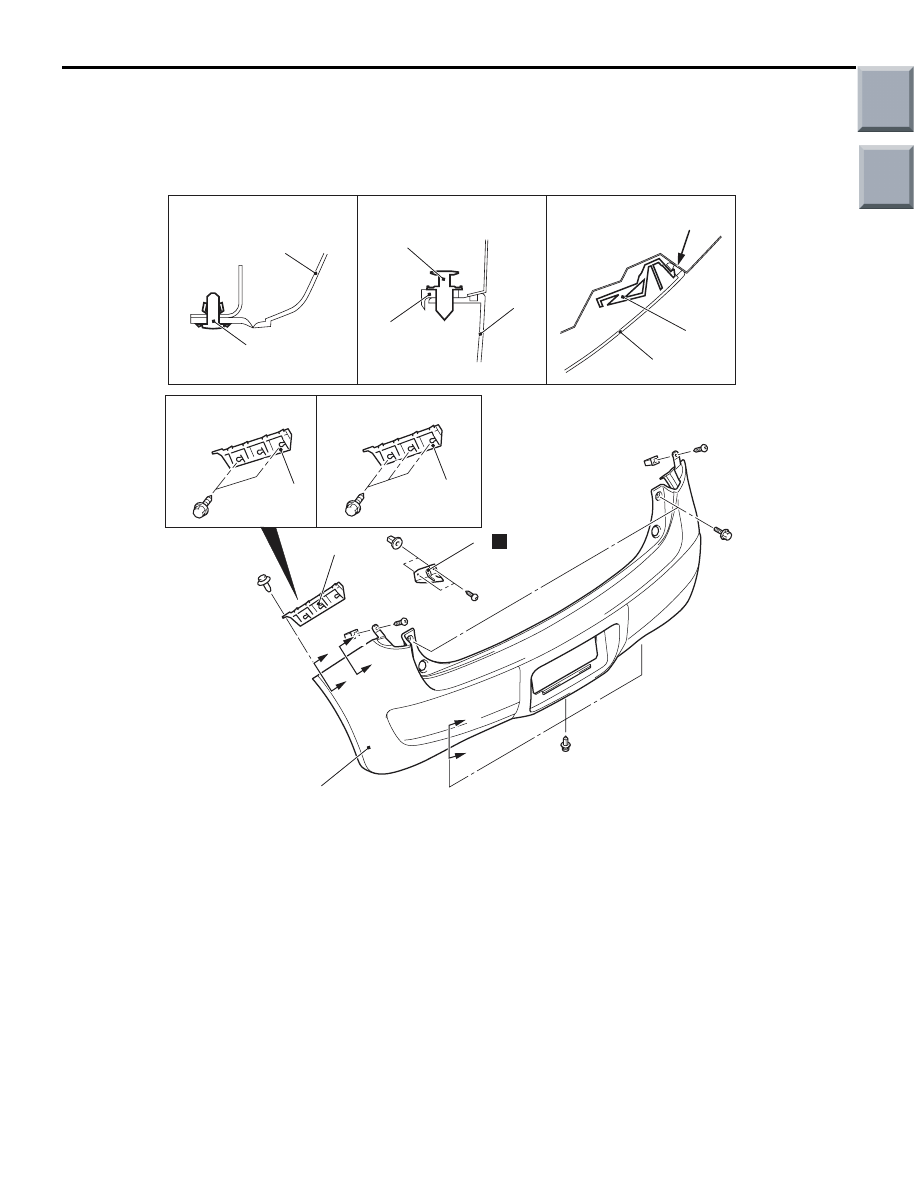
REAR BUMPER ASSEMBLY
EXTERIOR
51-7
REAR BUMPER ASSEMBLY
REMOVAL AND INSTALLATION
M1511001901323
<EXCEPT RALLIART Version-R>
AC601386
1
1
2
3
1
2
2
AB
1
B
C
N
A
A
C
B
Section A – A
Section B – B
Section C – C
Clip
Clip
Claw
2
2
<From April, 2006>
<Up to March, 2006>
Removal steps
•
Rear combination lamp (Refer to
GROUP 54A, Rear combination lamp
).
<<
A
>>
1. Rear bumper assembly
2. Rear bumper side bracket
>>
A
<< 3. Rear bumper support plate
Removal steps (Continued)
Main
Index
Group
TOC
REAR BUMPER ASSEMBLY
EXTERIOR
51-8
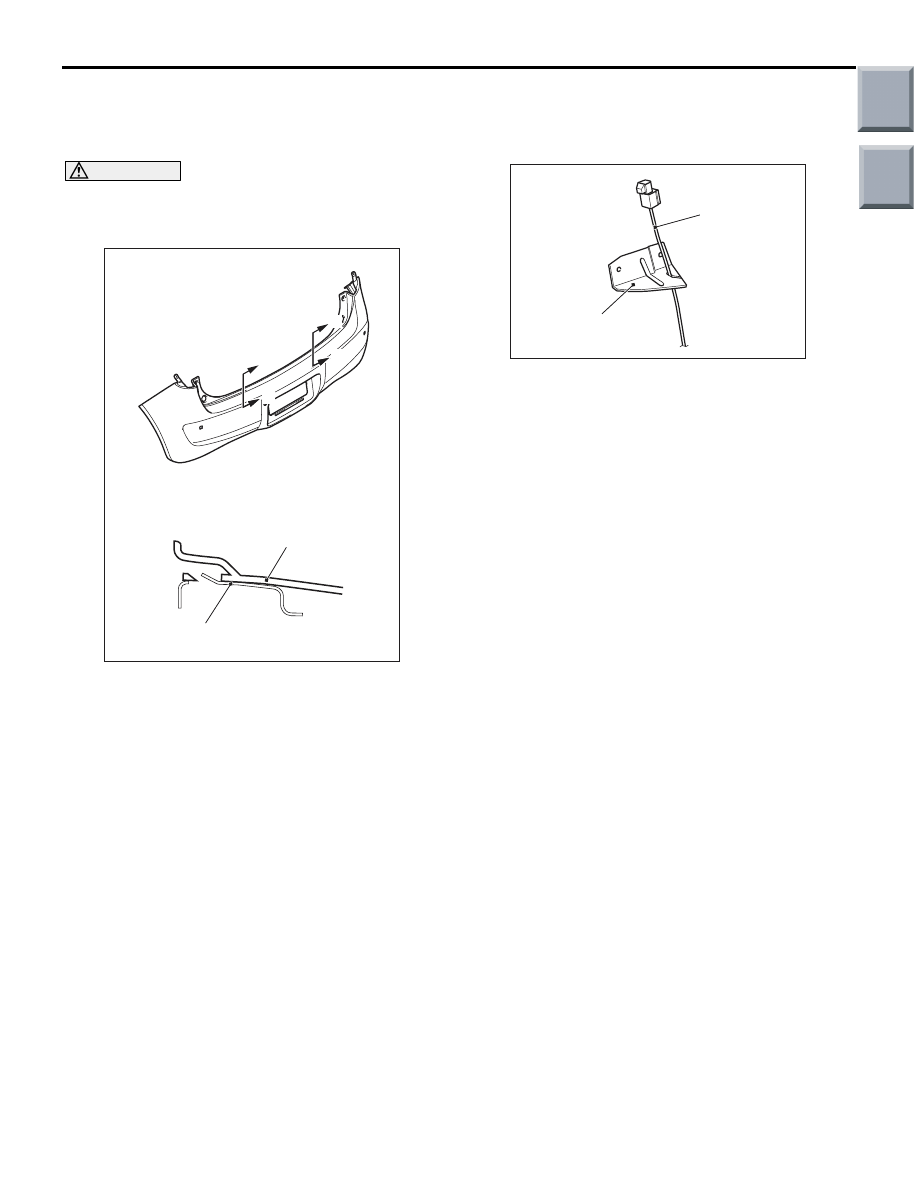
REMOVAL SERVICE POINT
<<A>>REAR BUMPER ASSEMBLY
REMOVAL
CAUTION
When removing the rear bumper, wrap a protec-
tive tape around the licence plate to avoid dam-
age to the bumper with the licence plate.
AC403411AB
A
A
A
A
Section A – A
Rear bumper
Rear bumper
centre upper bracket
Slide the rear bumper assembly sideways, and
remove it.
INSTALLATION SERVICE POINT
>>A<<REAR BUMPER SUPPORT PLATE
INSTALLATION
AC401752AE
Rear bumper
harness (LH)
Rear bumper
support plate (LH)
For rear bumper support plate (LH), a cutout for rear
bumper harness installation is provided. Install the
harness as shown in the illustration.
Main
Index
Group
TOC
REAR BUMPER ASSEMBLY
EXTERIOR
51-9
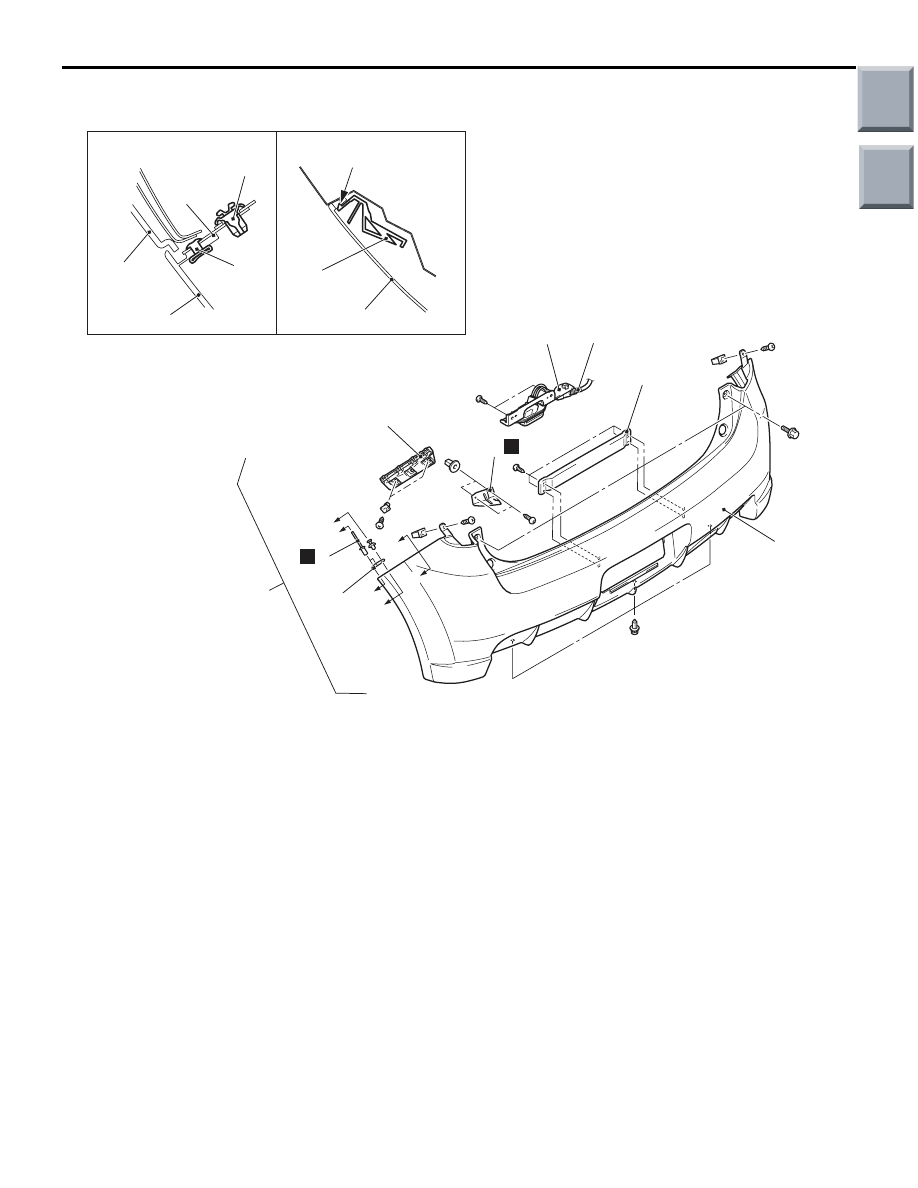
<RALLIART Version-R>
AC511776
Rear
overfender
6
8
6
5
7
9
8
9
4
1
3
8
AB
7
2
B
N
N
A
A
A
A
B
Section A – A
Section B – B
Clip
Claw
Removal steps
•
Rear combination lamp GROUP 54A,
Rear combination lamp
1. Licence plate lamp connector
connection
<<A>>
2. Rear bumper assembly
3. Licence plate lamp assembly
4. Rear bumper bracket
>>A<<
5. Rear bumper support plate
<<
B
>> >>
B
<< 6. Rivet
7. Rear bumper side lower bracket
8. Rear bumper face
9. Rear bumper side bracket
NOTE: Refer to REMOVAL AND INSTALLATION
<EXCEPT RALLIART Version-R> for the rear
bumper assembly removal and rear bumper support
plate installation.
Removal steps (Continued)
Main
Index
Group
TOC
Нет комментариевНе стесняйтесь поделиться с нами вашим ценным мнением.
Текст