Acura RL (1996-2004 year). Manual — part 318
Ignition System
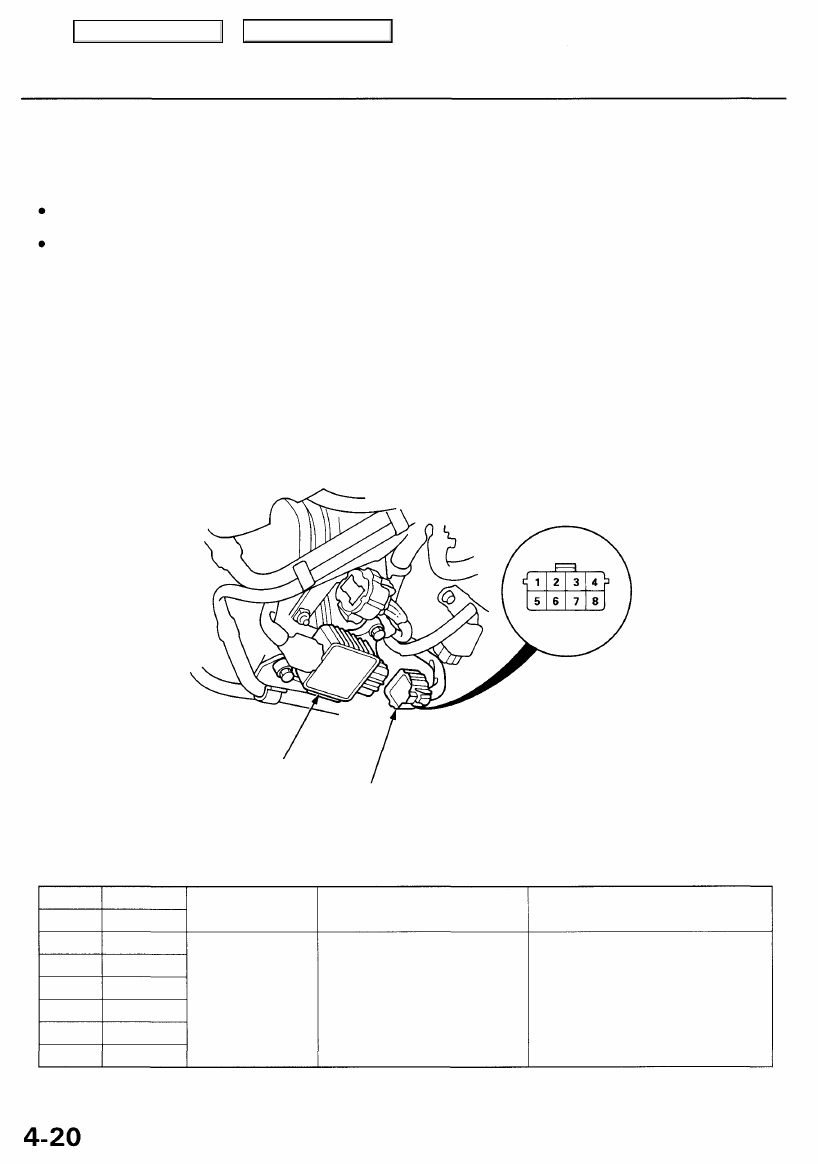
Ignition Control Module (ICM) Input Test
if the malfunction indicator lamp (MIL) blinks. Disconnect the 8P connector from the ignition control
module (ICM). Inspect the connector and socket terminals to be sure they are all making good contact.
If any terminals are bent, loose or corroded, repair them as necessary, and recheck the system.
If the terminals look OK, make the following input tests at the connector.
— If any test indicates a problem, find and correct the cause, then recheck the system.
— If all the input tests prove OK, the ICM must be faulty; replace it.
Wire side of
female terminals
ICM
8P CONNECTOR
Trml
Wire
Test condition
Test: Desired result
Possible cause if result is not obtained
2
7
4
3
1
8
6
5
BLK
3
BLK
4
WHT
1
WHT/GRN
WHT/BLK
WHT/BLU
RED/GRN
WHT/RED
Under all
conditions
Ignition switch ON
(ID
Check for continuity to ground:
There should be continuity.
Check for voltage to ground:
There should be battery
voltage.
• Poor ground (G151)
• An open in the wire
• Blown 30 A fuse in the under-dash
fuse/relay box
• Faulty ignition coil
• An open in the wire
Main Menu
Table of Contents
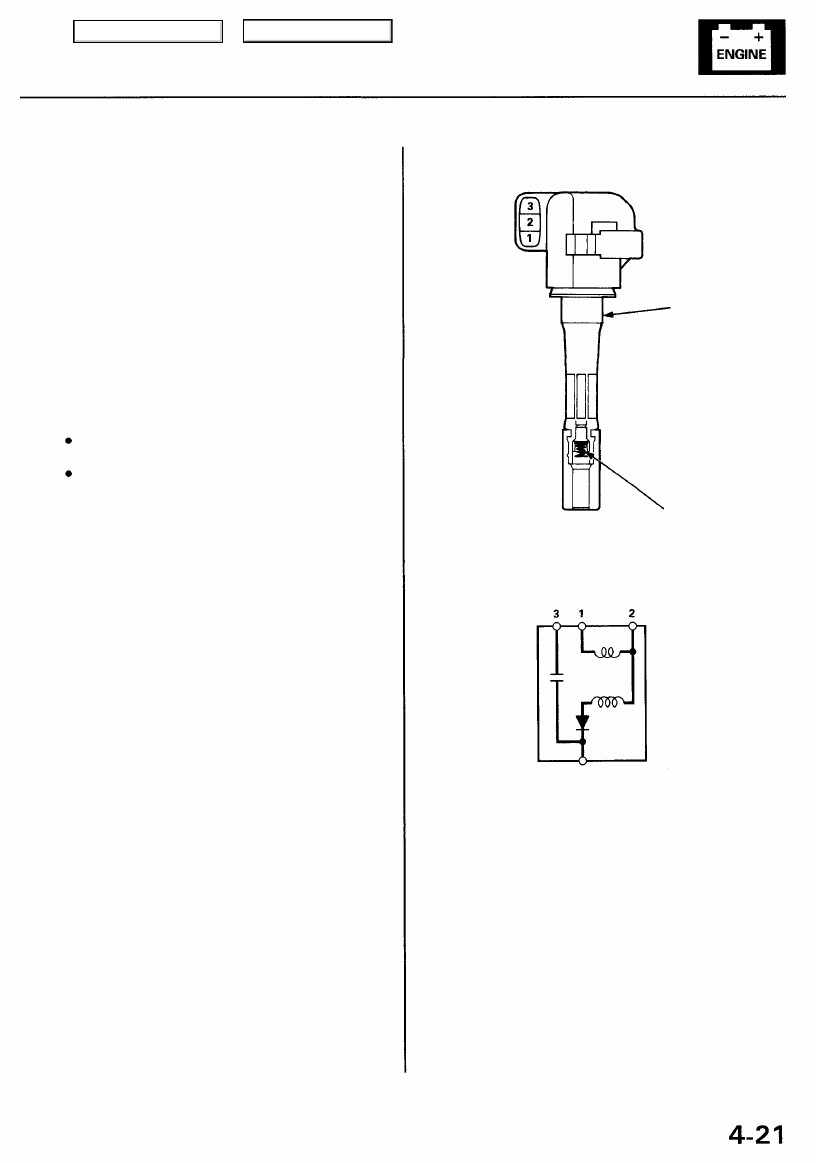
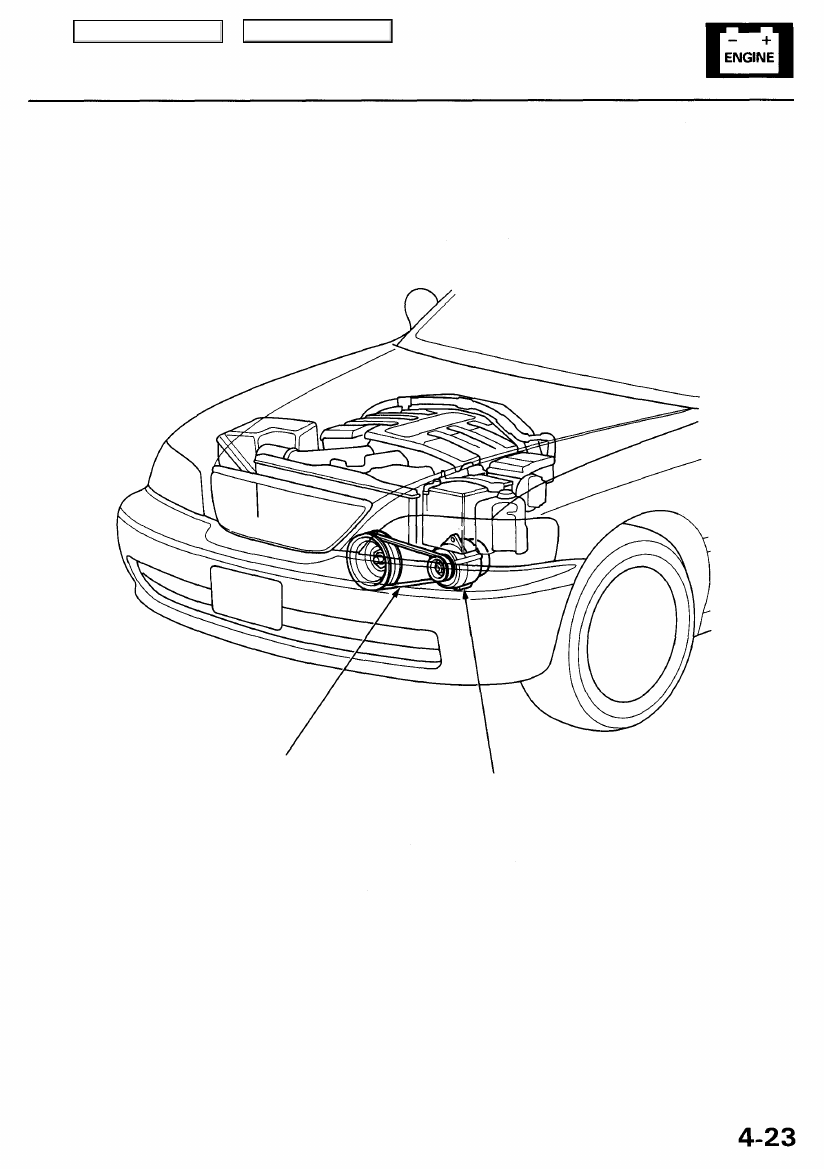
Ignition Coil Test
1. Turn the ignition switch OFF.
2. Remove the strut brace, then remove the engine
3. Remove the ignition coil.
4. Using an ohmmeter, measure resistance between
the terminals. Replace the coil if the resistance is
not within specification.
NOTE: Resistance will vary with the coil tempera-
ture; specification is at 77°F (25°C).
Primary Winding Resistance
(between the No. 1 and No. 2 terminals)
0.9- 1.1 ohms
If the resistance is not within specification,
replace the coil.
If the resistance is OK, but other troubleshooting
doesn't reveal the cause of the problem, substi-
tute a known-good ignition coil and check engine
operation again.
If the engine then runs OK, replace the original
coil.
Terminal
side of male
terminals
IGNITION
COIL
SECONDARY
WINDING
TERMINAL
SECONDARY
WINDING
TERMINAL
Main Menu
Table of Contents

Ignition System
Spark Plug Inspection
1. Inspect the electrodes and ceramic insulator for:
Worn or deformed
electrodes
Damaged
gasket
Cracked
insulator
Improper gap
Oil-fouling
Carbon deposits
Cracked center
electrode insulator
Burned or worn electrodes may be caused by:
Advanced ignition timing
Loose spark plug
Plug heat range too hot
Insufficient cooling
Fouled plug may be caused by:
Retarded ignition timing
Oil in combustion chamber
Incorrect spark plug gap
Plug heat range too cold
Excessive idling/low speed running
Clogged air cleaner element
Deteriorated ignition coil or ignition wires
2.
Do not adjust the gap of platinum tip plugs; replace
the spark plug if the gap is out of specification or if
the center electrode is rounded.
Electrode Gap:
Standard
Service Limit
1.1 mm (0.043 in)
1.3 mm (0.051 in)
Platinum tip plug:
Do not adjust the gap;
replace the spark plug if the
gap is out of specification or
if the center electrode is
rounded.
3. Replace the plug at the specified interval, or if the
center electrode is rounded as shown below:
ROUNDED ELECTRODE
NOTE: Use only the spark plugs listed below.
Spark Plugs
PFR5L-11 (NGK)
PK16PR-L11 (DENSO)
4.
Apply a small quantity of anti-seize compound to
the plug threads, and screw the plugs into the cylin-
der head finger-tight. Then torque them to 18 N-m
(1.8 kgf-m, 13 Ibf-ft).
Main Menu
Table of Contents
Нет комментариевНе стесняйтесь поделиться с нами вашим ценным мнением.
Текст