Acura RL (1996-2004 year). Manual — part 659
Control Unit Input Test
NOTE:
• Before testing, go to the Troubleshooting Guide (see page
). Be sure to go through self-diagnosis function
and
).
• All connector views are from the wire side of female terminals unless otherwise noted.
Multiplex Control Unit (Driver's):
1. Remove the under-dash fuse/relay box (see page
).
2. Remove the driver's unit from the under-dash fuse/relay box (see page
).
3. Inspect the connector and socket terminals to be sure they are all making good contact.
• If the terminals are bent, loose or corroded, repair them as necessary, and recheck the system.
• If the terminals look OK, make the following input tests at the connector and the fuse/relay box socket.
If any test indicates a problem, find and correct the cause, then recheck the system.
If all the input tests prove OK, the control unit must be faulty; replace it.
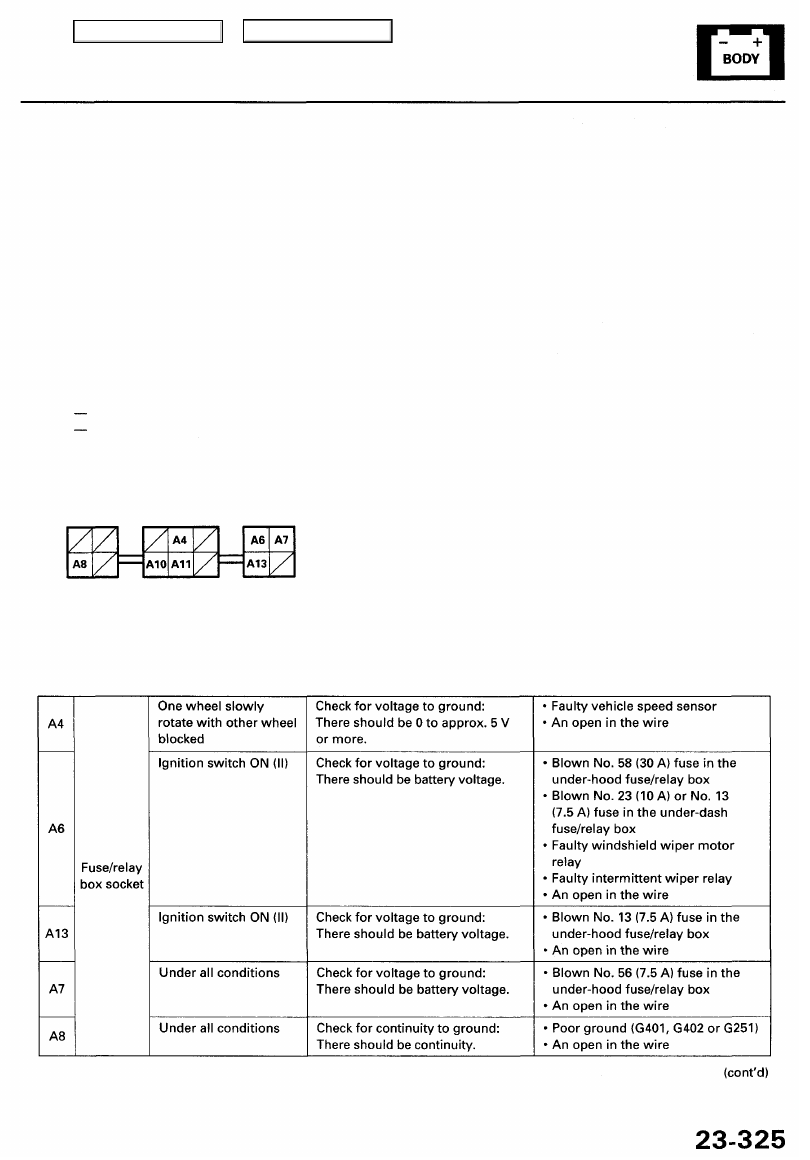
Fuse/relay
box socket
Cavity Wire Test condition Test: Desired result Possible cause if result is not obtained
Main Menu
Table of Contents
Wiper/Washer
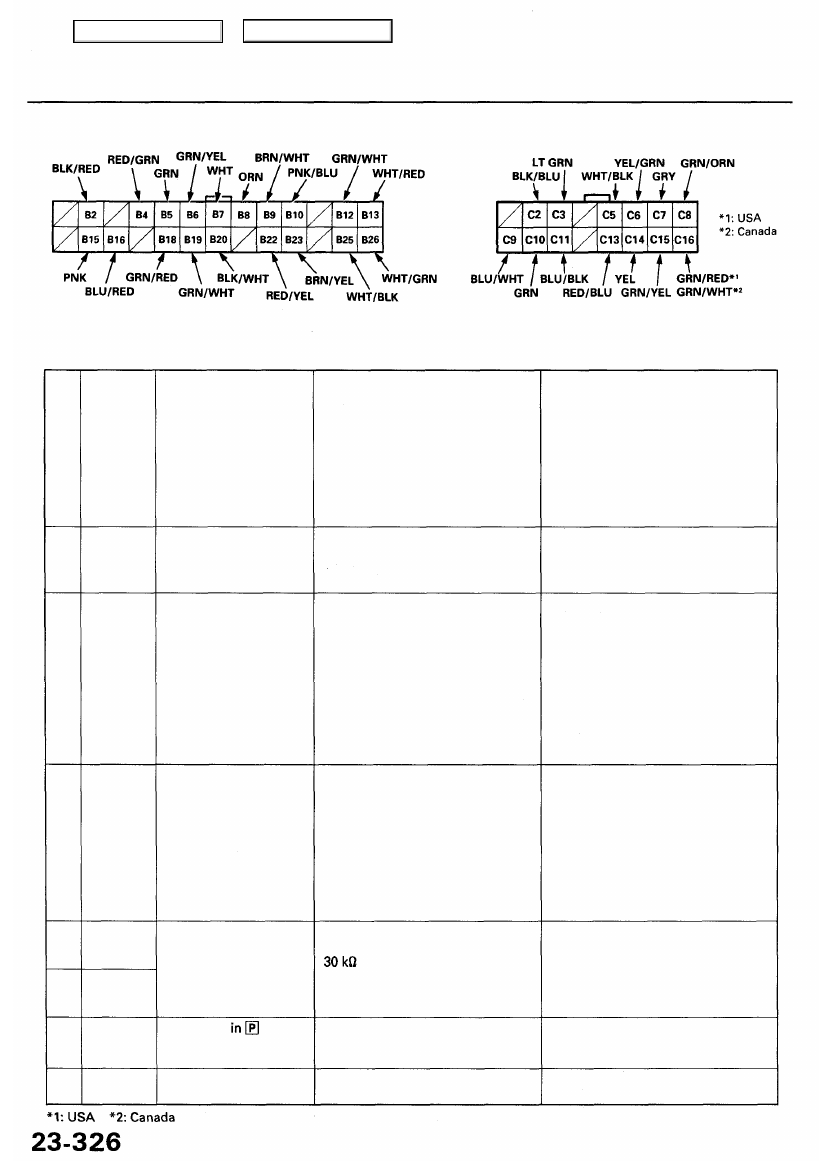
Disconnect the connectors from the removed driver's unit.
Cavity Wire
Test condition
Test: Desired result
Possible cause if result is not obtained
B5
B12
B18
B20
B6
B19
C2
C16
GRN
GRN/WHT
GRN/RED
BLK/WHT
GRN/YEL
RED/YEL
BLK/BLU
GRN/RED*
1
GRN/WHT*
2
Ignition switch ON (II)
and wiper switch at
I NT
Brake pedal pushed
Ignition switch ON (II)
Ignition switch ON (II)
and washer switch ON
Intermittent dwell time
control ring turned
Shift lever
Parking brake pedal
depressed
Check for voltage to ground:
There should be battery voltage.
Check for voltage to ground:
There should be battery voltage.
Check for voltage to ground:
There should be battery voltage.
Check for voltage to ground:
There should be battery voltage.
Check for resistance between the
terminals: It should vary from 0 to
as the ring is turned.
Check for voltage to ground:
There should be less than 1 V.
Check for voltage to ground:
There should be less than 1 V.
• Blown No. 23 (10 A) fuse in the
under-dash fuse/relay box ('96 - 98
models)
• Blown No. 58 (30 A) fuse in the
under-hood fuse/relay box ('99 - 01
models)
• Faulty windshield wiper motor
relay ('99 - 01 models)
• Faulty wiper switch
• An open in the wire
• Blown No. 39 (15 A) fuse in the
under-hood fuse/relay box
• Faulty brake switch
• An open in the wire
• Blown No. 23 (10 A) fuse in the
under-dash fuse/relay box ('96 - 98
models)
• Blown No. 58 (30 A) fuse in the
under-hood fuse/relay box ('99 - 01
models)
• Faulty windshield wiper motor
relay ('99-01 models)
• Faulty intermittent wiper relay
• Faulty wiper switch
• An open in the wire
• Blown No. 23 (10 A) fuse in the
under-dash fuse/relay box ('96 - 98
models)
• Blown No. 58 (30 A) fuse in the
under-hood fuse/relay box ('99 - 01
models)
• Faulty windshield wiper motor
relay ('99 - 01 models)
• Faulty washer switch
• An open in the wire
• Blown No. 13 (7.5 A) fuse in the
under-dash fuse/relay box ('99 - 01
models)
• Faulty intermittent dwell time
controller
• An open in the wire
• Faulty transmission range switch
• Poor ground (G401, G402)
• An open in the wire
• Faulty parking brake switch
• An open in the wire
Control Unit Input Test (cont'd)
Main Menu
Table of Contents
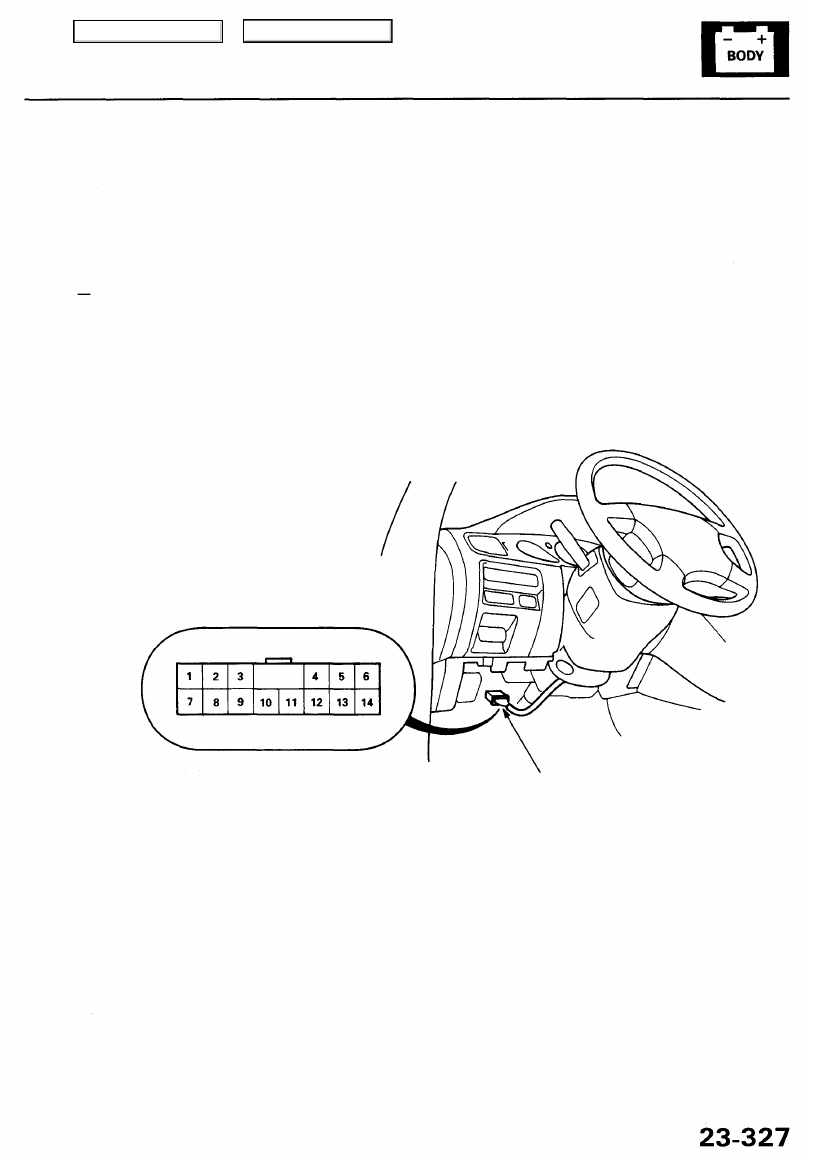
Wiper/Washer Switch Test
1. Remove the dashboard lower cover (see
).
2. Disconnect the combination switch harness HP connector from the main wire harness.
3. Check for continuity between the terminals in each switch position according to the table.
• If there is continuity, the switch is OK.
• If there is no continuity, check for continuity between the switch harnesses.
If the switch harness is OK, replace the wiper/washer switch.
Wire side of
female terminals
14P
CONNECTOR
Main Menu
Table of Contents
Wiper/Washer
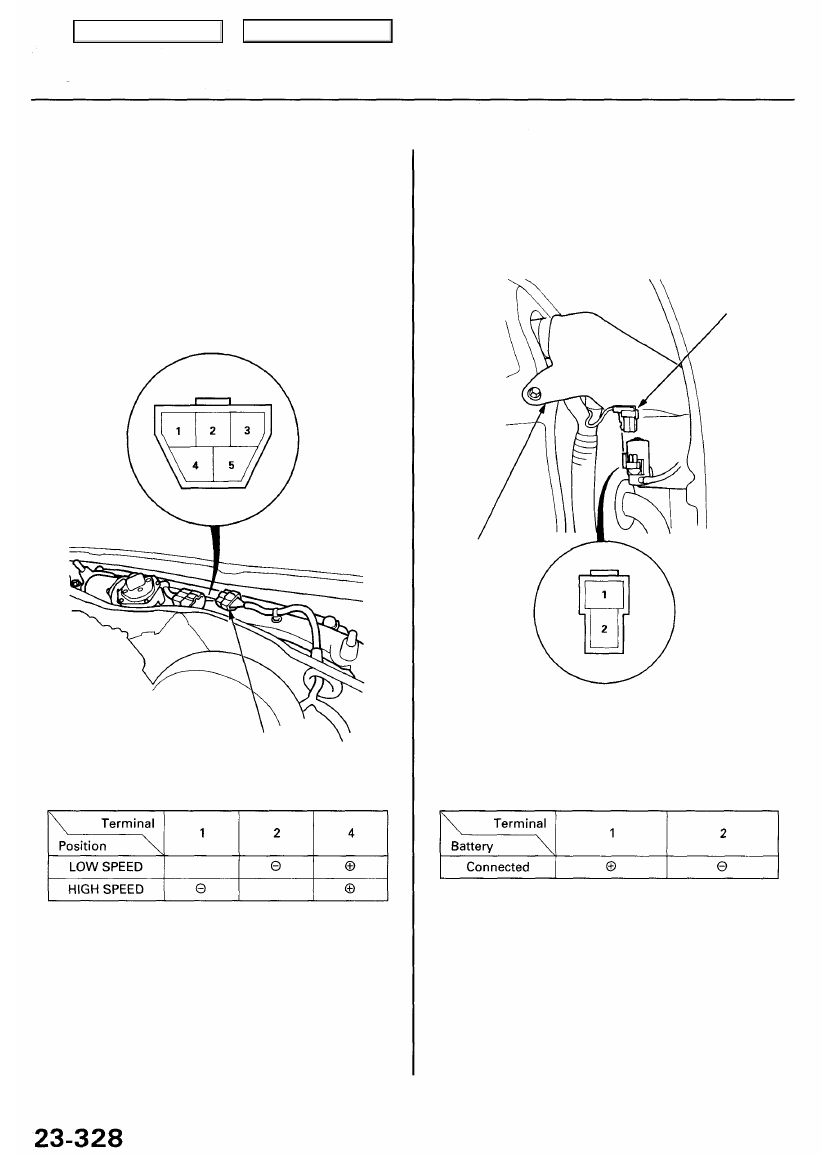
Windshield Wiper Motor Test
1. Open the hood, and remove the cap nuts and the
wiper arms.
NOTE: Carefully remove the wiper arms, so that
they do not touch the hood.
2. Remove the cowl cover by prying out the trim clips
(see
).
3. Disconnect the 5P connnector from the windshield
wiper motor.
Terminal side of
male terminals
Washer Motor Test
1. Remove the left inner fender (see
).
2. Disconnect the 2P connectors from the washer.
2P CONNECTOR
WASHER FLUID
RESERVOIR
Terminal side of
male terminals
3. Test the washer motor by connecting battery power
and ground according to the table.
• If the motor fails to run smoothly, replace it.
• If the motor runs smoothly, but little or no wash-
er fluid is pumped, check for a disconnected or
blocked washer hose, or a clogged pump outlet
in the motor.
4. Test the motor by connecting battery power and
ground according to the table.
5P CONNECTOR
If the motor does not run or fails to run smoothly,
replace it.
5. Connect an analog voltmeter between the No. 5 (+)
and No. 3 (-) terminals, and run the motor at low or
high speed.
The voltmeter should indicate 0 V and 4 V or less alter-
nately.
Main Menu
Table of Contents
Нет комментариевНе стесняйтесь поделиться с нами вашим ценным мнением.
Текст