Acura RL (1996-2004 year). Manual — part 657
Disconnect the connector from the door control unit.
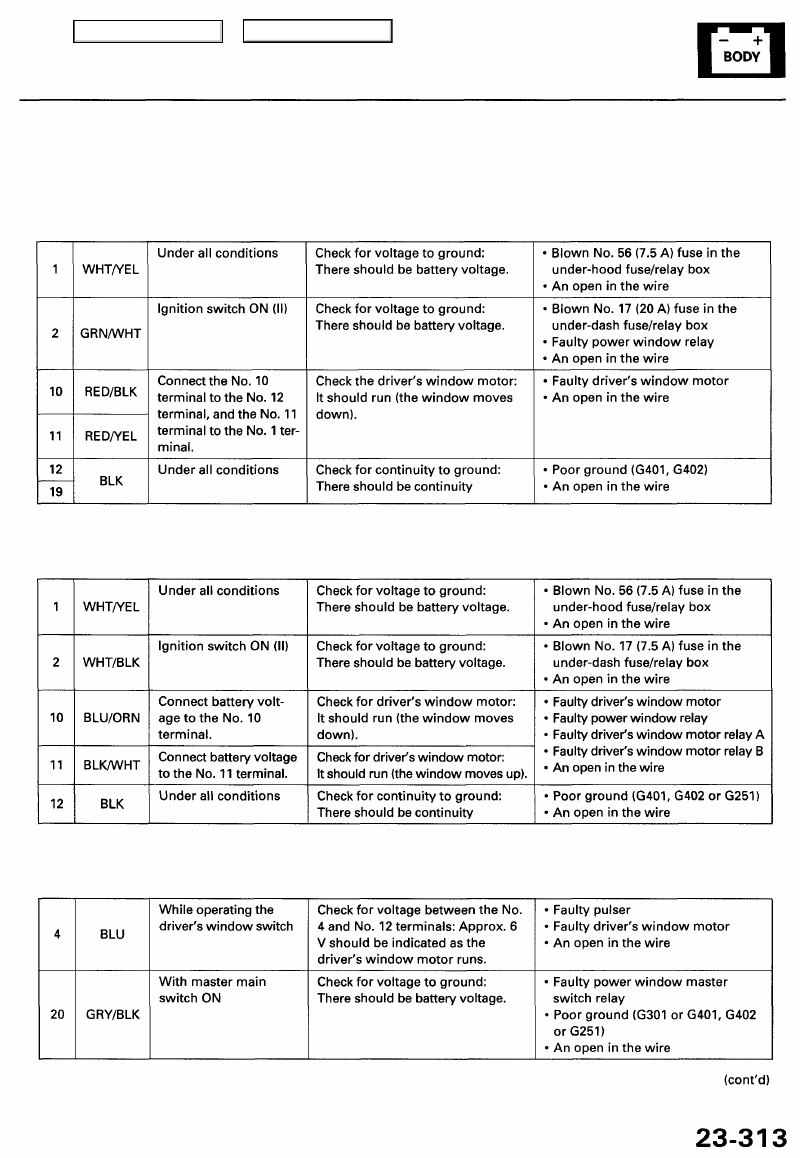
Cavity Wire Test condition Test: Desired result Possible cause if result is not obtained
'96 - 97 models:
'98 - 00 models:
Cavity Wire Test condition Test: Desired result Possible cause if result is not obtained
Reconnect the connector to the door control unit.
Cavity Wire Test condition Test: Desired result Possible cause if result is not obtained
Main Menu
Table of Contents
Power Windows
Control Unit Input Test (cont'd)
NOTE:
• Before testing, go to the Troubleshooting Guide (see page
). Be sure to go through self-diagnosis function
and
).
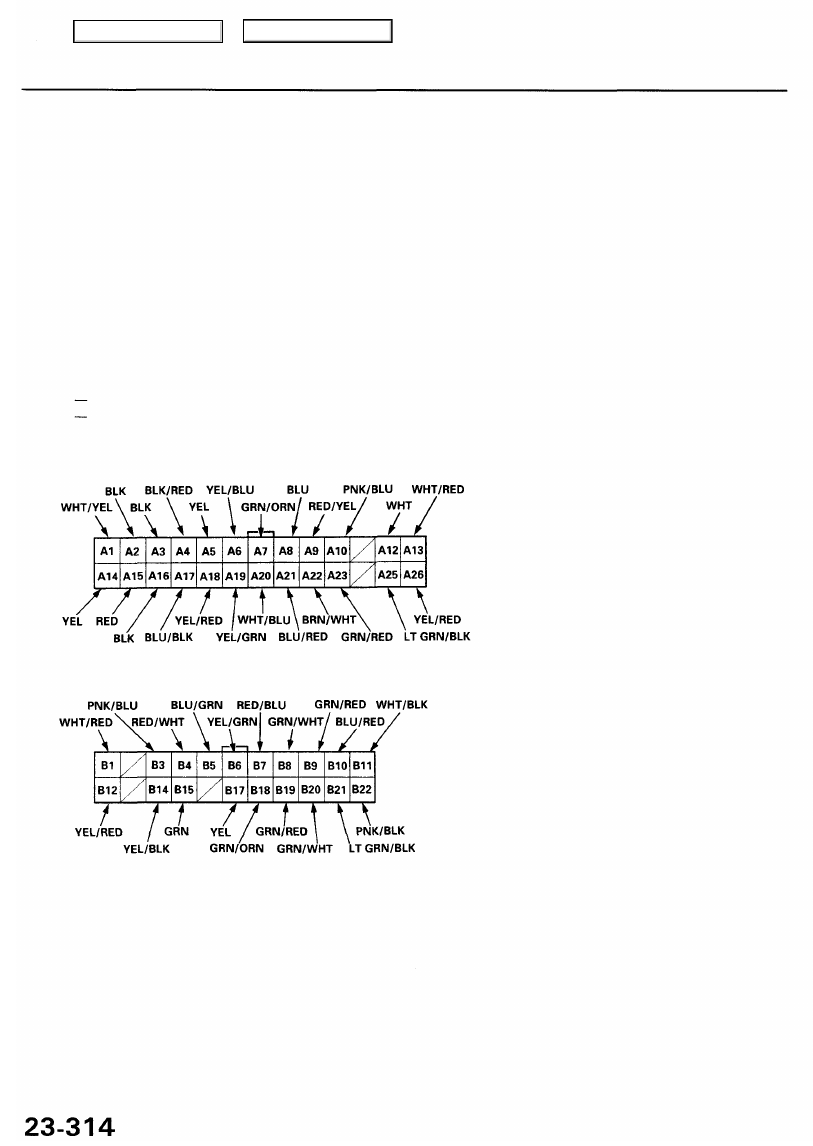
• All connector views are from the wire side of female terminals unless otherwise noted.
Multiplex Control Unit (Passenger's)
1. Remove the right kick panel (see
).
2. Disconnect the 22P and 26P connectors, then remove the passenger's unit (see page
).
3. Inspect the connector and socket terminals to be sure they are all making good contact.
• If the terminals are bent, loose corroded, repair them as necessary, and recheck the system.
• If the terminals look OK, make the following input tests at the connector.
If a test indicates a problem, find and correct the cause, then recheck the system.
If all the input tests prove OK, the power window master switch (control unit) must be faulty; replace it.
Main Menu
Table of Contents
Disconnect the connector from the passenger's control unit.
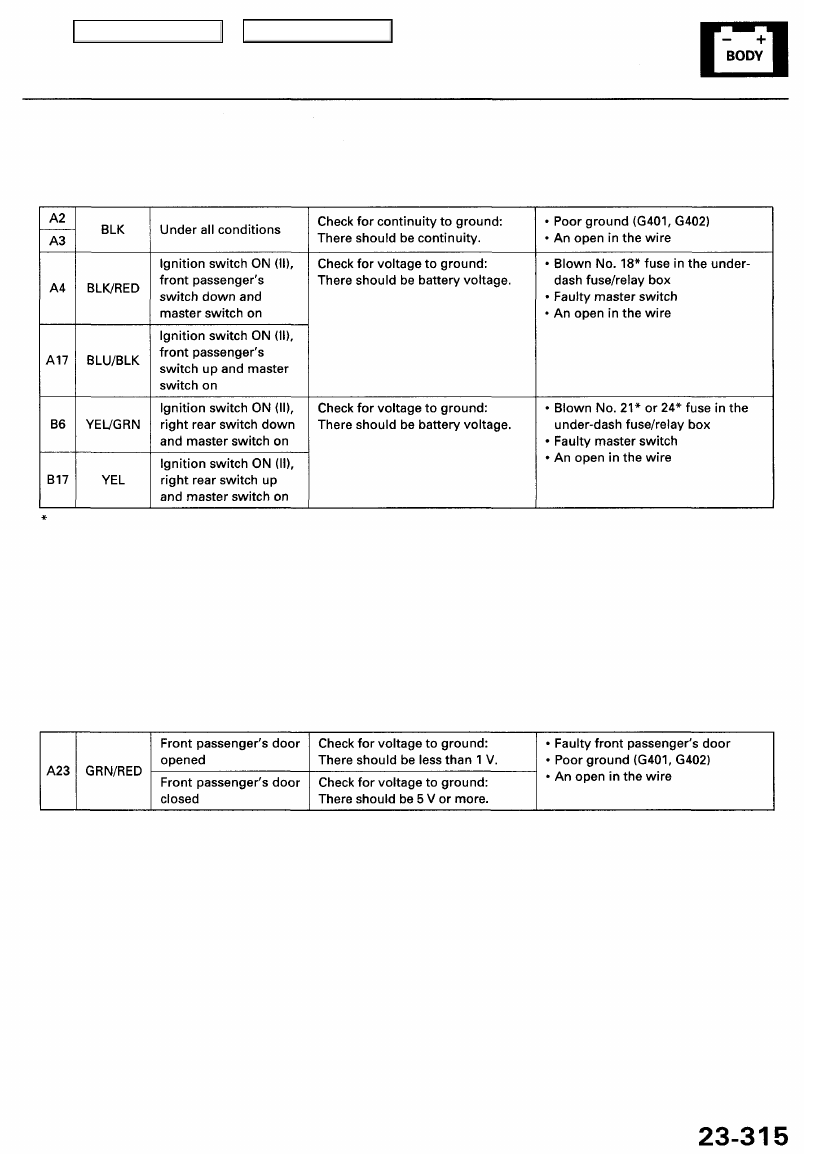
Cavity Wire Test condition Test: Desired result Possible cause if result is not obtained
Reconnect the connector to the passenger's control unit.
Cavity Wire Test condition Test: Desired result Possible cause if result is not obtained
'96 - 97 models:
No. 18 (20 A)
No. 21 (20 A)
'98 model:
No. 18 (30 A)
No. 24 (30 A)
'99-01 models:
No. 18 (20 A)
No. 24 (20 A)
Main Menu
Table of Contents
Power Windows
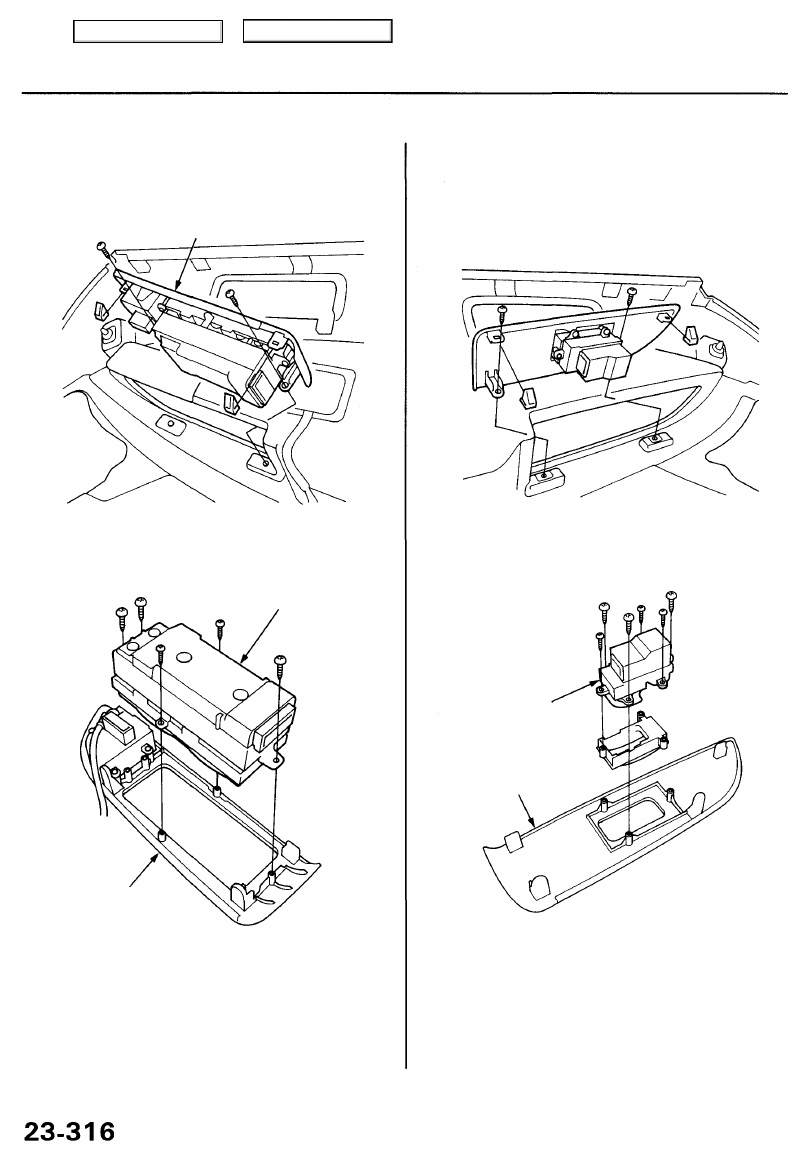
Master Switch Replacement
1. Remove the driver's door panel (see
).
2. Remove the two mounting screws, then remove the
master switch assembly from the door panel.
MASTER SWITCH ASSEMBLY
Passenger's Window Switch
Replacement
1. Remove the passenger's door panel (see
).
2. Remove the two screws, then remove the switch
assembly from the door panel.
3. Remove the six mounting screws, then remove the
passenger's window switch from the panel.
PASSENGER'S
WINDOW
SWITCH
PANEL
4. Install in the reverse order of removal.
4. Install in the reverse order of removal.
PANEL
3. Remove the five mounting screws, then remove the
master switch from the panel.
MASTER SWITCH
Main Menu
Table of Contents
Нет комментариевНе стесняйтесь поделиться с нами вашим ценным мнением.
Текст