Acura RL (1996-2004 year). Manual — part 439
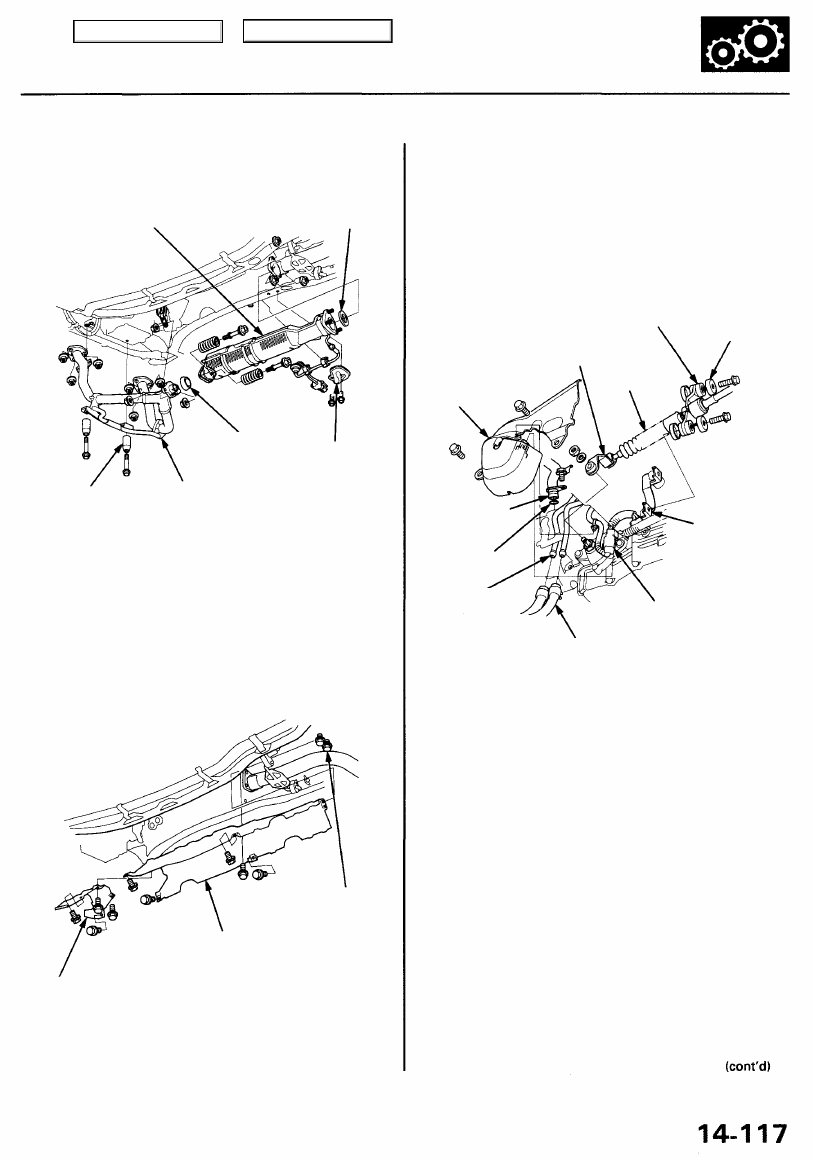
11. Remove the transmission stop collars, then remove
the exhaust pipe A.
THREE WAY CATALYTIC
CONVERTER
GASKET
Replace.
TRANSMISSION
STOP COLLAR
EXHAUST
PIPE A
SECONDARY
HO2S
HARNESS
COVER
12. Remove the secondary HO2S harness cover, then
remove the three way catalytic converter.
13. Remove the heat shields.
Loosen these
bolts.
HEAT SHIELD
HEAT SHIELD
14. Remove the ATP cooler hoses at the ATP cooler
lines. Turn the ends of the cooler hoses up to pre-
vent ATP from flowing out, then plug the ATP cooler
lines and hoses.
NOTE: Check for any signs of leakage from the
hoses and the lines.
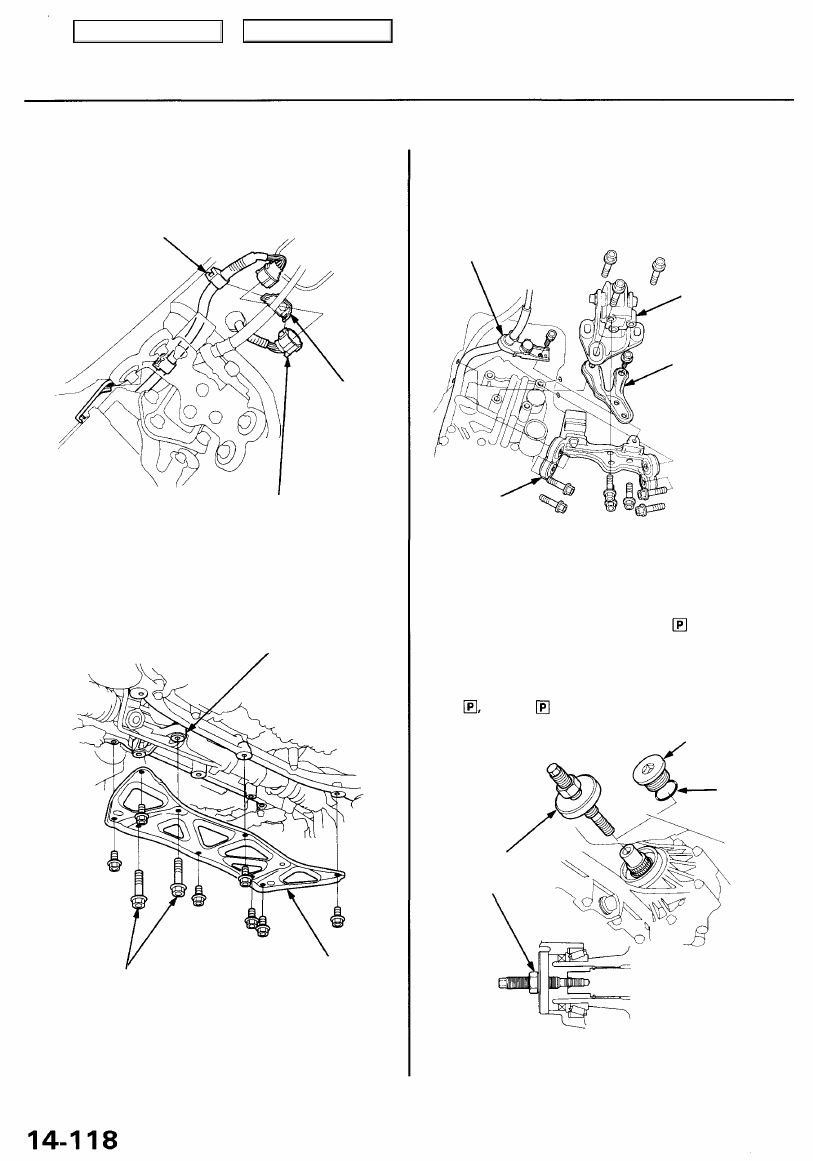
SHIFT CABLE
HOLDER
WASHER
SHIFT CABLE
COVER
ATF DIPSTICK
TUBE
O-RING
Replace.
SHIFT CABLE
HOLDER BASE
15. Remove the shift cable cover mounting bolts, then
remove the shift solenoid valve/A/T clutch pressure
control solenoid valve harness connector and clamp
from the shift cable cover.
16. Remove the shift cable cover from the transmission
housing.
17. Remove the shift cable holder with shift cable from
the shift cable holder base.
18. Remove the control lever from the control shaft.
19. Remove the ATF dipstick tube from the torque con-
verter housing.
GASKET
Replace.
ATF COOLER
LINES
ATF COOLER
HOSES
SHIFT SOLENOID VALVE/
A/T CLUTCH PRESSURE
CONTROL SOLENOID VALVE
HARNESS CONNECTOR
CONTROL
LEVER
SHIFT
CABLE
Main Menu
Table of Contents
Transmission
Removal (cont'd)
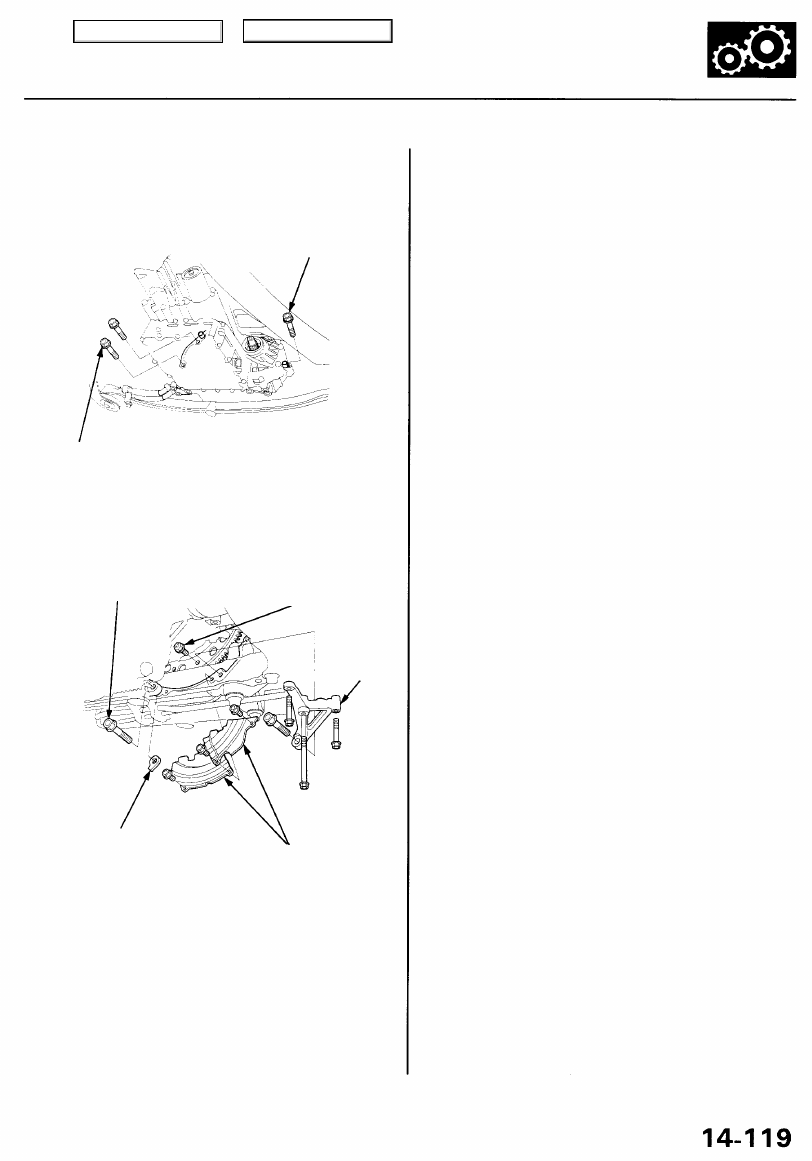
20. Disconnect the transmission range switch connector,
then remove the clamp from the harness bracket.
CLAMP
HARNESS
BRACKET
TRANSMISSION RANGE
SWITCH CONNECTOR
21. Remove the lower plate, and reinstall the steering
gearbox mounting bolts as shown.
STEERING GEARBOX
STEERING GEARBOX
MOUNTING BOLTS
Reinstall these bolts on
the steering gearbox.
LOWER
PLATE
22. Remove the shift cable guide bracket from the
transmission beam.
CAUTION: Take care not to bend the shift cable.
TRANSMISSION
REAR MOUNT
BRACKET/MOUNT
EXHAUST PIPE
BRACKET
TRANSMISSION
BEAM
23. Place a jack under the transmission, and raise the
transmission just enough to take weight off of the
mounts, then remove the transmission beam, rear
transmission bracket/mount and exhaust pipe bracket.
24. Make sure the transmission is in position, then
remove the 36 mm sealing bolt and O-ring ('00
model) from the secondary driven gear shaft.
NOTE: If the transmission is in any position other than
shift into position by rotating the control shaft.
36 mm SEALING BOLT
O-RING
Replace.
'00 model
EXTENSION SHAFT
PULLER
25. Remove the extension shaft from the differential
using the special tool as shown.
SHIFT CABLE
GUIDE
Main Menu
Table of Contents
26. Remove the transmission housing mounting bolts.
TRANSMISSION HOUSING
MOUNTING BOLT
TRANSMISSION
HOUSING MOUNTING
BOLTS
27. Remove the engine stiffener.
TRANSMISSION HOUSING
MOUNTING BOLT
DRIVE PLATE
BOLT
ENGINE
STIFFENER
26 mm SHIM
TORQUE CONVERTER
COVERS
28. Remove the torque converter covers.
29. Remove the six drive plate bolts one at a time while
rotating the crankshaft pulley.
NOTE: If necessary, remove the spark plugs while
removing the drive plate bolts.
30. Remove the transmission housing mounting bolts.
31. Pull the transmission away from the engine until it
clears the dowel pins, then lower it on the transmis-
sion jack.
Main Menu
Table of Contents
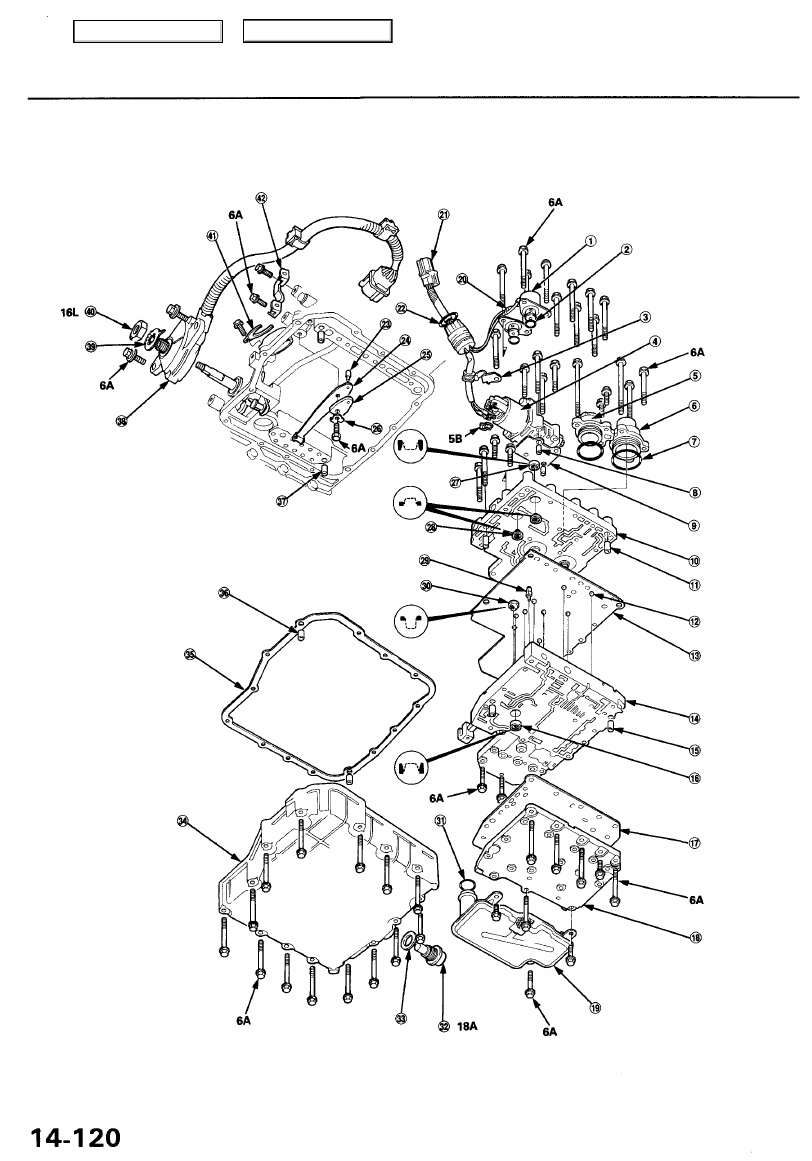
Illustrated Index
Transmission Housing/Lower Valve Body
Main Menu
Table of Contents
Нет комментариевНе стесняйтесь поделиться с нами вашим ценным мнением.
Текст