Acura RL (1996-2004 year). Manual — part 564
Doors
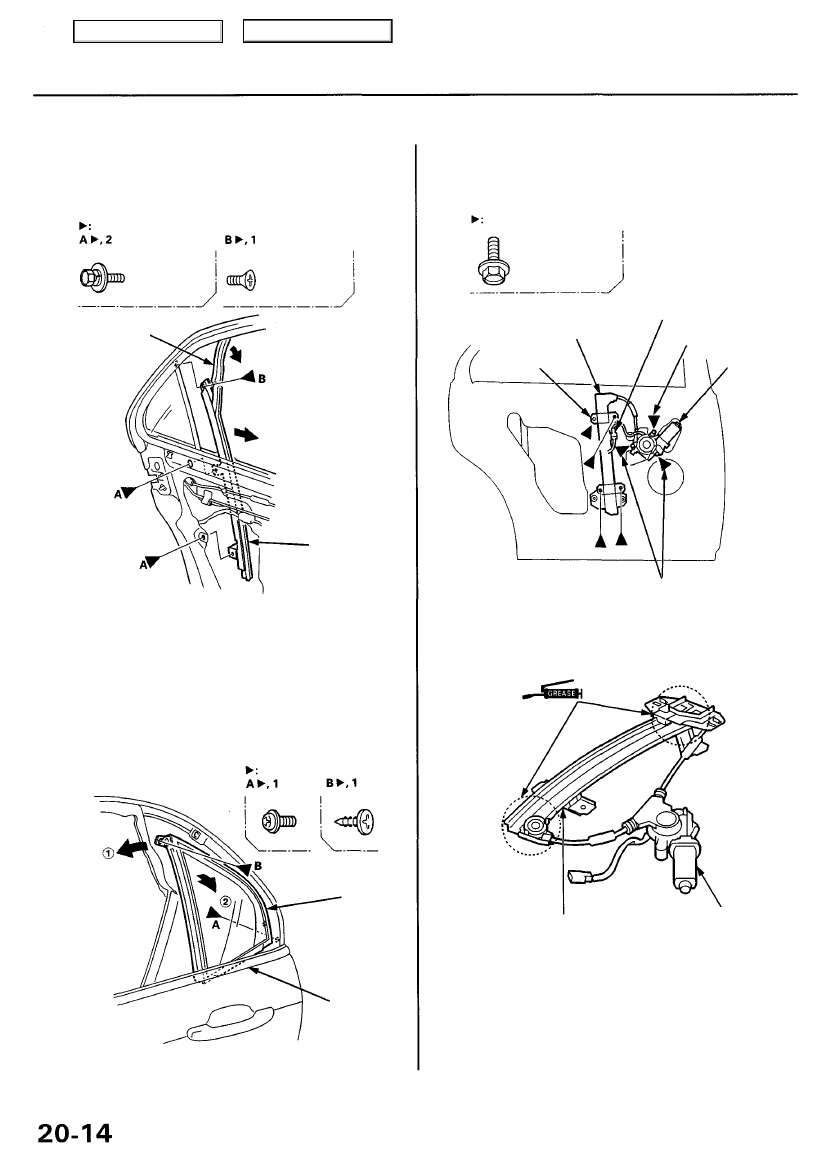
Glass/Quarter Glass/Regulator Removal (cont'd)
3. Remove the glass run channel as needed, remove
the bolts and screw, then move the rear channel
forward.
4 x 0.8 mm
4 N-m (0.4 kgf-m,
3 Ibf-ft)
GLASS RUN
CHANNEL
REAR
CHANNEL
4. Remove the quarter glass.
NOTE: When installing the quarter glass, make sure
the outer molding lip is not pinched.
Screw locations
QUARTER
GLASS
OUTER
MOLDING
5. Disconnect the connector, then remove the regula-
tor through the hole in the door.
Bolt locations, 7
6 x 1.0 mm
8 N-m (0.8 kgf-m,
6 Ibf-ft)
CONNECTOR
Loosen.
POWER
WINDOW
MOTOR
6. Grease all the sliding surfaces of the regulator where
shown.
7. Installation is the reverse of the removal procedure.
NOTE: Roll the glass up and down to see if it moves
freely without binding. Also make sure that there is
no clearance between the glass and glass run channel
when the glass is closed. Adjust the position of the
glass as necessary (see page
).
6 x 1.0 mm
9 N-m (0.9 kgf-m,
7 Ibf-ft)
Bolt, screw locations
Loosen.
Loosen.
REGULATOR
REGULATOR
POWER WINDOW
MOTOR
Main Menu
Table of Contents
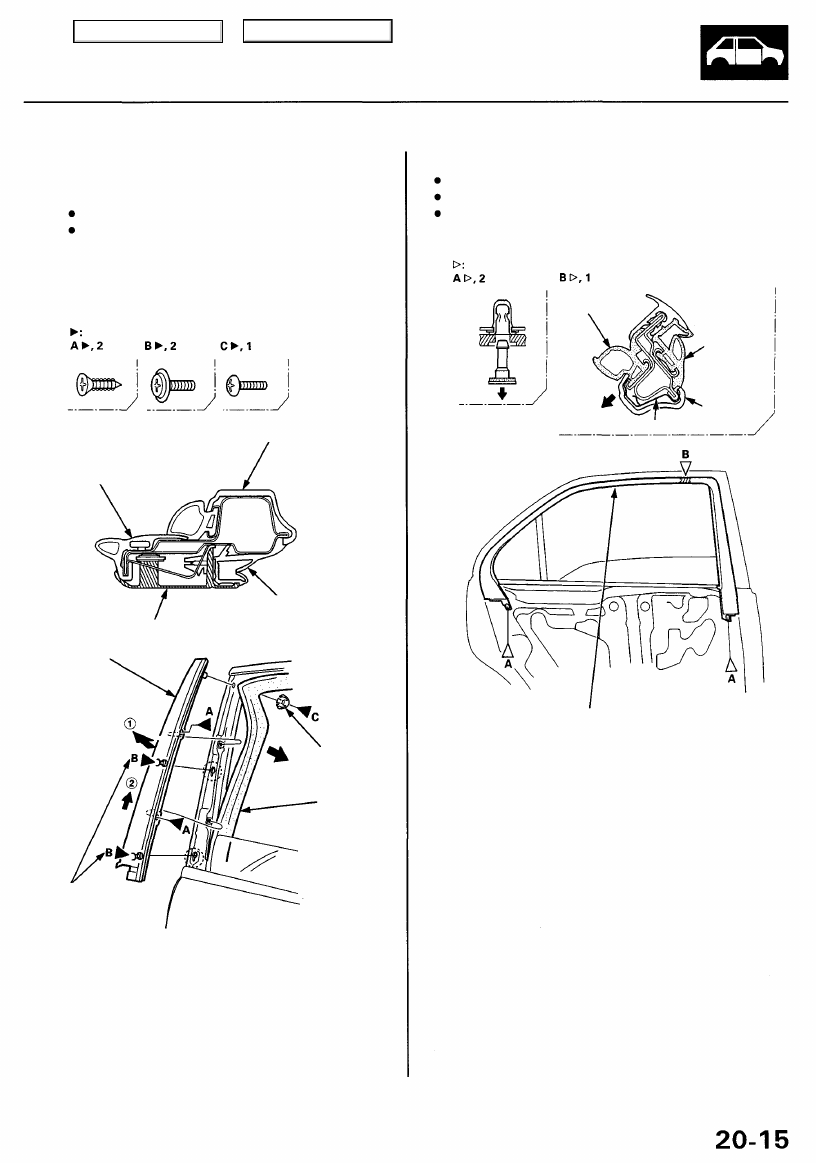
Sash Trim Removal
NOTE: Lower the glass fully.
1. Remove:
Inner sash trim
2. Remove the glass run channel and outer weather-
strip as needed. Remove and loosen the screws,
then remove the sash trim.
Screw locations
INNER SASH
TRIM
OUTER
WEATHERSTRIP
SASH TRIM
GLASS RUN
CHANNEL
SASH
TRIM
GROMMET
GLASS RUN
CHANNEL
Loosen.
3. Installation is the reverse of the removal procedure.
NOTE: Make sure the glass run channel and outer
weatherstrip are installed securely.
Inner Sash Trim Removal
NOTE:
Lower the glass fully.
Take care not to scratch the inner sash trim.
Remove the door panel (see page
).
Clip locations
INNER
WEATHERSTRIP
CLIP
GLASS RUN
CHANNEL
INNER SASH
TRIM
INNER SASH
TRIM
Installation is the reverse of the removal procedure.
NOTE: If necessary, replace any damaged clips.
Main Menu
Table of Contents
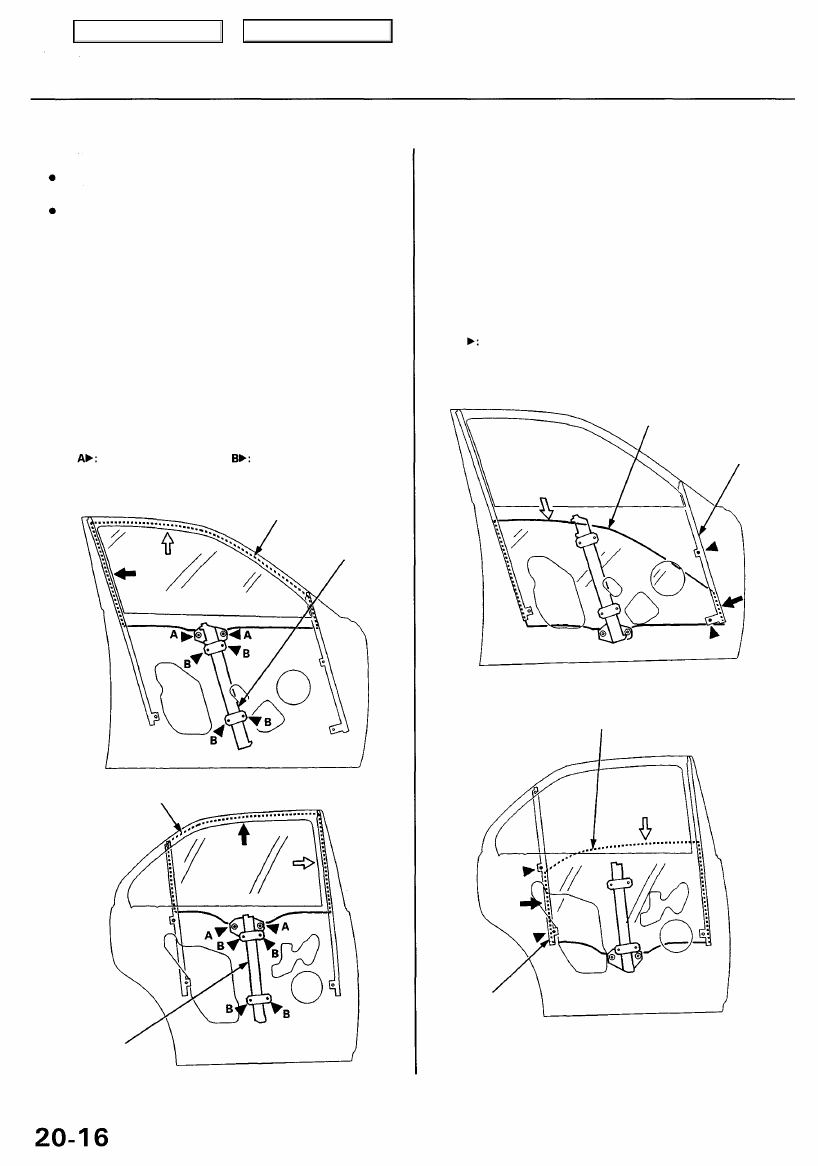
Doors
Glass Adjustment
NOTE:
Place the vehicle on a firm, level surface when adjust-
ing the glass.
Check the weatherstrips and glass run channel for dam-
age or deterioration, and replace them if necessary.
1. Remove:
2. Raise the glass fully.
3. Loosen the glass mounting bolts and regulator mount-
ing bolts.
4. Push the glass rearward (front door glass) or for-
ward (rear door glass).
Front:
GLASS
REGULATOR
Rear:
GLASS
REGULATOR
5. Tighten the glass mounting bolts and regulator
mounting bolts.
6. Loosen the front channel mounting bolts or rear
channel mounting bolts.
7. Lower the glass.
8. Push the front channel or rear channel against the
glass, then tighten each mounting bolt.
Front:
GLASS
FRONT
CHANNEL
Rear:
GLASS
REAR
CHANNEL
Glass mounting bolt
locations.
Regulator mounting
bolt locations.
Front and rear
channel mounting
bolt locations
Main Menu
Table of Contents
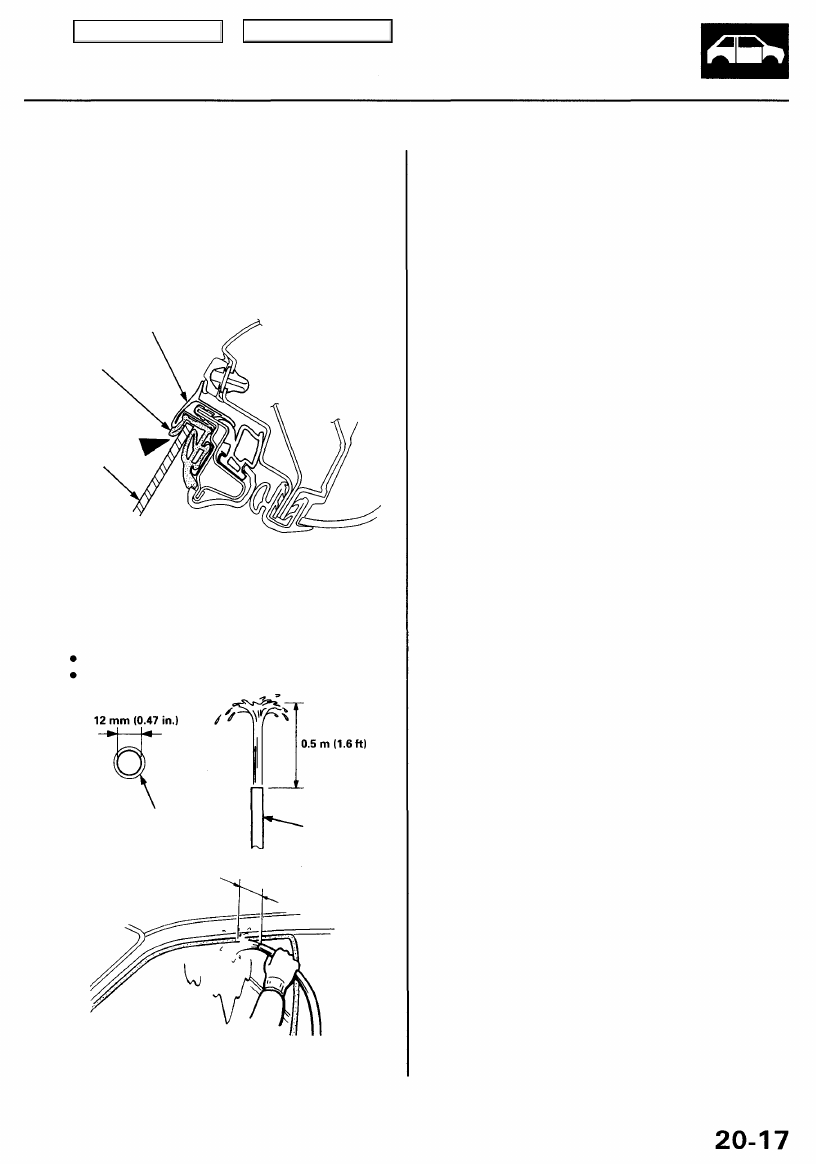
9. Check that the glass moves smoothly.
10. Raise the glass fully and check for gaps.
11. Check the glass operation.
NOTE: Check that the glass contacts the glass run
channel evenly.
OUTER
WEATHERSTRIP
GLASS RUN
CHANNEL
GLASS
12. Check for water leaks.
Spray water over the roof and on the sealing area
as shown.
NOTE:
Adjust the water pressure as shown.
Do not squeeze the tip of the hose.
HOSE
HOSE
300 mm (11.8 in.)
13. Reinstall all removed parts in the reverse order of
removal.
Main Menu
Table of Contents
Нет комментариевНе стесняйтесь поделиться с нами вашим ценным мнением.
Текст