Acura RL (1996-2004 year). Manual — part 519

Modulator Unit
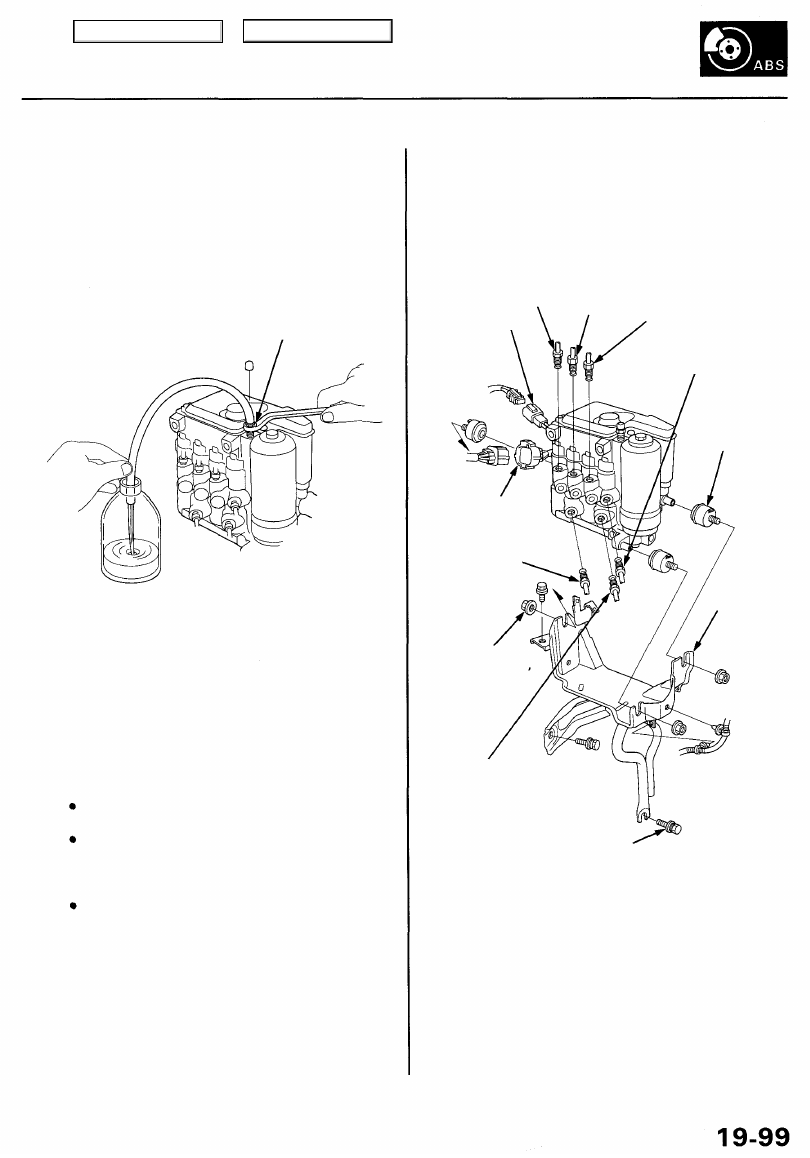
High-Pressure Brake Fluid Replacement/Bleeding
Replacement
1. Relieve system pressure (see page
). Leave the
tube and wrench on the maintenance bleeder, and
leave the tube in the container.
2. Start the engine to operate the pump motor.
NOTE:
If the pump motor operates for 40 seconds or
more, the ABS indicator light comes on, and the
pump motor stops. Stop and restart the engine to
operate the pump motor again.
If the ABS indicator light comes on, remove the
ABS B2 (15 A) fuse for 3 seconds or more to
erase the DTC after servicing.
3. Repeat steps 1 and 2 to drain the rest of the brake
fluid from the modulator unit.
NOTE: The modulator has a capacity of approxi-
mately 150 (5.0 fl-oz, 5.3 Imp-oz). Approximately
35 - 45 (1.2 - 1.5 fl-oz, 1.2 - 1.6 Imp-oz) of the fluid
is drained each time you relieve system pressure.
4. Remove the cap, and refill the reservoir to the MAX
(upper) level with fresh brake fluid.
NOTE: Pour the brake fluid slowly so that it does
not foam, and wait for a few minutes.
5. Repeat steps 1 and 2 twice, and refill the reservoir
to the MAX (upper) level with fresh brake fluid.
6. Tighten the maintenance bleeder to the specified
torque.
7. Start the engine, and make sure that the ABS indica-
tor light goes off.
Bleeding
When the brake fluid is completely drained from the
reservoir (air enters the modulator unit), bleed the air
from the modulator as follows:
1. Fill the reservoir to the MAX (upper) level with fresh
brake fluid.
2. Connect a tube to the maintenance bleeder on the
modulator unit, and set the other end of the tube in a
suitable container (see page
).
3. Loosen the bleeder, and start the engine to operate
the pump motor.
4. Tighten the bleeder when the fluid starts to flow out
of the bleeder.
NOTE: Take care not to spill the brake fluid from
the container.
5. Stop the engine after the pump motor stops.
NOTE: If the ABS indicator light comes on and the
pump motor stops, restart the engine and repeat steps
3 through 5 above.
Main Menu
Table of Contents
Modulator Function Check
Removal
NOTE: This inspection determines whether the basic
brake system continues to operate normally when the
modulator unit high-pressure side is low.
1. Relieve system pressure (see page
).
NOTE: After relieving, tighten the bleeder to 11 N-m
(1.1 kgf-m, 8 Ibf-ft).
BLEEDER
2. Raise the vehicle off the ground.
3. Have an assistant depress the brake pedal firmly, and
check that the wheels do not rotate. If the wheels
rotate, replace the modulator unit.
4. Start the engine to operate the pump motor, then
add brake fluid as needed.
NOTE:
If the reservoir empties, bleed the high-pressure
brake fluid.
If the pump motor operates for 40 seconds or
more, the indicator light comes on, and the
pump motor stops. Stop and restart the engine
to operate the pump motor again.
If the ABS indicator light comes on, remove the
ABS B2 (15 A) fuse for 3 seconds or more to
erase the DTC after servicing.
5. After the pump motor stops, refill the reservoir to
the MAX line.
6. After servicing, make sure the ABS indicator light
goes off.
1. Disconnect the 14P and 2P connectors.
2. Disconnect the six brake lines, then remove the
modulator unit.
From
left-front
From
right-rear
2P CONNECTOR
From
left-rear
From
right-front
RUBBER
MOUNT
14P CONNECTOR
From
master cylinder
rear side
BRACKET
8 mm NUT
21 N-m (2.1 kgf-m
15 Ibf-ft)
From
master cylinder
front side
8 mm BOLT
22 N-m (2.2 kgf-m, 16 Ibf-ft)
Main Menu
Table of Contents
Modulator Unit
Installation
NOTE: This procedure is for modulator unit replacement.
1. Fill the modulator reservoir to the MAX line.
2. Bleed air from the suction port in the modulator
unit by leaning the modulator unit to one side slow-
ly (about 45 degrees) as shown.
CAUTION: After bleeding air, do not turn the mod-
ulator unit upside-down or lean it excessively.
SUCTION PORT
About 45 degrees
3. Install the modulator unit in the reverse order of
removal.
NOTE: Check the letters stamped on the modulator
body, and connect the brake lines properly. Tighten
the flare nuts to 19 N-m (1.9 kgf-m, 14 Ibf-ft).
4. Start the engine to operate the pump motor, then add
brake fluid as needed.
NOTE:
If the pump motor operates for 40 seconds or
more, the indicator light comes on, and the pump
motor stops. Bleed the high-pressure brake fluid,
then remove the ABS B2 (15 A) fuse for 3 seconds
or more to erase the DTC.
If modulator removal/installation is for some
other reason than repairing or replacing the
modulator, the pump motor may not operate. In
this case, step 4 and 5 are not necessary.
5. After the pump motor stops, refill the reservoir to
the MAX line.
6. Make sure the ABS indicator light goes off.
7. Bleed the conventional brake system (see page
).
8. Perform ABS function test (see page
).
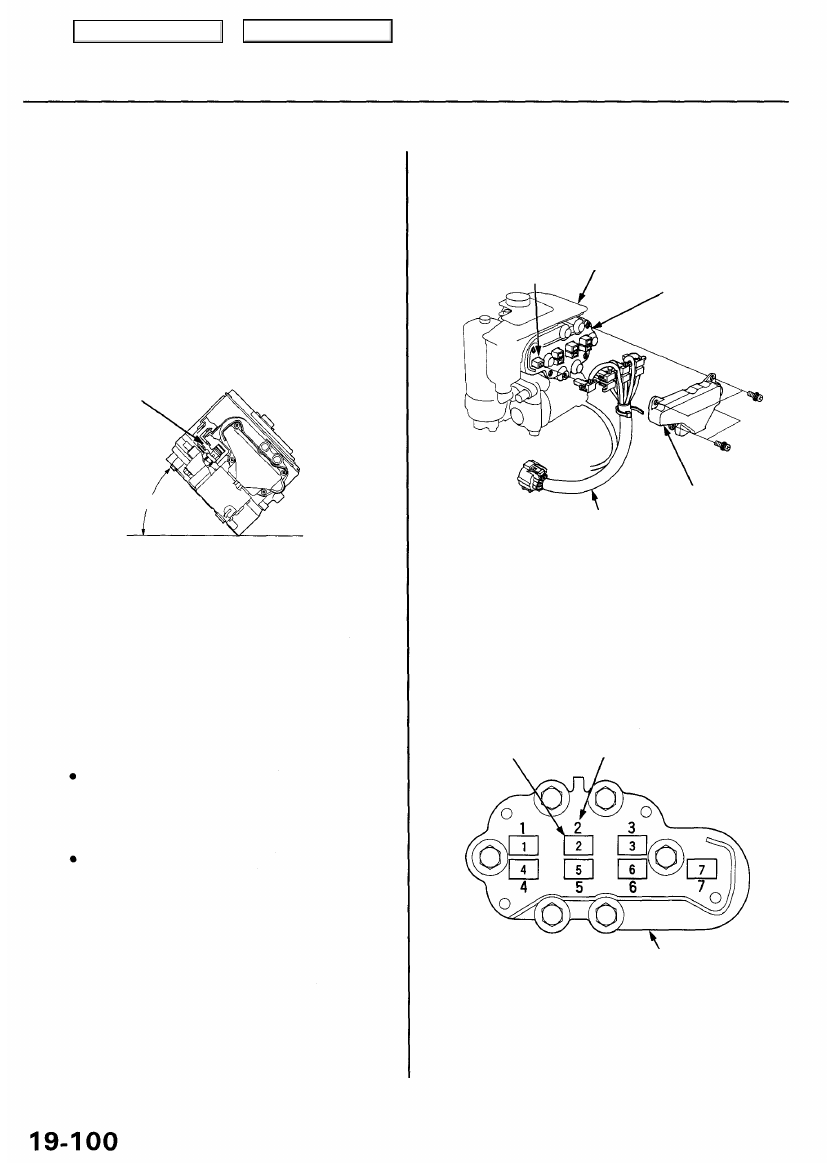
Wire Harness Replacement
1. Remove the modulator unit (see page
).
2. Remove the cover, then remove the wire harness.
MODULATOR UNIT
SOLENOID CONNECTOR
SET PLATE
COVER
WIRE HARNESS
3. Check the numbers stamped on the set plate, and
connect each connector of the new wire harness to
the set plate with the corresponding number.
CAUTION: This step is important. After connecting,
recheck the wire harness installation.
CONNECTOR
NUMBERS
(Stamped)
SET PLATE
4. Install the cover.
5. Perform modulator unit installation.
Main Menu
Table of Contents
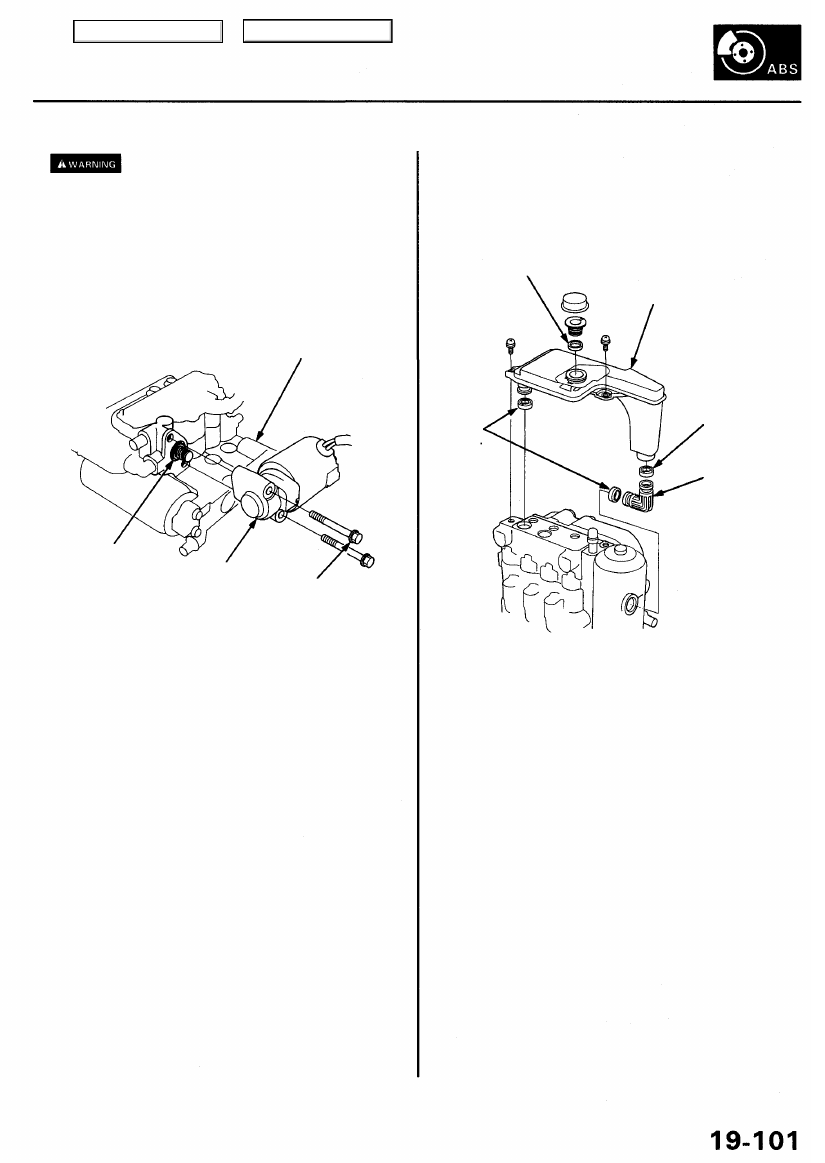
Pump Motor Replacement
The modulator unit contains high-pressure
brake fluid. Be sure to relieve system pressure unit
before removing the pump motor.
1. Relieve system pressure (see page
).
2. Remove the modulator unit (see page
).
3. Replace the pump motor.
MODULATOR UNIT
O-RING
Replace.
PUMP MOTOR
8 mm FLANGE BOLT
Replace.
NOTE: Use 8 mm bolts
in the pump motor set.
15 N-m (1.5 kgf-m, 11 Ibf-ft)
4. Perform modulator unit installation (see page
Reservoir Replacement
1. Remove the modulator unit (see page
2. Replace the reservoir.
O-RING
Replace.
RESERVOIR
Replace.
O-RING
Replace
O-RING
Replace.
JOINT
Replace.
3. Perform modulator unit installation (see page
).
Main Menu
Table of Contents
Нет комментариевНе стесняйтесь поделиться с нами вашим ценным мнением.
Текст