Acura RL (1996-2004 year). Manual — part 709
(K) From page
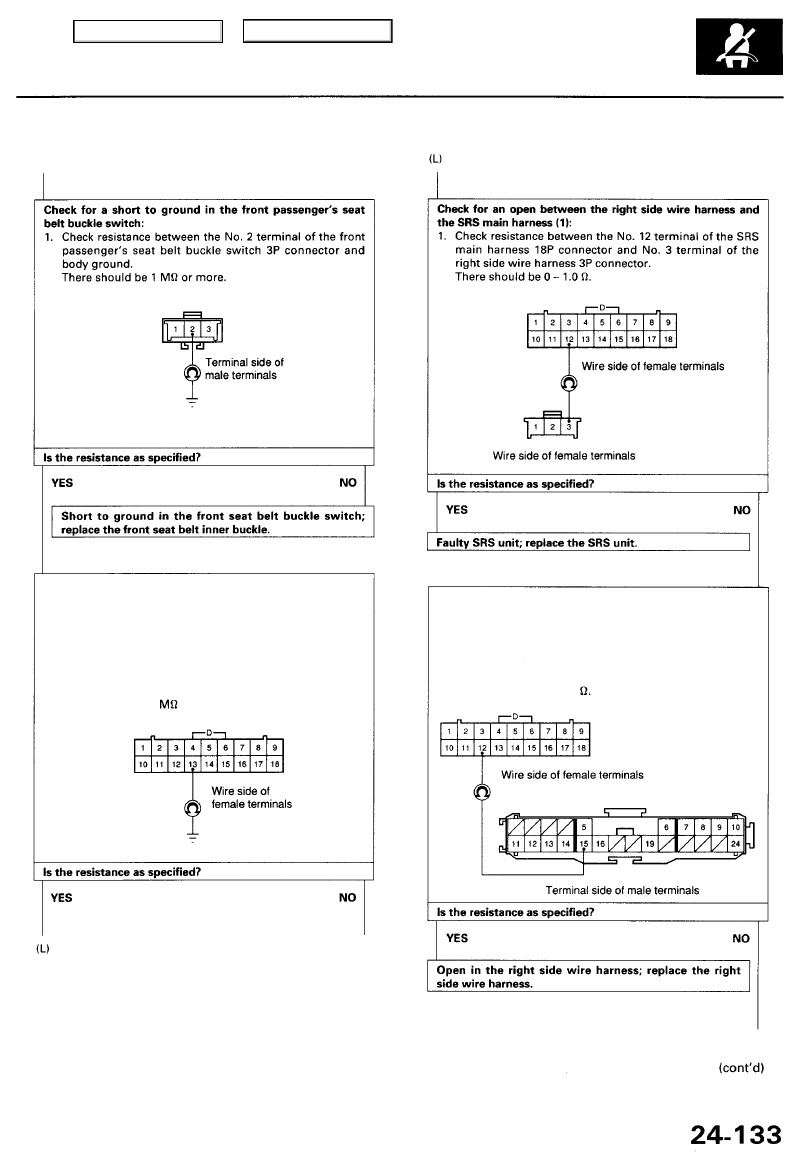
Check for a short to ground in the low line:
1. Disconnect the front passenger's tension reducer
solenoid connector from the front passenger's tension
reducer solenoid.
2. Disconnect the airbag connectors (see page
).
3. Disconnect the SRS main harness 18P connector from
the SRS unit.
4. Check resistance between the No. 13 terminal of the SRS
main harness 18P connectors and body ground.
There should be 1 or more.
Check for an open between the right side wire harness and
the SRS main harness (2):
1. Disconnect the right side wire harness 24P connector
).
2. Check resistance between the No. 12 terminal of the SRS
main harness 18P connector and the No. 15 terminal of
the main wire harness 24P connector.
There should be 0- 1.0
(M)
(N)
Main Menu
Table of Contents
Troubleshooting - '99 - 01 Models
DTC 9-4 (cont'd)
(N) From page
(M)
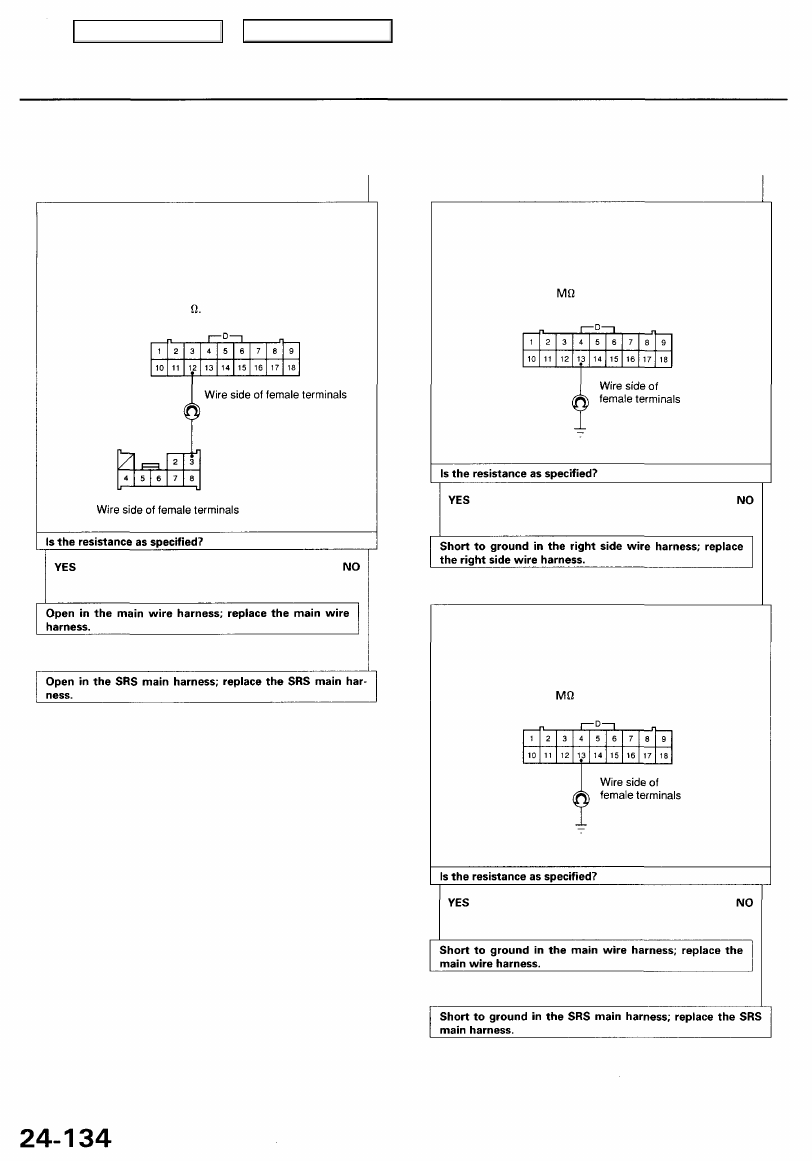
Check for a short to ground between the right side wire
harness and the SRS main harness (1):
1. Disconnect the right side wire harness 24P connector
(see page
).
2. Check resistance between the No. 13 terminal of the SRS
main harness 18P connector and body ground.
There should be 1 or more.
Check for an open between the right side wire harness and
the SRS main harness (3):
1. Disconnect the main wire harness 8P connector from the
SRS main harness (see page
).
2. Check resistance between the No. 12 terminal of the SRS
main harness 18P connector and the No. 3 terminal of
the SRS main harness 8P connector.
There should be 0 - 1.0
Check for a short to ground between the right side wire
harness and the SRS main harness (2):
1. Disconnect the main wire harness 8P connector from the
).
2. Check resistance between the No. 13 terminal of the SRS
main harness 18P connector and body ground.
There should be 1 or more.
Main Menu
Table of Contents
DTC 11-1 and DTC 11-2
CAUTION: Whenever the ignition switch is ON (II), or
has been turned OFF for less than 3 minutes, be careful
not to bump the SRS unit or the side impact sensor; the
airbags could accidentally deploy and cause damage or
injuries.
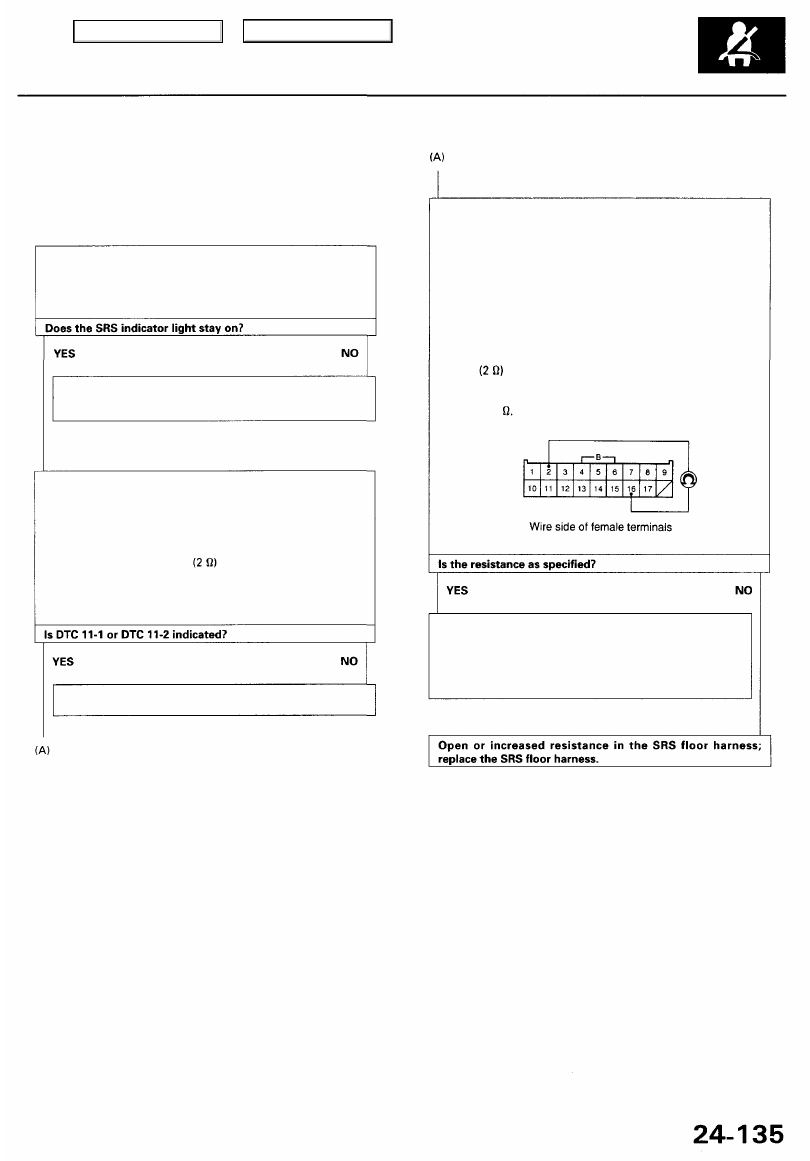
Check for an open or increased resistance in the SRS floor
harness:
1. Disconnect the negative battery cable, and wait for 3
minutes.
2. Disconnect between the front passenger's side airbag 2P
and the SRS floor harness 2P connectors, between the
driver's seat belt tensioner 2P and the left side wire har-
ness 2P connectors, and between the front passenger's
seat belt tensioner 2P and the right side wire harness 2P
connectors (see page
).
3. Disconnect the SRS floor harness 18P connector from the
). Do not disconnect the special
tool from the SRS floor harness 2P connector.
4. Check resistance between the No. 2 and No. 16 terminals
of the SRS floor harness 18P connector. There should be
2.0-3.0
Try to reproduce the SRS indicator light:
1. Erase the DTC memory (see page
).
2. Turn the ignition switch ON (II), and check that the SRS
indicator light comes on for about 6 seconds, and then
goes off.
Intermittent failure, system is OK at this time. See
Troubleshooting Intermittent Failures on page
Check for an open or increased resistance in the driver's
side airbag inflator:
1. Disconnect the negative battery cable, and wait for 3
minutes.
2. Disconnect the SRS floor harness 2P connector from the
driver's side airbag 2P connector (see page
).
3. Connect the special tool to the SRS floor harness 2P
).
4. Reconnect the negative battery cable.
5. Erase the DTC memory (see page
).
).
Open or increased resistance in the driver's side airbag
inflator; replace the driver's side airbag (see page
).
Faulty SRS unit or poor contact at the SRS floor harness
18P connector and the SRS unit; check the connection
between the SRS floor harness 18P connector and the
SRS unit.
• If the connector is OK, replace the SRS unit (see page
).
Main Menu
Table of Contents
Troubleshooting - '99 - 01 Models
DTC 11-3
CAUTION: Whenever the ignition switch is ON (II), or
has been turned OFF for less than 3 minutes, be careful
not to bump the SRS unit or the side impact sensor; the
airbags could accidentally deploy and cause damage or
injuries.
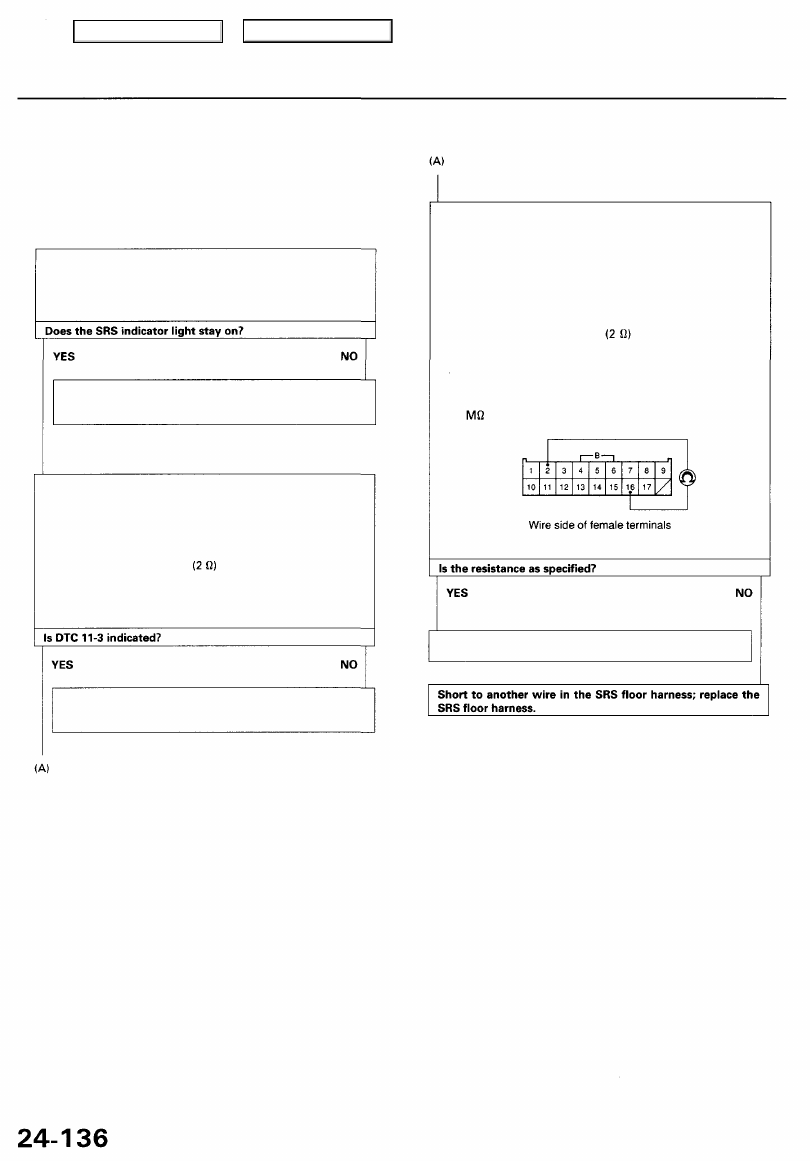
Try to reproduce the SRS indicator light:
1. Erase the DTC memory (see page
).
2. Turn the ignition switch ON (II), and check that the SRS
indicator light comes on for about 6 seconds, and then
goes off.
Check for a short to another wire in the SRS floor harness:
1. Disconnect the negative battery cable, and wait for 3
minutes.
2. Disconnect between the front passenger's side airbag 2P
and the SRS floor harness 2P connectors, between the
driver's seat belt tensioner 2P and the left side wire har-
ness 2P connectors, and between the front passenger's
seat belt tensioner 2P and the right side wire harness 2P
connectors (see page
).
3. Disconnect the special tool from the SRS floor har-
).
4. Disconnect the SRS floor harness 18P connector from
).
5. Check resistance between the No. 2 and No. 16 terminals
of the SRS floor harness 18P connector. There should be
1 or more.
Check for a short to another wire in the driver's side airbag
inflator:
1. Disconnect the negative battery cable, and wait for 3
minutes.
2. Disconnect the SRS floor harness 2P connector from the
driver's side airbag 2P connector (see page
).
3. Connect the special tool to the SRS floor harness 2P
).
4. Reconnect the negative battery cable.
5. Erase the DTC memory (see page
).
).
Faulty SRS unit; replace the SRS unit (see page
).
Short to another wire in the driver's side airbag inflator;
replace the driver's side airbag (see page
).
Intermittent failure, system is OK at this time. See
Troubleshooting Intermittent Failures on page
Main Menu
Table of Contents
Нет комментариевНе стесняйтесь поделиться с нами вашим ценным мнением.
Текст