Acura RL (1996-2004 year). Manual — part 581
Hood
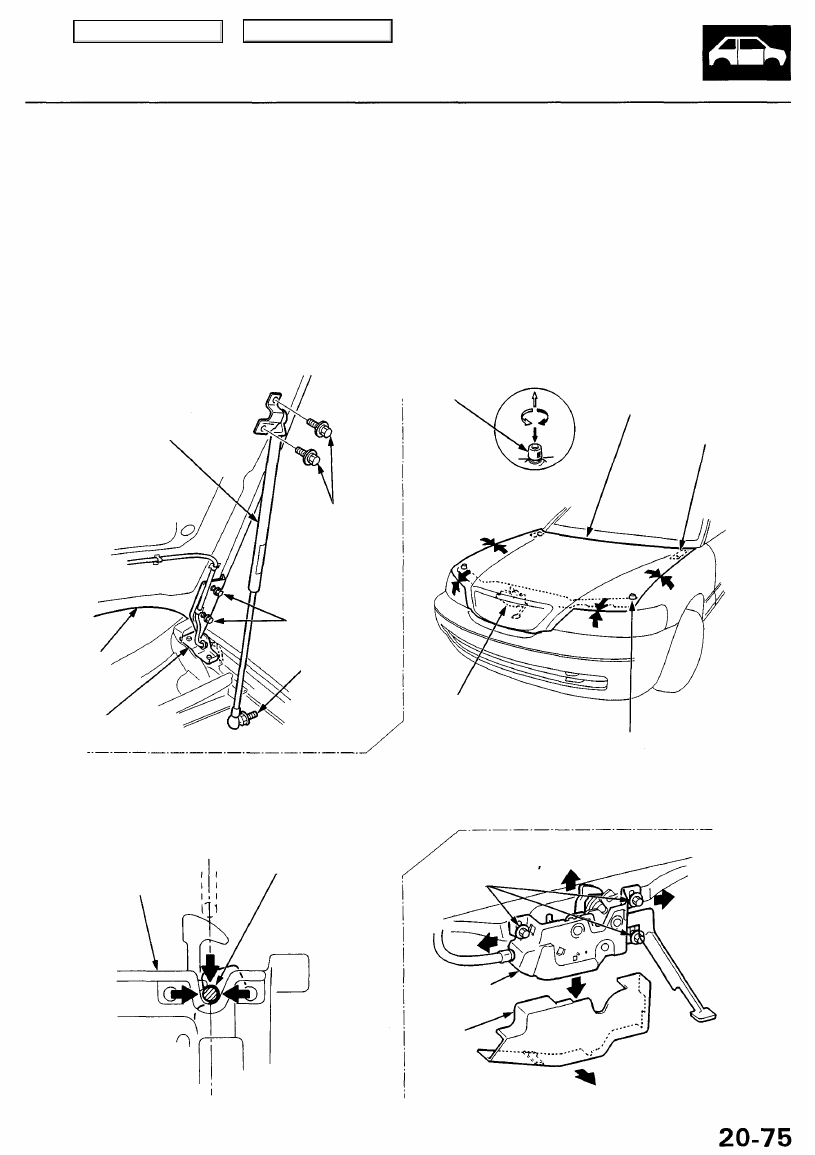
Adjustment
NOTE: Before adjusting the hood, remove the support strut from each side of the hood, and loosen each hood mounting
bolt slightly.
1. Adjust the hood right and left, as well as fore and aft, by using the elongated holes on the hood hinge.
2. Turn the hood edge cushions, as necessary, to make the hood fit flush with the body at front and side edges.
3. Adjust the hood latch to obtain the proper height at the forward edge.
4. After adjustment, tighten each bolt securely.
5. Apply touch-up paint to the hinge mounting bolts and around the hinges.
SUPPORT
STRUT
{ HOOD EDGE
I CUSHION
HOOD
HOOD
HINGE
6 x 1.0 mm
9.8 N-m (1.0 kgf-m,
7.2 Ibf-ft)
6 x 1.0 mm
9.8 N-m (1.0 kgf-m,
7.2 Ibf-ft)
8 x 1.25 mm
22 N-m (2.2 kgf-m,
16 Ibf-ft)
NOTE: Move the hood latch right or left until the striker
is centered in the hood latch as shown.
HOOD
LATCH
HOOD
HOOD
HINGE
HOOD EDGE
CUSHION
HOOD
LATCH
STRIKER
6 x 1.0 mm
9.8 N-m (1.0 kgf-m
7.2 Ibf-ft)
COVER
Remove.
HOOD
LATCH
Main Menu
Table of Contents
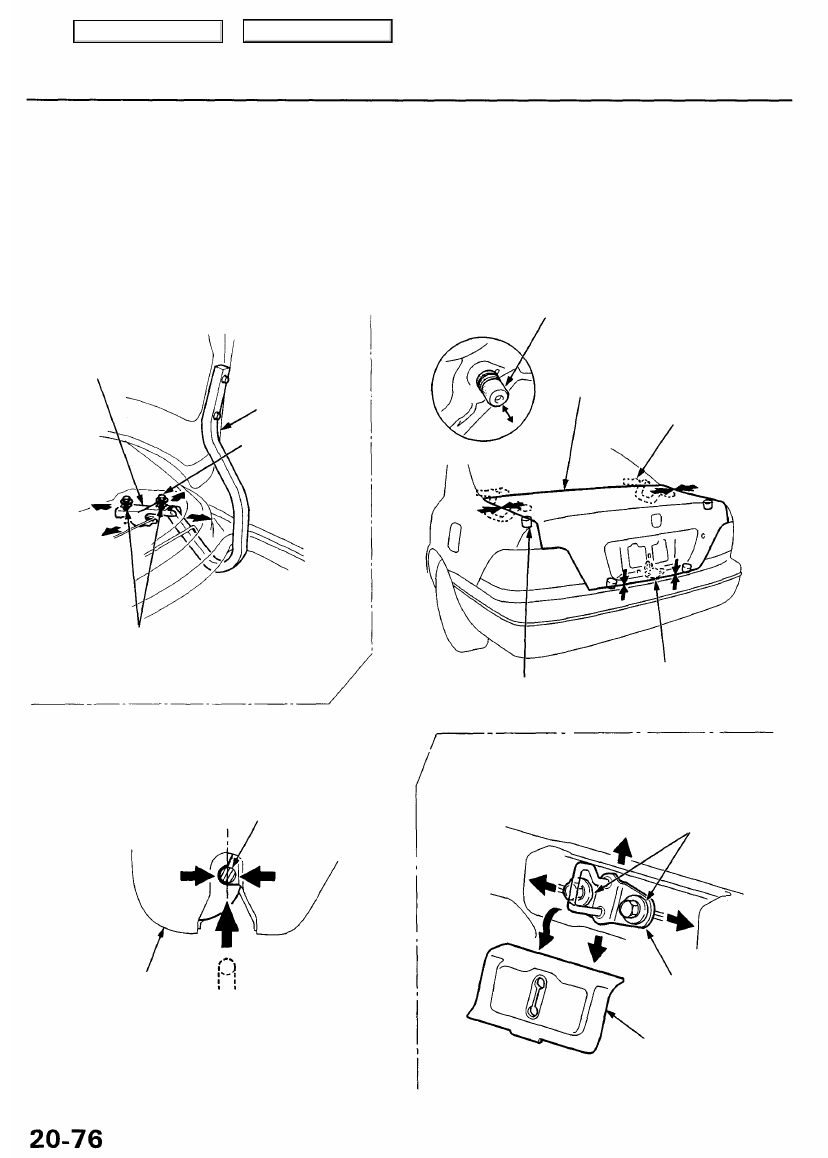
Adjustment
NOTE: Before adjusting the trunk lid, loosen each bolt slightly.
1. Adjust the trunk lid hinges right and left, as well as fore and aft, by using the elongated holes.
2. Turn the trunk lid edge cushions, as necessary, to make the trunk lid fit flush with the body at the rear and side edges.
3. Adjust the fit between the trunk lid and the trunk lid opening by moving the striker.
4. After adjustment, tighten each bolt securely.
TRUNK LID
HINGE
TRUNK LID
NOTE: Take care not
to hit the rear window
when loosening the
bolts.
6 x 1.0 mm
9.8 N-m (1.0 kgf-m. 7.2 Ibf-ft)
NOTE: Remove the rear shelf (see page
).
NOTE: Move the striker right or left until it's centered in
the trunk lid latch as shown.
STRIKER
TRUNK LID
LATCH
TRUNK LID EDGE
CUSHION
TRUNK LID
HINGE
STRIKER
TRUNK LID
EDGE CUSHION
NOTE: When adjusting the striker, remove the rear trim
panel (see page
), then remove the striker cover.
6 x 1.0 mm
9.8 N-m (1.0 kgf-m,
7.2 Ibf-ft)
STRIKER
COVER
STRIKER
TRUNK LID
Trunk Lid
Main Menu
Table of Contents
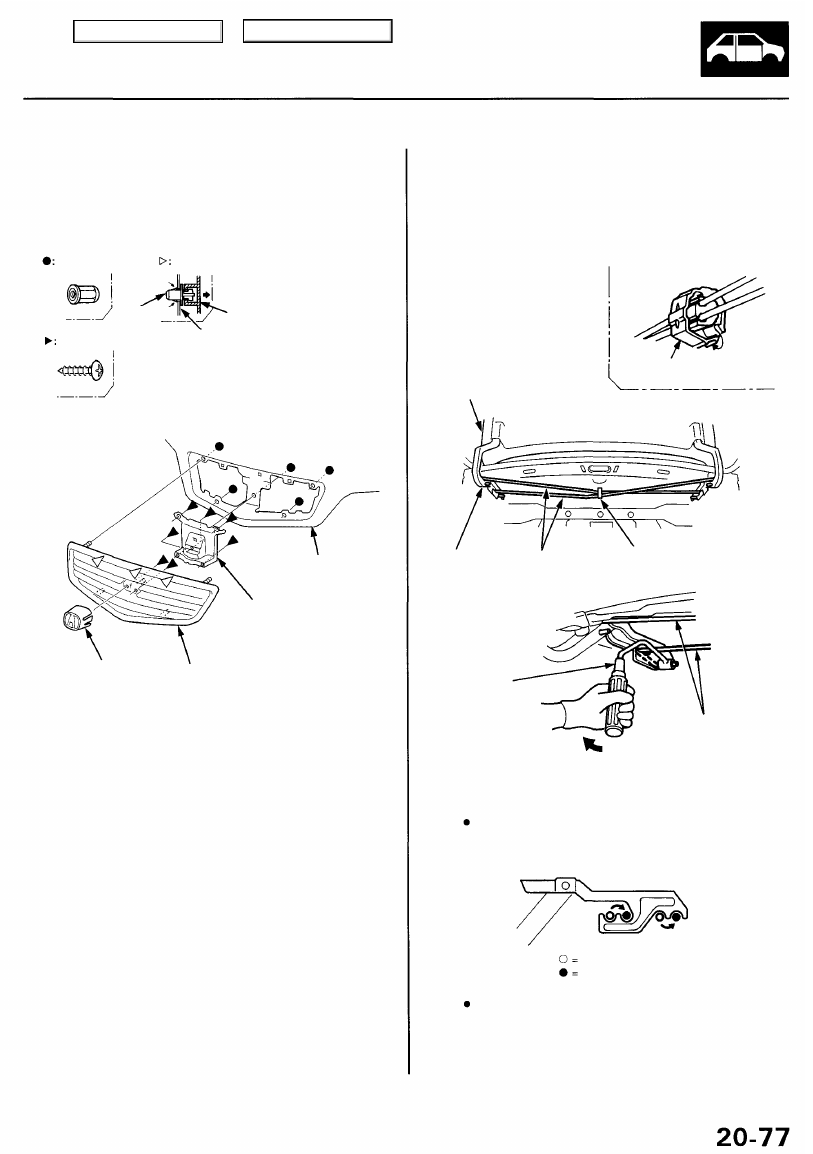
Front Grille
Trunk Lid Torsion Bars
Removal
NOTE: Take care not to scratch the hood.
1. Open the hood, then remove the nuts.
2. Detach the clips, then remove the front grille.
CLIP
Screw locations, 7
FRONT
GRILLE
HOOD
HOOD
FRONT GRILLE
COVER
EMBLEM
FRONT
GRILLE
3. If necessary, remove the emblem.
4. Installation is the reverse of the removal procedure.
NOTE: If necessary, replace any damaged clips.
Removal
CAUTION: Put on gloves to protect your hands.
NOTE: Take care not to damage the body.
Remove the torsion bars with the torsion bar assembly
tool while holding the trunk lid as shown.
TRUNK LID
TRUNK LID
HINGE
TORSION
BARS
TORSION BAR
CENTER CLIP
TORSION BAR
ASSEMBLY TOOL
TORSION
BARS
Installation is the reverse of the removal procedure.
NOTE:
Adjust the torsion bars fore or aft with the torsion
bar assembly tool as shown.
Make sure the trunk lid opens properly.
Clip locations, 3
Nut locations, 5
Normal position
Higher tension
TORSION BAR
CENTER CLIP
Main Menu
Table of Contents
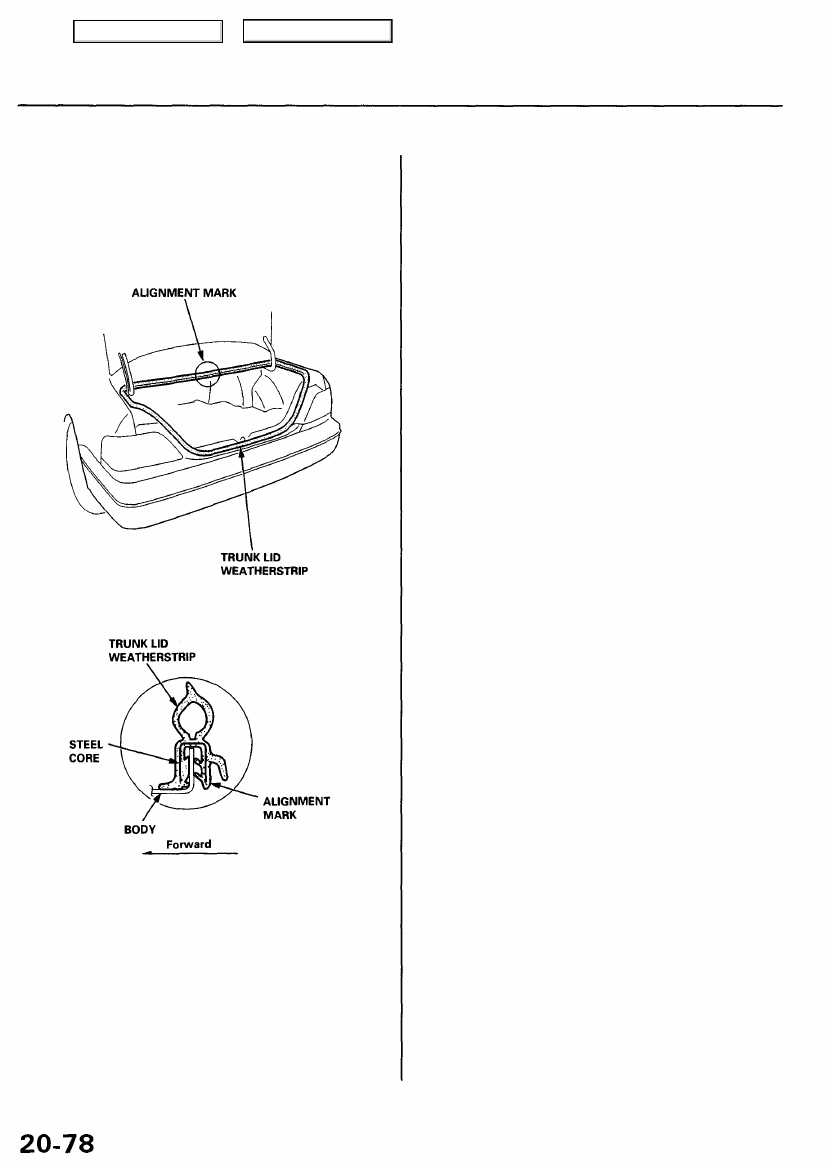
Trunk Lid Weatherstrip
Installation
When installing the trunk lid weatherstrip, align it with
the alignment mark on the trunk lid opening.
NOTE:
• Make sure there are no wrinkles in the weatherstrip,
• Check for water leaks.
Main Menu
Table of Contents
Нет комментариевНе стесняйтесь поделиться с нами вашим ценным мнением.
Текст