Acura TL (1995-1998) body repair. Manual — part 6
Front Bulkhead
Replacement
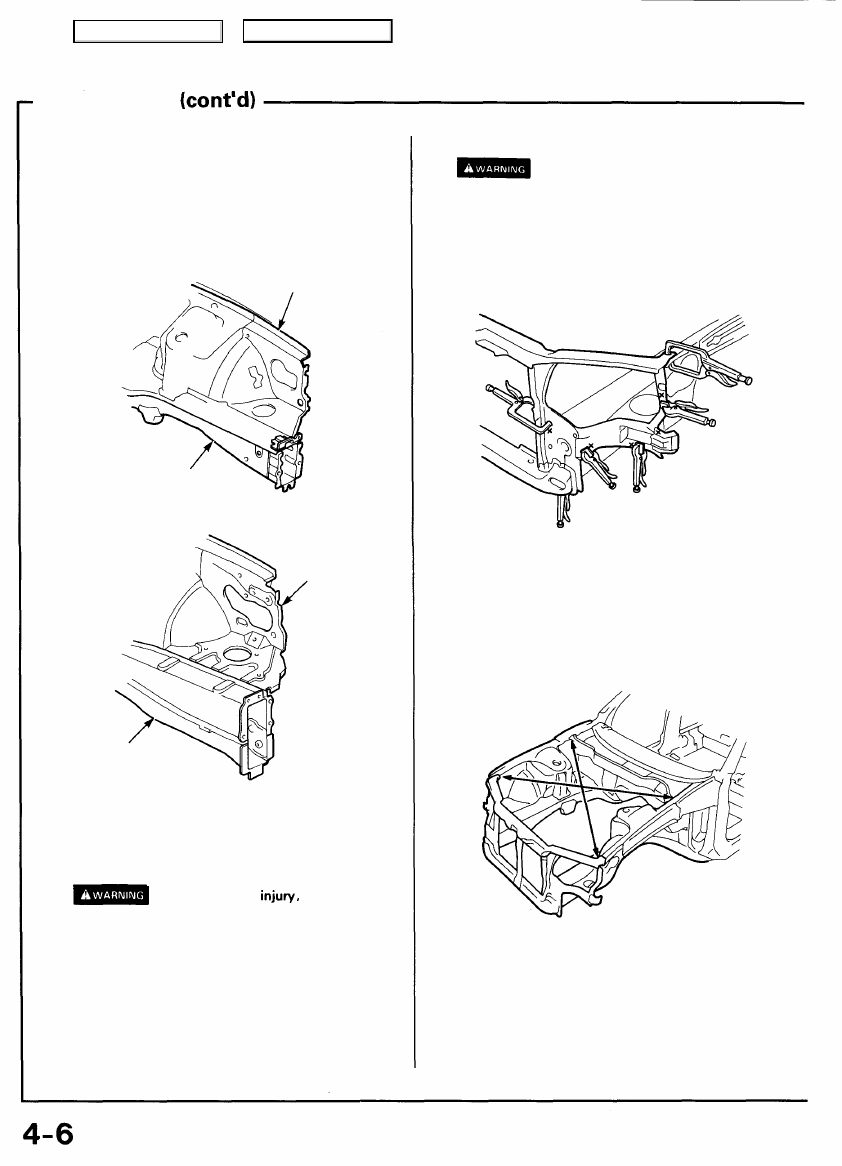
5. Mold the damaged related parts.
• Use a hammer and dolly to mold the damaged areas
of the front wheelhouse front and side frame.
• Even out the welding flanges with a hammer and
dolly.
• Fill all drilled holes by MIG or gas welding.
2.5TL:
FRONT WHEEL-
HOUSE
FRONT SIDE FRAME
3.2TL:
FRONT
WHEEL-
HOUSE
FRONT SIDE
FRAME
6. Set the new front bulkhead.
• Grind both sides of the welding section of the bulk-
head with a sander to remove the undercoat and
expose the steel plate.
To prevent eye
wear goggles
or safety glasses whenever sanding, cutting or
grinding.
• Clamp both the right and left sides with the vise-
grips as shown.
NOTE: Apply the spot sealer to the welding surface
when spot welding.
• Check the front bulkhead position using the body
dimensional drawings (see
).
7. Tack weld the new front bulkhead.
To prevent eye injury and burns
when welding, wear an approved welding helmet,
gloves and safety shoes.
Spot weld the clamped sections.
NOTE: Make sure that the right and left bulkheads are
in line with each other.
8. Measure the front compartment diagonally.
Measure the front compartment diagonally with a track-
ing gauge or convex tool as shown to check it for
twisting or bending.
9. Temporarily assemble the hood, headlight and front
fender, then check the clearances and level differences.
Main Menu
Table of Contents
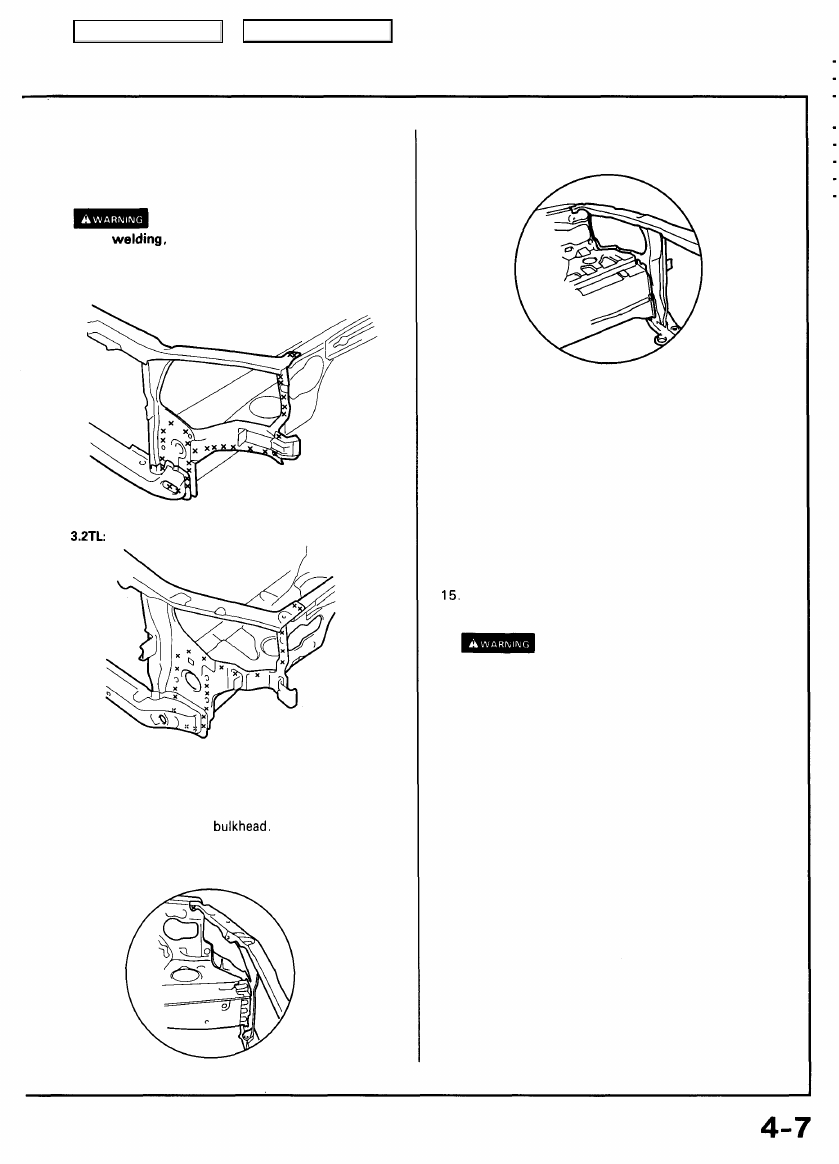
10. Perform the main welding.
• Spot weld the bulkhead as shown.
• Make 20% to 30% more spot welds than there were
holes drilled.
To prevent eye injury and burns
when
wear an approved welding helmet,
gloves and safety shoes.
2.5TL:
11. Finish the welds.
Use a hammer and dolly to even out the front wheel-
house and front side frame flanges for a close fit with
the surface of the front
2.5TL:
3.2TL:
).
13. Attach the front fender.
Lower the body.
NOTE: Tighten the wheel nuts to the specified torque.
Torque: 108 N-m (11.0 kgf-m, 79.6 Ibf-ft)
Apply the paint.
See Paint Repair section.
• Ventilate when spraying paint. Most paint
contains substances that are harmful if inhaled
or swallowed. Read the paint label before
opening the paint container.
• Avoid contact with skin. Wear an approved
respirator, gloves, eye protection and appropriate
clothing when painting.
• Paint is flammable. Store it in a safe place, and
keep it away from sparks, flames or cigarettes.
16. Install the related parts.
Inspect, check, and make adjustments.
• Adjust the headlight aim.
• Check that the electical components light up and
operate properly.
• Replenish radiator coolant and inspect for leaks.
Main Menu
Table of Contents
Front Wheelhouse/Damper Housing
Description
The front wheelhouse component is constructed as a unit with the front damper housing. Therefore, replacement of the
component affects the front wheel alignment. When assembling it, either use a positioning jig or follow dimensions on the
frame repair chart for positioning. Weld carefully.
Main Menu
Table of Contents
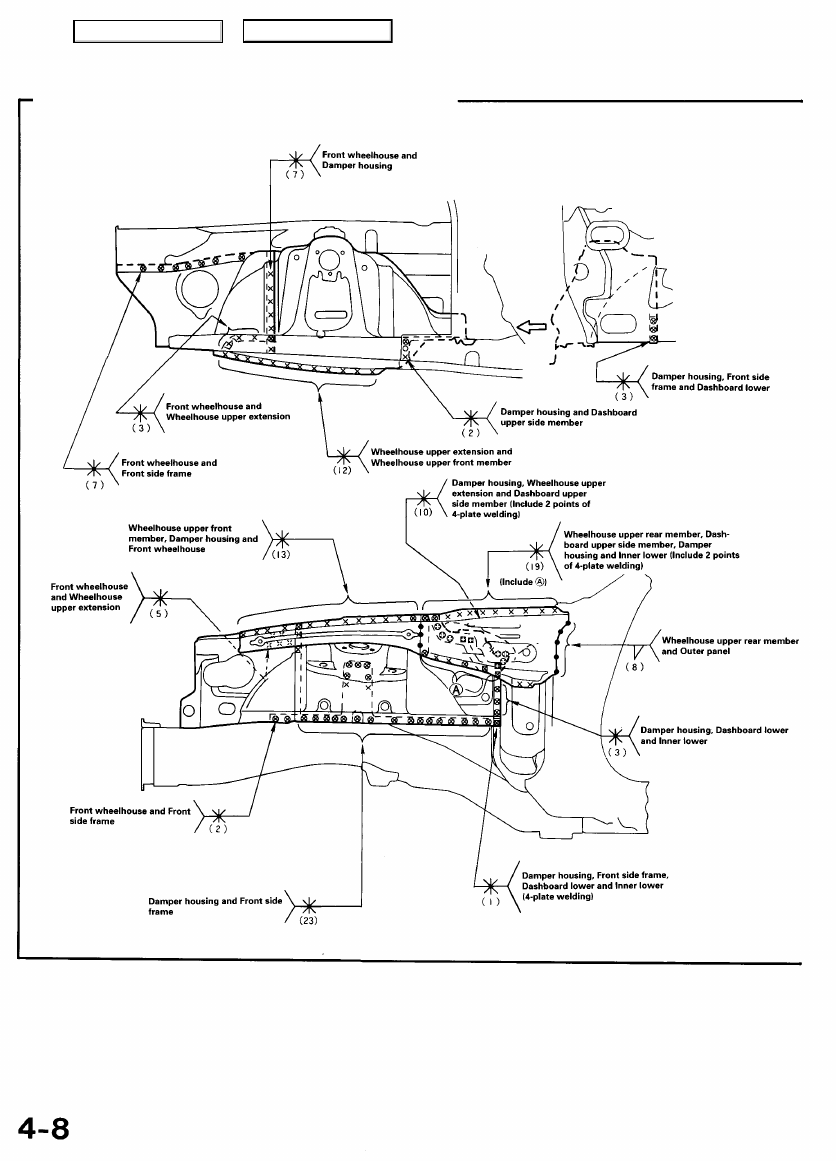
Mass Production Body Welding Diagram
Front Wheelhouse/Damper Housing
2.5TL:
Main Menu
Table of Contents
Нет комментариевНе стесняйтесь поделиться с нами вашим ценным мнением.
Текст