Mazda Transaxle FN4A-EL. Manual — part 4
K1–8
AUTOMATIC TRANSAXLE
Caution
••••
Clean the transaxle exterior thoroughly with a steam cleaner or cleaning solvents before removal.
••••
If any old sealant gets into the transaxle during installation of the oil pan, trouble may occur in the
transaxle. Remove any old sealant from the transaxle case and oil pan, and clean with cleaning
fluids.
14. Remove the oil pan.
Examine any material found in the pan or on the magnet to determine the condition of the transaxle. If large
amounts of material are found, replace the torque converter and carefully inspect the transaxle for the cause.
(1) Clutch facing material
•
Drive plate and brake band wear
(2) Steel (magnetic)
•
Bearing, gear, and driven plate wear
(3) Aluminum (nonmagnetic)
•
Aluminum part wear
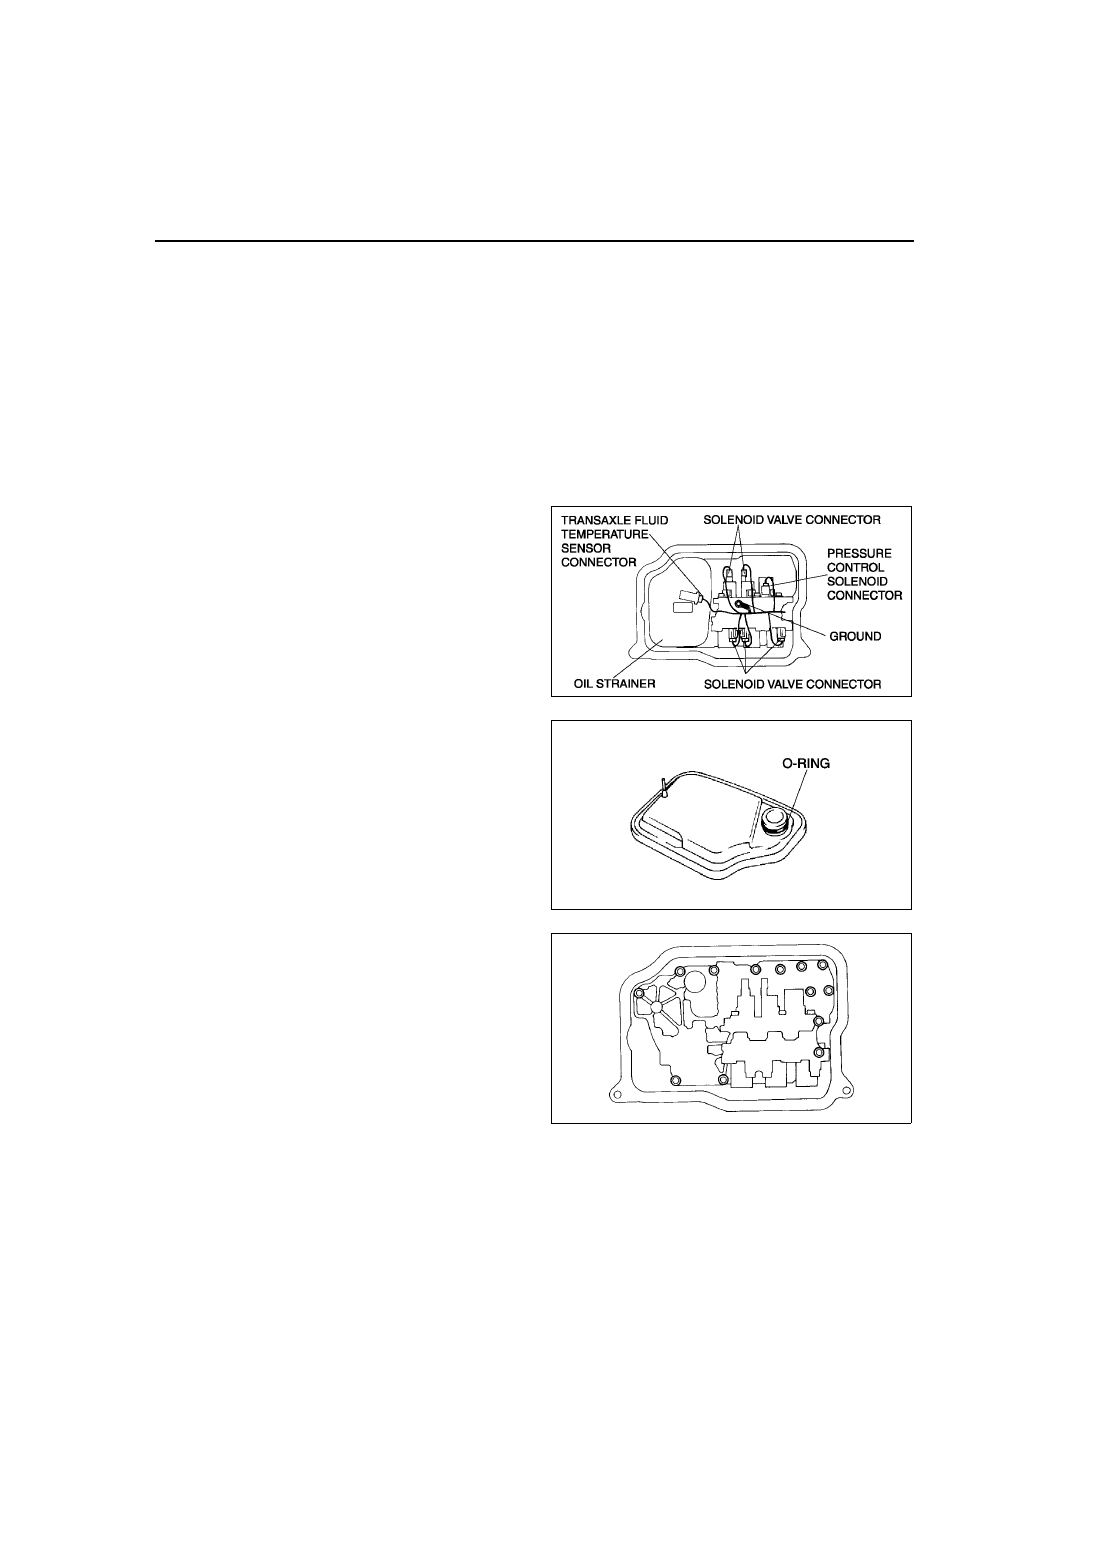
15. Disconnect the solenoid valve connector, ground,
and transaxle fluid temperature sensor connector.
16. Remove the oil strainer.
17. Remove the O-ring from the oil strainer.
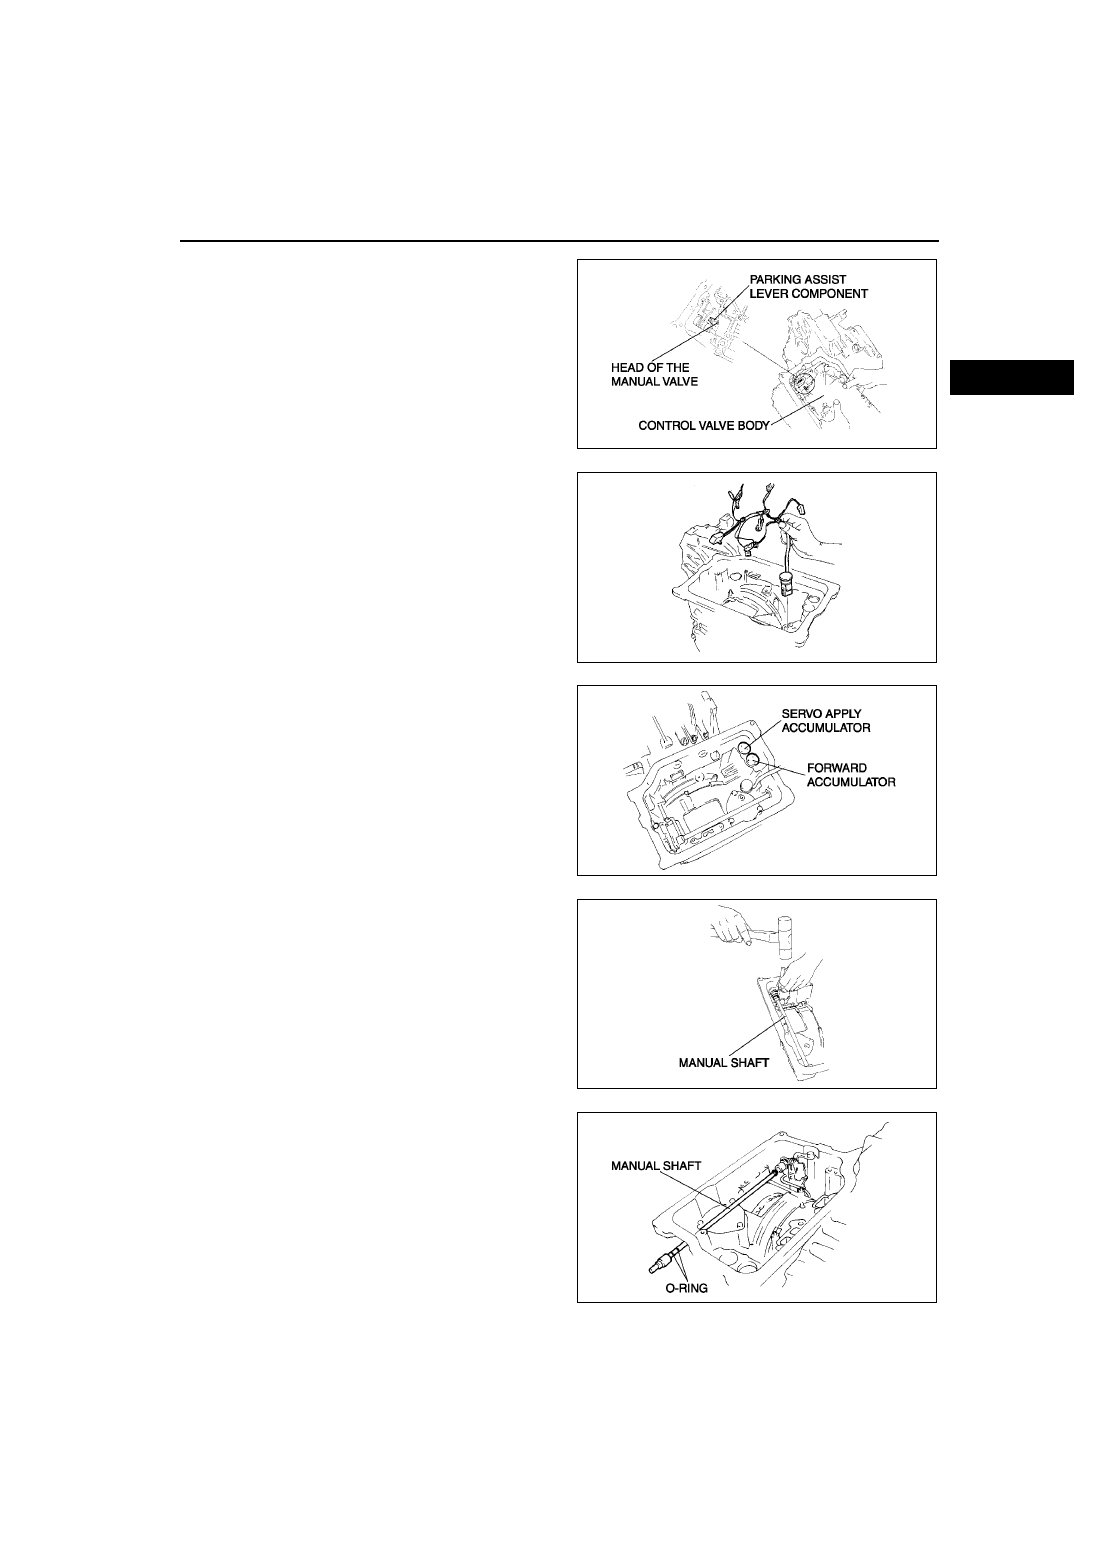
18. Remove the bolts as shown in the figure.
Note
•
Remove the control valve body by removing
the head of the manual valve from the port of
the parking assist lever component.
A6E5714A007
A6E5714A008
X3U517AA8
AUTOMATIC TRANSAXLE
K1–9
K1
19. Remove the control valve body.
20. Remove the coupler component.
21. Remove the accumulator component.
22. Remove the manual shaft.
(1) Remove the roll pin using a pin punch.
(2) Remove the manual shaft.
(3) Remove the O-ring from the manual shaft.
A6E5714A009
X3U517AAA
A6E5714A010
A6E5714A011
A6E5714A012
K1–10
AUTOMATIC TRANSAXLE
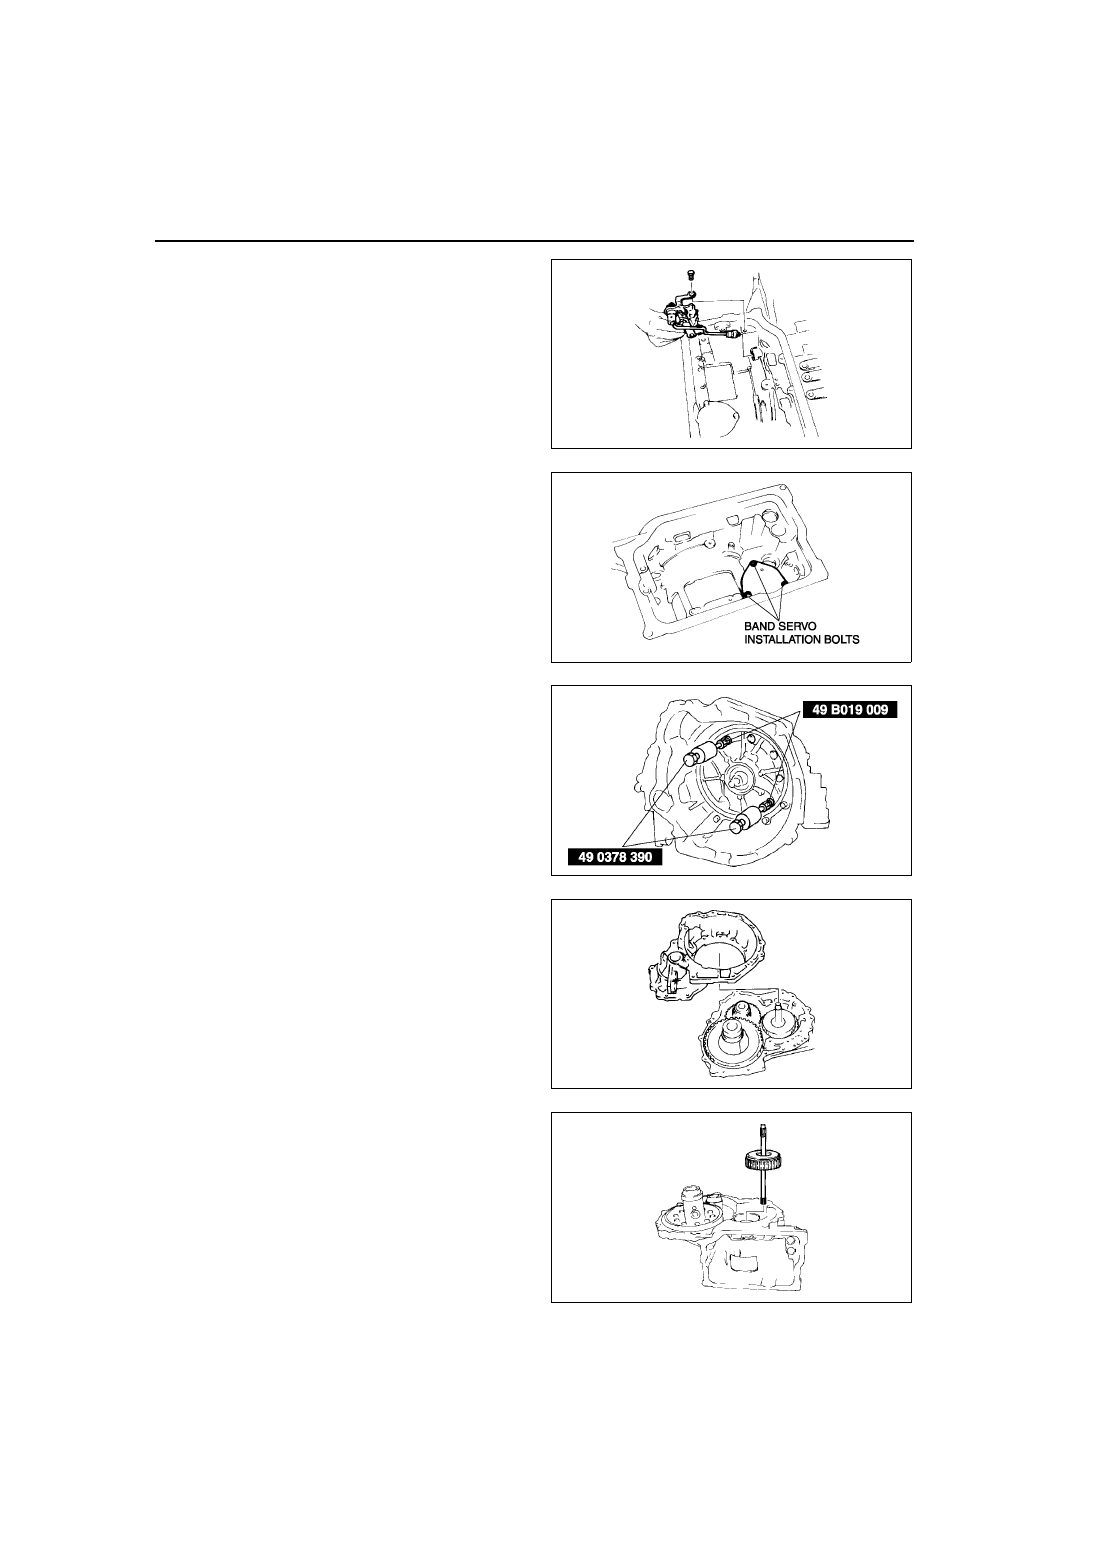
23. Remove the parking rod lever component.
24. Remove the band servo component.
25. Remove the oil pump using the SST.
26. Remove the converter housing by tapping lightly
with a plastic hammer.
27. Remove the forward clutch component.
X3U517AAE
A6E5714A013
A6E5714A014
X3U517AAH
X3U517AAJ
AUTOMATIC TRANSAXLE
K1–11
K1
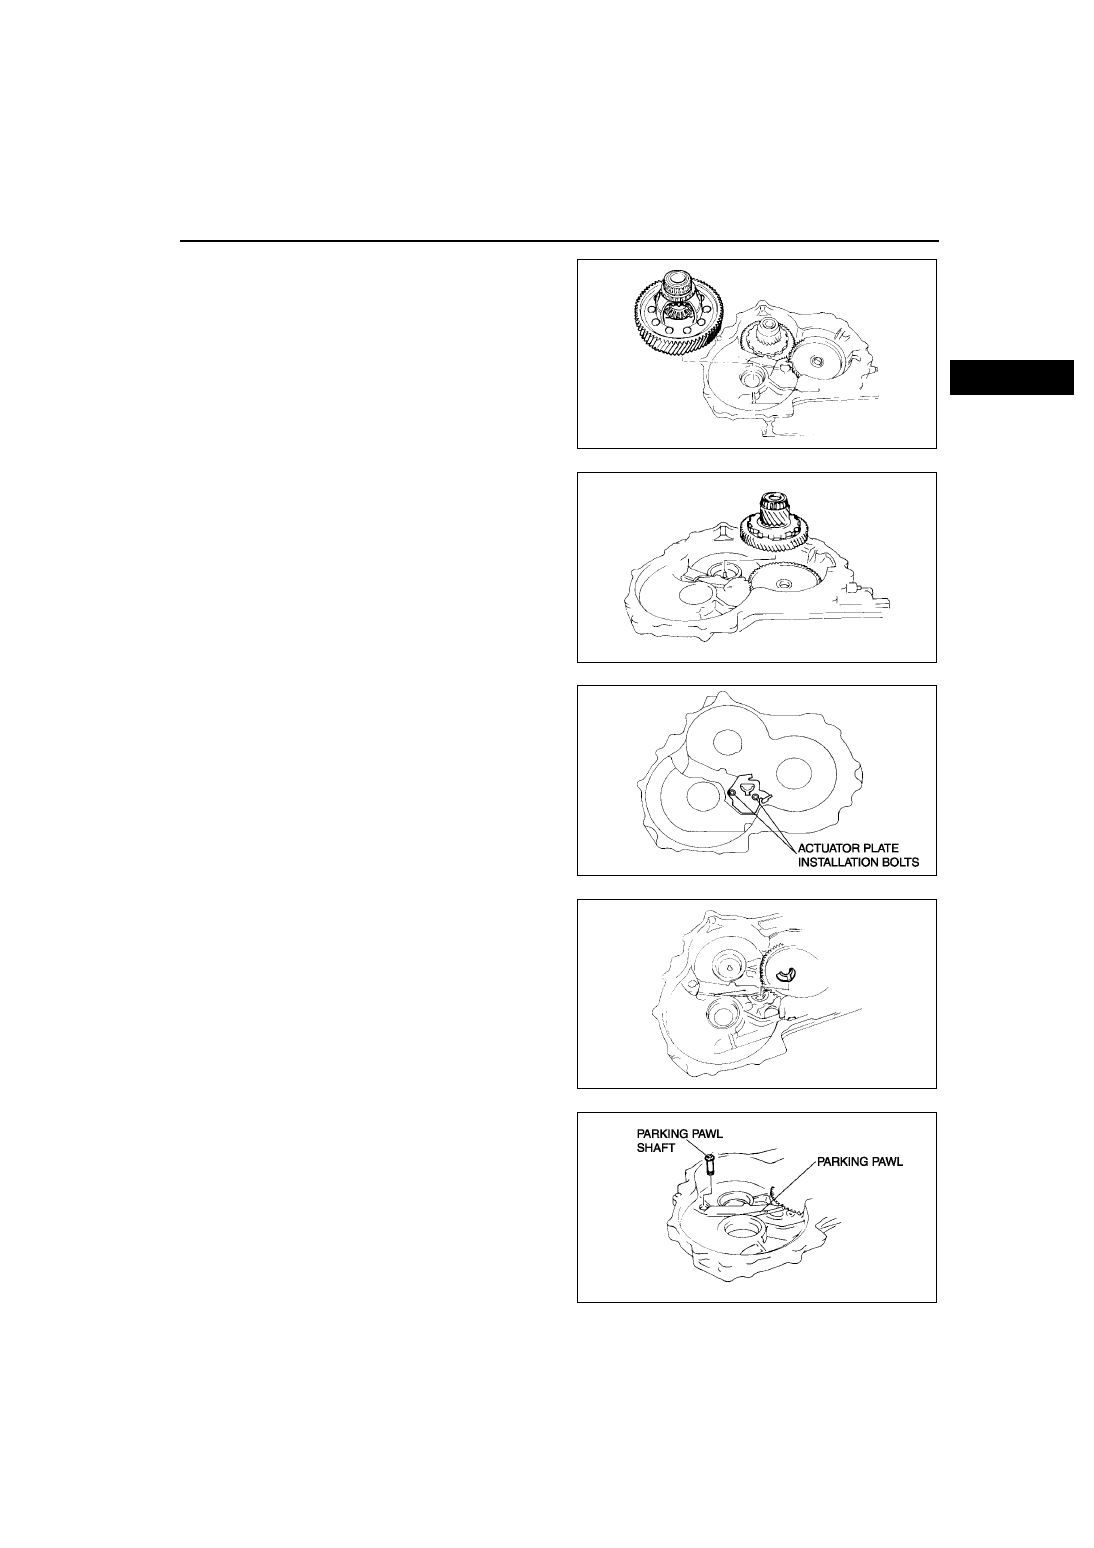
28. Remove the differential.
29. Remove the secondary gear and output gear.
30. Remove the actuator plate.
31. Remove the support actuator.
32. Pull out the parking pawl shaft.
33. Remove the parking pawl.
X3U517AAK
X3U517AAL
A6E5714A015
X3U517AAN
A6E5714A016
Нет комментариевНе стесняйтесь поделиться с нами вашим ценным мнением.
Текст