Mazda Training manual — part 190

TC001-18-01H
INTRODUCTION TO M-MDS
03 - PDA Navigation
Activity 03- Page 7
Reset button
Now that you have mastered basic PDA navigation, perform a soft reset so the PDA
will be ready to use with M-MDS. The soft reset deletes data that has not been saved,
such as the current vehicle session, but saves data previously stored in the PDA’s
memory.
To perform a soft reset, use the stylus to press the reset button one time on the back
of the PDA, as shown in the picture below.
NOTE
On an HP PDA, the reset button is in a different location. Ask your instructor if you
are not sure where the reset button is located.
Conclusion:
In this activity, you performed basic PDA navigation to view battery status, adjust
screen brightness, and adjust screen “on time.” You also learned “soft resetting”
the PDA.
Instructor Sign-off: ____________________________________
TC001-18-01H
INTRODUCTION TO M-MDS
04 - Retrieving and Clearing DTCs
Activity 04- Page 1
Activity 04: Retrieving and Clearing DTCs
Upon completing this activity you will be able to use M-MDS to:
•
Open a vehicle session
•
Retrieve and clear DTCs from a current Mazda vehicle
•
Close a vehicle session
What you need to complete this activity:
•
A current Mazda vehicle prepped by your instructor
•
Mazda-approved PDA with PDS installed
•
Mazda-approved laptop with ActiveSync installed
•
High-speed internet access if possible.
•
VCM
Procedure:
Initialize M-MDS and Open a Vehicle Session
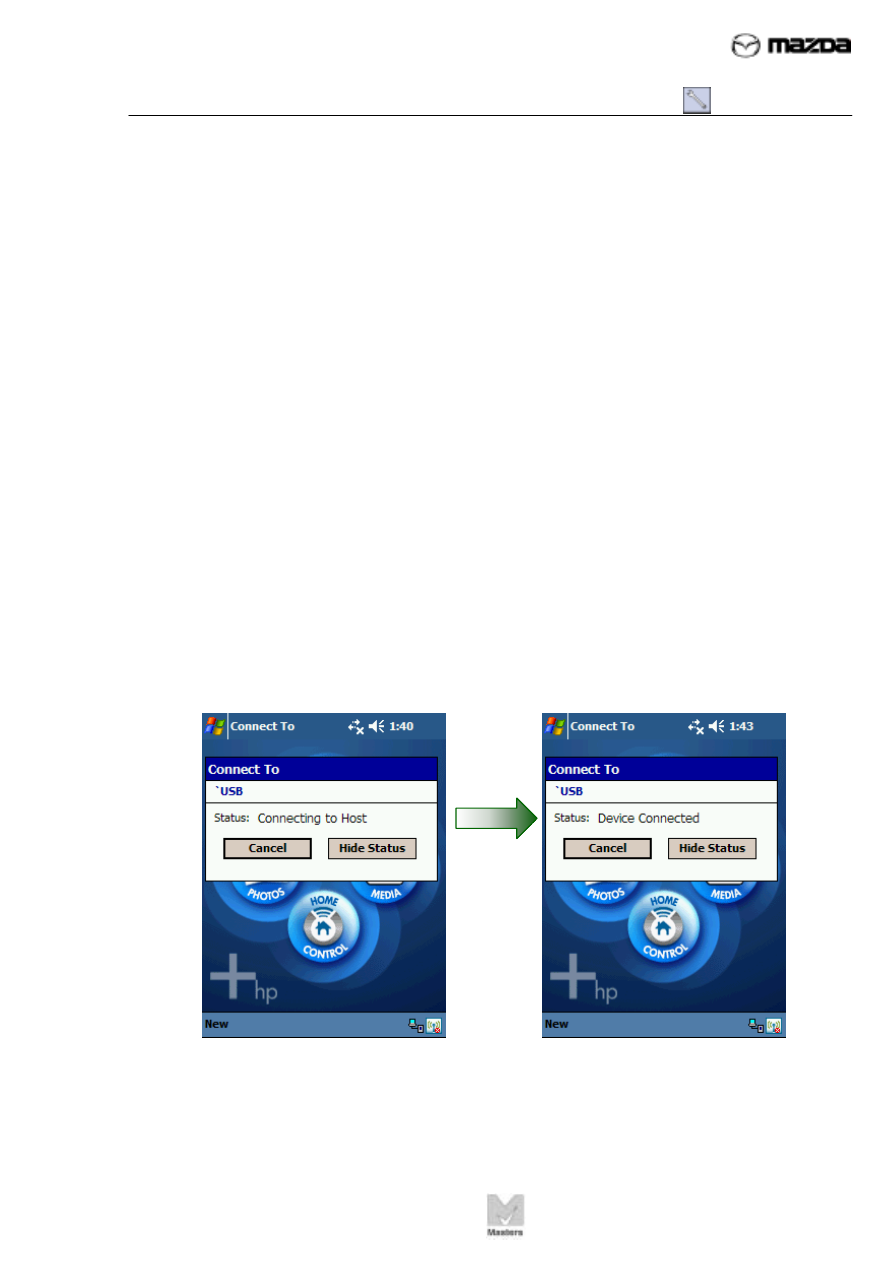
1. Connect the M-MDS data cable to DLC 2 under the dash. The PDA will turn on
automatically.
Three USB pop-up messages quickly flash on and off the PDA. You may
not see the first two messages:
USB message 2
USB message 1
TC001-18-01H
INTRODUCTION TO M-MDS
04 - Retrieving and Clearing DTCs
Activity 04- Page 2
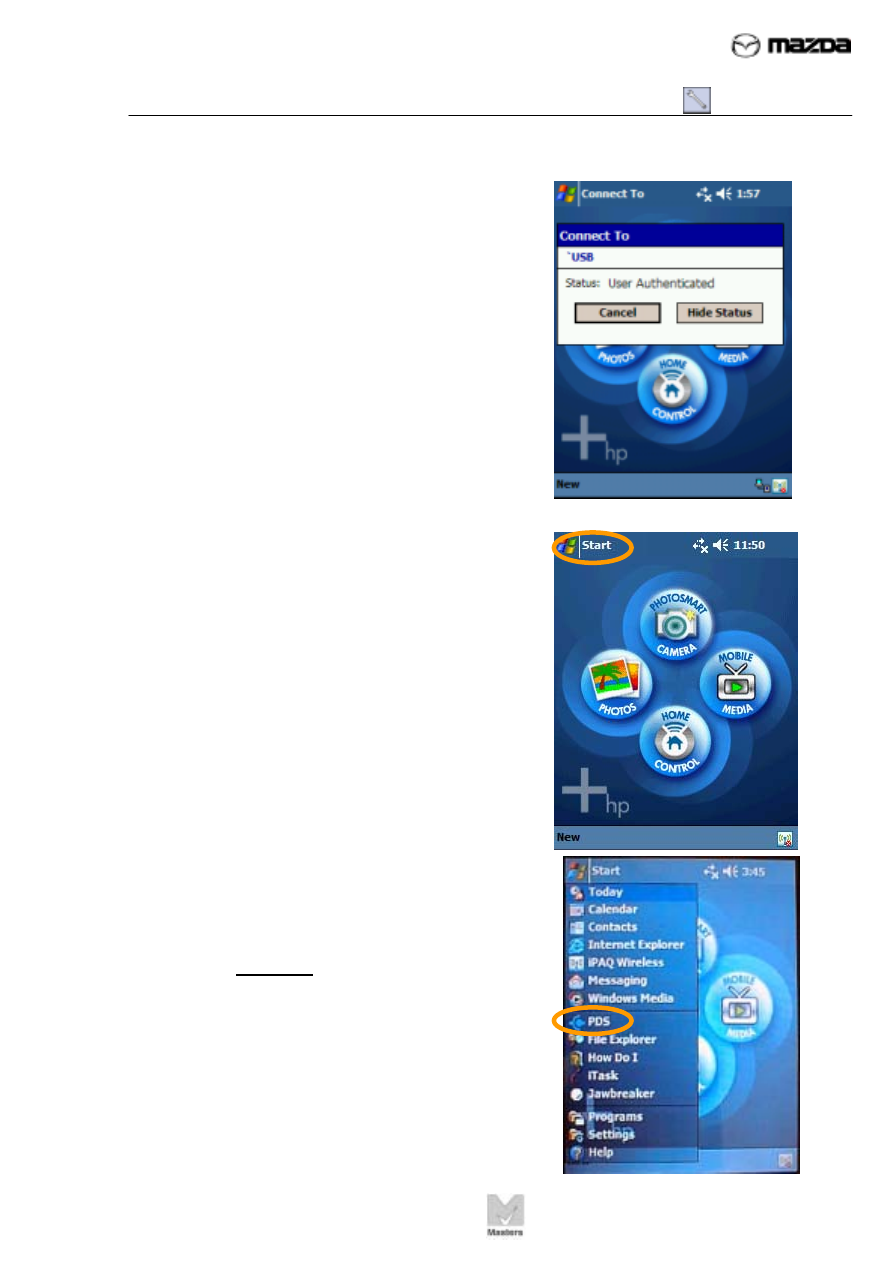
USB message 3
Activity 04
(Continued)
The third message, “Status: User
Authenticated,” is the most important
message.
2. Tap
Start on the main screen.
3. A drop-down menu lists the frequently used
programs. Go to step 4 if PDS is listed on the
drop-down menu. Go to step 5 on page 3 if
PDS is not listed on the drop-down menu.
4. Tap PDS from the drop-down menu, then go
to step 6 on page 4..
Your PDA’s main screen
may look slightly different
than this example.

TC001-18-01H
INTRODUCTION TO M-MDS
04 - Retrieving and Clearing DTCs
Activity 04- Page 3
USB message 3
Activity 04
(Continued)
5. If PDS is not listed on the drop-down menu,
you will need to access PDS from the
Programs screen.
NOTE
The following steps are required when PDS is newly installed on the PDA
or after conducting a hard reset on the PDA.
A. Select Programs from the drop-down menu.
B. The Programs screen displays either
PDS or PDS Tools.
Tap PDS if it is displayed.
Нет комментариевНе стесняйтесь поделиться с нами вашим ценным мнением.
Текст