Great Wall engine 4G64S4M. Manual — part 15
11-54
6EN0624
arrow mark
ENGINE
CYLINDER HEAD AND VALVE
9EN0477
paint marks
paint marks
90
100
6AE0299
6EN0625
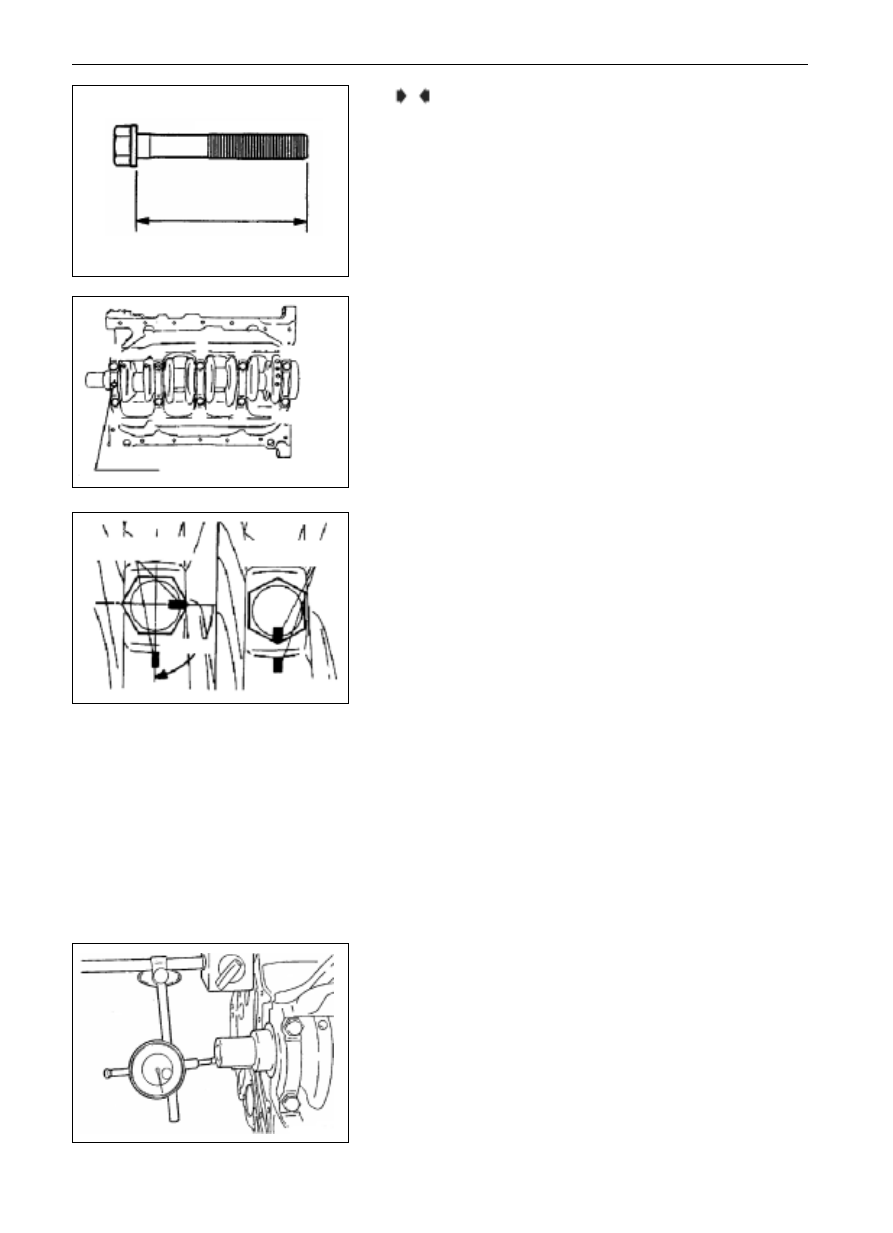
Mount of Main Bearing Cap/ Main Bearing Bolt
(1)
Mount the main bearing cap with the arrow mark thereof
directing to the side of timing toothed belt.
(2)
Be sure the length of bolt is less than the limit value before
mounting the main bearing cap bolt. In case it is larger than the
limit value, change the bolt.
Limit value (A): 71.7 mm
(3)
Coat the engine oil on the threaded part and seat face of the
bolt.
(4)
Tighten the main bearing cap bolt with the torque of 25N.m as
per the specified sequence.
(5)
Make paint mark on each bolt head.
(6)
Screw down the paint mark at the position of the main bearing
cap by 90
100forward from the paint mark on bolt.
(7)
Tighten each bolt by 90
100in the above specified se-
quence until the paint marks on the bolts are in alignment with
that on the main bearing cap.
Notice:
If the screwing angle is less than 90, the tightening
property specified is cannot be guaranteed. Therefore,
attention should be paid to the screwing angle when
tightening.
In case the nut is over tightened, (the screwing angle is
more than 100
), loosen it thoroughly, and then re-
tighten it from the Step (1).
(8)
Ensure the crankshaft can rotate smoothly after the main
bearing cap is well mounted, and inspect the axial clearance.
In case the axial clearance exceeds the application limit value,
change the No.3 crankshaft thrusting bearing.
Standard value; 0.05
0.18mm
Limit value: 0.25mm
C
11-55
ENGINE
CYLINDER HEAD AND VALVE
MD990938
MD998376
6EN0709
6EN0626
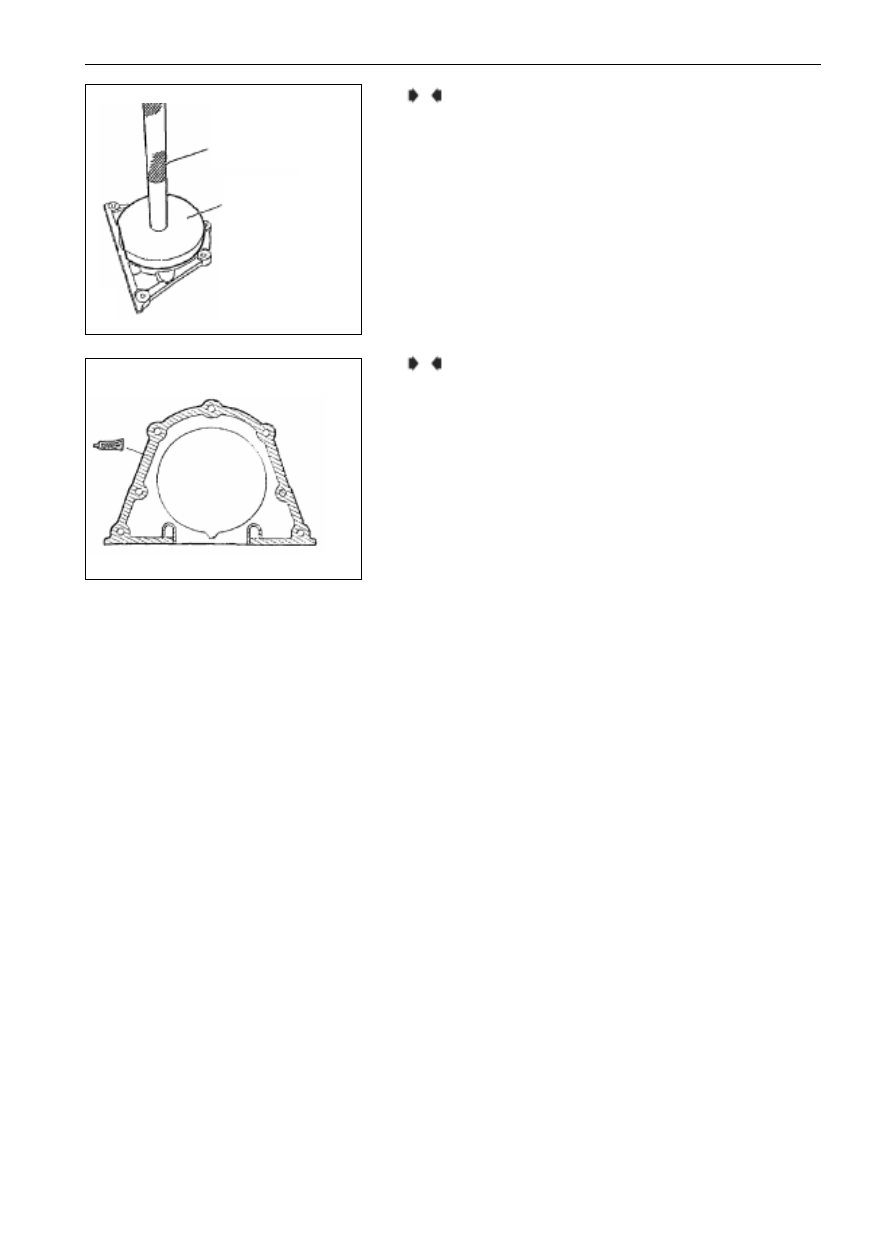
Mount of Oil Seal
Mount of Rear Oil Seal Cover
Specified sealant
Brand: Genuine Mitsubishi brand sealant MD970389 or the
equivalents.
Notice:
(1)
The rear oil seal cover should be mounted quickly on the
condition the sealant is not dry (
15 min).
(2)
Keep the sealing area free from the lubricant and coolant for
1 hours or so after the mount.
D
E
11-56
ENGINE
AC GENERATOR
AC GENERATOR
1
6
5
4
2
3
7
8
9
10
11
12
13
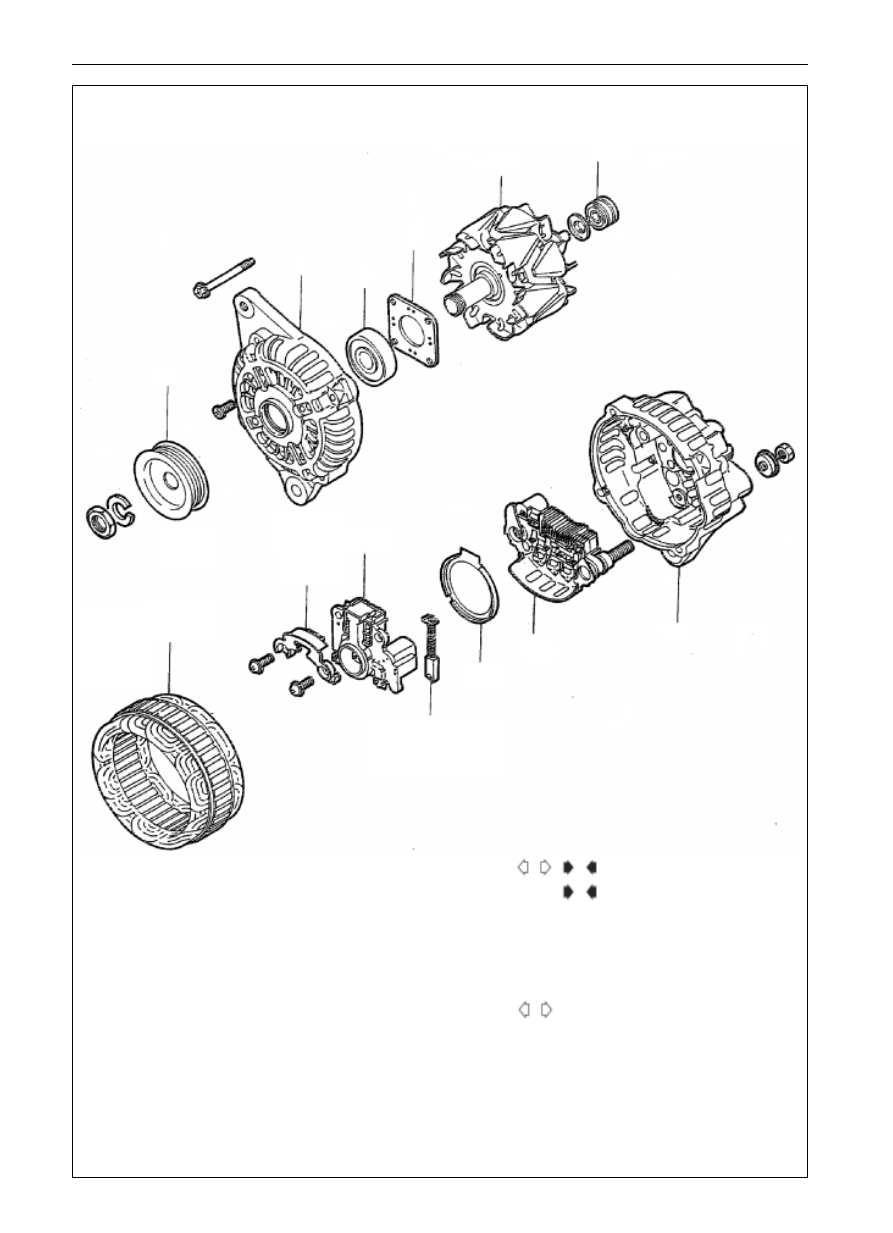
DISASSEMBLY AND ASSEMBLY
Disassembly Procedure
1.
generator pulley
2.
rotor assembly
3.
rear bearing
4.
bearing block
5.
front bearing
6.
front cap
7.
stator assembly
8.
retaining plate
9.
adjustor and brush stand
10. brush
11. ring
12. rectifier assembly
13. rear cap
A
A
A
B
9EN0187

11-57
ENGINE
AC GENERATOR
6EN1774
1EN0300
rectifer
soldering joint
DEL0009
6EN0603
6EN0604
NOTES FOR DISASSEMBLY
SEPARATION OF STATOR AND FRONT CAP
(1)
Insert the screwdriver into the gap between front cap and stator
to separate the front cap from the stator.
(2)
If it is hard to separate them, lightly hit the front cap with a plastic
hammer and prize it with screwdriver at the same time.
NOTES:
Don't insert the screwdriver too deep lest the stator winding
is damaged.
DISASSEMBLY OF GENERATOR PULLEY AND ITS FAN
(1)
With the pulley end upwards, disassemble the pulley after fixing
the rotor with a bench clamp.
NOTES:
Do not damage the rotor.
DISASSEMBLY OF STATOR ASSEMBLY, ADJUSTOR
AND BRUSH STAND
(1)
Knock down the stator with an electric iron (180
250W), such
operation should be finished within 4 seconds lest heat is con-
ducted to the diode.
(2)
While disassembling rectifier from adjustor, burn off the part
welded to the rectifier with the electric iron.
Ensure not to conduct the heat generated by the electric iron
to the diode for a long time.
Do not let the diode pin overburden forces.
CHECK
ROTOR
(1)
Check whether the rotor winding is switched into conduction and
confirm conduction exists between the slip-rings. Measure the
resistance of the rotor. If the resistance is too low, it means the
circuit is shorted . If there exists non-conduction or short circuit,
replace the rotor assembly.
Standard value: 3
0.5
(2)
Grounding of rotor winding. Check if it is insulated between the
slip-ring and iron core, if not, replace the rotor assembly.
A
B
Нет комментариевНе стесняйтесь поделиться с нами вашим ценным мнением.
Текст