Lexus LC Cabriolet (2021 year). Manual in english — page 3
62
1-2. Child safety
Q
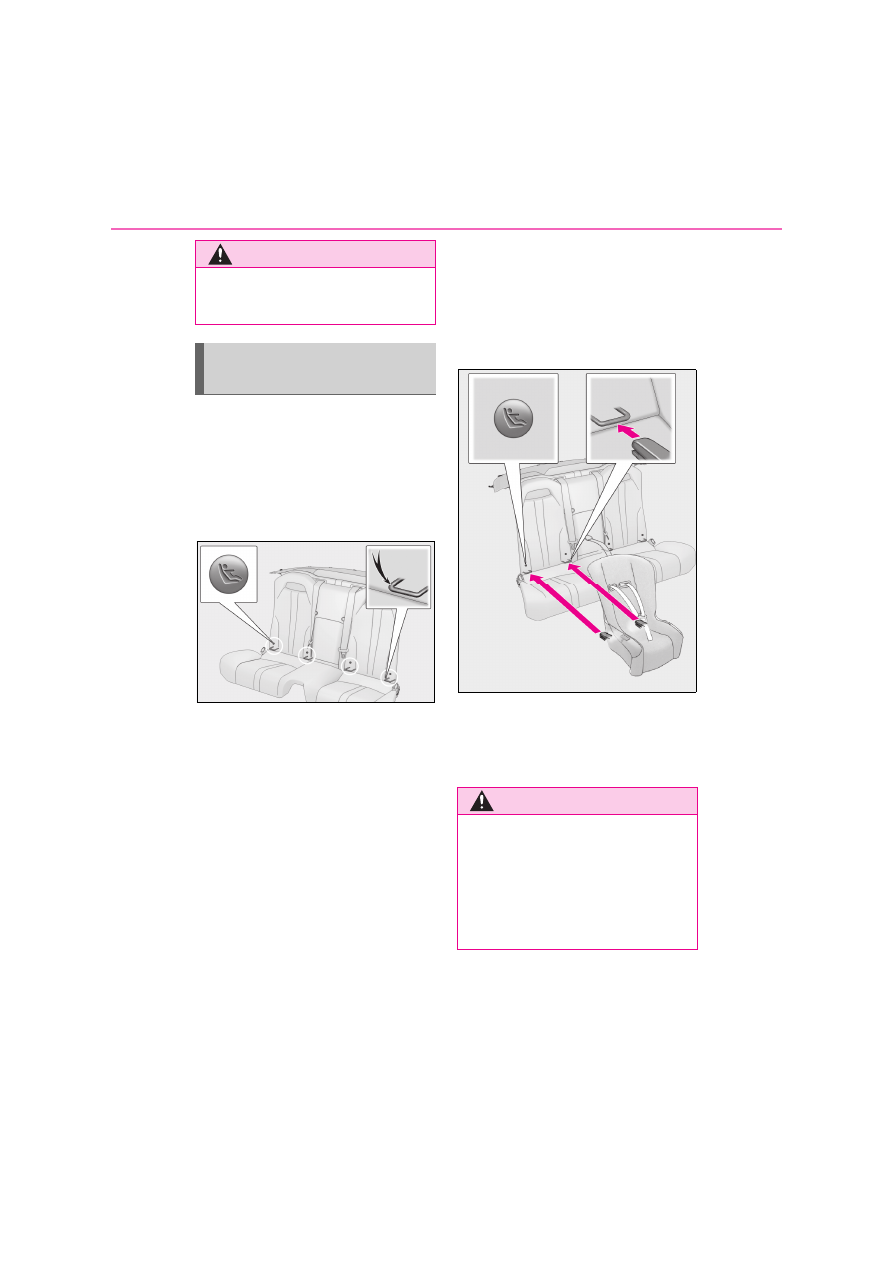
ISOFIX lower anchorages (ISO-
FIX child restraint system)
Lower anchorages are provided for
the each rear seat. (Buttons displaying
the location of the anchorages are
attached to the seats.)
Q
Installation with ISOFIX lower
anchorage (ISOFIX child restraint
system)
Install the child restraint system in
accordance to the operation manual
enclosed with the child restraint sys-
tem.
If the child restraint system on hand is
not within the “universal” category (or
the necessary information is not in the
table), refer to the “Vehicle List” pro-
vided by the child restraint system
maker for various possible installation
positions, or check the compatibility
after asking the retailer of the child
seat. (
P.55, 56)
1
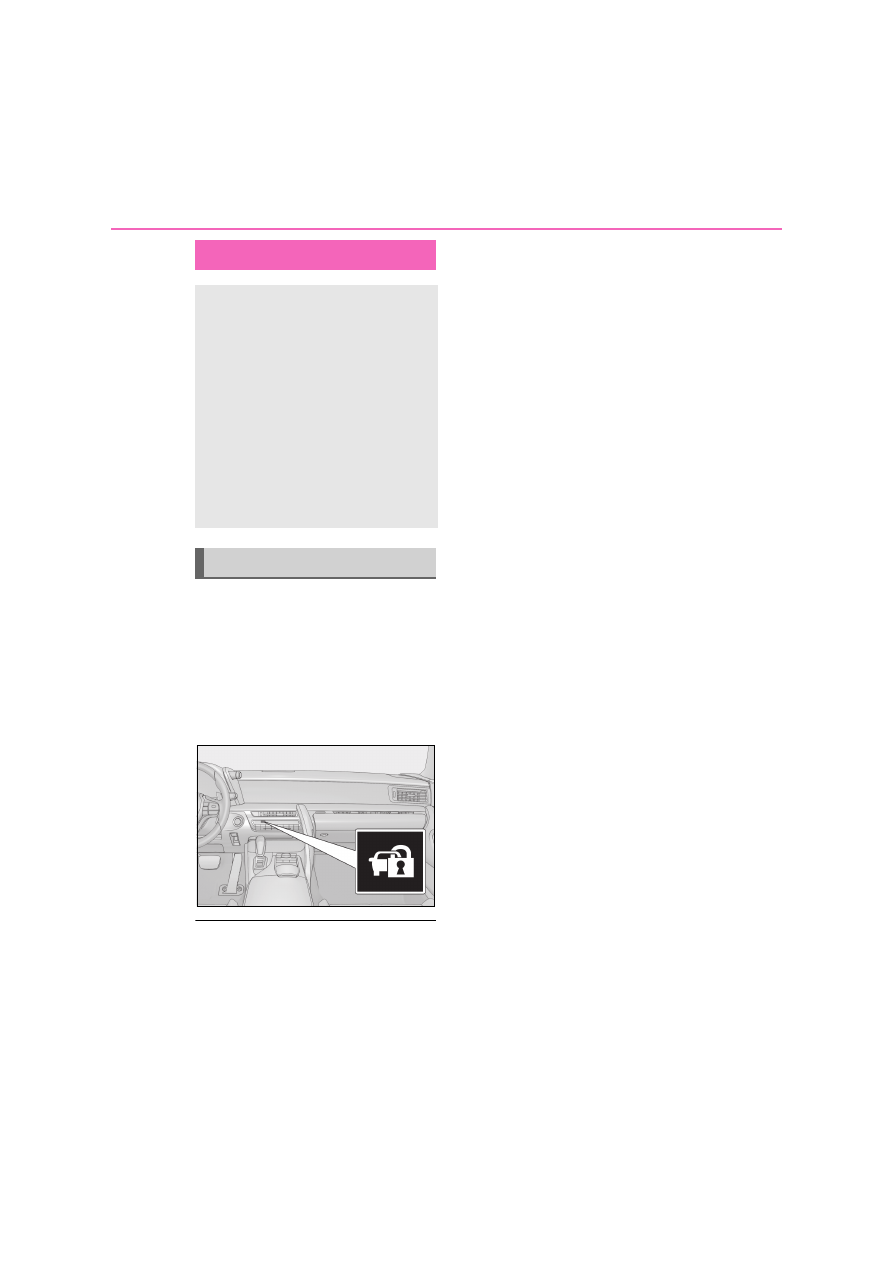
Check the positions of the exclu-
sive fixing bars, and install the child
restraint system to the seat.
The bars are installed in the clearance
between the seat cushion and seatback.
2
After installing the child restraint
system, rock it back and forth to
ensure that it is installed securely.
(
P.61)
WARNING
O
Follow all installation instructions pro-
vided by the child restraint system
manufacturer.
Child restraint system fixed with
an ISOFIX lower anchorage
WARNING
Q
When installing a child restraint sys-
tem
Observe the following precautions.
Failure to do so may result in death or
serious injury.
O
After securing a child restraint system,
never adjust the seat.
63
1
1-2. Child safety
For
sa
fe
ty
an
d s
ec
uri
ty
WARNING
O
When using the lower anchorages, be
sure that there are no foreign objects
around the anchorages and that the
seat belt is not caught behind the child
restraint system.
O
Follow all installation instructions pro-
vided by the child restraint system
manufacturer.
64
1-3. Theft deterrent system
1-3.Theft deterrent system
The indicator light flashes after the
engine switch has been turned off to
indicate that the system is operating.
The indicator light stops flashing after
the engine switch has been turned to
ACC or ON to indicate that the sys-
tem has been canceled.
Q
System maintenance
The vehicle has a maintenance-free type
engine immobilizer system.
Q
Conditions that may cause the system to
malfunction
O
If the grip portion of the key is in contact
with a metallic object
O
If the key is in close proximity to or touch-
ing a key registered to the security sys-
tem (key with a built-in transponder chip)
of another vehicle
Engine immobilizer system
The vehicle’s keys have built-in
transponder chips that prevent the
engine from starting if a key has not
been previously registered in the
vehicle’s on-board computer.
Never leave the keys inside the
vehicle when you leave the vehicle.
This system is designed to help pre-
vent vehicle theft but does not guar-
antee absolute security against all
vehicle thefts.
Operating the system
65
1
1-3. Theft deterrent system
For
sa
fe
ty
an
d s
ec
uri
ty
Q
Certifications for the engine immobilizer system
Except for vehicles sold in Ukraine
76
1-3. Theft deterrent system
*
: If equipped
Q
Setting
Turn the engine switch off, have all the
passengers exit the vehicle and ensure
that both side doors are closed.
Press
twice within 5 seconds.
Q
Canceling
Using the entry function: Push the
edge of the door handle to unlock the
doors.
Using the wireless remote control:
Press .
NOTICE
Q
To ensure the system operates cor-
rectly
Do not modify or remove the system. If
modified or removed, the proper opera-
tion of the system cannot be guaranteed.
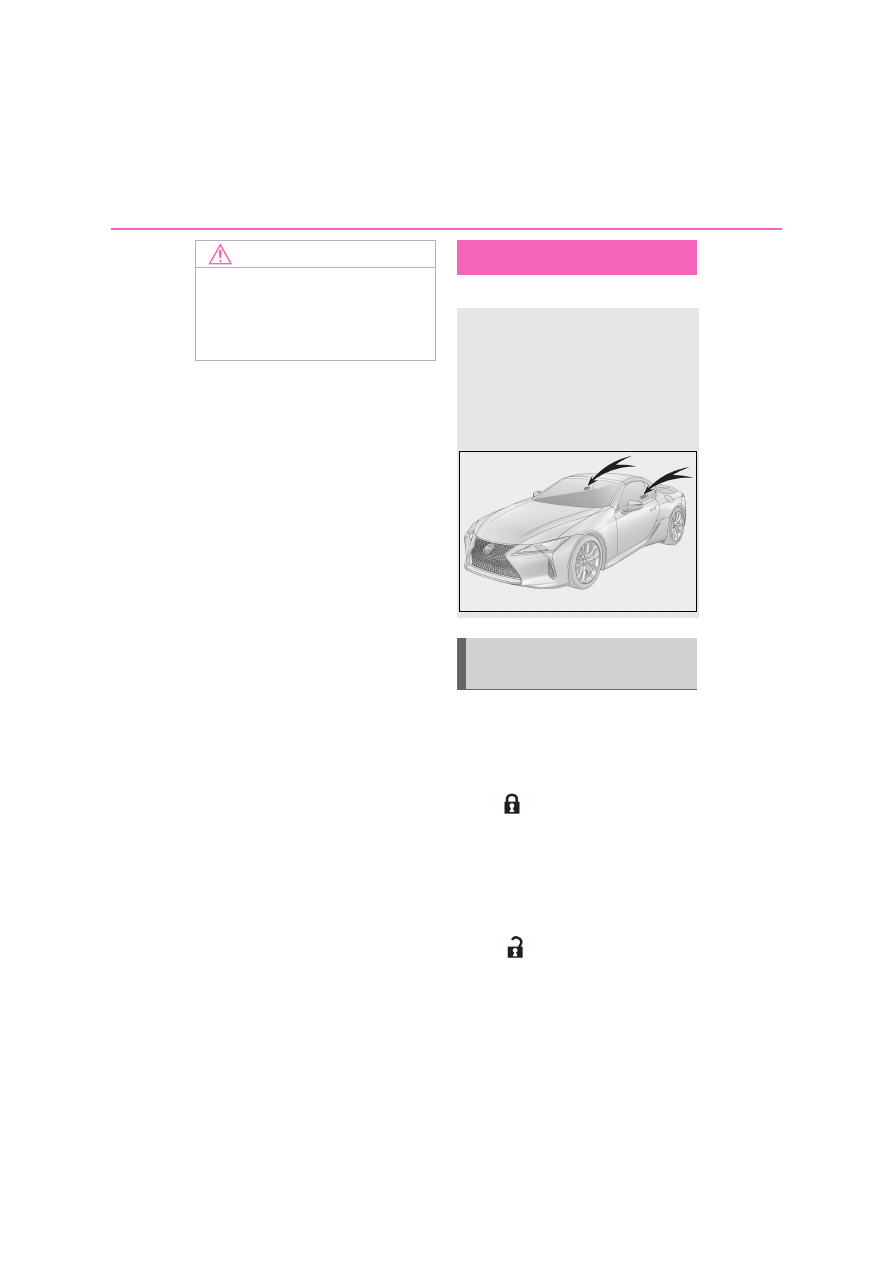
Double locking system
*
Unauthorized access to the vehicle
is prevented by disabling the door
unlocking function from both the
interior and exterior of the vehicle.
Vehicles employing this system
have labels on the side windows.
Setting/canceling the double
locking system
77
1
1-3. Theft deterrent system
For
sa
fe
ty
an
d s
ec
uri
ty
*
: If equipped
Q
Items to check before locking the
vehicle
To prevent unexpected triggering of
the alarm and vehicle theft, make sure
of the following:
Nobody is in the vehicle.
The windows are closed before the
alarm is set.
No valuables or other personal
items are left in the vehicle.
WARNING
Q
Double locking system precaution
Never activate the double locking sys-
tem when there are people in the vehicle
because both side doors cannot be
opened from inside the vehicle.
Alarm
*
The alarm uses light and sound to
give an alert when an intrusion is
detected.
The alarm is triggered in the follow-
ing situations when the alarm is set:
A locked door or trunk is
unlocked or opened in any way
other than using the entry func-
tion or wireless remote control.
(The door will lock again auto-
matically.)
The hood is opened.
The intrusion sensor detects
something moving inside the
vehicle. (Example: an intruder
breaks a window and gets into the
vehicle.)
The tilt sensor detects a change of
vehicle inclination.
Setting/canceling/stopping the
alarm system
78
1-3. Theft deterrent system
Q
Setting
Close the doors, trunk and hood, and
lock both side doors using the entry
function or wireless remote control.
The system will be set automatically
after 30 seconds.
The indicator light changes from being on
to flashing when the system is set.
Q
Canceling or stopping
Do one of the following to deactivate
or stop the alarm:
Unlock the doors or open the trunk
using the entry function or wireless
remote control.
Start the engine. (The alarm will be
deactivated or stopped after a few
seconds.)
Q
System maintenance
The vehicle has a maintenance-free type
alarm system.
Q
Triggering of the alarm
The alarm may be triggered in the following
situations:
(Stopping the alarm deactivates the alarm
system.)
O
The doors are unlocked using the
mechanical key.
O
A person inside the vehicle opens a door,
the trunk or hood, or unlocks the vehicle
using a door lock switch.
O
The battery is recharged or replaced
when the vehicle is locked. (
P.410)
Q
Alarm-operated door lock
In the following cases, depending on the sit-
uation, the door may automatically lock to
prevent improper entry into the vehicle:
O
When a person remaining in the vehicle
unlocks the door and the alarm is acti-
vated.
O
While the alarm is activated, a person
remaining in the vehicle unlocks the door.
O
When recharging or replacing the bat-
tery
Q
Customization
The alarm can be set to deactivate when the
mechanical key is used to unlock. (Custom-
izable features:
P.435)

79
1
1-3. Theft deterrent system
For
sa
fe
ty
an
d s
ec
uri
ty
Q
The intrusion sensor and tilt sensor
detection
The intrusion sensor detects intrud-
ers or movement in the vehicle.
The tilt sensor detects changes in
vehicle inclination, such as when the
vehicle is towed away.
This system is designed to deter and
prevent vehicle theft but does not
guarantee absolute security against all
intrusions.
Q
Setting the intrusion sensor and tilt
sensor
The intrusion sensor and tilt sensor will
be set automatically when the alarm is
set. (
P.78)
Q
Canceling the intrusion sensor and
tilt sensor
If you are leaving pets or other moving
things inside the vehicle, make sure to
disable the intrusion sensor and tilt
sensor before setting the alarm, as they
will respond to movement inside the
vehicle.
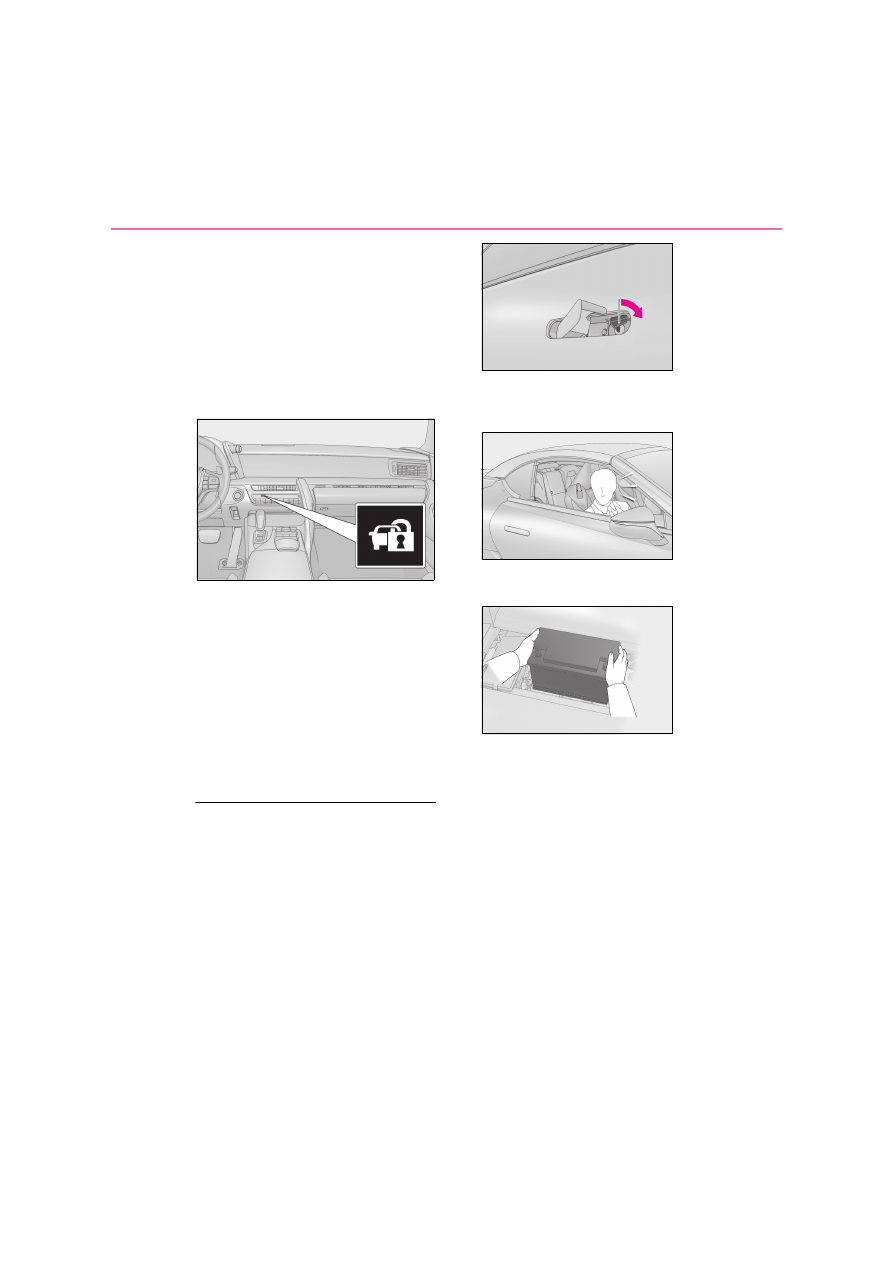
1
Turn the engine switch off.
2
Press the intrusion sensor and tilt
sensor cancel switch.
Press the switch again to re-enable the
intrusion sensor and tilt sensor.
Each time the intrusion sensor and tilt sen-
sor are canceled/set, a message will be
shown on the multi-information display in
the instrument cluster.
Q
Canceling and automatic re-enabling of
the intrusion sensor and tilt sensor
O
The alarm will still be set even when the
intrusion sensor and tilt sensor are can-
celed.
O
After the intrusion sensor and tilt sensor
are canceled, pressing the engine switch
or unlocking the doors using the entry
function or wireless remote control will
re-enable the intrusion sensor and tilt
sensor.
O
The intrusion sensor and tilt sensor will
automatically be re-enabled when the
alarm system is deactivated.
Q
Intrusion sensor detection consider-
ations
The sensor may trigger the alarm in the fol-
lowing situations:
O
People or pets are in the vehicle.
O
A window or the soft top roof is open.
In this case, the sensor may detect the fol-
lowing:
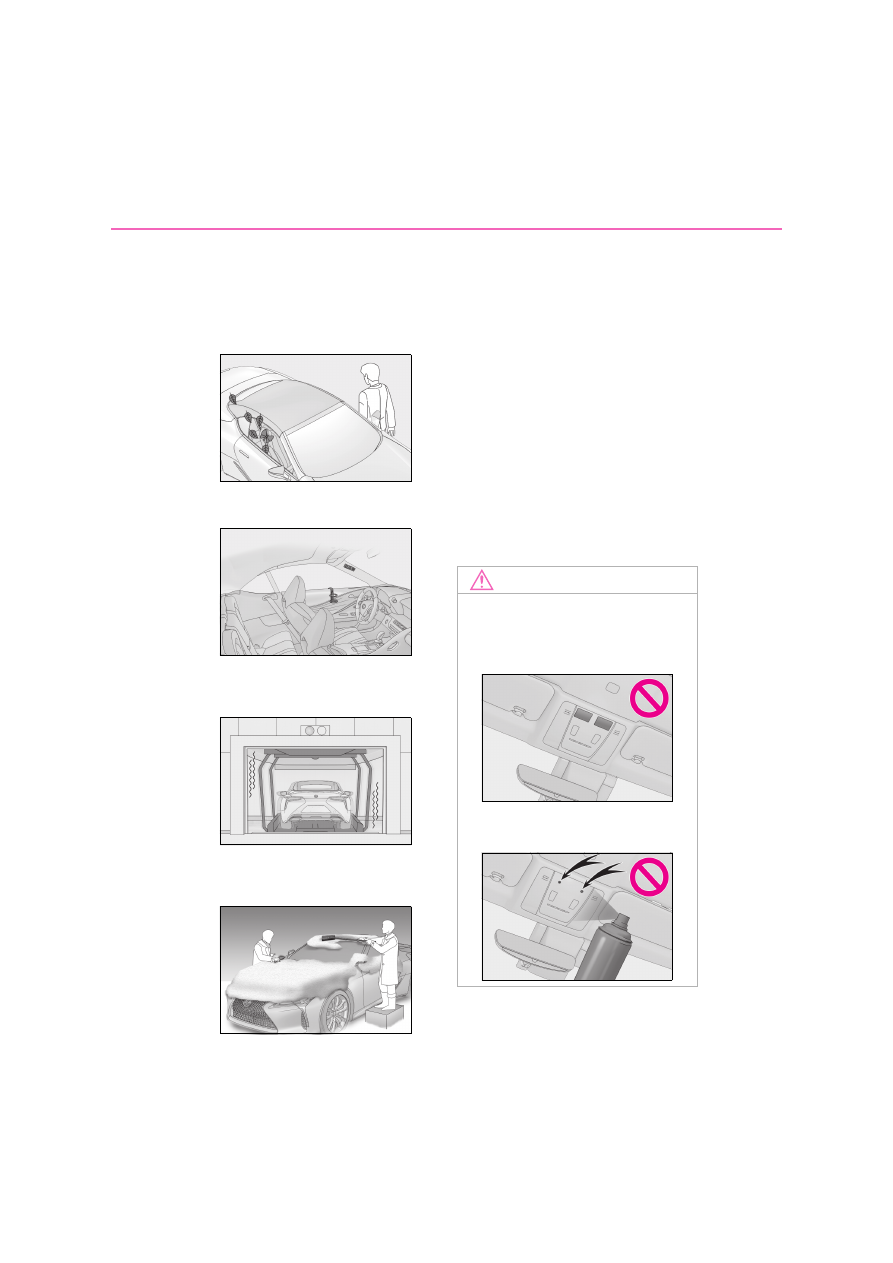
NOTICE
Q
To ensure the system operates cor-
rectly
Do not modify or remove the system. If
modified or removed, the proper opera-
tion of the system cannot be guaranteed.
Intrusion sensor and tilt sensor
80
1-3. Theft deterrent system
• Wind or the movement of objects such as
leaves and insects inside the vehicle
• Ultrasonic waves emitted from devices
such as the intrusion sensors of other
vehicles
• The movement of people outside the
vehicle
O
Unstable items, such as dangling acces-
sories, are in the vehicle.
O
The vehicle is parked in a place where
extreme vibrations or noises occur, such
as in a parking garage.
O
Ice or snow is removed from the vehicle,
causing the vehicle to receive repeated
impacts or vibrations.
O
The vehicle is inside an automatic or
high-pressure car wash.
O
The vehicle experiences impacts, such as
hail, lightning strikes, and other kinds of
repeated impacts or vibrations.
Q
Tilt sensor detection considerations
The sensor may trigger the alarm in the fol-
lowing situations:
O
The vehicle is transported by a ferry,
trailer, train, etc.
O
The vehicle is parked in a parking garage.
O
The vehicle is inside a car wash that
moves the vehicle.
O
Any of the tires loses air pressure.
O
The vehicle is jacked up.
O
An earthquake occurs or the road caves
in.
NOTICE
Q
To ensure the intrusion sensor func-
tion correctly
O
To ensure that the sensors operate
properly, do not touch or cover them.
O
Do not spray air fresheners or other
products directly into the sensor holes.
81
1
1-3. Theft deterrent system
For
sa
fe
ty
an
d s
ec
uri
ty
NOTICE
O
Installing accessories other than genu-
ine Lexus parts or leaving objects
between the driver’s seat and front
passenger’s seat may reduce the
detection performance.
2
83
2
V
eh
icle
st
at
us
in
fo
rm
at
ion
an
d i
nd
ica
tor
s
Vehicle status information
and indicators
2-1. Instrument cluster
Warning lights and indicators.
84
Gauges and meters . . . . .
89
Multi-information display. . ..
93
Head-up display . . . . . . ...
99
Fuel consumption information
. . . . . . . . . . . . . . .
103
84
2-1. Instrument cluster
2-1.Instrument cluster
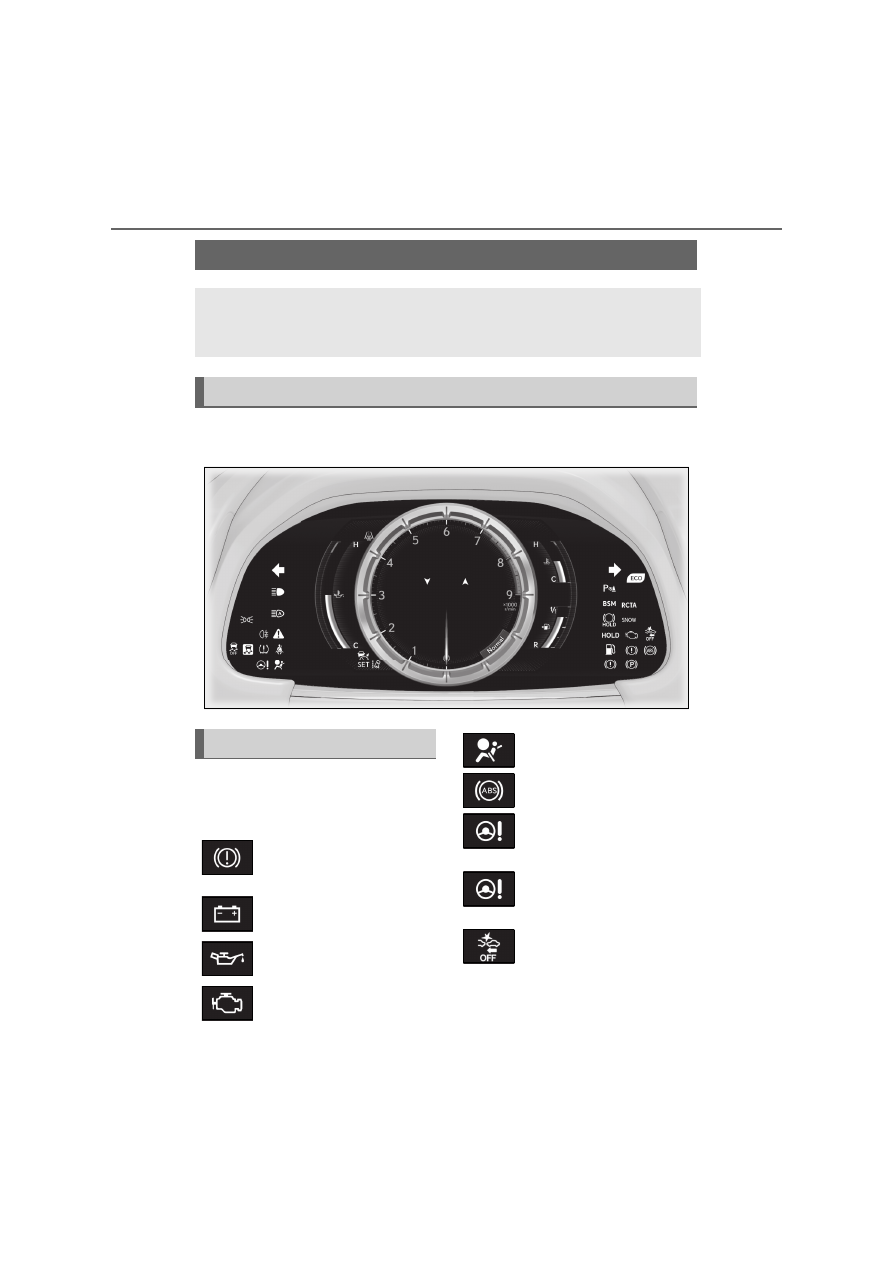
For the purpose of explanation, the following illustrations display all warning lights
and indicators illuminated.
Warning lights inform the driver of
malfunctions in the indicated vehicle
systems.
Warning lights and indicators
The warning lights and indicators on the instrument cluster, center panel and
outside rear view mirrors inform the driver of the status of the vehicle’s various
systems.
Instrument cluster
Warning lights
(red)
Brake system warning light
*1
(
P.388)
Charging system warning
light
*2
(
P.388)
Low engine oil pressure
warning light
*2
(
P.389)
Malfunction indicator lamp
*1
(
P.389)
SRS warning light
*1
(
P.389)
ABS warning light
*1
(
P.389)
(red)
Electric power steering sys-
tem warning light
*1
(
P.390)
(yellow)
Electric power steering sys-
tem warning light
*1
(
P.390)
(Flashes or
illuminates)
PCS warning light
*1
(
P.390)
85
2
2-1. Instrument cluster
V
eh
icle
st
at
us
in
fo
rm
at
ion
an
d i
nd
ica
tor
s
*1
: These lights turn on when the engine
switch is turned to ON to indicate that a
system check is being performed. They
will turn off after the engine is started, or
after a few seconds. There may be a
malfunction in a system if a light does
not come on, or turn off. Have the vehi-
cle inspected by any authorized Lexus
retailer or Lexus authorized repairer, or
any reliable repairer.
*2
: This light illuminates on the multi-infor-
mation display.
*3
: The light flashes to indicate a malfunc-
tion.
*4
: This light illuminates on the center
panel.
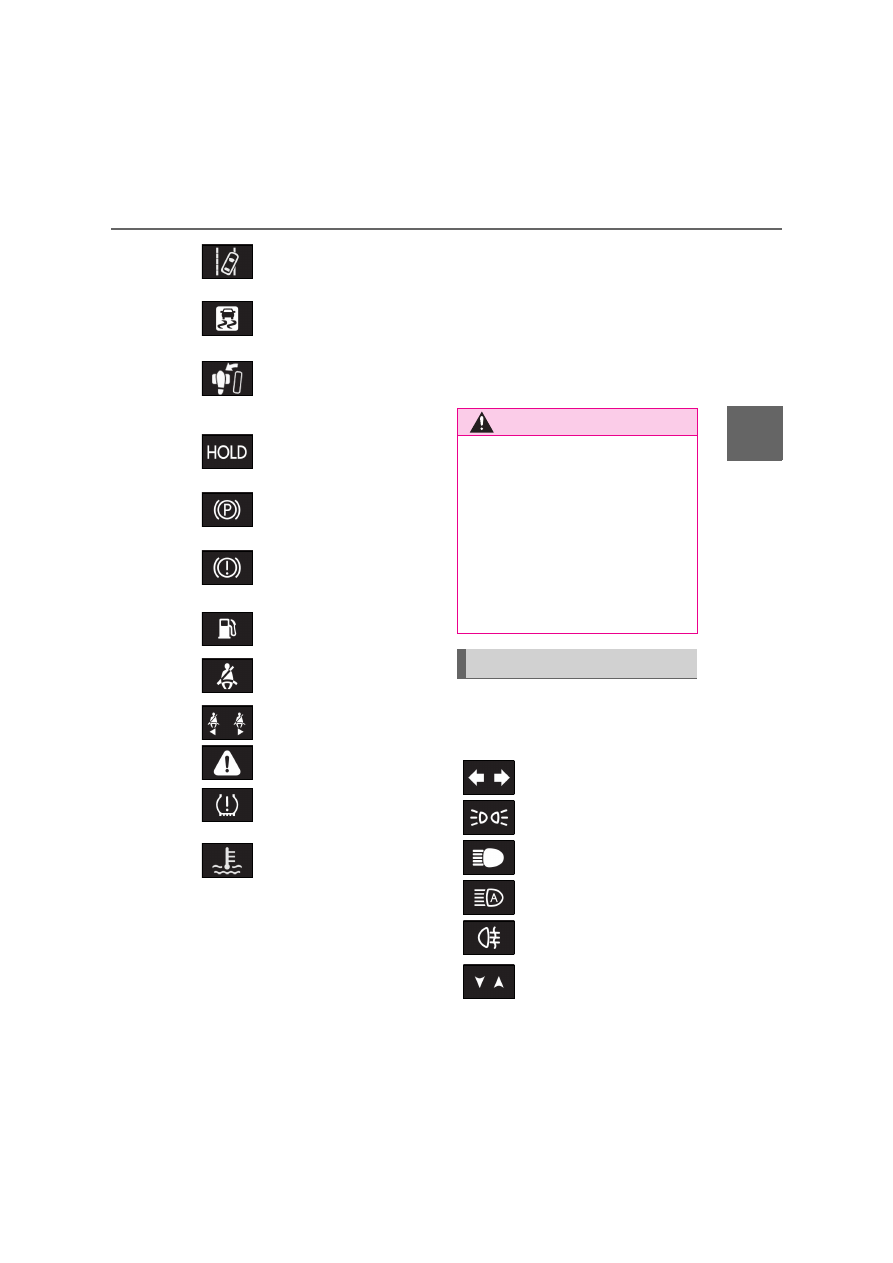
The indicators inform the driver of the
operating state of the vehicle’s various
systems.
(orange)
LKA indicator
*2
(
P.390)
Slip indicator
*1
(
P.391)
Brake Override System
warning light
*2
(
P.391)/Drive-Start Con-
trol warning light
*2
(
P.391)
Brake hold operated indica-
tor
*1, 3
(
P.391)
Parking brake indicator
*3
(
P.392)
(yellow)
Brake system warning light
*1
(
P.392)
Low fuel level warning light
(
P.392)
Driver’s and front passen-
ger’s seat belt reminder light
(
P.392)
Rear passengers’ seat belt
reminder lights
*4
(
P.393)
Master warning light
*1
(
P.393)
Tire pressure warning light
*1,
3
(
P.393)
High coolant temperature
warning light
*2
(
P.394)
WARNING
Q
If a safety system warning light does
not come on
Should a safety system light such as the
ABS and SRS warning light not come on
when you start the engine, this could
mean that these systems are not avail-
able to help protect you in an accident,
which could result in death or serious
injury. Have the vehicle inspected by any
authorized Lexus retailer or Lexus
authorized repairer, or any reliable
repairer immediately if this occurs.
Indicators
Turn signal indicator
(
P.203)
Tail light indicator (
P.209)
Headlight high beam indica-
tor (
P.210)
Automatic High Beam indica-
tor
*1
(
P.211)
Rear fog light indicator
(
P.214)
(If
equipped)
Gear Shift Indicator
*2
(
P.202)
86
2-1. Instrument cluster
*1
: These lights turn on when the engine
switch is turned to ON to indicate that a
system check is being performed. They
will turn off after the engine is on, or
after a few seconds. There may be a
malfunction in a system if a light does
not come on, or turn off. Have the vehi-
cle inspected by any authorized Lexus
retailer or Lexus authorized repairer, or
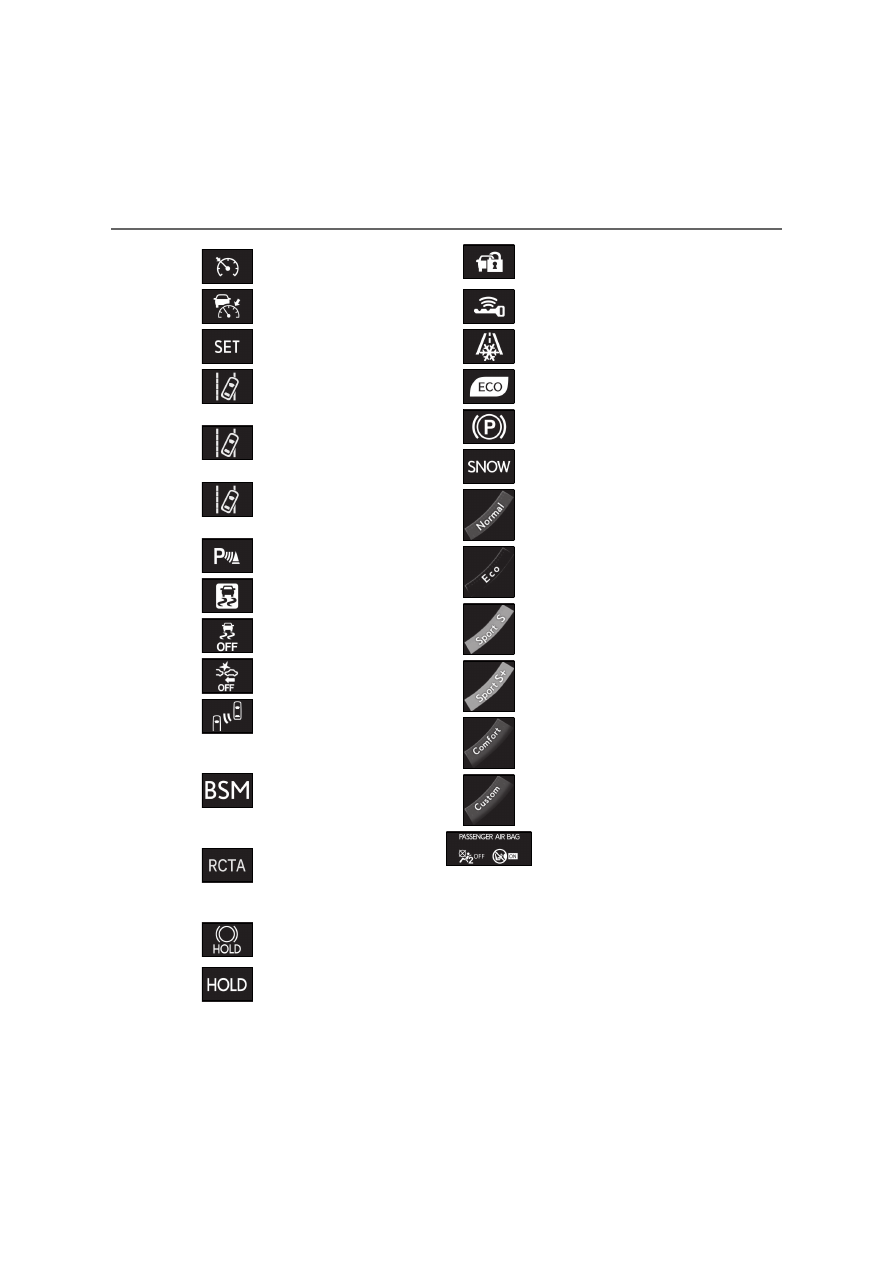
Cruise control indicator
*2
(
P.252)
Dynamic radar cruise control
indicator
*2
(
P.252)
Cruise control “SET” indica-
tor
*2
(
P.252)
(white)
LKA indicator
*2
(
P.240)
(green)
LKA indicator
*2
(
P.240)
(orange)
LKA indicator
*2, 3
(
P.240)
Lexus parking assist-sensor
indicator (
P.263)
Slip indicator
*1, 3
(
P.291)
VSC OFF indicator
*1
(
P.292)
PCS warning light
*1, 4
(
P.232)
(If
equipped)
BSM (Blind Spot Monitor)
outside rear view mirror indi-
cators
*5, 6
(
P.268)
(If
equipped)
BSM (Blind Spot Monitor)
indicator (
P.268)
(If
equipped)
RCTA (Rear Crossing Traffic
Alert) indicator (
P.268)
Brake hold standby indica-
tor
*1
(
P.206)
Brake hold operated indica-
tor
*1
(
P.206)
Security indicator
*7
(
P.64,
77)
Smart entry & start system
indicator
*2
(
P.404)
Low outside temperature
indicator
*2, 8
(
P.89)
Eco Driving Indicator Light
*1
(
P.87)
Parking brake indicator
(
P.204)
Snow mode indicator
(
P.200)
“Normal” indicator
*2
(
P.262)
“Eco” indicator
*2
(
P.262)
“Sport S” indicator
*2
(
P.262)
“Sport S+” indicator
*2
(
P.262)
“Comfort” indicator
*2
(
P.262)
“Custom” indicator
*2
(
P.262)
“PASSENGER AIR BAG”
indicator
*7
(
P.49)
87
2
2-1. Instrument cluster
V
eh
icle
st
at
us
in
fo
rm
at
ion
an
d i
nd
ica
tor
s
any reliable repairer.
*2
: This light illuminates on the multi-infor-
mation display.
*3
: The light flashes to indicate that the sys-
tem is operating.
*4
: The light comes on when the system is
turned off.
*5
: In order to confirm operation, the BSM
outside rear view mirror indicators illu-
minate in the following situations:
When the engine switch is turned to
ON while the BSM main switch is
turned on.
When the BSM main switch is turned
on while the engine switch is in ON.
If the system is functioning correctly, the
BSM outside rear view mirror indica-
tors will turn off after a few seconds.
If the BSM outside rear view mirror
indicators do not illuminate or do not
turn off, there may be a malfunction in
the system.
If this occurs, have the vehicle inspected
by any authorized Lexus retailer or
Lexus authorized repairer, or any reli-
able repairer.
*6
: This light illuminates on the outside rear
view mirrors.
*7
: This light illuminates on the center
panel.
*8
: When the outside temperature is
approximately 3°C (37°F) or lower,
the indicator will flash for approximately
10 seconds, then stay on.
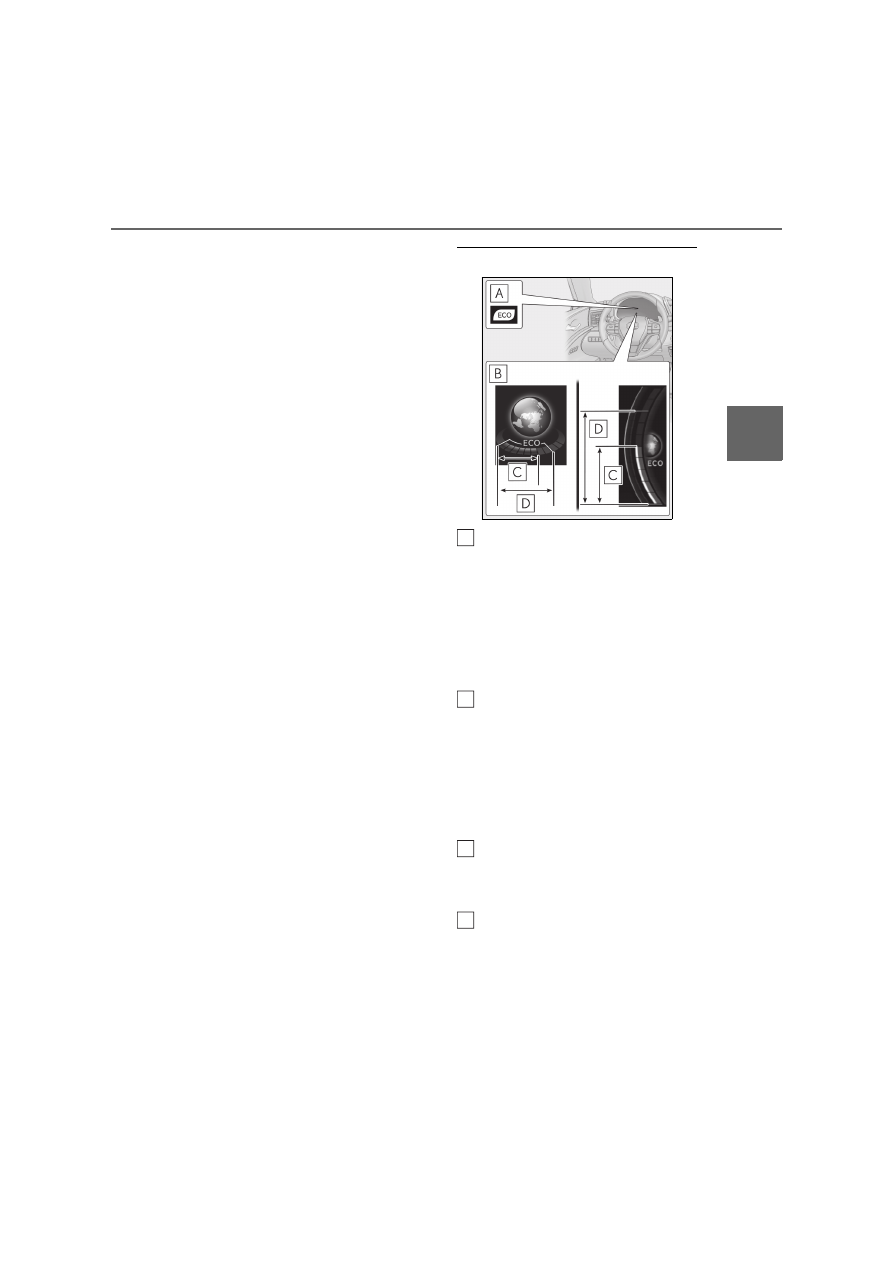
Q
Eco Driving Indicator
Eco Driving Indicator Light
During Eco-friendly acceleration (Eco driv-
ing), the Eco Driving Indicator Light will
turn on. When the acceleration exceeds the
Zone of Eco driving, or when the vehicle is
stopped, the light turns off.
Eco Driving Indicator can be enabled on
the multi-information display. (
P.93)
Eco Driving Indicator Zone Display
Suggests the Zone of Eco driving with cur-
rent Eco driving ratio based on accelera-
tion.
When the driving mode is Normal mode or
Comfort mode, switch the display to the
side position. (
P.92)
Eco driving ratio based on acceleration
The part that exceeds the Zone of Eco driv-
ing illuminates in white.
Zone of Eco driving
Eco Driving Indicator will not operate
under the following conditions:
O
The shift position is in any position other
than D.
O
A paddle shift switch is operated.
A
B
C
D
88
2-1. Instrument cluster
O
The driving mode is SPORT S mode or
SPORT S+ mode.
O
The vehicle speed is approximately 130
km/h (80 mph) or higher.
Нет комментариевНе стесняйтесь поделиться с нами вашим ценным мнением.
Текст