Defender (1999-2002). Manual — part 95
CHASSIS AND BODY
9
REPAIR
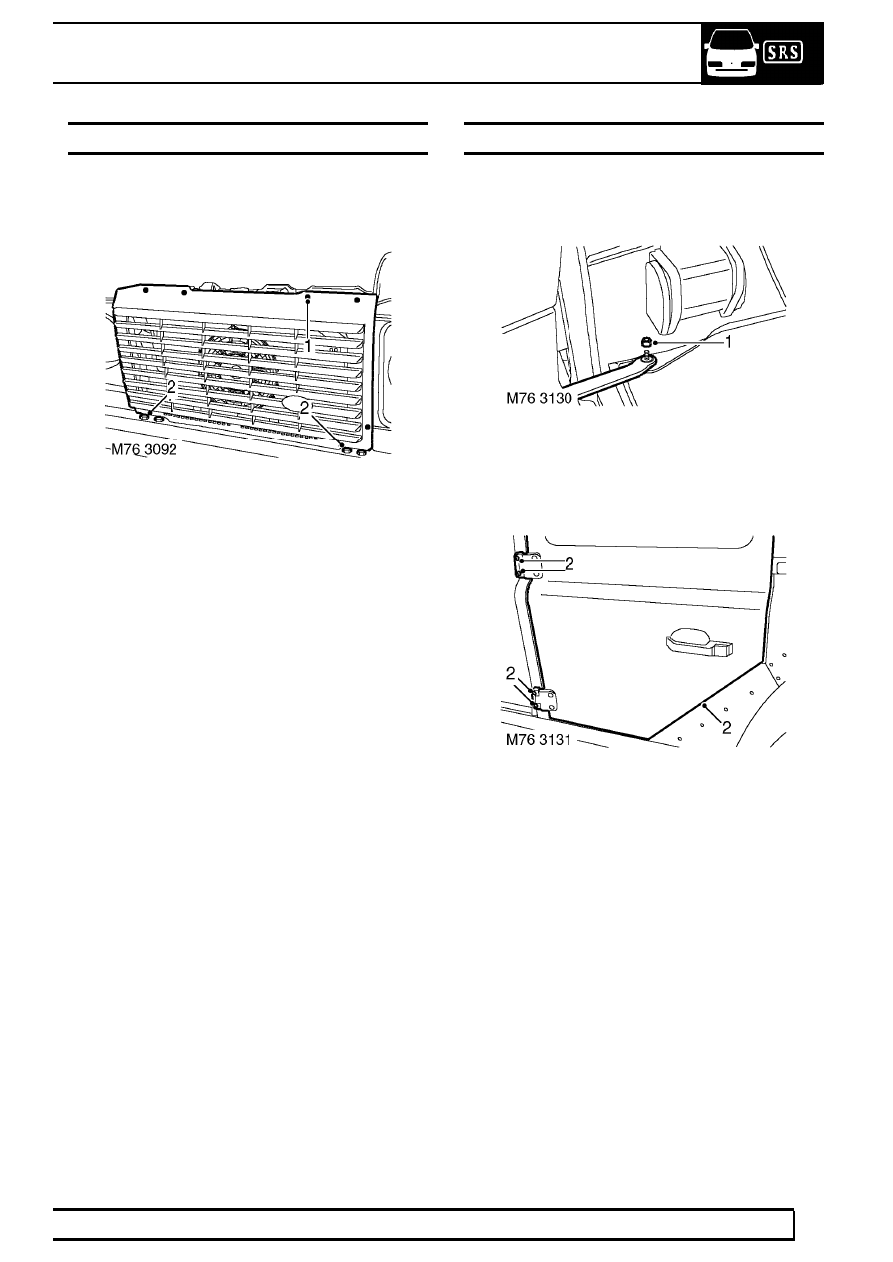
FRONT BUMPER
Service repair no - 76.22.08
Remove
1. Remove 6 screws and remove front grille.
2. Remove 4 through bolts securing front bumper
to chassis longitudinals.
3. Remove front bumper.
Refit
4. Fit front bumper to chassis longitudinals and
secure with bolts.
5. Fit front grille and secure with screws.
DOOR - REAR
Service repair no - 76.28.02.99
Remove
1. Remove nut securing door check strap.
2. With assistance remove 4 bolts securing door to
body and remove door.
Refit
3. With assistance position door and fit but do not
tighten bolts.
4. Align door to body aperture and tighten bolts.
5. Fit and tighten check strap nut.
76
CHASSIS AND BODY
10
REPAIR
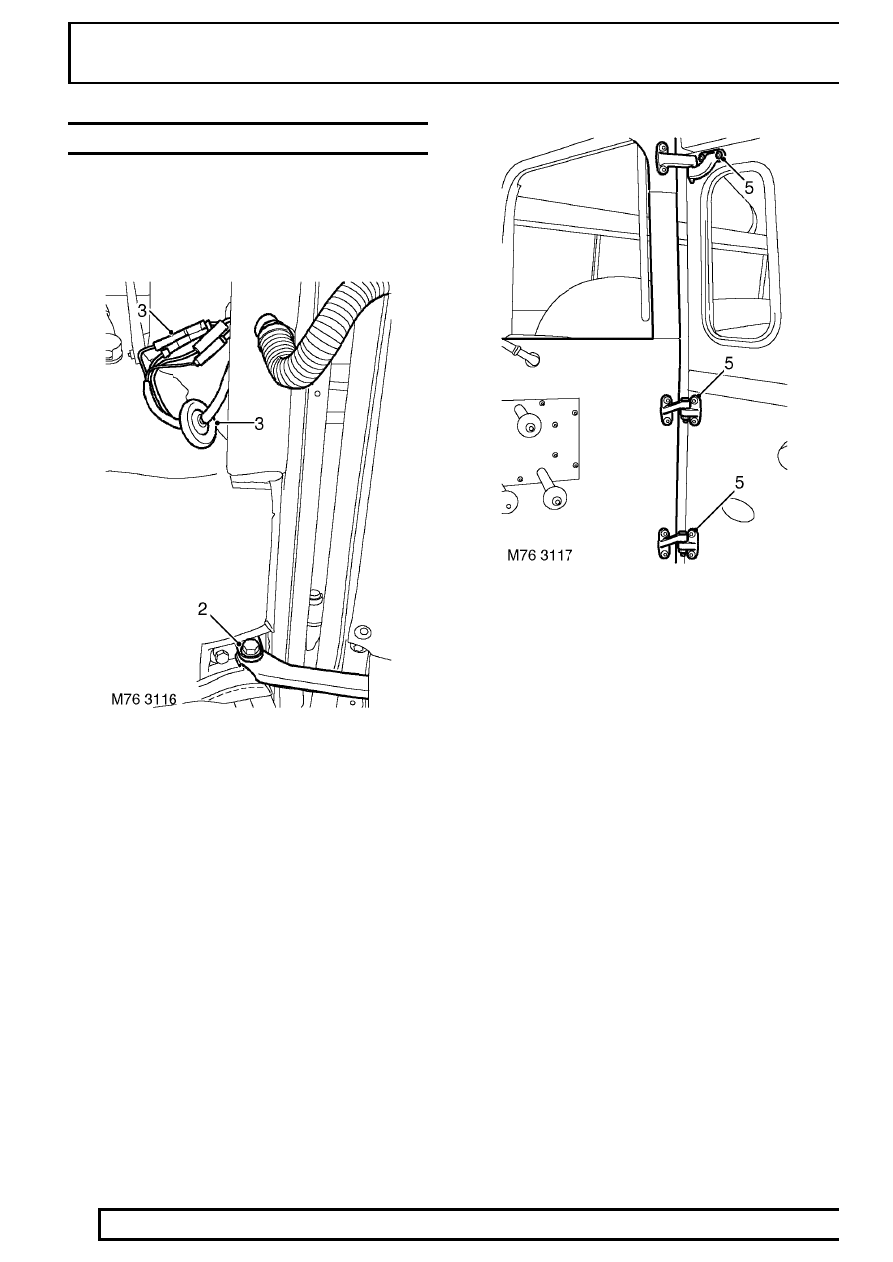
DOOR - TAIL - REMOVE
Service repair no - 76.28.19.99
Remove
1. Remove 3 nuts and remove spare wheel.
2. Remove bolt securing check strap to body.
3. Release harness grommet from harness cover,
disconnect connectors and multiplug.
4. Release harness cover and harness from body.
5. With assistance, remove 6 screws securing door
hinges to body and remove door.
Refit
6. With assistance, position door and fit but do not
tighten bolts.
7. Position check strap and tighten bolt.
8. Align door to body and tighten bolts.
9. Position harness through body and secure
harness cover.
10. Secure harness connectors and multiplug.
11. Secure harness grommet to body.
12. Position spare wheel to tail door and tighten
nuts.

CHASSIS AND BODY
11
REPAIR
GLASS/SEALING RUBBER - TAIL DOOR - UP TO
02MY
Service repair no - 76.31.22
Remove
1. Remove high level stop lamp. See
ELECTRICAL, Repair.
2. Remove 3 nuts and remove spare wheel.
3. Raise cover, remove nut and remove rear wiper
arm assembly.
4. Disconnect 2 HRW Lucars.
5. Remove 30 screws securing door glass
retainers.
6. Remove door glass retainers.
7. Remove door glass sealing strips.
8. Release and remove door glass.
Refit
9. Clean old sealant from glass aperture.
10. Apply sealant to glass aperture.
11. Position door glass, fit sealing strips and glass
retainers and secure with screws.
12. Connect HRW lucars.
13. Fit high level stop lamp. See ELECTRICAL,
Repair.
14. Fit rear wiper arm assembly and secure with nut.
15. Position spare wheel and secure with nuts.
76
CHASSIS AND BODY
12
REPAIR
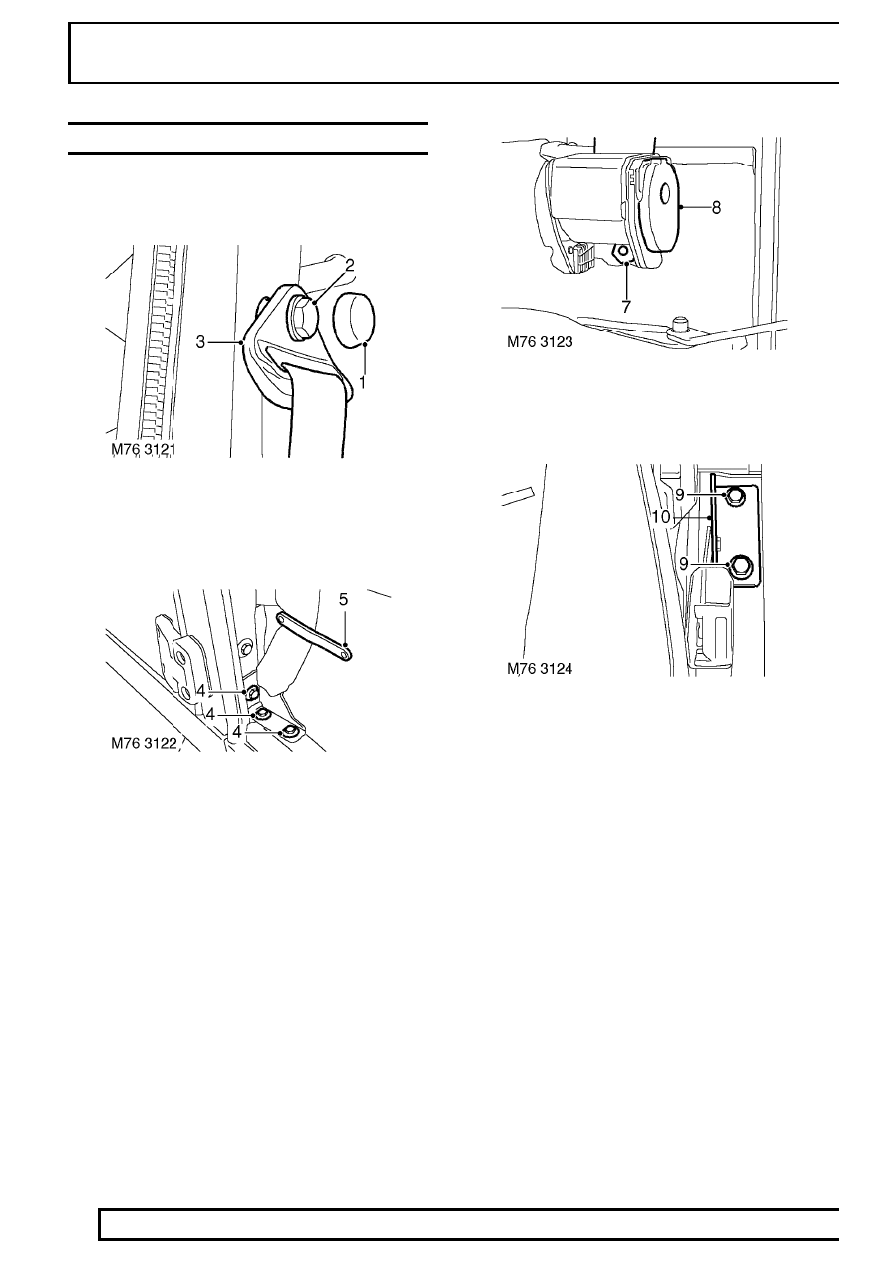
SEAT BELT - FRONT
Service repair no - 76.73.13
Remove
1. Remove cap from seat belt guide bolt.
2. Remove bolt securing seat belt guide to ’B’ post.
3. Release belt from ’B’ post mounting.
4. Remove 3 bolts securing belt bracket to seat
base.
5. Remove 2 studs securing seat belt retaining clip.
6. Remove retaining clip.
7. Remove bolt securing inertia reel to body.
8. Remove automatic belt assembly.
9. Remove 2 bolts securing stalk to body.
10. Remove stalk.
Refit
11. Position stalk and tighten bolts.
12. Position automatic belt assembly to body and
tighten bolt to 38 Nm
13. Unreel portion of belt.
14. Position bracket to seat base, tighten bolts.
15. Position belt to ’B’ post mounting and tighten bolt
to 32 Nm (24 lbf.ft).
16. Fit cap to bolt head.
17. Position belt retaining clip to seat base and
secure with studs.
Нет комментариевНе стесняйтесь поделиться с нами вашим ценным мнением.
Текст