Defender (1999-2002). Manual — part 35

ENGINE
31
REPAIR
All Models
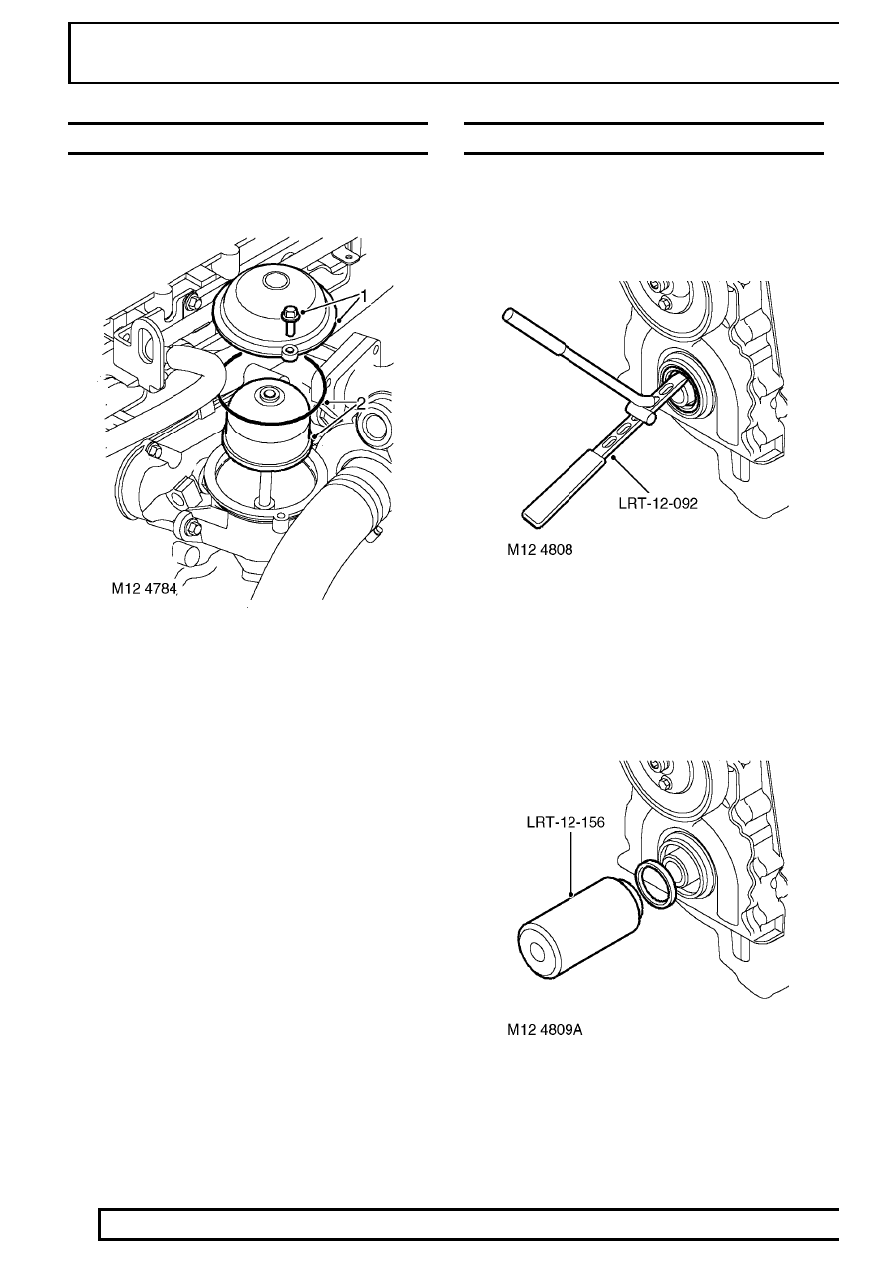
6. Remove 3 bolts securing centrifuge to engine oil
cooler.
7. Remove centrifuge and discard ’O’ ring.
8. Remove 2 bolts, remove drain pipe from
centrifuge and discard gasket.
Refit
9. Clean mating faces of centrifuge, oil cooler and
sump.
10. Position drain pipe to centrifuge using new
gasket and tighten bolts to 10 Nm (7 lbf.ft) .
11. Position new ’O’ ring to oil cooler.
12. Position centrifuge and tighten bolts to 25 Nm
(18 lbf.ft) .
13. Align drain pipe to sump, fit new gasket and
tighten bolts to 10 Nm (7 lbf.ft)
Models with air conditioning only
14. Position compressor and tighten bolts to 25 Nm
(18 lbf.ft) .
15. Fit auxiliary drive belt. See ELECTRICAL,
Repair.
All Models
16. Fit turbocharger. See FUEL SYSTEM, Repair.
17. Fit underbelly panel. See CHASSIS AND
BODY, Repair.
12
ENGINE
32
REPAIR
ROTOR - CENTRIFUGE
Service repair no - 12.60.91
Remove
1. Remove 2 bolts and remove centrifuge cover.
2. Remove and discard ’O’ ring and rotor
Refit
3. Clean centrifuge body and cover.
4. Fit new rotor.
5. Fit centrifuge cover using new ’O’ ring and
tighten bolts to 9 Nm (7 lbf.ft) .
OIL SEAL - TIMING COVER
Service repair no - 12.65.05
Remove
1. Remove crankshaft pulley. See this Section.
2. Position LRT-12-092 into crankshaft front oil seal
and discard seal.
Refit
3. Using a lint free cloth, thoroughly clean oil seal
recess and the running surface on crankshaft
pulley.
4. Position new seal into timing chain housing. Drift
seal into place using LRT-12-156 .
5. Remove LRT-12-156 .
6. Fit crankshaft pulley. See this Section.

ENGINE
33
REPAIR
TIMING CHAIN AND SPROCKETS
Service repair no - 12.65.13
Remove
1. Remove crankshaft front oil seal. See this
Section.
2. Remove cylinder head gasket. See this
Section.
3. Remove sump gasket. See this Section.
4. Release clip securing vacuum pump drain hose
to timing chain cover.
5. Remove 8 bolts securing timing chain cover.
6. Remove cover.
7. Remove timing chain and camshaft sprocket.
8. Remove 2 bolts and remove timing chain fixed
guide.
9. Remove bolt and remove timing chain adjustable
guide.
10. Remove bolt securing oil pump drive sprocket.
11. Remove crankshaft sprocket, oil pump drive
chain and sprocket.
12. Remove bolt and remove timing chain lubrication
jet.
Refit
13. Clean timing chain lubrication jet.
14. Fit lubrication jet and tighten bolt to 10 Nm (7
lbf.ft) .
15. Clean oil pump drive sprocket bolt threads.
16. Clean timing sprockets and chain guides.
17. Ensure that crankshaft is set to TDC firing No. 1
cylinder.
18. Fit oil pump drive chain to crankshaft sprocket
and fit sprocket to crankshaft.
19. Fit sprocket to oil pump.
20. Apply Loctite 242 to oil pump sprocket bolt
threads and tighten bolt to 25 Nm (18 lbf.ft) .
21. Fit timing chain fixed guide and tighten M10 bolt
to 45 Nm (34 lbf.ft) and M6 bolt to 10 Nm (7
lbf.ft) .
22. Fit timing chain adjustable guide and tighten bolt
to 25 Nm (18 lbf.ft).
12
ENGINE
34
REPAIR
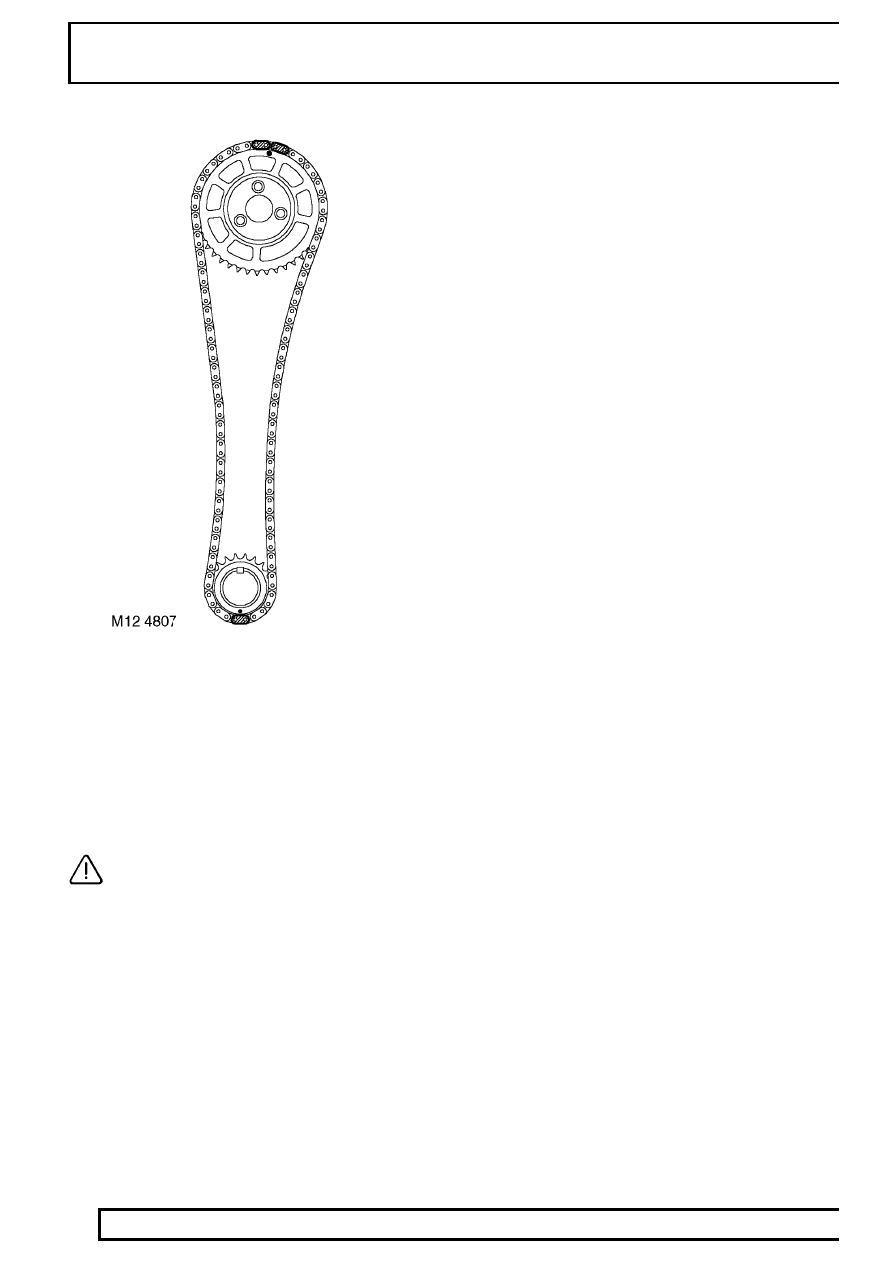
23. Fit camshaft sprocket to timing chain with timing
mark between the 2 bluelinks.
24. Fit timing chain to crankshaft sprocket aligning
blue link to timing mark.
25. Clean timing cover and mating face.
26. Apply an even film of sealant, Part No. STC
4600 to timing cover and spread to an even film
using a roller.
CAUTION: Assembly and bolt tightening
must be completed within 20 minutes of
applying sealant.
27. With assistance, fit timing cover, connect
vacuum pump drain hose and working
progressively, tighten bolts to 27 Nm (20 lbf.ft) .
28. Secure vacuum hose clip.
29. Fit cylinder head gasket. See this Section.
30. Fit sump gasket. See this Section.
31. Fit crankshaft front oil seal. See this Section.
Нет комментариевНе стесняйтесь поделиться с нами вашим ценным мнением.
Текст