Defender. Manual — part 274
Wipers and Washers - Rear Window Wiper Motor
Removal and Installation
Removal
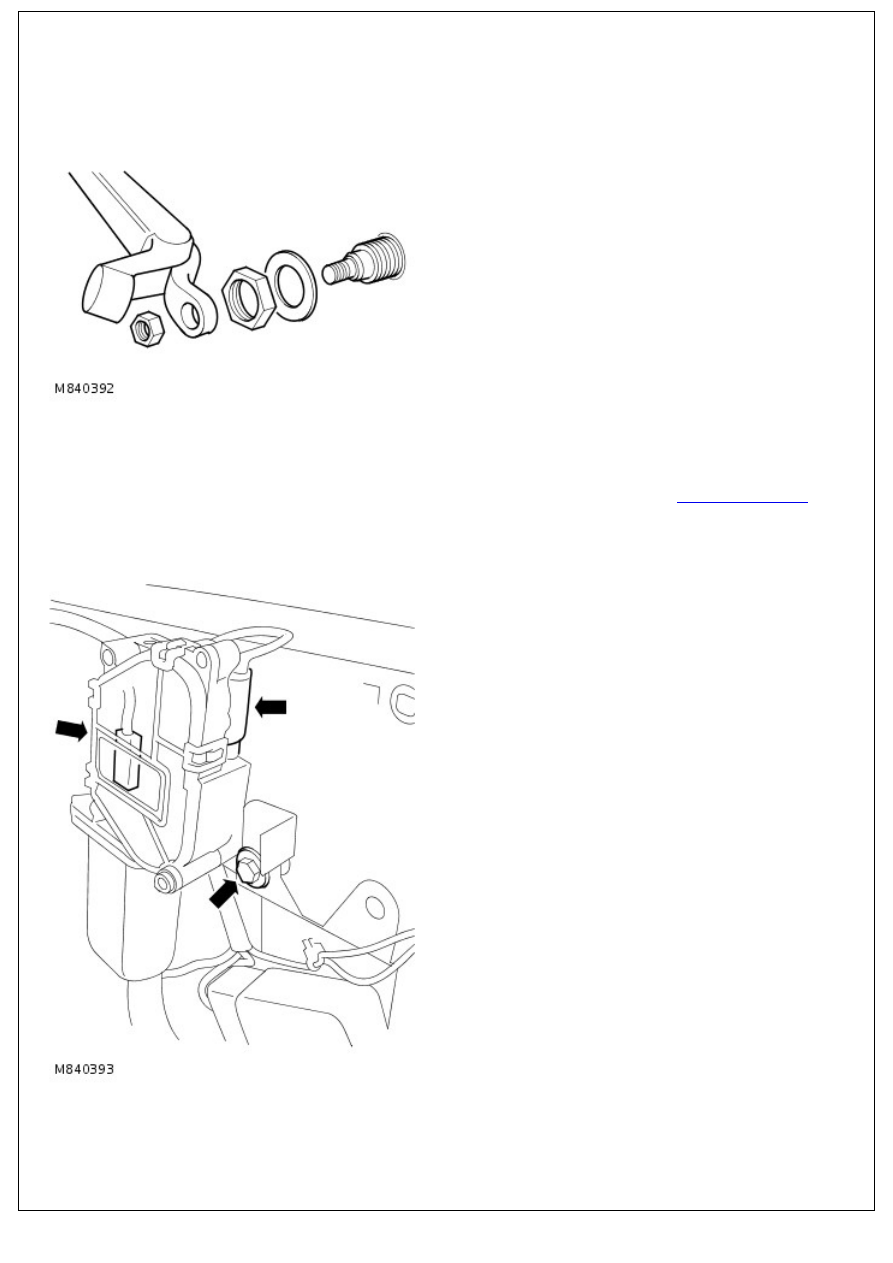
1. Remove spare wheel from taildoor.
2. Raise nut cover, remove nut and release wiper arm.
3. Remove nut and collect washer securing wiper motor to
taildoor.
4. Open taildoor.
5. Remove taildoor trim casing.
For additional information, refer to:
Taildoor Trim Panel
(501-
05 Interior Trim and Ornamentation, Removal and
Installation).
6. Remove bolt securing door locking solenoid to taildoor.
7. Pivot both assemblies and withdraw wiper motor from
taildoor.
8. Disconnect multiplugs from wiper motor.
9. NOTE: Do not carry out further dismantling if component is
removed for access only.
Remove wiper motor assembly.
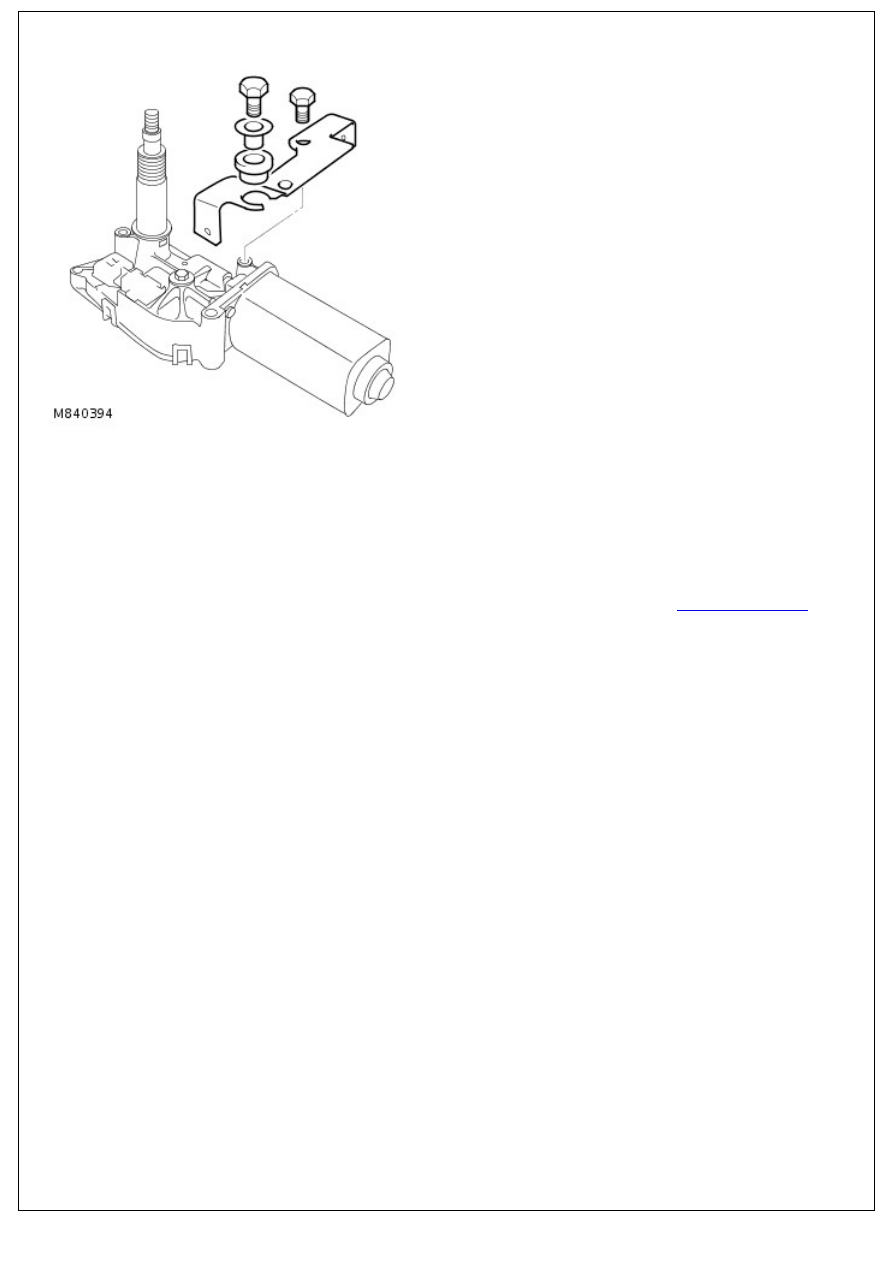
10. Remove 2 bolts securing wiper motor to mounting
bracket, remove bracket.
Installation
1. Fit mounting bracket to motor and tighten bolts to 10 Nm (7
lbf.ft).
2. Fit motor spindle to rear door, connect multiplugs and push
motor fully home. Align motor mounting bracket with
solenoid mounting bracket, fit bolt and tighten to 10 Nm ( 7
lbf.ft ).
3. Fit taildoor trim casing.
For additional information, refer to:
Taildoor Trim Panel
(501-
05 Interior Trim and Ornamentation, Removal and
Installation).
4. Fit washer and nut to rear wiper assembly, tighten nut to 3
Nm (2.2 lbf.ft).
5. Fit wiper arm to spindle, align blade to glass and tighten nut
to 17 Nm (13 lbf.ft).
6. Close nut cover.
7. Fit spare wheel and tighten nuts to 45 Nm (33 lbf.ft).
Wipers and Washers - Windshield Washer Pump
Removal and Installation
Removal
1. Remove headlamp.
For additional information, refer to:
Headlamp Assembly
(417-01 Exterior Lighting, Removal and Installation).
2. Position drain tin to collect any fluid spillage.
3. Disconnect multiplug from washer pump.
4. Disconnect hose from washer pump.
5. Release washer pump from reservoir and discard sealing
washer.
Installation
1. Fit new sealing washer and secure pump to reservoir.
2. Connect hose and multiplug to washer pump.
3. Fit headlamp.
For additional information, refer to:
Headlamp Assembly
(417-01 Exterior Lighting, Removal and Installation).
4. Fill reservoir with screen cleaning fluid.
Wipers and Washers - Windshield Wiper Motor
Removal and Installation
Removal
1. Disconnect the battery ground cable.
For additional information, refer to:
Battery Disconnect and
Connect
(414-01 Battery, Mounting and Cables, General
Procedures).
2. Remove the instrument panel.
For additional information, refer to:
Instrument Panel
(501-12
Instrument Panel and Console, Removal and Installation).
3. NOTE: Make sure the clips are discarded.
Remove the audio unit support bracket.
Remove and discard the 5 clips.
4. Remove the LH demister duct.
Remove the clip.
5. Release the LH defrost vent duct.
Remove the screw.
6. Remove the LH defrost vent duct.
Нет комментариевНе стесняйтесь поделиться с нами вашим ценным мнением.
Текст