Defender. Manual — part 159
Manual Transmission/Transaxle - Transmission Draining and Filling
General Procedures
1.
WARNING: Do not work on or under a vehicle
supported only by a jack. Always support the vehicle on safety
stands.
Raise and support the vehicle.
2. NOTE: The oil should be drained when the transmission is
warm and the vehicle is standing on a level surface.
Position a container to collect the oil.
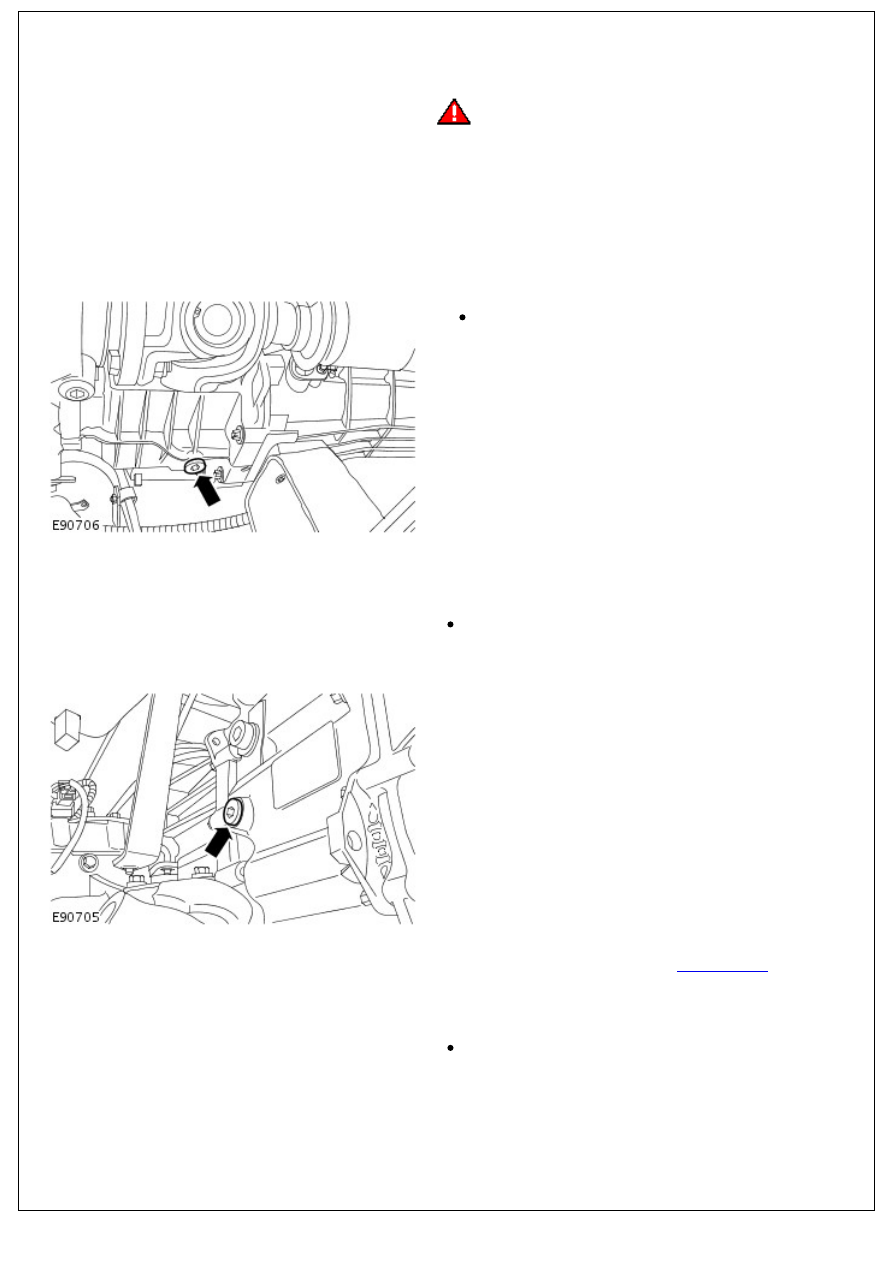
3. Clean the area surrounding the transmission drain plug.
4. Remove the transmission drain plug.
Allow the oil to drain.
5. Clean transmission drain plug.
6. Install the transmission drain plug and clean any oil residue
from the surrounding area.
Tighten to 50 Nm (37 lb.ft).
7. Clean the area surrounding the transmission filler plug.
8. Remove the transmission filler plug.
9. Fill the transmission with the correct grade of oil.
For additional information, refer to:
Specifications
(308-03
Manual Transmission/Transaxle, Specifications).
10. Install the transmission filler plug and clean any oil residue
from the surrounding area.
Tighten to 35 Nm (26 lb.ft).
11. Remove the container.
12. Lower the vehicle.
Manual Transmission/Transaxle - Gearshift Control Shaft Seal
In-vehicle Repair
Removal
1. Disconnect the battery ground cable.
For additional information, refer to:
Battery Disconnect and
Connect
(414-01 Battery, Mounting and Cables, General
Procedures).
2.
WARNING: Do not work on or under a vehicle
supported only by a jack. Always support the vehicle on safety
stands.
Raise and support the vehicle.
3. Remove the transfer case.
For additional information, refer to:
Transfer Case
(308-07A
Transfer Case - 2.4L Duratorq-TDCi HPCR (103kW/140PS) -
Puma, Removal).
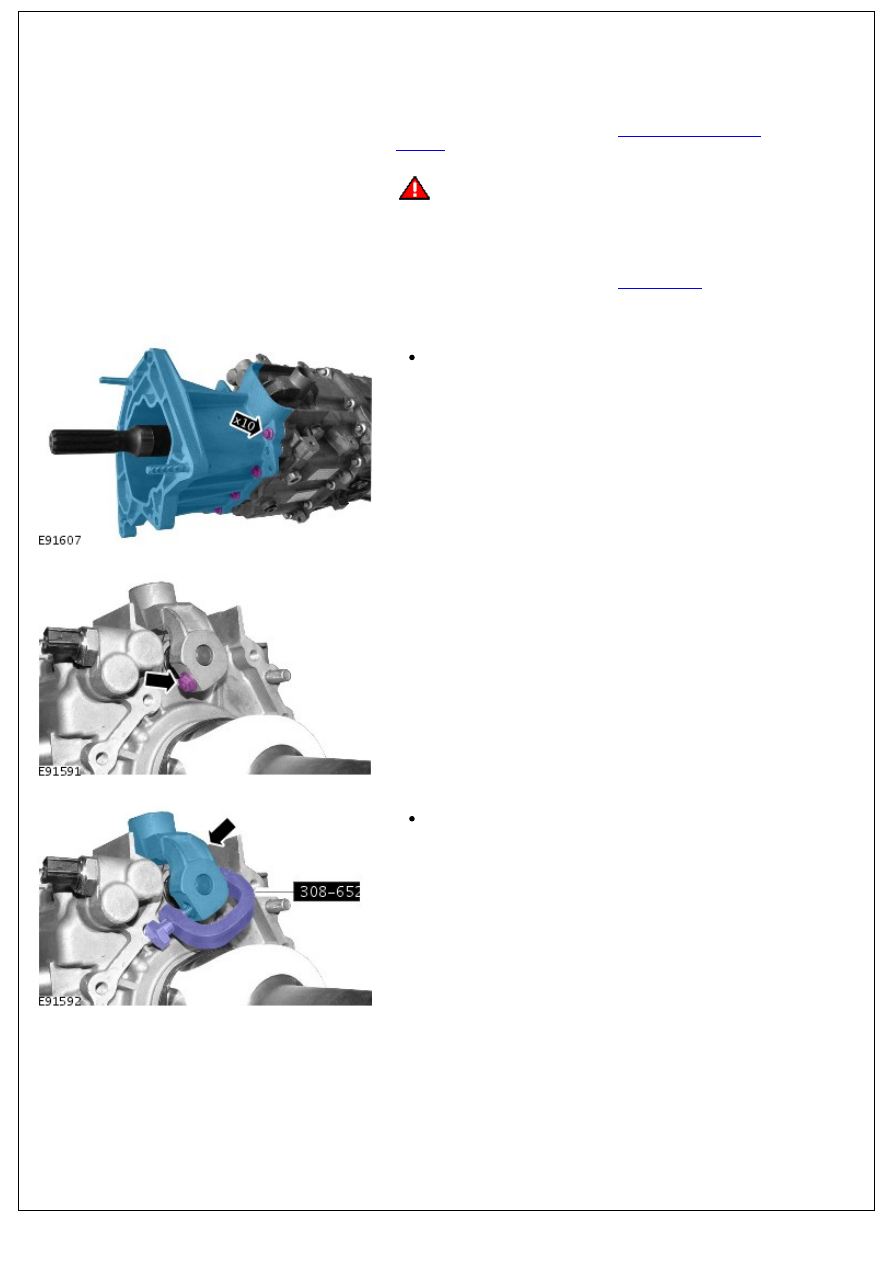
4. Remove the transmission extension housing.
Remove the 10 bolts.
5. Remove the gearshift yoke nut.
6. Using the special tool, remove the gearshift yoke.
Remove the pin.
7. Using the special tool, remove the gearshift control shaft

7. Using the special tool, remove the gearshift control shaft
seal.
Installation
1. Using the special tool, install the gearshift control shaft seal.
2. Install the gearshift selector yoke.
Tighten to 12 Nm (9 lb.ft).
3. Install the transmission extension housing.
Tighten to 25 Nm (18 lb.ft).
4. Install the transfer case.
For additional information, refer to:
Transfer Case
(308-07A
Transfer Case - 2.4L Duratorq-TDCi HPCR (103kW/140PS) -
Puma, Installation).
5. Connect the battery ground cable.
For additional information, refer to:
Battery Connect
(414-01
Battery, Mounting and Cables, General Procedures).
Manual Transmission/Transaxle - Input Shaft Seal
In-vehicle Repair
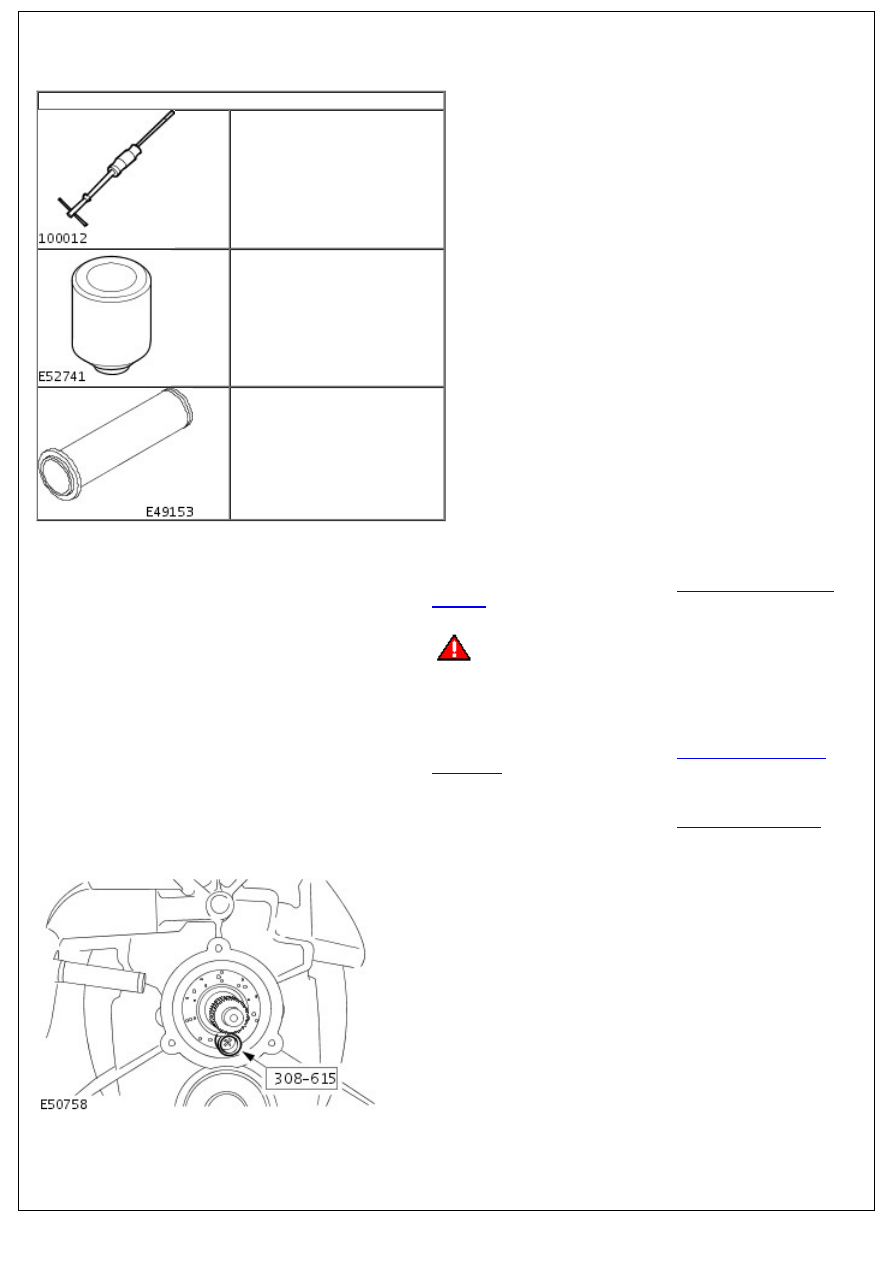
Special Tool(s)
Slide Hammer
100-012
Remover, Seals
308-615
Installer Input Shaft Seal
308-605
Removal
1. Disconnect the battery ground cable.
For additional information, refer to:
Battery Disconnect and
Connect
(414-01 Battery, Mounting and Cables, General
Procedures).
2.
WARNING: Do not work on or under a vehicle
supported only by a jack. Always support the vehicle on safety
stands.
Raise and support the vehicle.
3. Drain the transmission.
For additional information, refer to:
Transmission Draining
and Filling
(308-03 Manual Transmission/Transaxle, General
Procedures).
4. Remove the clutch slave cylinder.
For additional information, refer to:
Clutch Slave Cylinder
(308-02 Clutch Controls - 2.4L Duratorq-TDCi HPCR
(103kW/140PS) - Puma, Removal and Installation).
5. Install the special tool into the seal.
6. Using the special tools, remove and discard the input shaft
Нет комментариевНе стесняйтесь поделиться с нами вашим ценным мнением.
Текст