Defender. Manual — part 160
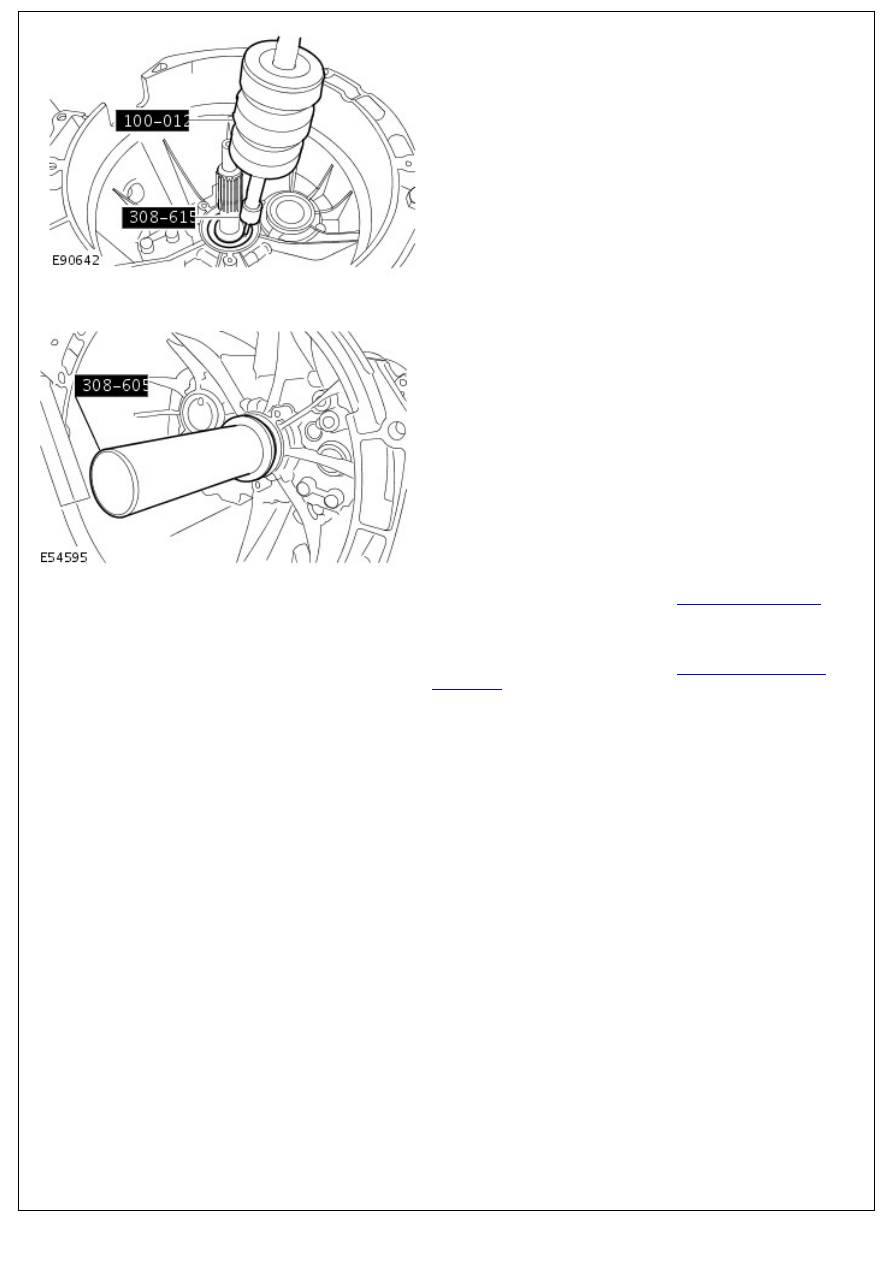
6. Using the special tools, remove and discard the input shaft
seal.
Installation
1. Using the special tool, install the new input shaft seal.
2. Install the clutch slave cylinder.
For additional information, refer to:
Clutch Slave Cylinder
(308-02 Clutch Controls - 2.4L Duratorq-TDCi HPCR
(103kW/140PS) - Puma, Removal and Installation).
3. Fill the transmission.
For additional information, refer to:
Transmission Draining
and Filling
(308-03 Manual Transmission/Transaxle, General
Procedures).
Manual Transmission/Transaxle - Output Shaft Seal
In-vehicle Repair
Special Tool(s)
Slide Hammer
100-012
Seal Remover Input and Output
308-375
Slide Hammer Adaptor
100-012-01
Holding Tool, Output Flange
308-701
Installer
205-081A
Long Legged Puller
308-516
Installer, Output Drive Flange Seal
308-604
Adapter Slide Hammer
100-012-05
Removal
1. Disconnect the battery ground cable.
For additional information, refer to:
Battery Disconnect and
Connect
(414-01 Battery, Mounting and Cables, General
Procedures).
2. Remove the gearshift lever.
For additional information, refer to:
Gearshift Lever
(308-06
Manual Transmission/Transaxle External Controls - 2.4L
Duratorq-TDCi HPCR (103kW/140PS) - Puma, Removal and
Installation).
3.
WARNING: Do not work on or under a vehicle
supported only by a jack. Always support the vehicle on safety
stands.
Raise and support the vehicle.
4. Drain the transmission.
For additional information, refer to:
Transmission Draining
and Filling
(308-03 Manual Transmission/Transaxle, General
Procedures).
5. Remove the transfer case.
For additional information, refer to:
Transfer Case
(308-07A
Transfer Case - 2.4L Duratorq-TDCi HPCR (103kW/140PS) -
Puma, Removal).
6. Remove the transmission extension shaft cover.
Remove and discard the tie strap.
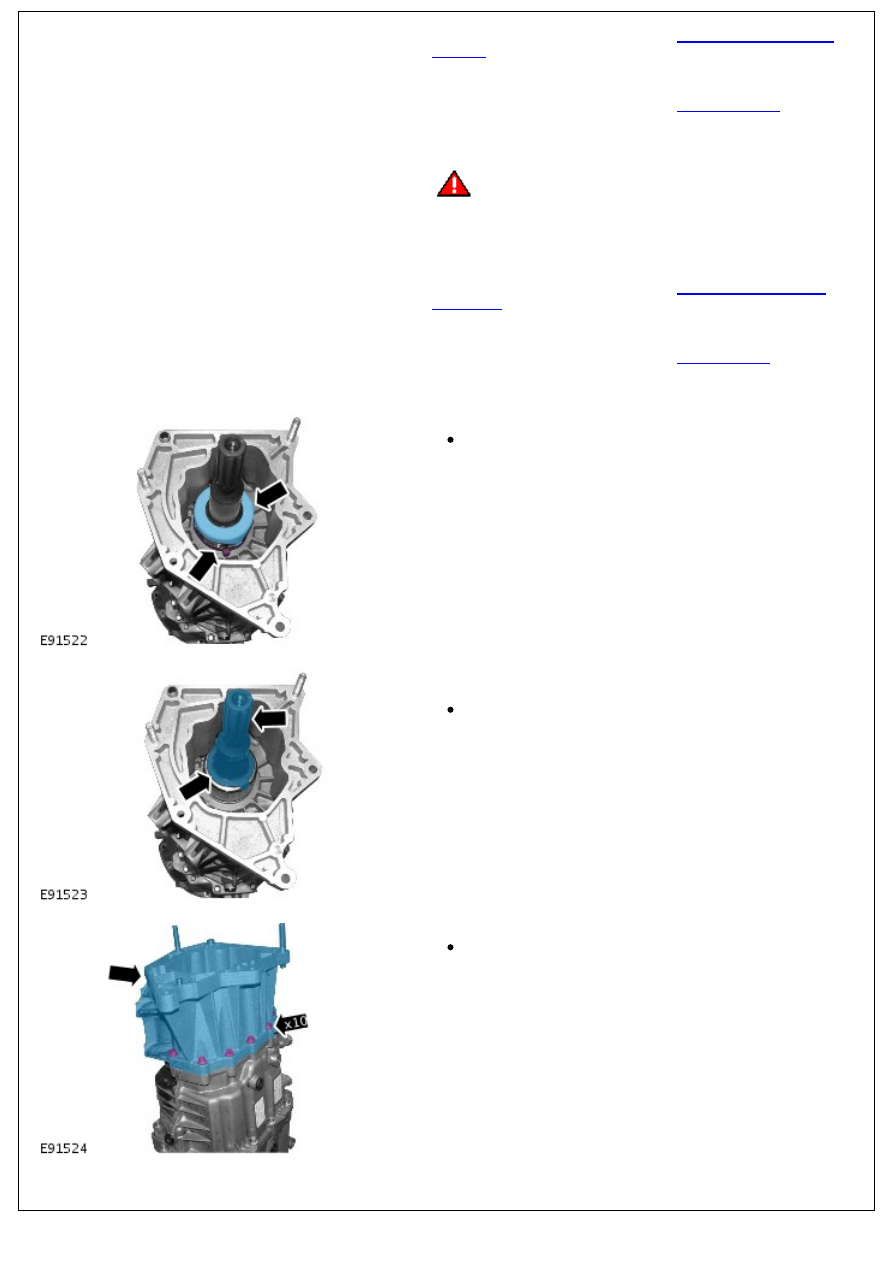
7. Using a suitable tool, remove the transmission extension
shaft.
Remove the seal.
8. Remove the transmission extension housing.
Remove the 10 bolts.
9. Using the special tool, remove the output flange securing

9. Using the special tool, remove the output flange securing
bolt.
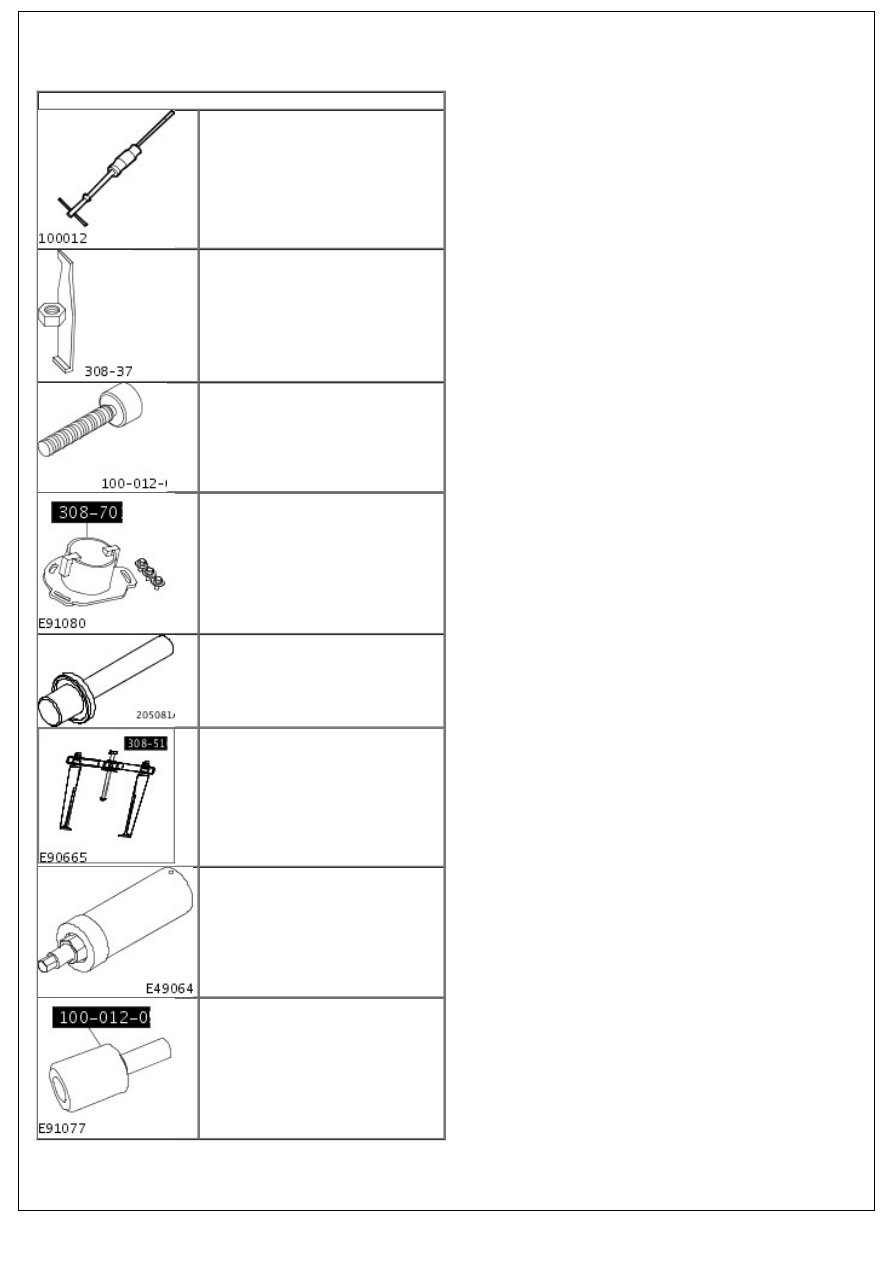
10. Using the special tools, remove the output flange.
11. Using the special tools, remove and discard the output
shaft seal.
Installation
1. Using the special tool, install the output shaft seal.
2.
WARNING: Care should be taken when using the hot
air blower. Failure to follow this instruction may result in
personal injury.
Нет комментариевНе стесняйтесь поделиться с нами вашим ценным мнением.
Текст