Defender. Manual — part 95
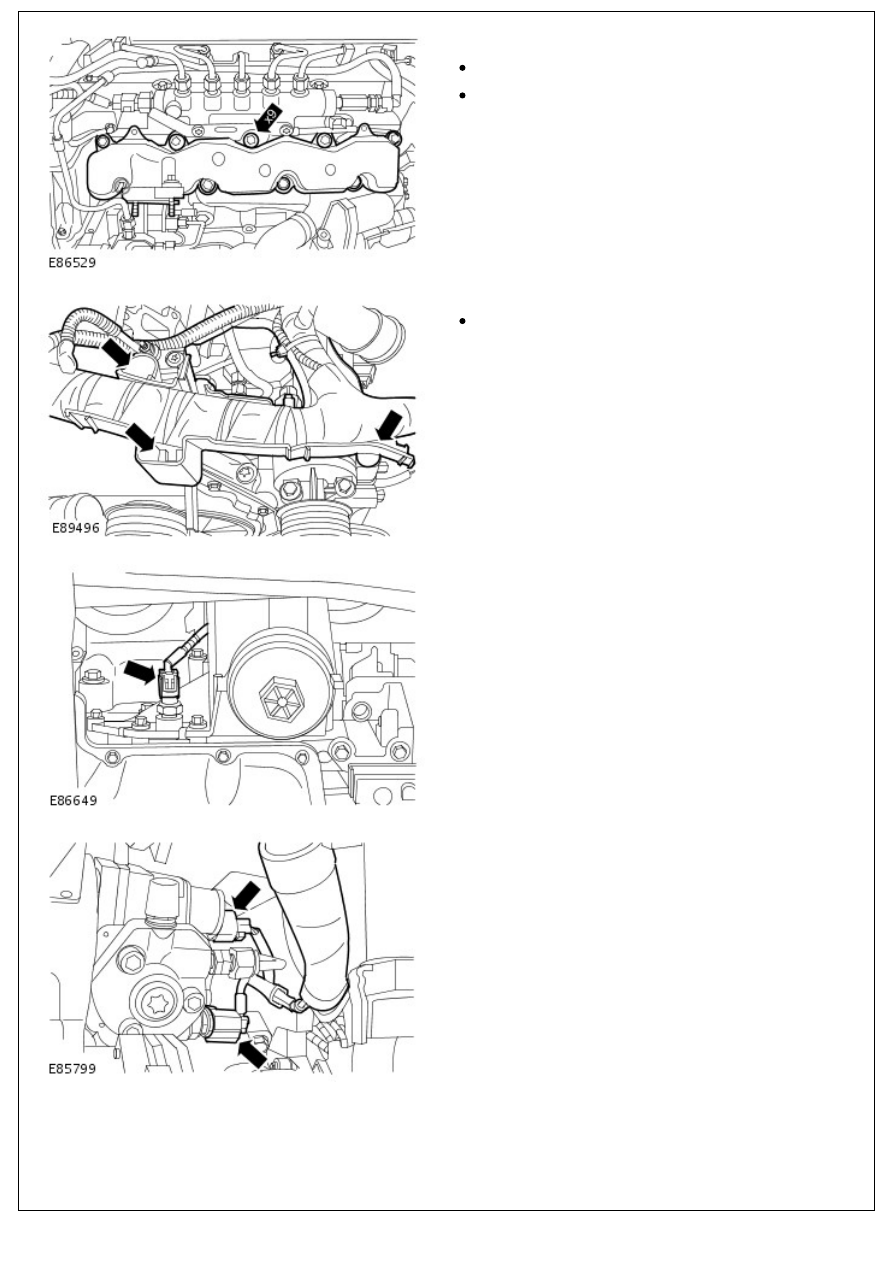
14. Remove the EGR valve outlet tube and intake manifold
assembly.
Fully loosen the 9 bolts.
Remove and discard the 8 seals.
15. Release the engine wiring harness.
Release the 3 clips.
16. Disconnect the engine oil pressure (EOP) sensor electrical
connector.
17. Disconnect the fuel metering valve and the fuel
temperature sensor electrical connectors.
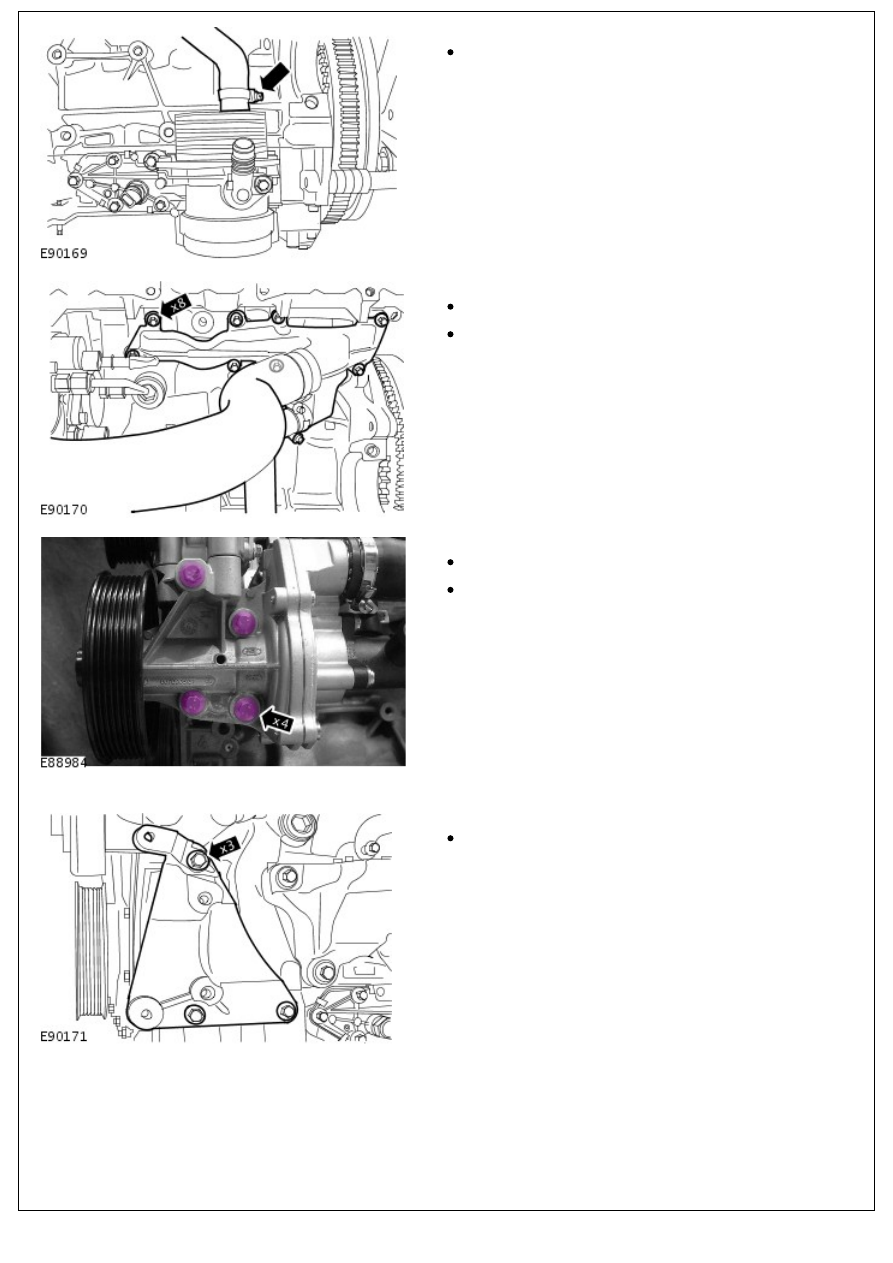
18. Disconnect the coolant hose.
18. Disconnect the coolant hose.
Release the clip.
19. Release the coolant manifold.
Remove the 8 bolts.
Remove and discard the gasket.
20. Release the coolant pump.
Remove the 4 bolts.
Remove and discard the gasket.
21. Remove the coolant pump and coolant manifold assembly.
22. Remove the power steering pump bracket.
Remove the 3 bolts.
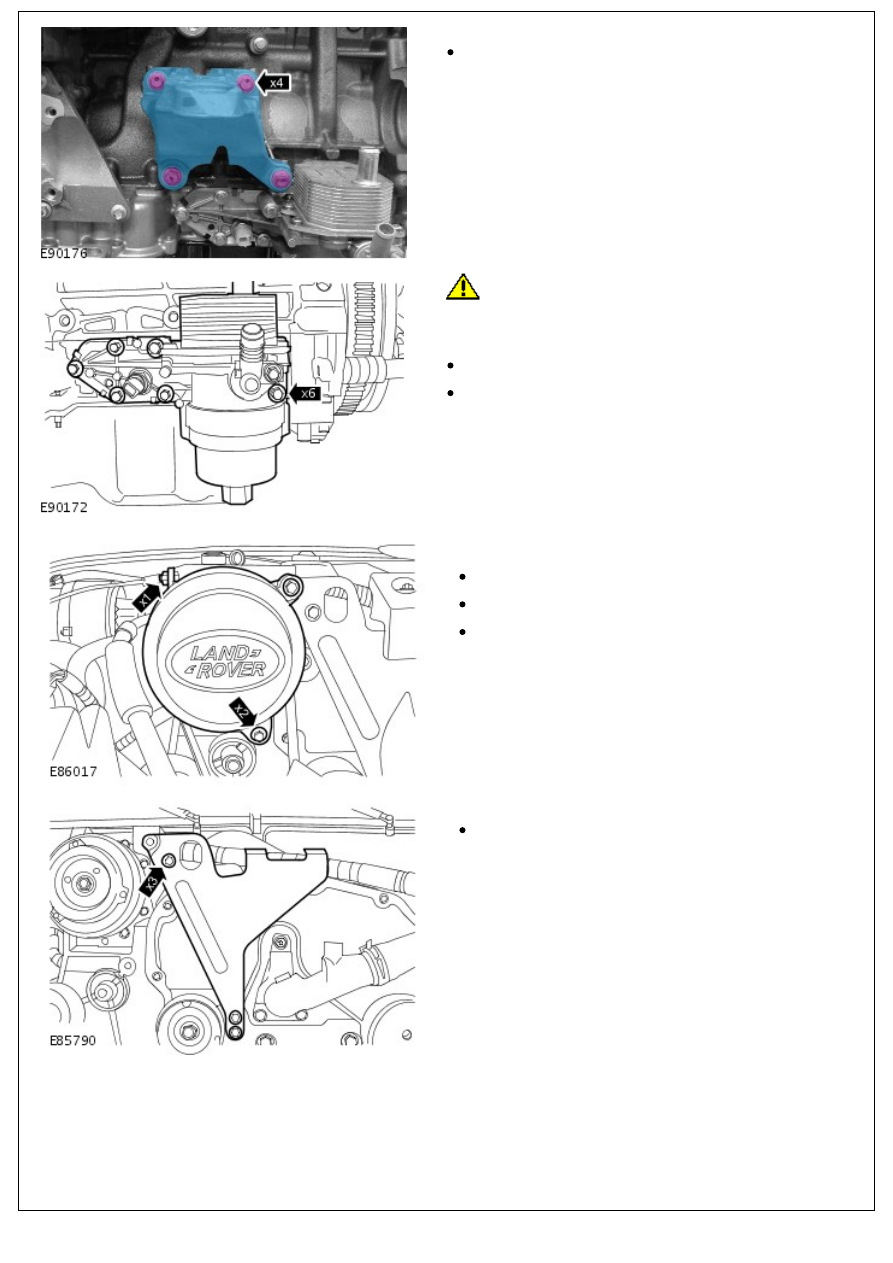
23. Remove the LH engine mount bracket.
23. Remove the LH engine mount bracket.
Remove the 4 bolts.
24.
CAUTION: Make sure that all openings are sealed. Use
new blanking caps.
Remove the oil filter housing assembly.
Remove the 6 bolts.
Remove and discard the gasket.
25. Remove the air conditioning (A/C) compressor pulley
cover.
Remove the 2 bolts.
Remove the nut.
Remove the accessory drive belt.
26. Remove the engine lifting bracket.
Remove the 3 bolts.
27. Disconnect the A/C compressor electrical connector.
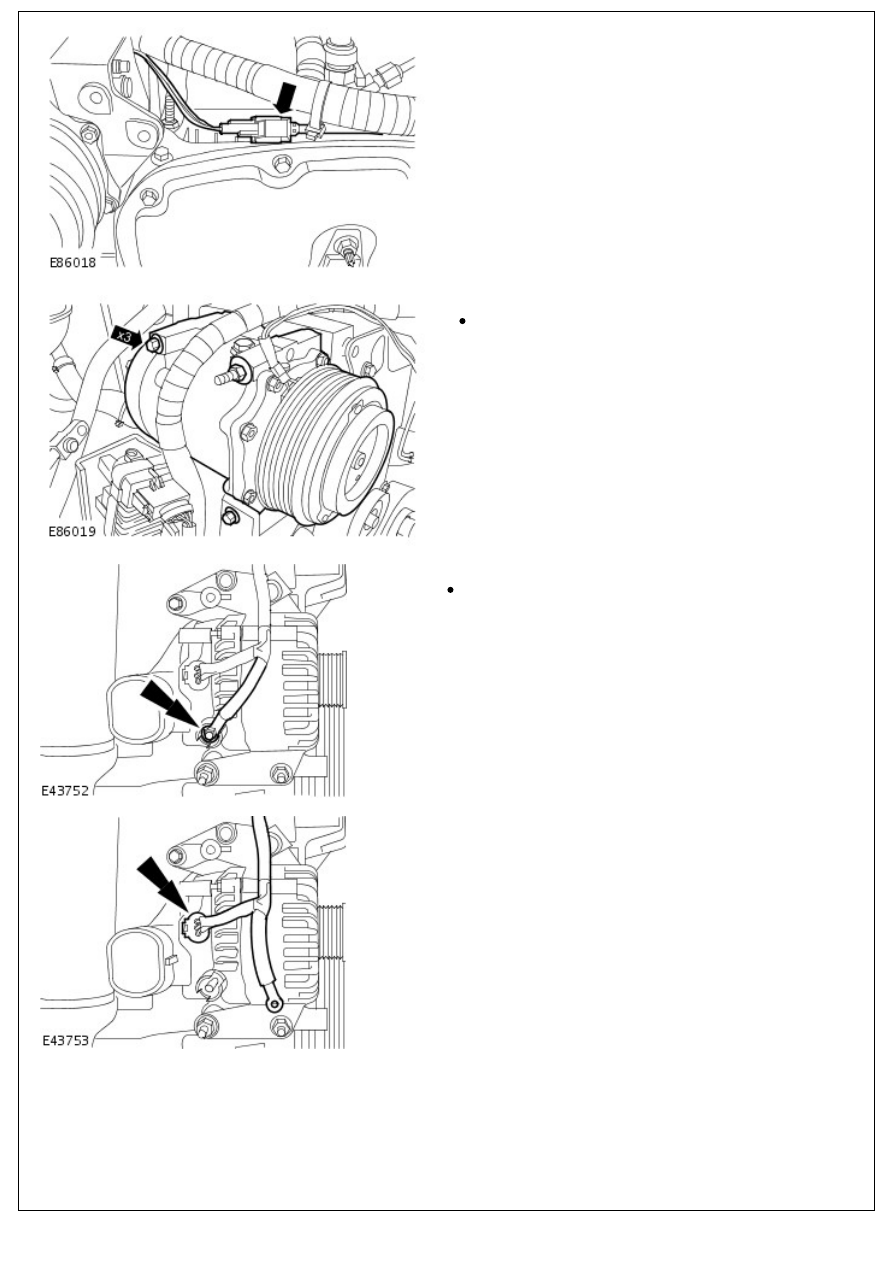
27. Disconnect the A/C compressor electrical connector.
28. Remove the A/C compressor.
Remove the 3 bolts.
29. Disconnect the battery positive cable from the generator.
Remove the nut.
30. Disconnect the generator electrical connector.
31. Remove the generator.
Нет комментариевНе стесняйтесь поделиться с нами вашим ценным мнением.
Текст