Defender. Manual — part 94
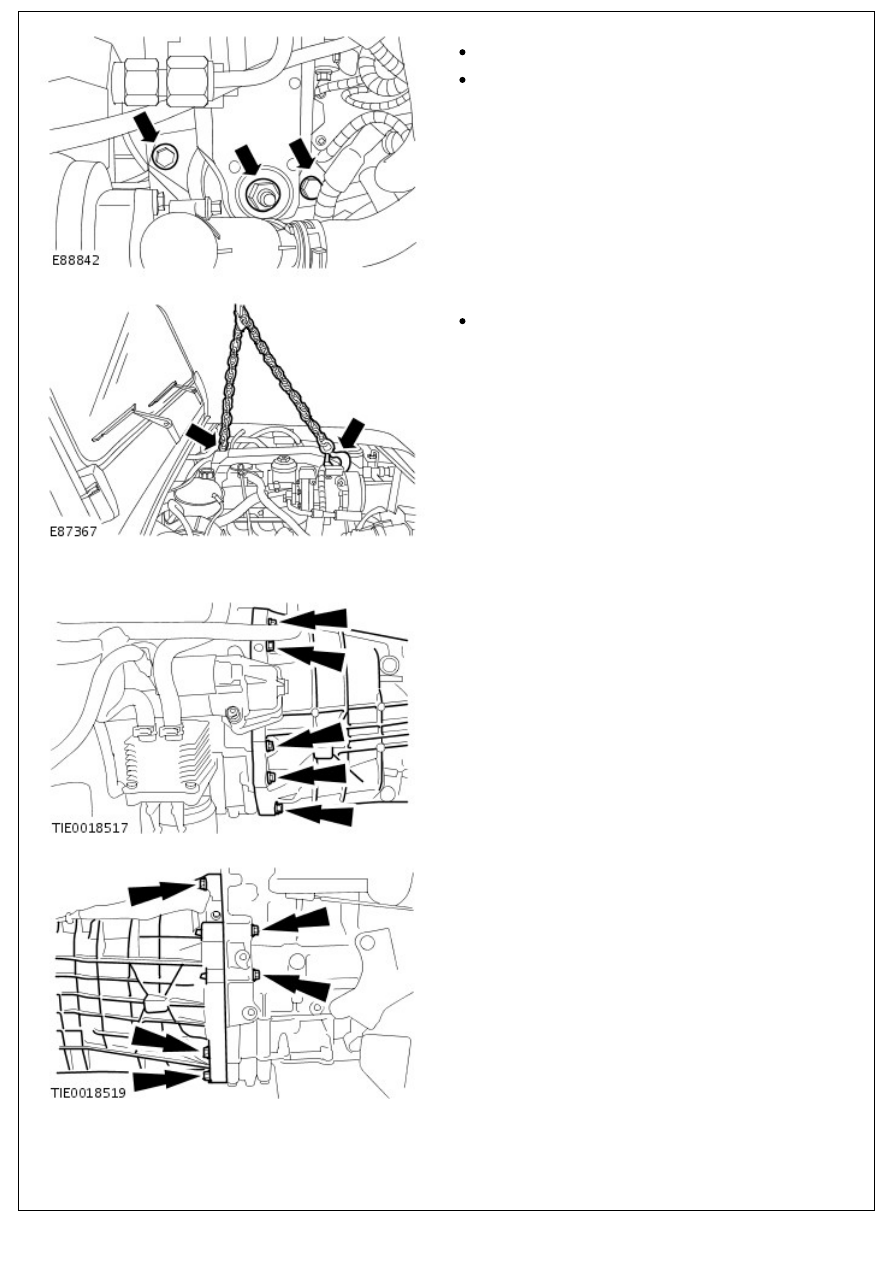
30. Release the LH engine mount.
Remove the nut.
Remove the 2 bolts.
31. Raise and support the engine.
Using a suitable hydraulic jack, support the
transmission.
32. Remove both of the engine mounts.
33. Remove the 5 LH engine to transmission bolts.
34. Remove the 5 RH engine to transmission bolts.
35. With assistance, carefully remove the engine.
Engine - 2.4L Duratorq-TDCi HPCR (103kW/140PS) - Puma - Engine
Disassembly
Disassembly
1. Install the engine to suitable engine stand.
2. Drain the engine oil.
Position a container to collect the engine oil.
Remove the drain plug.
Allow the engine oil to drain.
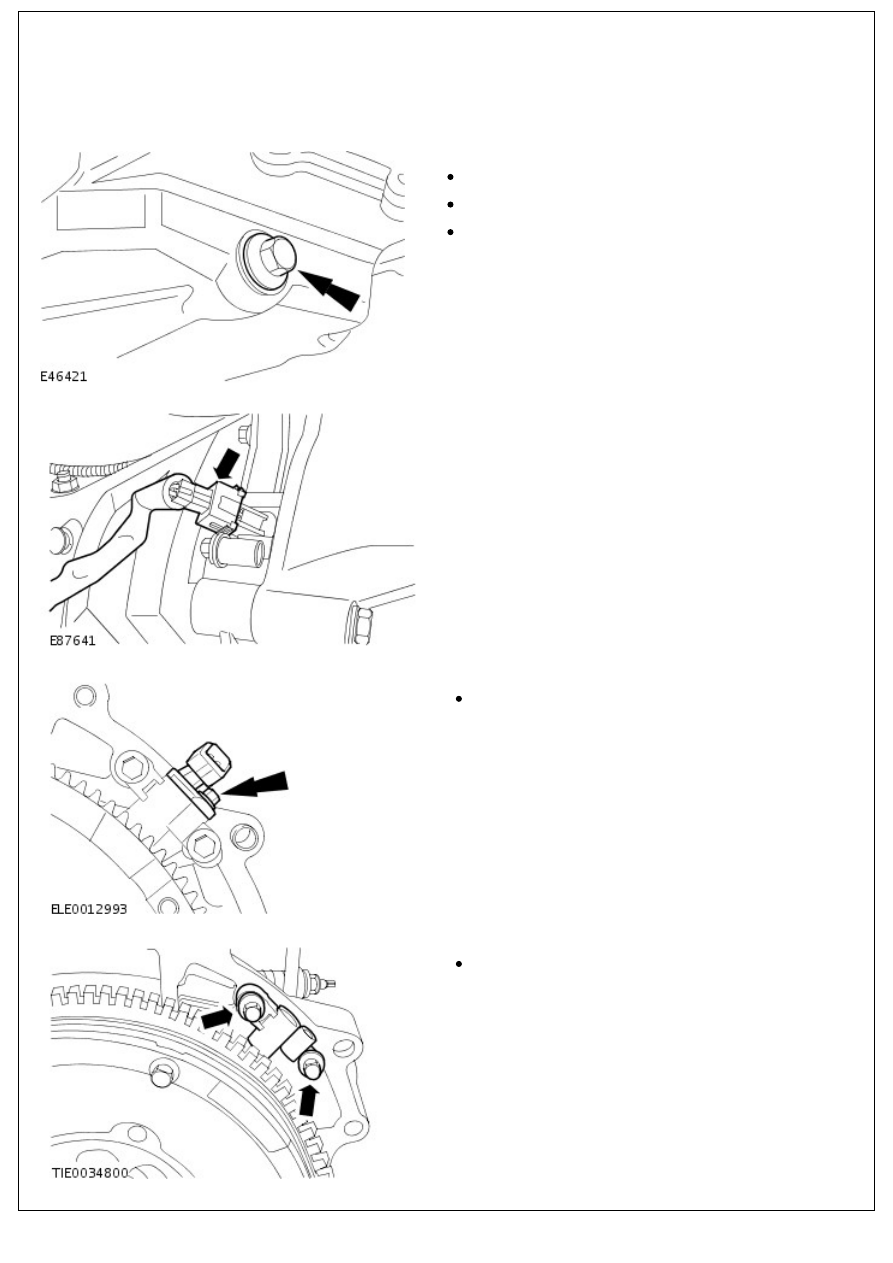
3. Disconnect the crankshaft position (CKP) sensor electrical
connector.
4. Remove the CKP sensor.
Remove the bolt.
5. Remove the CKP sensor bracket.
Remove the 2 bolts.
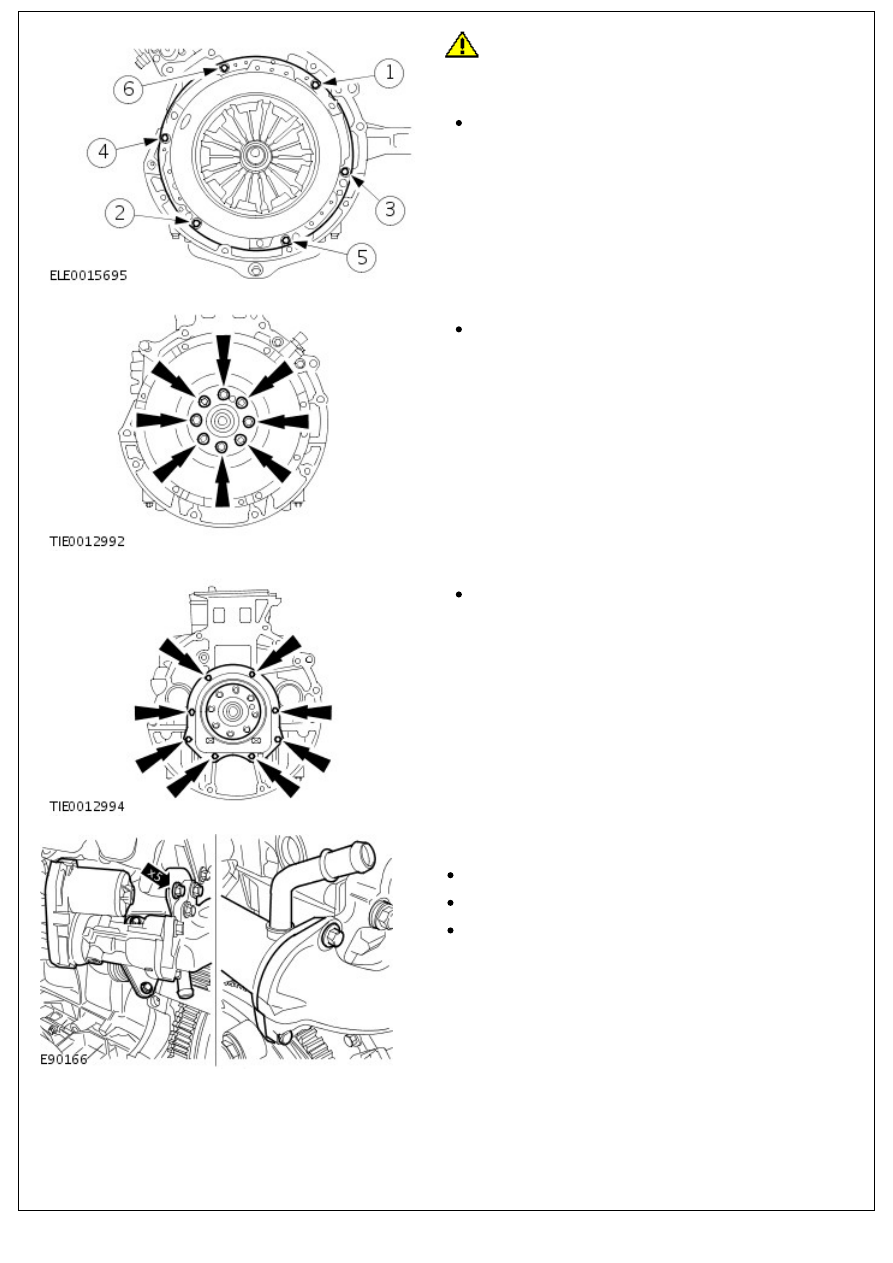
6.
CAUTION: Loosen the clutch pressure plate bolts by 2
turns at a time in the sequence shown.
Remove the clutch disc and the clutch pressure plate.
Remove the 6 bolts.
7. Remove the flywheel.
Remove and discard the 8 bolts.
8. Remove and discard the crankshaft rear seal.
Remove the 8 bolts.
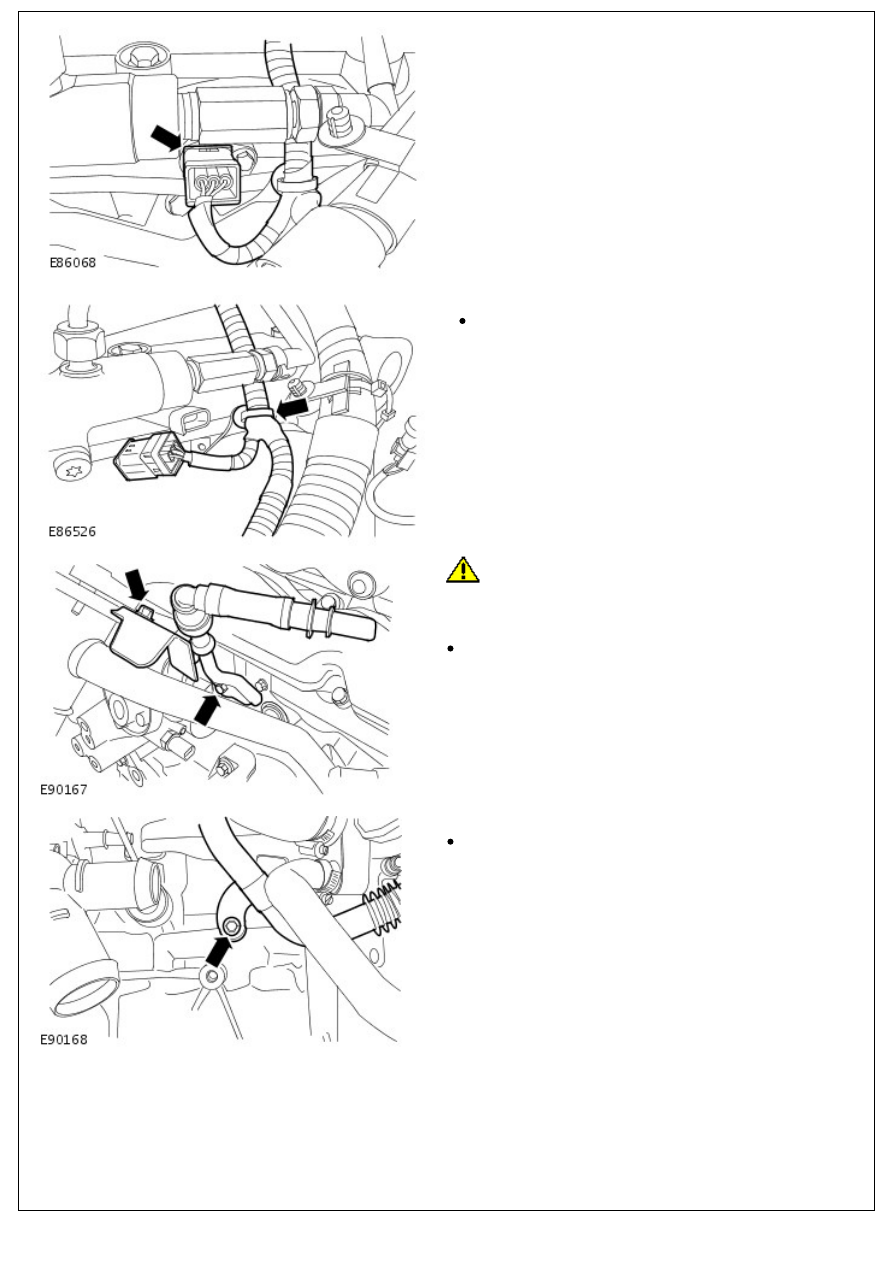
9. Remove the exhaust gas recirculation (EGR) valve and the
EGR cooler.
Disconnect the EGR valve electrical connector.
Remove the 5 bolts.
Discard the 2 gaskets.
10. Disconnect the camshaft position (CMP) sensor electrical
10. Disconnect the camshaft position (CMP) sensor electrical
connector.
11. Release the engine wiring harness.
Release the clip.
12.
CAUTION: Make sure that all openings are sealed. Use
new blanking caps.
Remove the fuel injection pump supply pipe.
Remove the bolt.
13. Release the EGR valve outlet tube.
Remove the bolt.
14. Remove the EGR valve outlet tube and intake manifold
Нет комментариевНе стесняйтесь поделиться с нами вашим ценным мнением.
Текст