Defender. Manual — part 186
Transfer Case - 2.4L Duratorq-TDCi HPCR (103kW/140PS) - Puma -
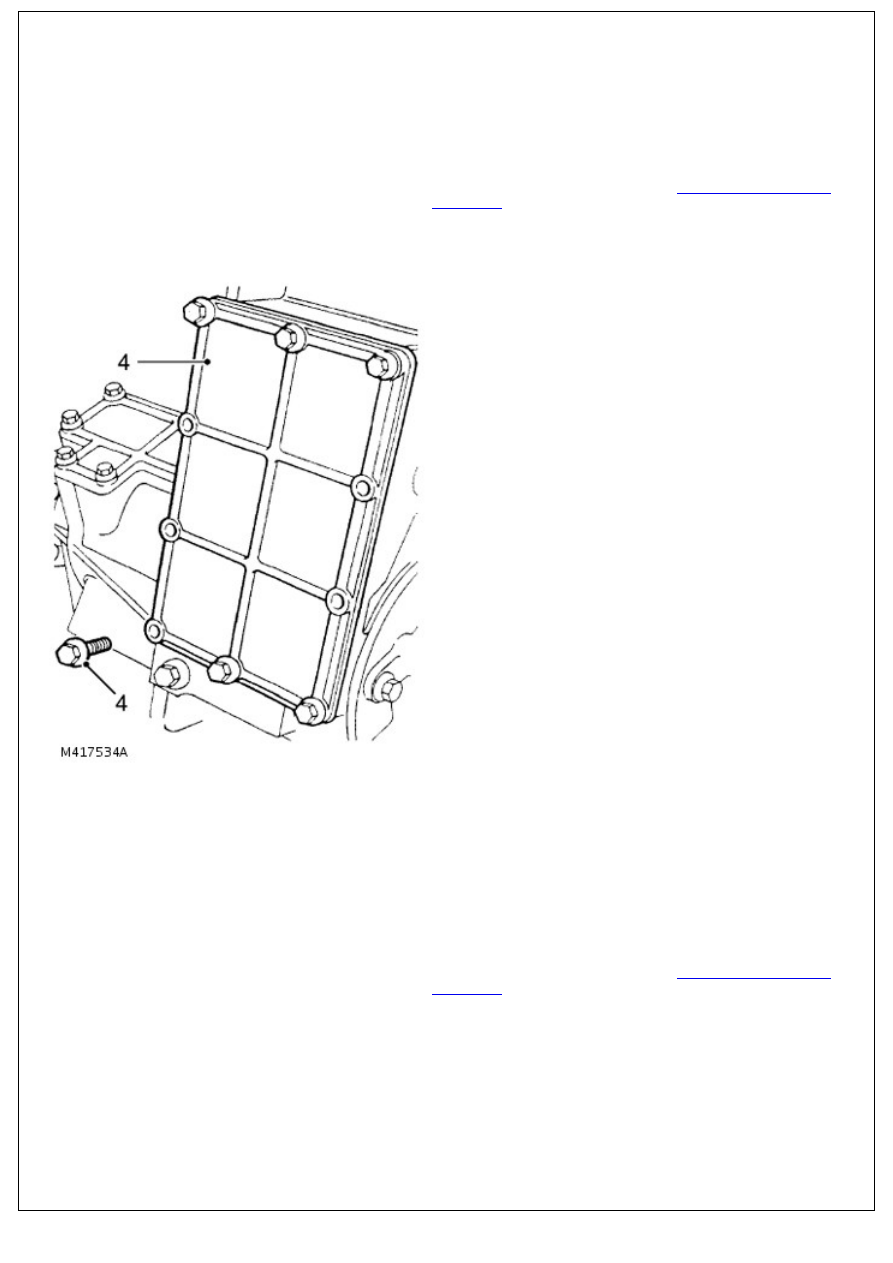
Transfer Case Lower Cover
In-vehicle Repair
Removal
1. Raise vehicle on ramp.
2. Drain transfer case oil.
For additional information, refer to:
Transfer Case Draining
and Filling
(308-07A Transfer Case - 2.4L Duratorq-TDCi
HPCR (103kW/140PS) - Puma, General Procedures).
3. Remove 10 bolts securing lower cover to transfer case and
remove cover.
Installation
1. Clean lower cover and mating face on transfer case.
2. Clean bolt threads.
3. Apply sealant, Part No. STC 50552 to bolt threads.
4. Apply sealant, Part No. STC 4600 to lower cover sealing face.
5. Position lower cover, fit bolts and tighten to 25 Nm (18
lbf.ft).
6. Fill transfer case with oil.
For additional information, refer to:
Transfer Case Draining
and Filling
(308-07A Transfer Case - 2.4L Duratorq-TDCi
HPCR (103kW/140PS) - Puma, General Procedures).
7. Lower vehicle on ramp.
Transfer Case - 2.4L Duratorq-TDCi HPCR (103kW/140PS) - Puma -
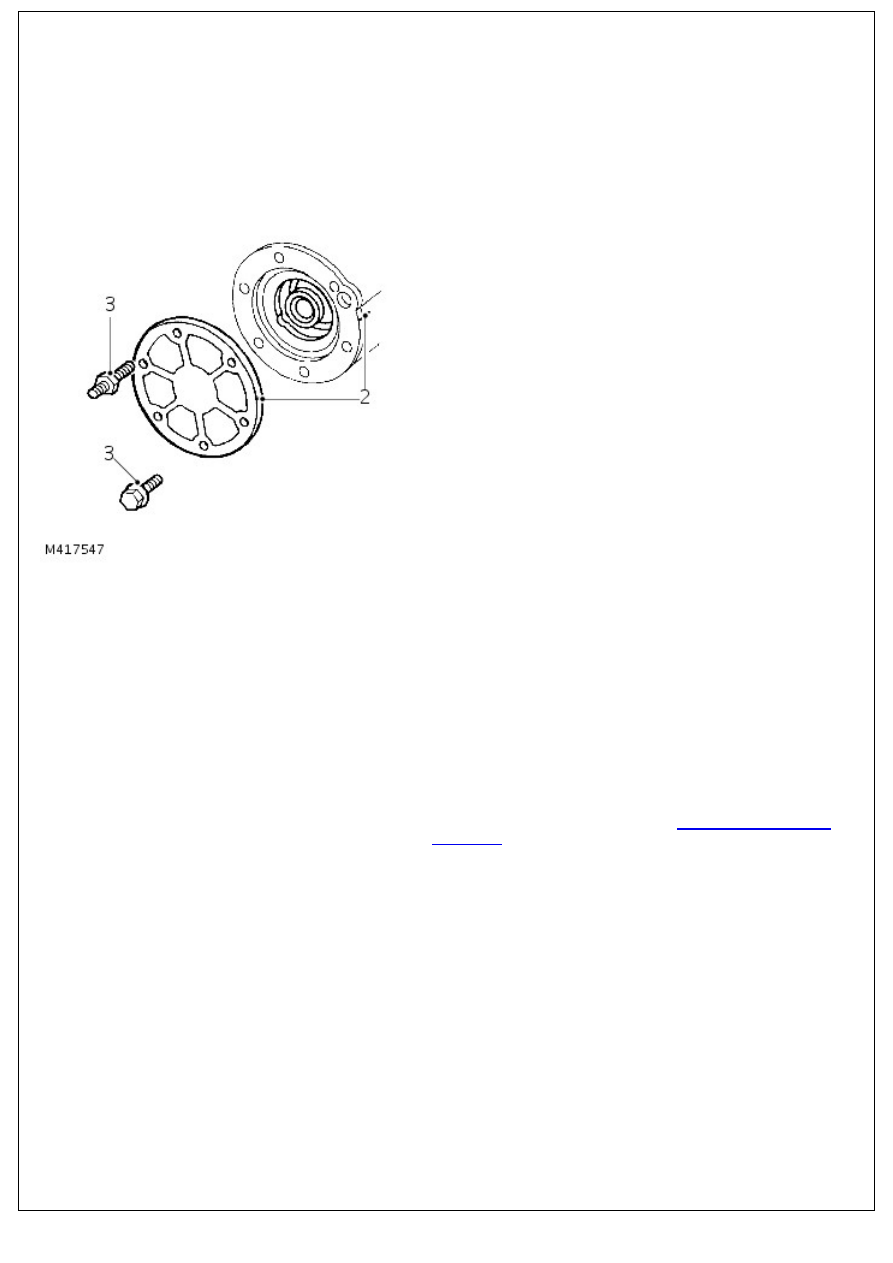
Transfer Case Rear Cover
In-vehicle Repair
Removal
1. Raise vehicle on 4 post ramp.
2. Mark rear cover to bearing housing for assembly purposes.
3. Noting fitted position of stud bolt and harness clip bracket,
remove 5 bolts and stud bolt securing rear cover.
4. Collect harness clip bracket.
5. Remove rear cover.
Installation
1. Clean rear cover and mating face.
2. Apply sealant, Part No. STC 4600 to rear cover mating face.
3. Align reference marks, fit rear cover.
4. Clean rear cover bolts and apply sealant, Part No. STC 50552
to threads of bolts and stud nut.
5. Position clip bracket, fit stud nut and bolts, tighten by
diagonal selection to 25 Nm (18 lbf.ft).
6. Check/top-up transfer case oil.
For additional information, refer to:
Transfer Case Draining
and Filling
(308-07A Transfer Case - 2.4L Duratorq-TDCi
HPCR (103kW/140PS) - Puma, General Procedures).
7. Lower vehicle.
Transfer Case - 2.4L Duratorq-TDCi HPCR (103kW/140PS) - Puma -
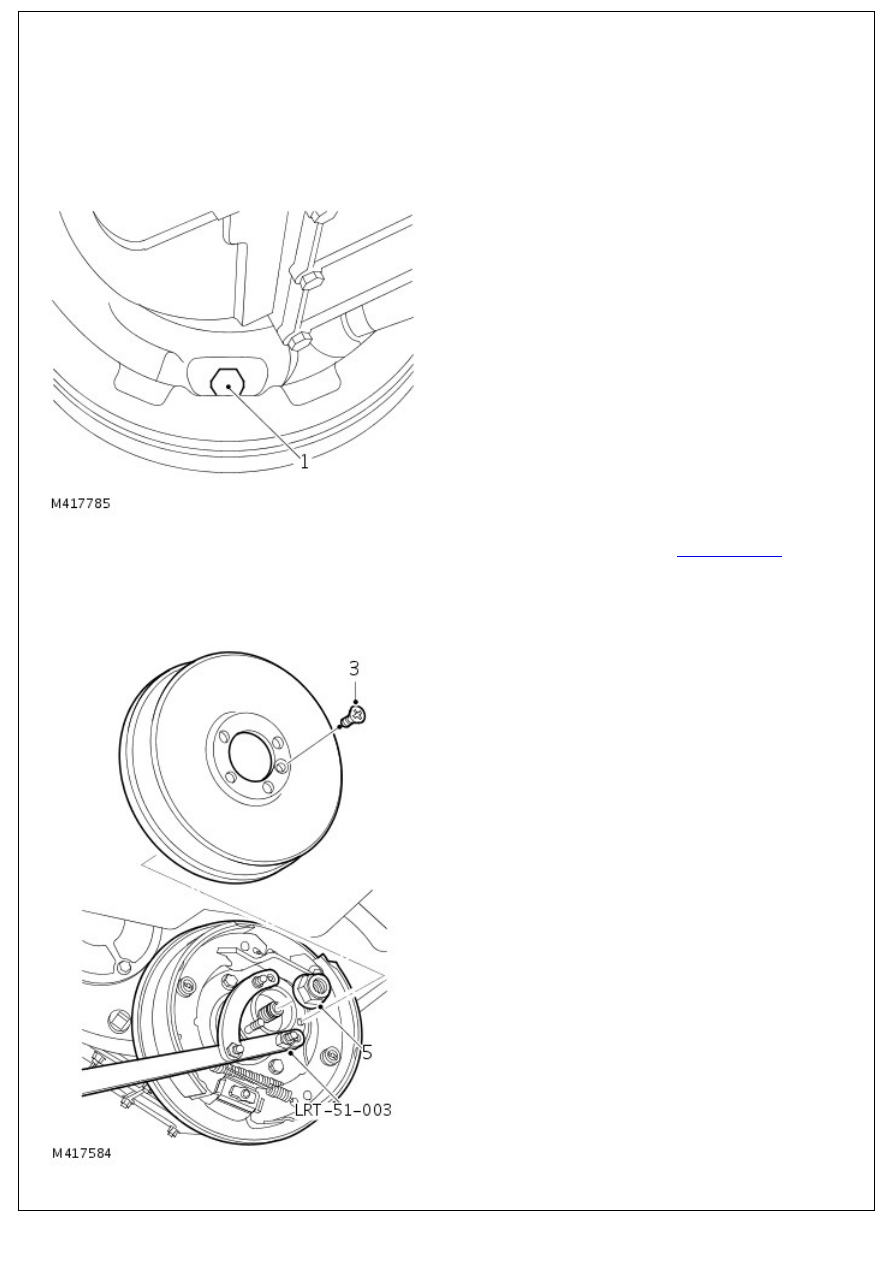
Transfer Case Rear Output Shaft Seal
In-vehicle Repair
Removal
1. Loosen brake shoe adjuster bolt.
2. Remove rear drive shaft.
For additional information, refer to:
Rear Driveshaft
(205-01
Driveshaft, Removal and Installation).
3. Remove screw securing brake drum.
4. Remove brake drum.
5. Restrain transfer case drive flange using LRT-51-003,
remove and discard drive flange nut, remove and discard
steel and felt washers.
6. Using LRT-99-500 if necessary, remove drive flange from
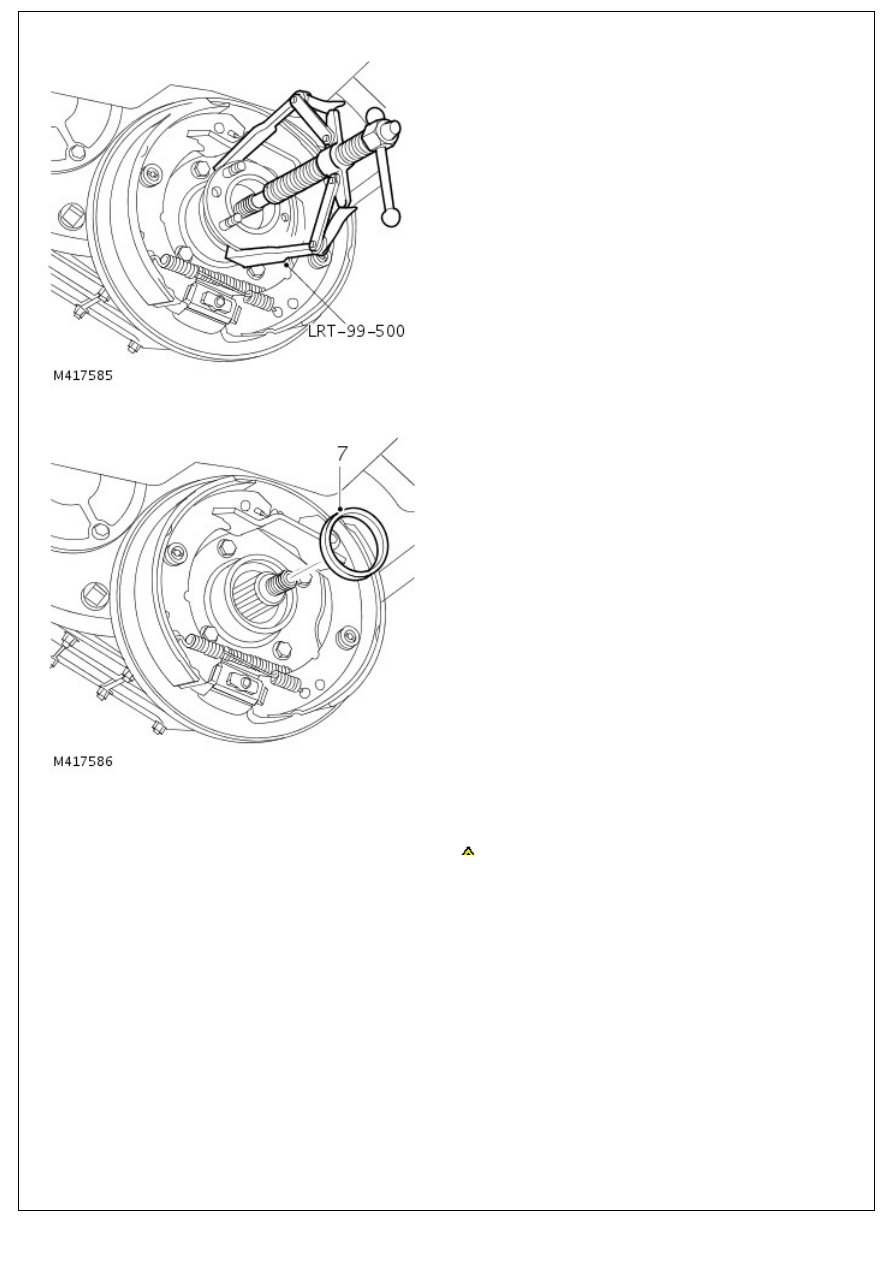
transfer case.
7. Remove and discard rear output shaft oil seal from transfer
case.
Installation
1. Clean seal recess.
CAUTION: Oil seal must be fitted dry.
Нет комментариевНе стесняйтесь поделиться с нами вашим ценным мнением.
Текст