Defender. Manual — part 97
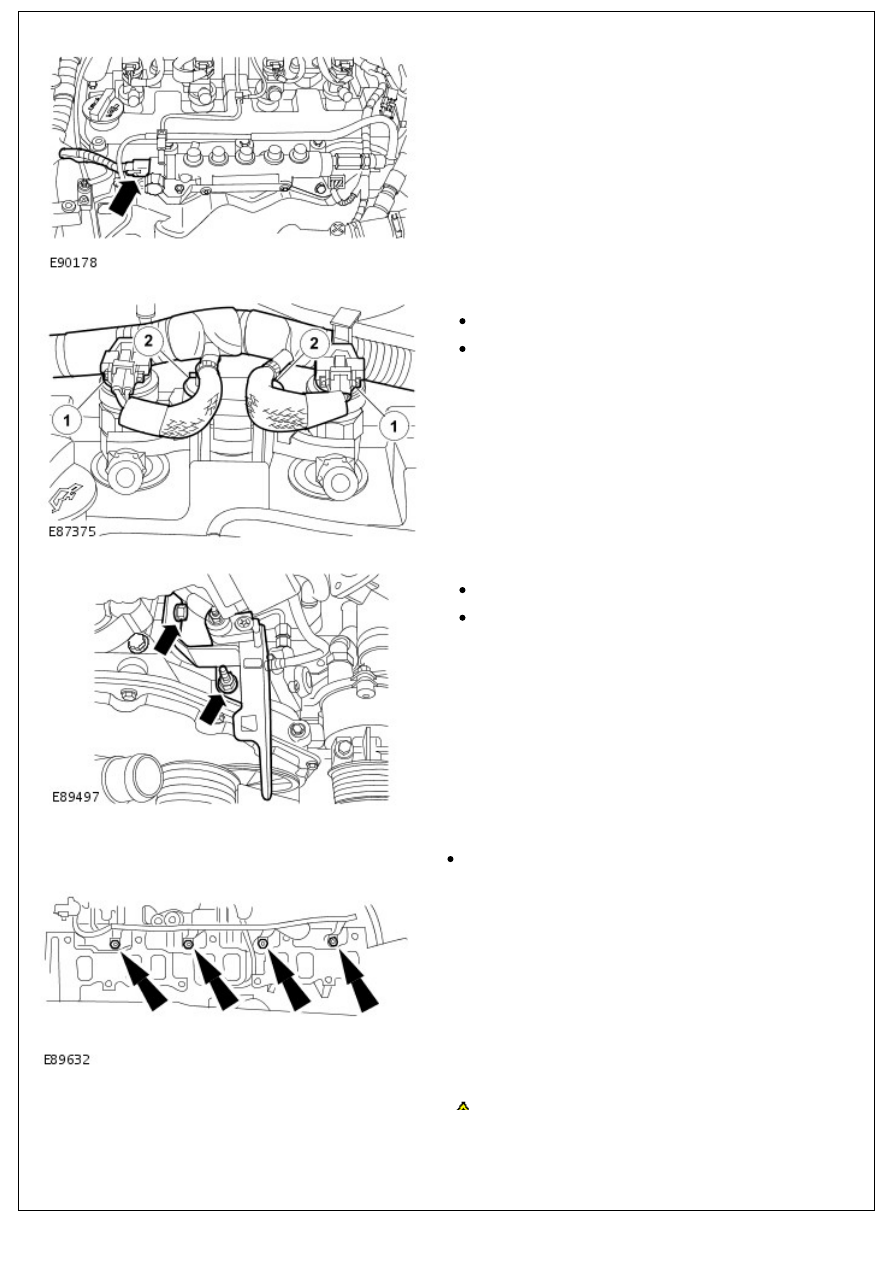
45. Disconnect the fuel rail pressure sensor (FRP) electrical
connector.
46. Disconnect the 4 injectors electrical connectors.
Release the injector wiring harness.
Release the 7 clips.
47. Release the engine wiring harness support bracket.
Remove the nut.
Remove the bolt.
48. Release the glow plug wiring harness.
Remove the 4 nuts.
49. Remove the engine wiring harness.
CAUTION: Make sure that all openings are sealed. Use
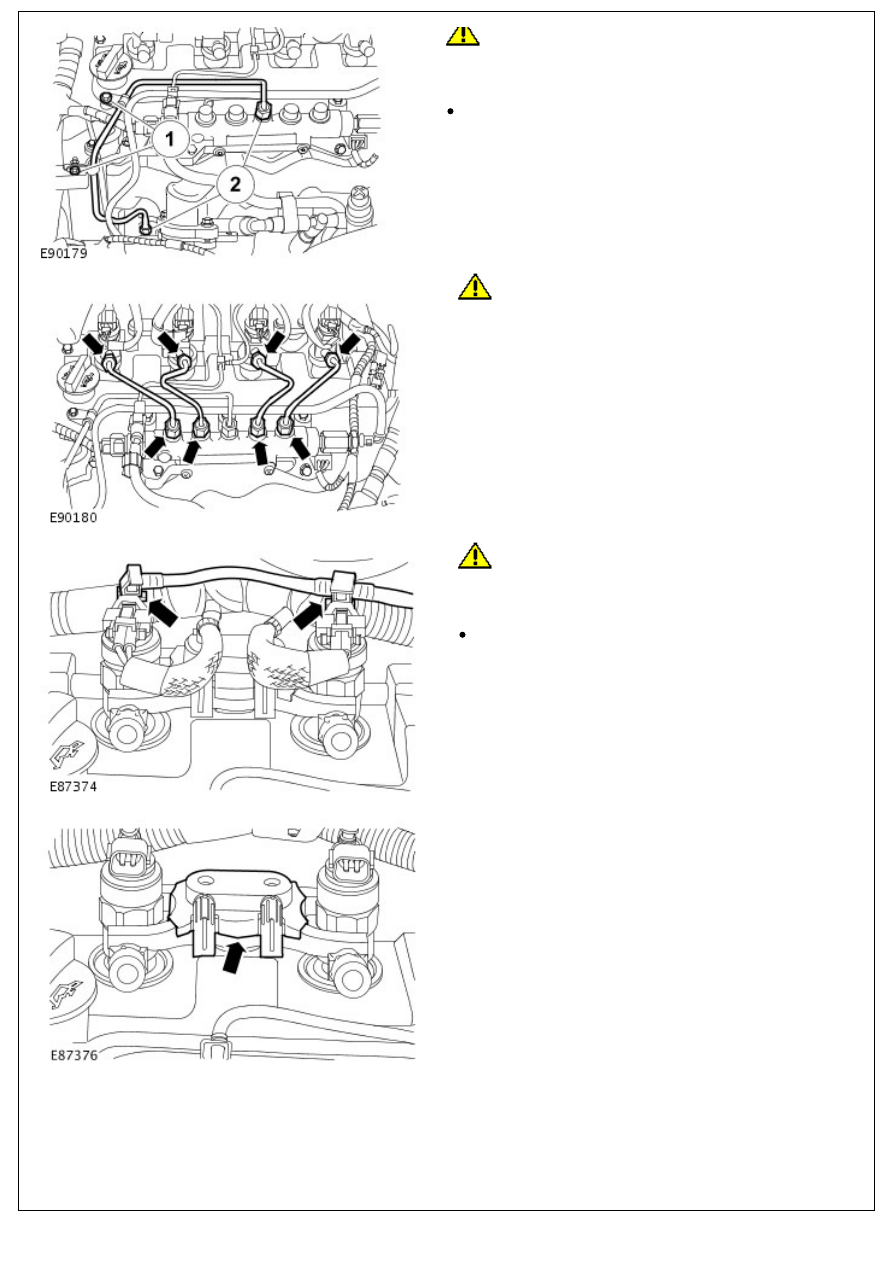
50.
CAUTION: Make sure that all openings are sealed. Use
new blanking caps.
Remove and discard the high-pressure fuel rail supply line.
Release the 2 clips.
51.
CAUTION: Make sure that all openings are sealed.
Use new blanking caps.
Remove and discard the 4 high-pressure injector supply
lines.
52.
CAUTION: Make sure that all openings are sealed.
Use new blanking caps.
Disconnect the injector spill rail.
Remove the 4 clips.
53. Remove the 2 injector clamp covers.
54. Remove the 2 injector clamps.
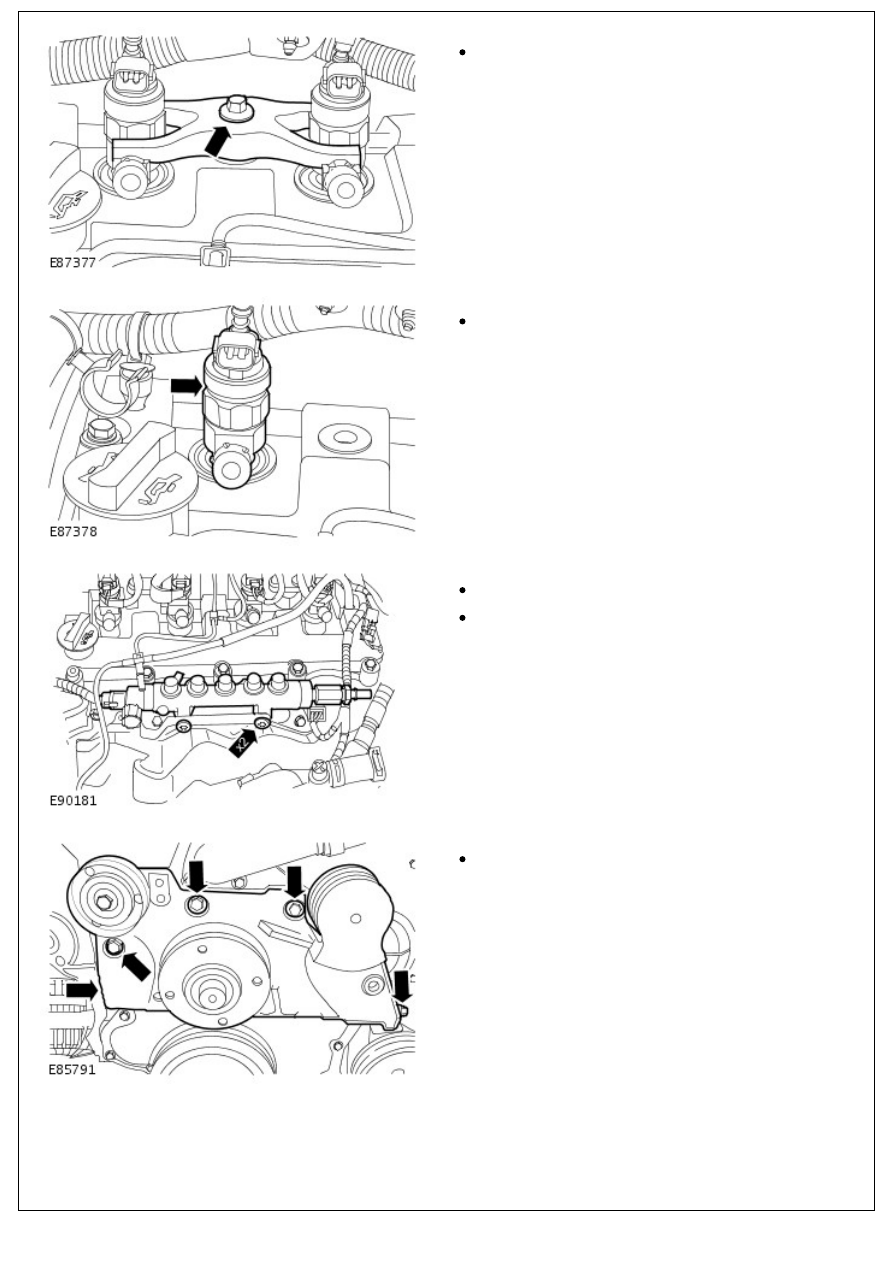
54. Remove the 2 injector clamps.
Remove the 2 bolts.
55. Remove the 4 injectors.
Remove and discard the sealing washer.
56. Remove the fuel rail.
Remove the 2 bolts.
Remove the bracket.
57. Remove the accessory drive belt idler assembly.
Remove the 5 bolts.
58. Remove the cylinder head coolant outlet elbow.
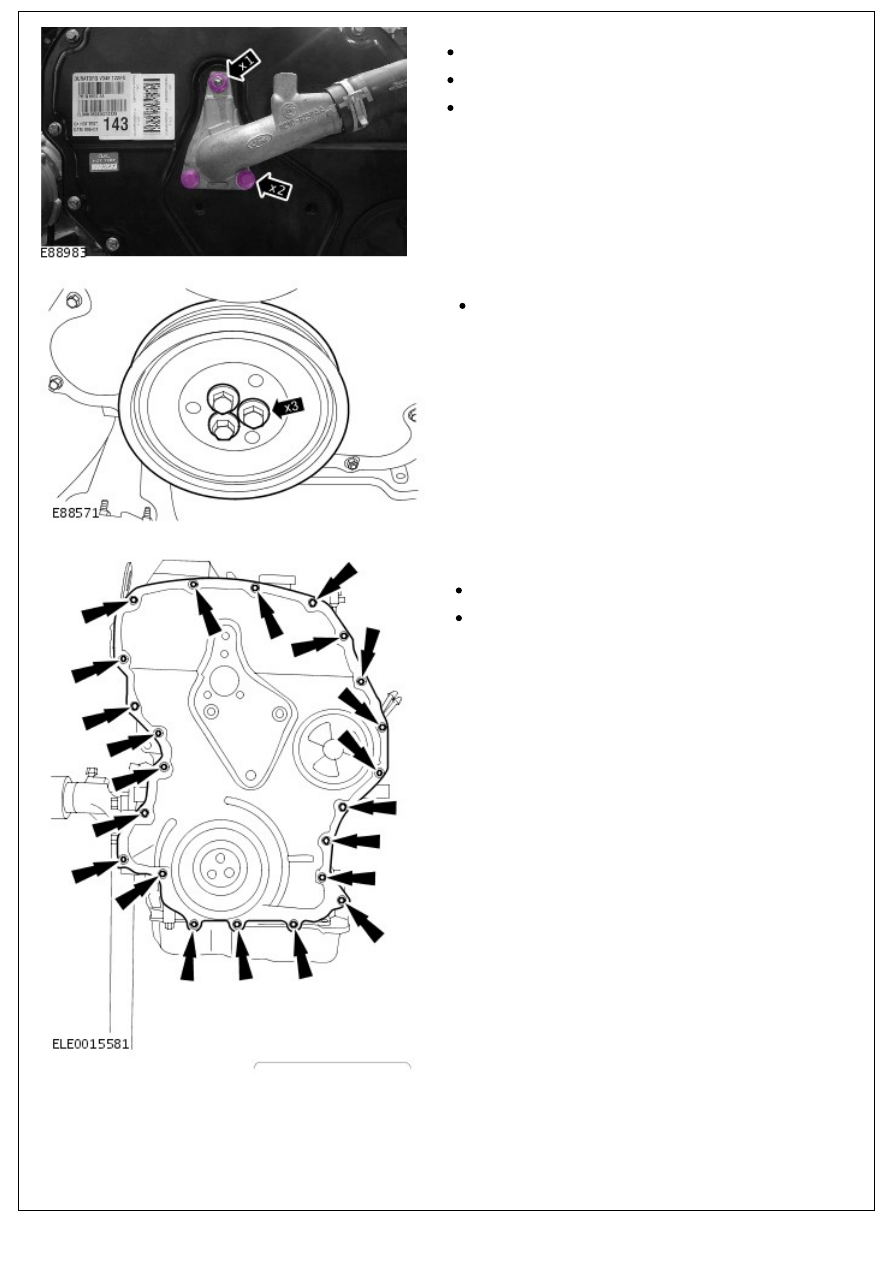
58. Remove the cylinder head coolant outlet elbow.
Remove the nut.
Remove the 2 bolts.
Remove and discard the O-ring seal.
59. Remove the crankshaft pulley.
Remove and discard the 3 bolts.
60. Using a suitable tool, remove and discard the timing
cover.
Remove the 20 bolts.
Remove the 2 nuts.
61. Remove the valve cover.
Нет комментариевНе стесняйтесь поделиться с нами вашим ценным мнением.
Текст