Defender. Manual — part 155
FLYWHEEL
The single mass flywheel is bolted to the flange of the engine crankshaft. A dowel ensures that the flywheel is correctly
located. A ring gear is located on the outside diameter of the flywheel and is seated against a flange. The ring gear is an
interference fit on the flywheel and is a serviceable item, which can be replaced if damaged or worn.
The operating face of the flywheel is machined to provide a smooth surface for the clutch driven plate to engage on.
Clutch - 2.4L Duratorq-TDCi HPCR (103kW/140PS) - Puma - Clutch Disc
and Pressure Plate
Removal and Installation
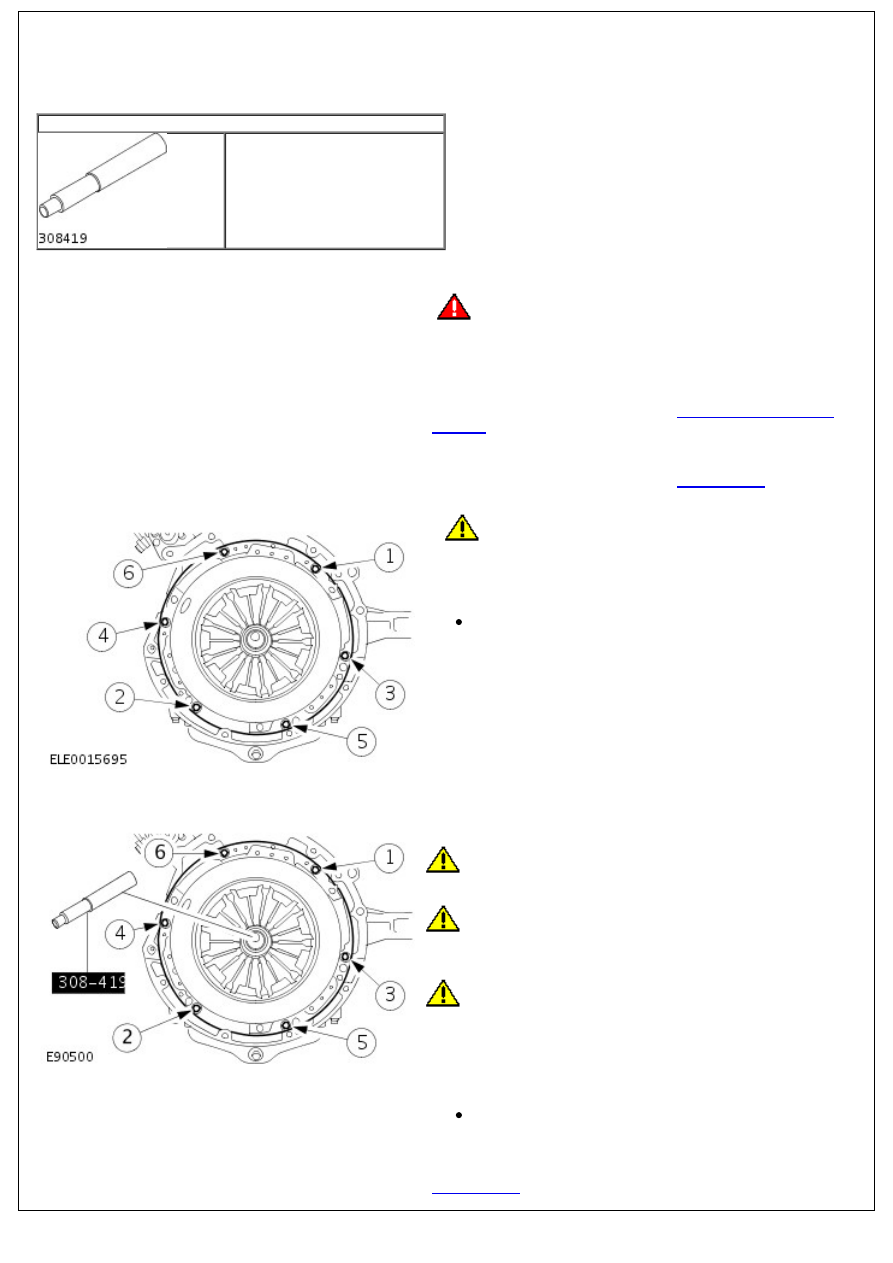
Special Tool(s)
Clutch alignment tool.
308-419
Removal
1.
WARNING: Do not work on or under a vehicle
supported only by a jack. Always support the vehicle on safety
stands.
Raise and support the vehicle.
2. Disconnect the battery ground cable.
For additional information, refer to:
Battery Disconnect and
Connect
(414-01 Battery, Mounting and Cables, General
Procedures).
3. Remove the transmission.
For additional information, refer to:
Transmission
(308-03
Manual Transmission/Transaxle, Removal).
4.
CAUTION: Loosen the clutch pressure plate bolts by 2
turns at a time in the sequence shown. Failure to follow this
instruction may result in damage to the vehicle.
Remove the clutch disc and the clutch pressure plate.
Remove and discard the 6 bolts.
Installation
1. CAUTIONS:
Make sure new bolts are installed. Failure to follow this
instruction may result in damage to the vehicle.
Apply grease of the correct specification to the pilot
bearing. Failure to follow this instruction may result in damage
to the vehicle.
Tighten the bolts in the sequence shown. Failure to
follow this instruction may result in damage to the vehicle.
• NOTE: Clean the component mating faces.
Using the special tool, install the clutch disc and the clutch
pressure plate.
Tighten the bolts to 29 Nm (21 lb.ft).
2. Remove the special tool.
3. Install the transmission. For additional information, refer to:
Transmission
(308-03 Manual Transmission/Transaxle,
Installation).
4. Connect the battery ground cable.
For additional information, refer to:
Battery Connect
(414-01
Battery, Mounting and Cables, General Procedures).
Clutch - 2.4L Duratorq-TDCi HPCR (103kW/140PS) - Puma - Pilot Bearing
Removal and Installation
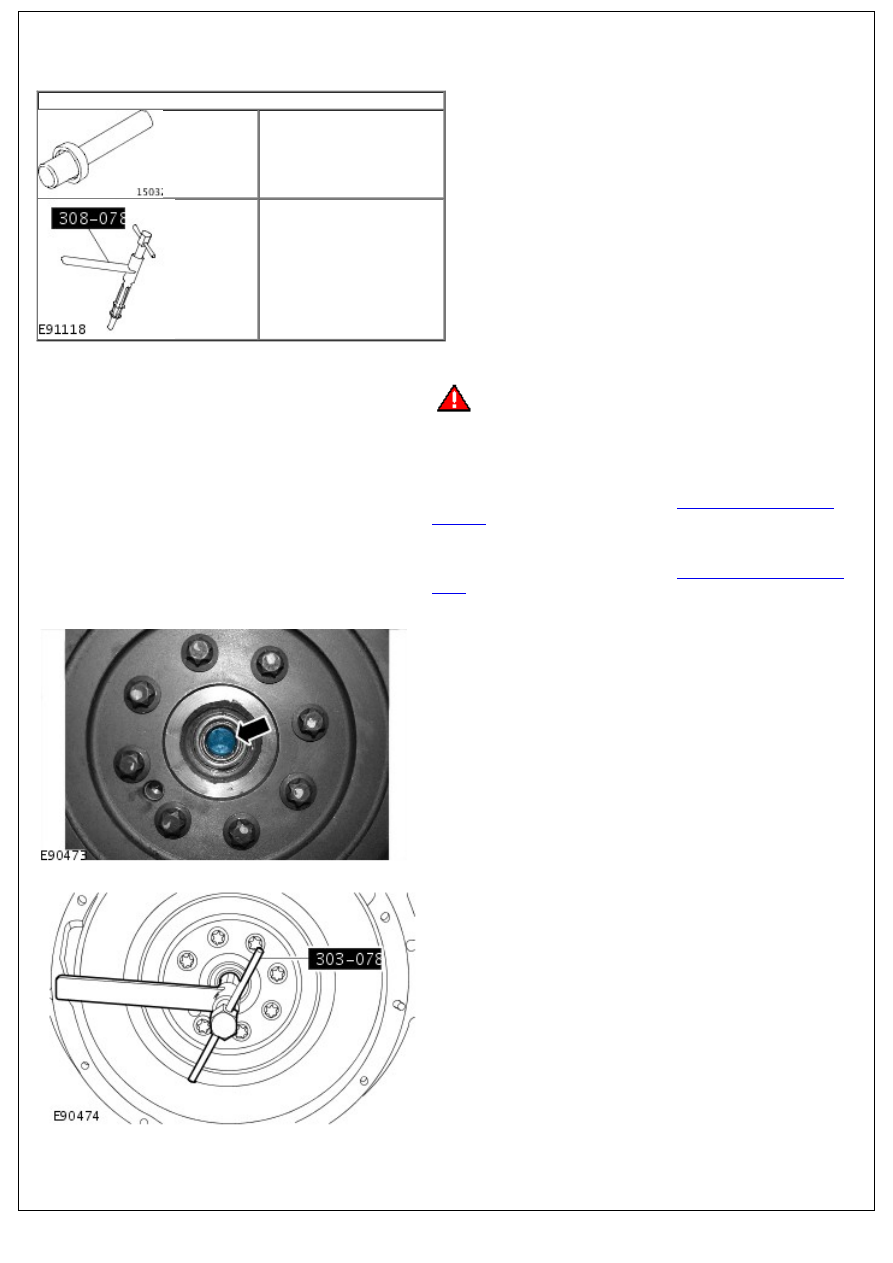
Special Tool(s)
Bearing installer
205-081
Bearing remover
303-078
Removal
1.
WARNING: Do not work on or under a vehicle
supported only by a jack. Always support the vehicle on safety
stands.
Raise and support the vehicle.
2. Disconnect the battery ground cable.
For additional information, refer to:
Battery Disconnect and
Connect
(414-01 Battery, Mounting and Cables, General
Procedures).
3. Remove the clutch disc and pressure plate.
For additional information, refer to:
Clutch Disc and Pressure
Plate
(308-01 Clutch - 2.4L Duratorq-TDCi HPCR
(103kW/140PS) - Puma, Removal and Installation).
4. Using a suitable tool, break through the pilot bearing.
5. Using the special tool, remove the pilot bearing.
Installation
1. Using the special tool, install the pilot bearing.
Нет комментариевНе стесняйтесь поделиться с нами вашим ценным мнением.
Текст