Defender 300Tdi (1996+). Manual — part 107
86
ELECTRICAL
8
REPAIR
ALARM SOUNDER
Service repair no - 86.55.87
Remove
1. Remove LH front seat cushion.
2. Release retaining clip and remove battery
access cover.
3. Slacken battery negative lead clamp bolt.
4. Turn starter switch ’on’.
5. Turn starter switch ’off’ and remove key.
6. Disconnect battery negative lead.
NOTE: Operation 6 needs to be carried out
within 15 seconds to avoid activating
battery backed-up alarm sounder, if fitted.
NOTE: If an alarm sounder without battery
back-up is fitted, it is not necessary to
disconnect battery.
7. Remove 2 nuts securing power steering pump
reservoir mounting bracket to front, LH inside
wing.
8. Move steering pump reservoir aside to gain
access to alarm sounder.
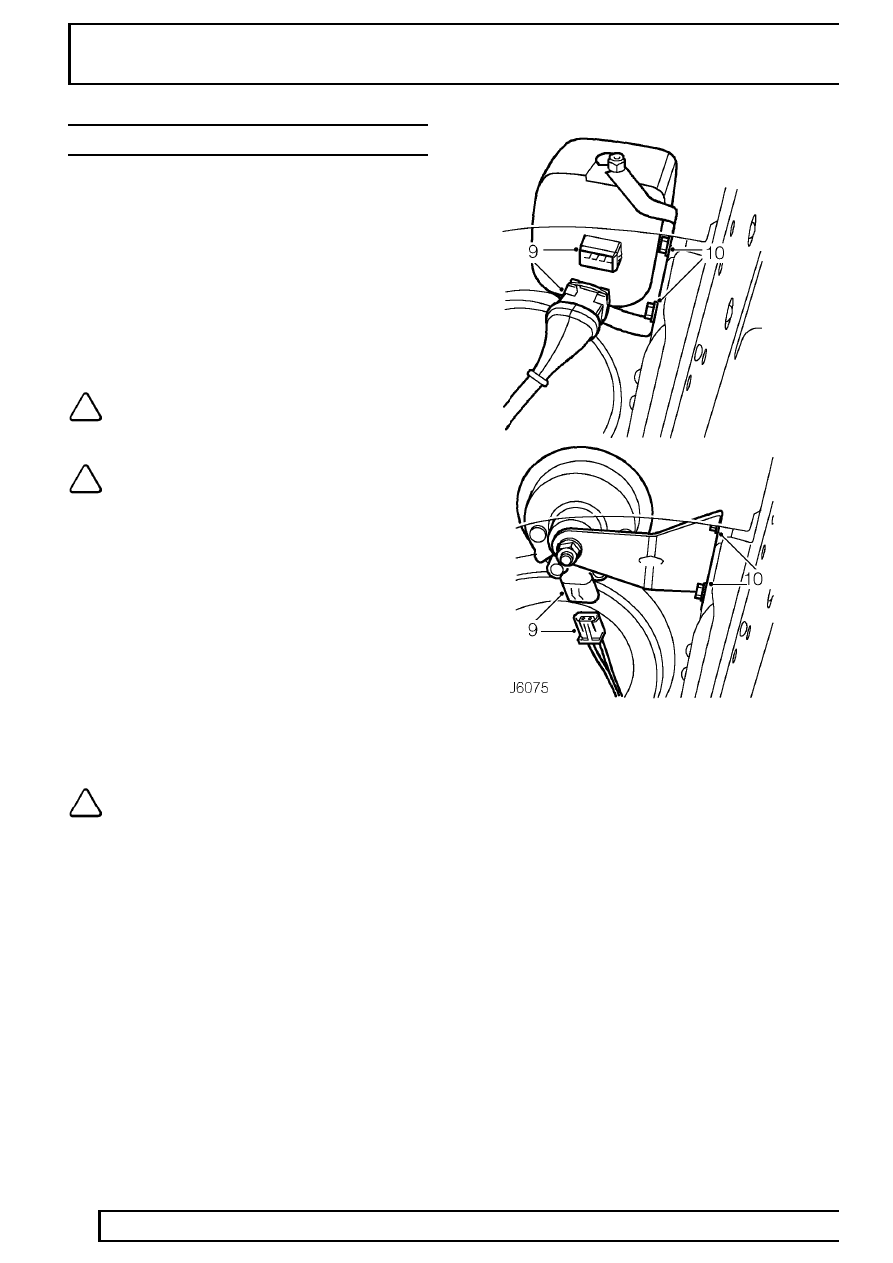
9. Disconnect harness multi-plug from rear of alarm
sounder.
10. Unscrew 2 bolts and remove alarm sounder from
inside wing.
Top illustration - alarm sounder with battery
back-up.
Lower illustration - alarm sounder without
battery back-up.
NOTE: A new battery backed-up alarm
sounder will not operate until charged by
vehicle generator for approximately three
hours.
Refit
11. Secure alarm sounder to inside wing, tightening
bolts to
10 Nm (7 lbf/ft).
12. Reconnect multi-plug to alarm sounder.
13. Secure power steering pump reservoir to inside
wing, tightening nuts to
10 Nm (7 lbf/ft).
14. Reconnect battery negative lead.
15. Fit battery access cover.
16. Fit LH seat cushion.
ELECTRICAL
9
REPAIR
ALARM SOUNDER RELAY
Service repair no - 86.77.09
Remove
1. Remove screw and lift off LH door check strap
cover.
2. Remove 3 screws and lower wiper motor cover
from fascia bulkhead, (on RH drive models first
remove grab handle).
3. Slide relay multi-plug from retaining bracket and
remove relay.
Refit
4. Secure multi-plug to mounting bracket and fit
new relay.
5. Position wiper motor cover and secure with 3
screws.
6. On RH drive models fit grab handle.
7. Fit door check strap and secure with screw.
ANTI-THEFT ALARM INDICATOR LIGHT
Service repair no - 86.45.61
Remove
1. Remove LH front seat cushion.
2. Release retaing clip and remove battery access
cover.
3. Slacken battery negative lead clamp bolt.
4. Turn starter switch ’on’.
5. Turn starter switch ’off’ and remove key.
6. Disconnect battery negative lead.
NOTE: Operation 6 needs to be carried out
within 15 seconds to avoid activating
battery backed-up alarm sounder, if fitted.
NOTE: If an alarm sounder without battery
back-up is fitted, it is not necessary to
disconnect battery.
7. Remove steering wheel
See STEERING,
Repair, Steering wheel.
8. Remove 4 screws securing instrument panel to
fascia cowl.
9. Pull instrument panel away from fascia and
disconnect speedometer cable, if necessary.
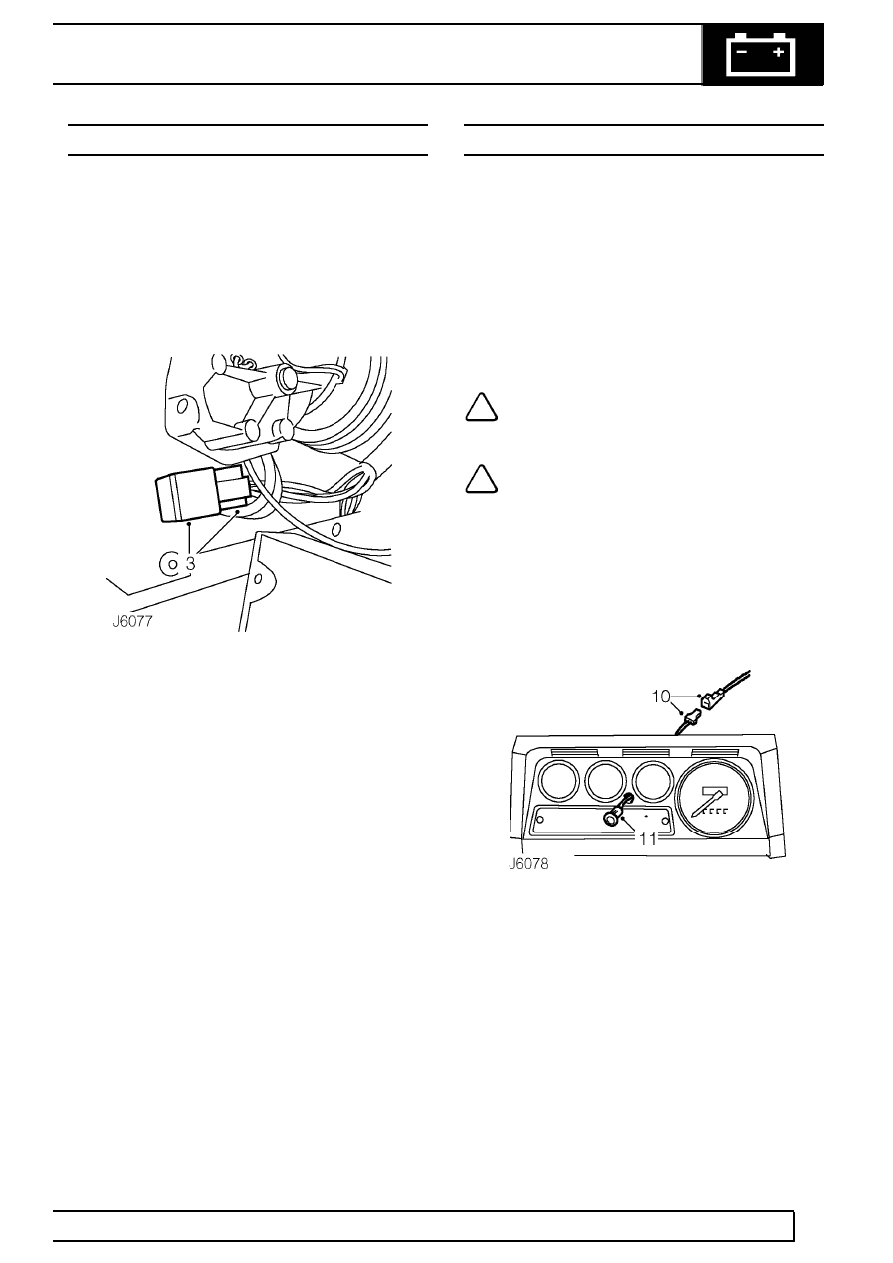
10. Disconnect alarm indicator light plug lead.
11. Press in retaining lugs and withdraw indicator
light from fascia panel.

86
ELECTRICAL
10
REPAIR
Refit
12. Fit alarm indicator light into fascia panel and
reconnect plug lead.
13. Reconnect speedometer cable and fit instrument
panel to fascia cowl.
14. Fit steering wheel
See STEERING, Repair,
Steering wheel.
15. Reconnect battery negative lead.
16. Fit battery access cover.
17. Fit LH seat cushion.
ALARM SYSTEM FUSE
Service repair no - 86.77.04
Remove
1. Remove LH front seat cushion.
2. Release retaining clip and remove battery
access cover.
3. Slacken battery negative lead clamp bolt.
4. Turn starter switch ’on’.
5. Turn starter switch ’off’ and remove key.
6. Disconnect battery negative lead.
NOTE: Operation 6 needs to be carried out
within 15 seconds to avoid activating
battery backed-up alarm sounder, if fitted.
NOTE: If an alarm sounder without battery
back-up is fitted, it is not necessary to
disconnect battery.
7. Remove steering wheel
See STEERING,
Repair, Steering wheel.
8. Remove 4 screws securing instrument panel to
fascia cowl
See INSTRUMENTS, Repair,
Instrument panel.
9. Pull instrument panel away from fascia and
disconnect speedometer cable, main harness
multi-plugs, alarm LED plug lead, heated rear
screen leads, gearbox oil temperature lead and
immobiliser warning light lead.
10. Remove instrument panel.
11. Remove alarm system 15 amp (blue) fuse from
holder located behind starter switch.
ELECTRICAL
11
REPAIR
Refit
12. Fit new fuse.
13. Position instrument panel to fascia cowl area
and reconnect immobiliser warning light leads,
gearbox oil temperature lead, heated rear screen
leads, alarm LED plug lead, main harness
multi-plugs and speedometer cable,
14. Secure instrument panel to fascia cowl with 4
screws
See INSTRUMENTS, Repair,
Instrument panel.
15. Fit steering wheel
See STEERING, Repair,
Steering wheel.
16. Reconnect battery negative lead.
17. Fit battery access cover.
18. Fit LH front seat cushion.
GENERATOR
Service repair no - 86.10.02
Remove
1. Disconnect battery.
2. Remove drive belt
See Auxiliary drive belt .
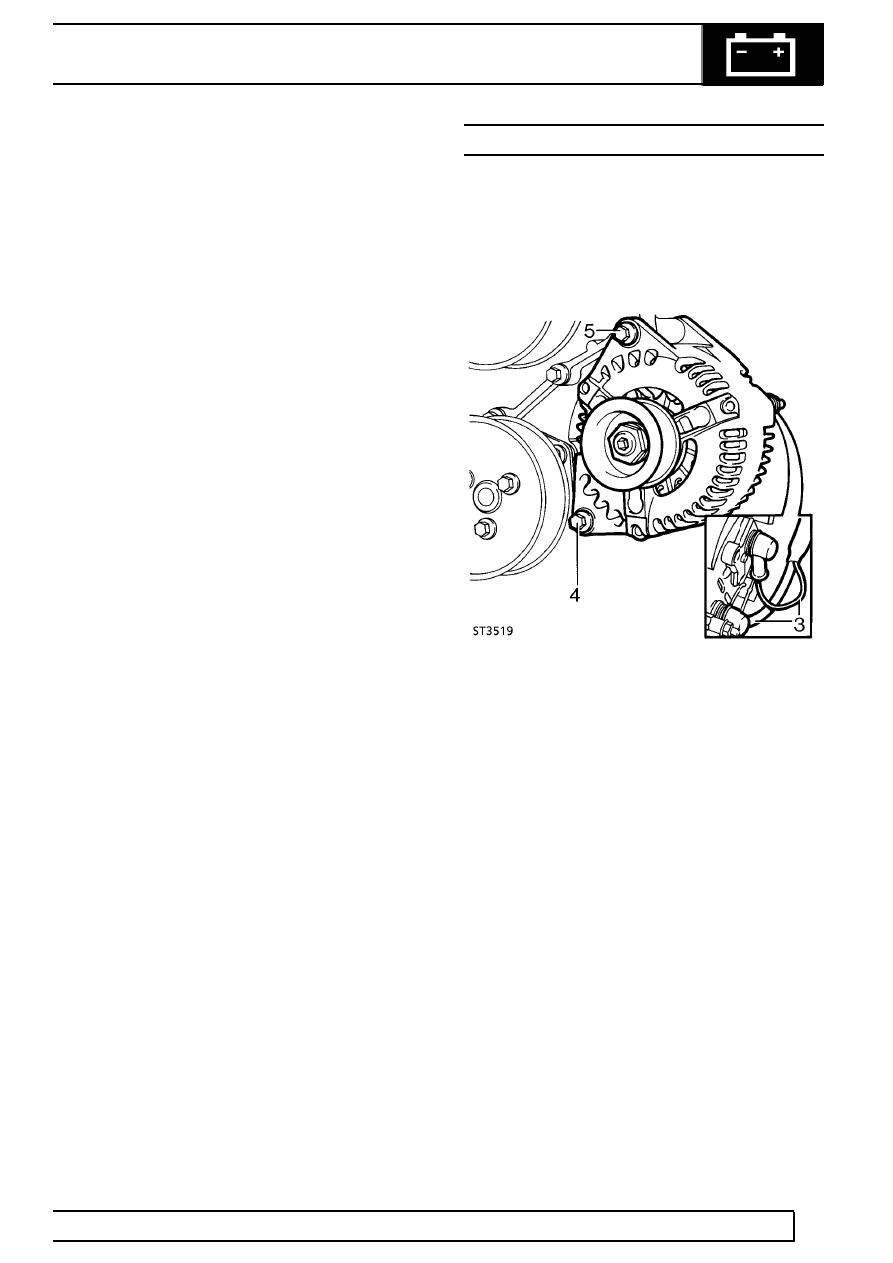
3. Unscrew 3 fixings, remove heat shield from rear
of generator, and disconnect electrical leads
from generator.
4. Remove generator bottom fixing bolt.
5. Remove long through bolt from top fixing and lift
generator from engine.
Refit
6. Fit generator to engine mounting bracket and
secure with top and bottom fixing bolts.
7. Connect electrical leads.
8. Fit heat shield.
9. Fit drive belt
See Auxiliary drive belt; Refit .
10. Reconnect battery.
Нет комментариевНе стесняйтесь поделиться с нами вашим ценным мнением.
Текст