Defender 300Tdi (1996+). Manual — part 79
76
CHASSIS AND BODY
8
DESCRIPTION AND OPERATION
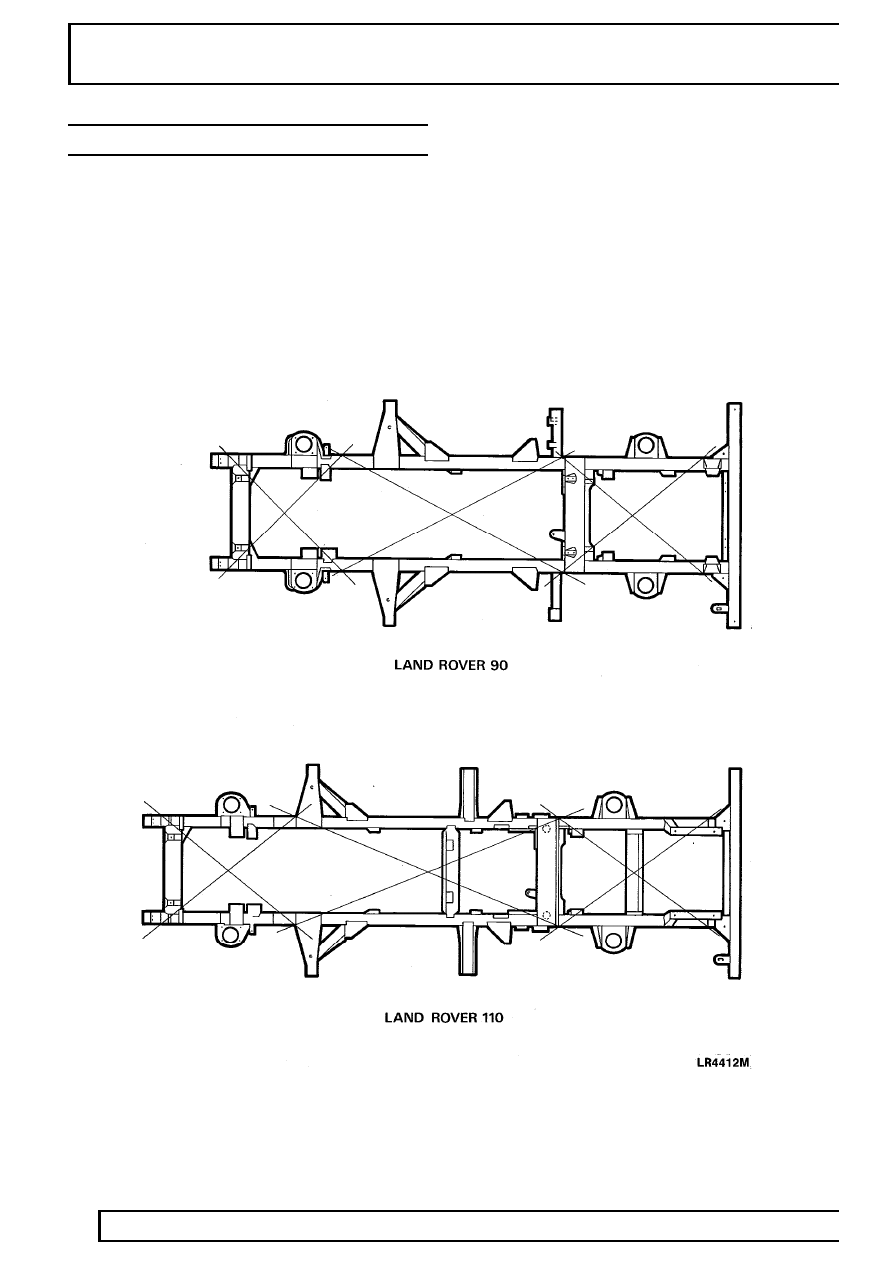
CHASSIS FRAME ALIGNMENT
With the vehicle assembled, a check for chassis
squareness can be made as follows:
1. Place the vehicle on a level floor.
2. Mark measuring points at approximately the
locations shown in LR4412M ensuring that the
marks are exactly opposite on each side of the
chassis frame.
3. Hold a plumb line against each of the measuring
points in turn and mark the floor directly beneath
the plumb-bob.
4. Move the vehicle and measure diagonally
between the marks made on the floor, if the
chassis is square the diagonals between the
related measuring points should agree within
9,50 mm.
5. Chassis frame dimensional checks can be
made, with the vehicle upper structure removed,
referring to the applicable illustration and
associated key.
CHASSIS AND BODY
1
REPAIR
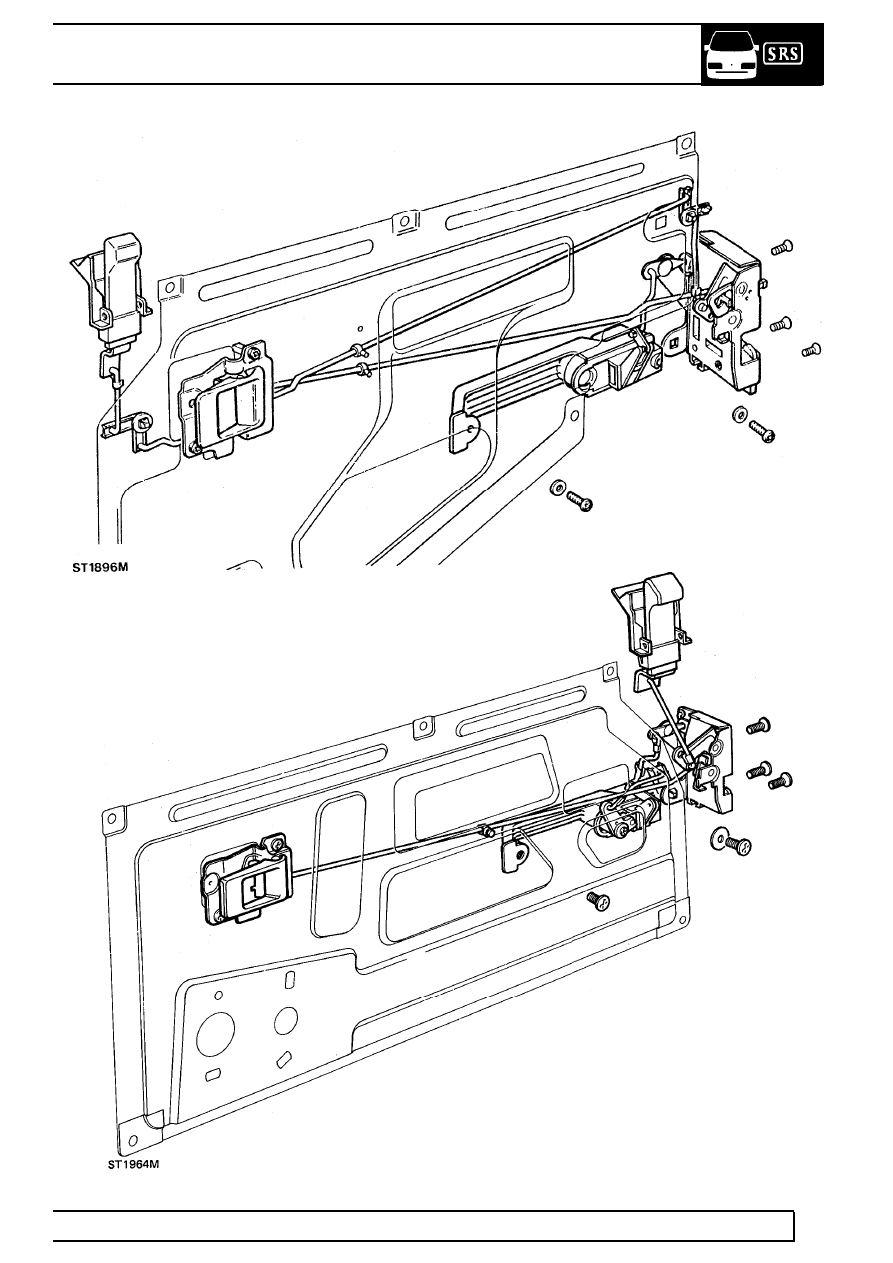
DOORS
RH rear door lock mechanism
RH front door lock mechanism
76
CHASSIS AND BODY
2
REPAIR
DOOR TRIM CASING
Service repair no - 76.34.01 - Front doors
Service repair no - 76.34.04 - Rear doors
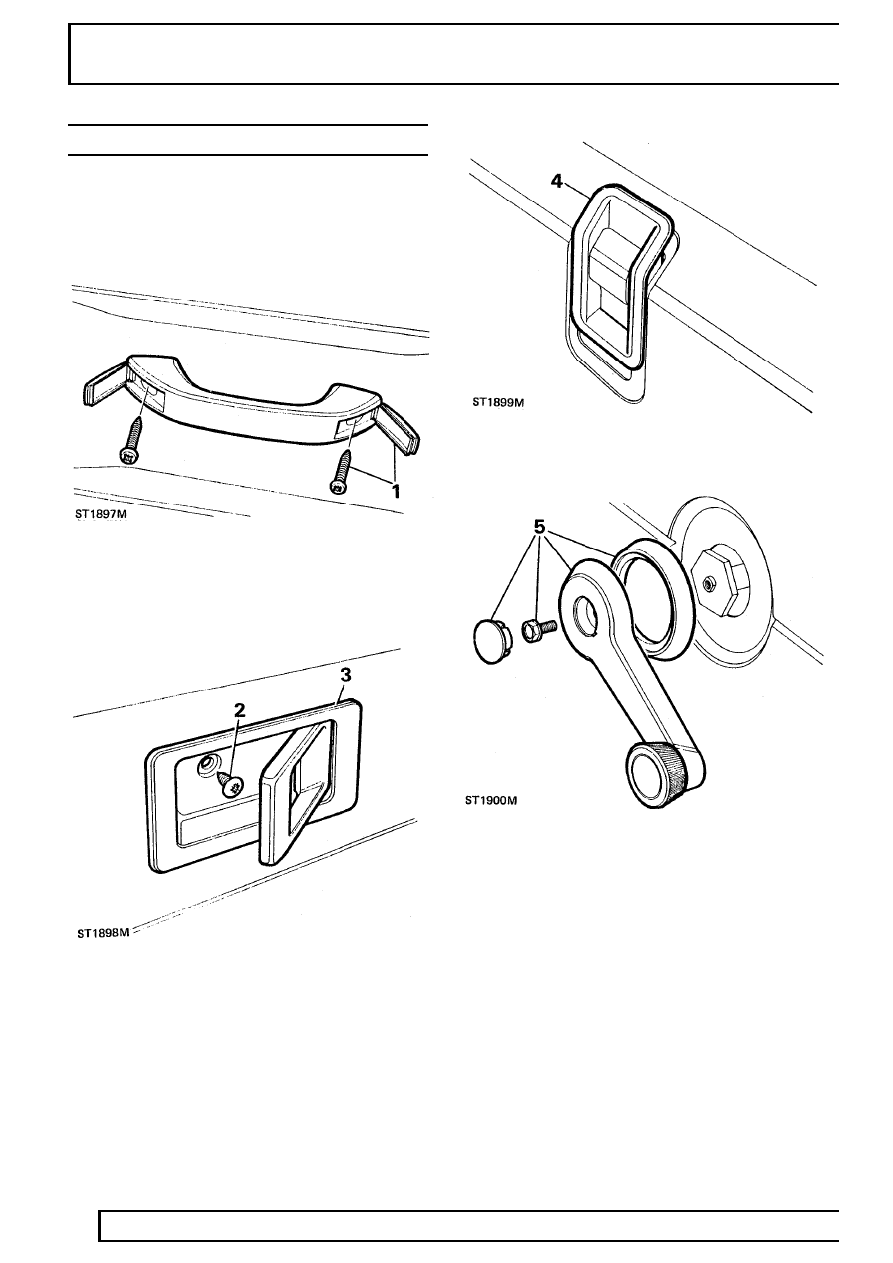
Remove
1. Prise open finisher caps, remove 2 screws, and
detach door pull.
2. Remove single screw behind remote control
lever.
3. Prise off remote control lever bezel.
4. Prise off door locking button bezel.
5. Prise out window regulator handle centre
finisher, remove retaining screw, and withdraw
handle and bezel.
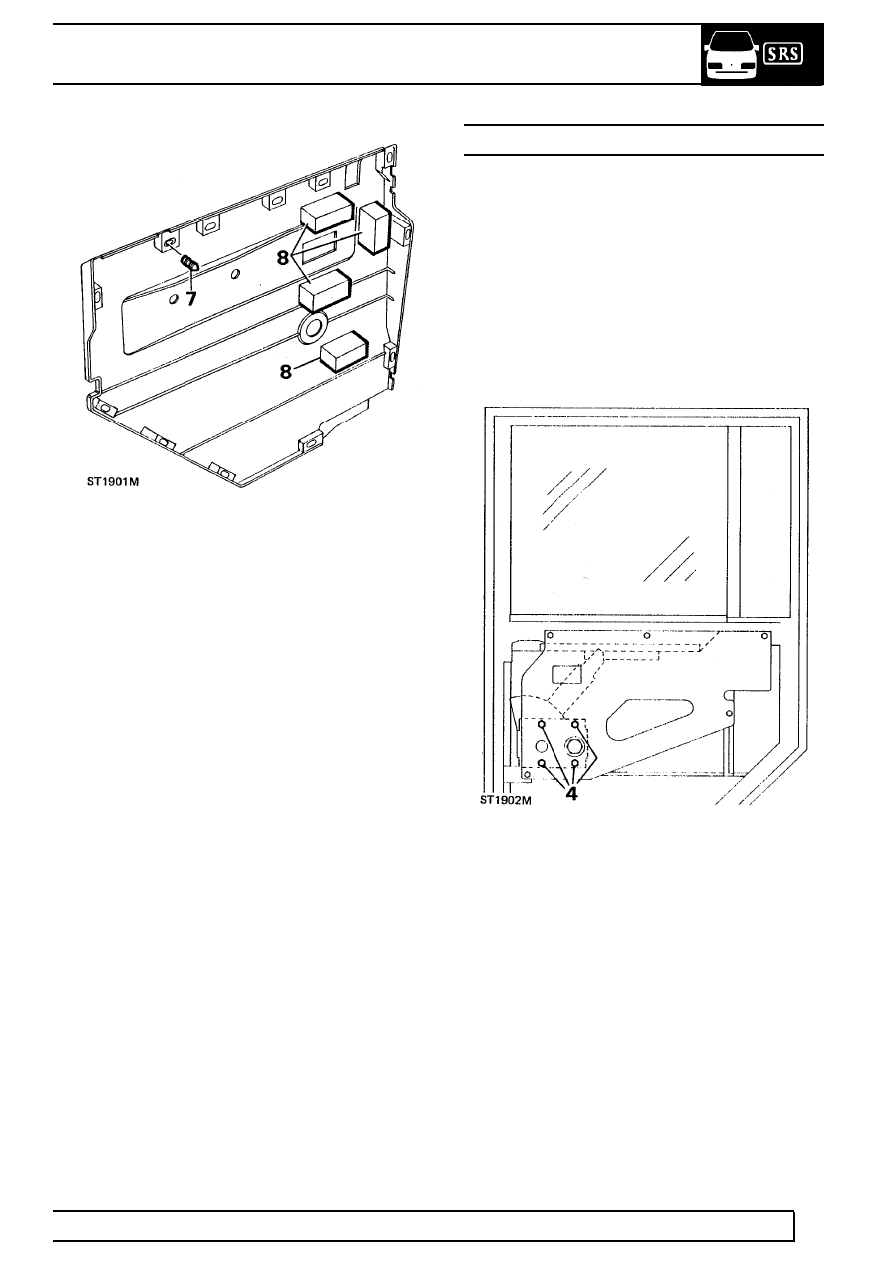
6. Using a screwdriver to release trim fasteners,
carefully ease trim casing from door.
CHASSIS AND BODY
3
REPAIR
Refit
7. Remove any trim fasteners held in door panel.
Refit or insert new clips to trim panel.
8. Ensure that anti-vibration pads are in position
and offer-up trim casing to door. Align fasteners
with holes in door and firmly push trim into
position.
9. Fit bezels to locking button and remote control
lever.
10. Fit single screw behind remote control lever.
11. Fit door pull and secure with 2 screws and
finisher caps.
12. Fit window regulator handle and retain with
single screw and finisher.
WINDOW REGULATOR - REAR SIDE DOOR
Service repair no - 76.31.45
Remove
1. Remove door trim casing
See Door trim casing
.
2. Remove plastic sheet.
3. Temporarily fit handle, wind window up to its
fullest extent and support glass with a length of
timber, to prevent it falling when removing
regulator.
4. Remove 4 screws retaining regulator to
mounting panel and withdraw regulator whilst
sliding lifting arm button from lifting channel. To
assist this operation, remove timber and lower
glass.
Нет комментариевНе стесняйтесь поделиться с нами вашим ценным мнением.
Текст